まえがき
Goaの環境構築メモです。http://localhost:8008/hello/${name} で「HELLO ${name}」を返すAPIを実行できるところまでの構築手順となります。
下記にてソースコード公開してます。
参考
手順1:Goのインストール
Windowsユーザー
下記サイトよりインストールする。
Macユーザー
brew install go
・go versionでインストールされていることを確認
・今の最新バージョンは「1.17」
% go version
go version go1.17.5 darwin/amd64
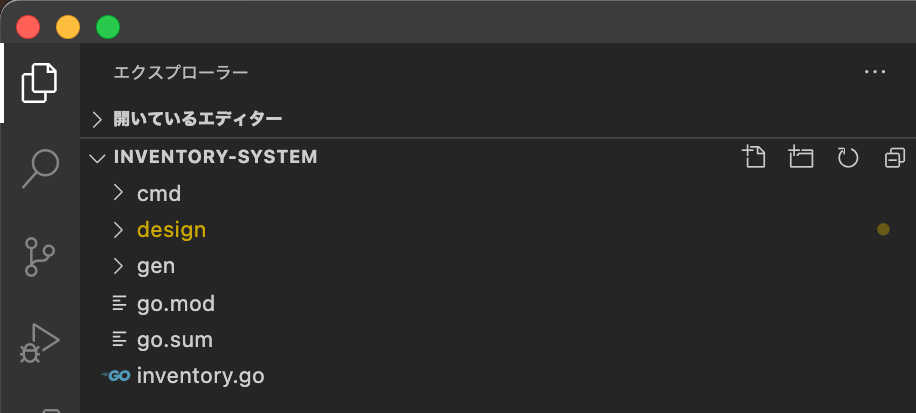
手順2:モジュールフォルダ作成
・Goのワークスペースディレクトリ(GOPATH)/src配下で、モジュールフォルダを作成する。
・次記事で在庫関連のAPIとして実装していくので、「inventory-system」という名前でモジュールを作成する。
・プロジェクト配下でgo mod init <module名>を実行し、Go Modulesで外部パッケージをインストールできるようにする。
cd <Goのワークスペースディレクトリ>/src
mkdir inventory-system
cd inventory-system
go mod init inventory-system
 → 「go.mod」というファイルが生成される。Mavenのpom.xml的なもの(だと思っている)
 → 「go.mod」の1行目に「module inventory-system」というように、module名が記される。
手順3:Goaのインストール
Goaのインストール
go get -u goa.design/goa/v3
go get -u goa.design/goa/v3/...
gRPCのインストール
・Goaは「gRPC」という技術を利用してコードを自動生成する。
・このgRPCが必要とするモジュールをインストールする必要がある。
Protocol Buffersのインストール
・gRPCで利用されるインタフェース記述言語(IDL)
Windowsの場合
・ダウンロードサイトより環境に応じたZIPファイルをダウンロード
・ZIPファイルを解凍し、binフォルダをPATHに通す
・protoc --versionでインストールされていることを確認
Macの場合
$ brew update     # formula を更新
$ brew upgrade    # 更新があるパッケージを再ビルドする
$ brew install protobuf # protobufをインストール
$ brew upgrade protobuf # protobufをアップグレード
$ protoc --version
Go向けのProtocプラグインをインストール
go install google.golang.org/protobuf/cmd/protoc-gen-go
go install google.golang.org/grpc/cmd/protoc-gen-go-grpc
手順4:Designファイル作成
・Goaでコード生成する際の設計図となるのがこのDesignファイルである。
・Goa DSLを利用してAPIのINPUT/OUTPUTを定義する。
The Goa DSL lets you describe the service methods as well as their input and output data structures.
go-workspace/src/inventory-system/design/design.go
package design

import (
	. "goa.design/goa/v3/dsl"
)

// APIサーバ定義
var _ = API("inventory-system", func() {
    // API の説明(タイトルと説明)
    Title("Inventory System Service")
    Description("Service for maintaining inventory")

    // ホスト情報
    Server("inventory-system", func() {
        Host("localhost", func() {
            URI("http://localhost:8008") // HTTP REST API
            URI("grpc://localhost:8088") // gRPC
        })
    })
})

// サービス定義
var _ = Service("inventory", func() {
    Description("inventory service hello")
    // Helloメソッド
    Method("hello", func() {
        // 引数として「message」を受け取る
        Payload(func() {
            Field(1, "message", String)
            Required("message")
        })
        // "Hello ${message}" を返すAPIにする
        Result(String)

        HTTP(func() {
            GET("/hello/{message}")
        })

        GRPC(func() {
            Response(CodeOK)
        })
    })
})
手順5:コード生成
goa gen <module_directory_name>/~/<designファイルがあるディレクトリ>
・designが変わるたびにgoa genする必要あり。
・generate the boilerplate code(編集されることのないコード)
cd go-workspace/src/inventory-system
goa gen inventory-system/design
・新たにgenフォルダが生成される。

goa example <module_directory_name>/~/<designファイルがあるディレクトリ>
・1度だけ実行すればOK。designが変わってもgoa exampleしなおす必要はない。
・generate a basic implementation of the service
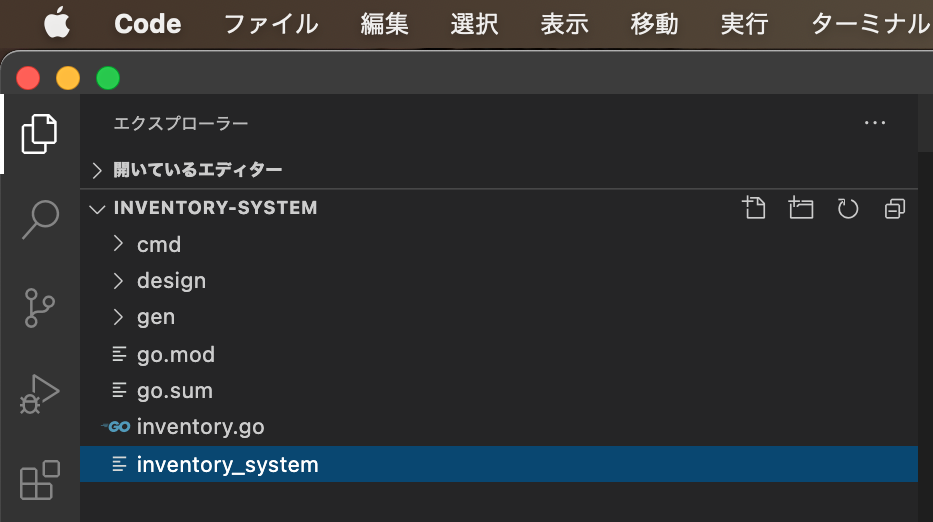
goa example inventory-system/design
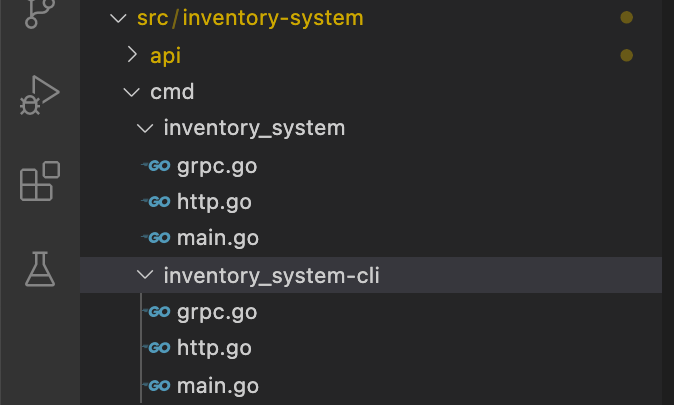
・cmdフォルダとinventory.goが生成される。
cmdフォルダ配下のmain.go = アプリ起動時に実行されるもの
・DB接続処理のような「アプリ起動時に1度だけ行いたい処理」は、main.go内に定義する。
"Hello ${message}" が返ってくるようにする
・inventory.goにHello関数が定義されているので、引数のmessageを参照して"Hello ${message}"がレスポンスとして返されるようにする。
// Hello implements hello.
func (s *inventorysrvc) Hello(ctx context.Context, p *inventory.HelloPayload) (res string, err error) {
	s.logger.Print("inventory.hello")
	res = "HELLO " + p.Message // ここを追加
	return
}
go build
・実行可能ファイルを生成する。
# generate server code
go build ./cmd/inventory_system
# generate client code
go build ./cmd/inventory_system-cli
・今回はserver codeのみ生成する。
go build ./cmd/inventory_system
・inventory_system が生成される。
手順6:アプリ実行
・実行すると次のようなログが出力される。
% ./inventory_system
[inventorysystem] 17:31:04 HTTP "Hello" mounted on GET /hello/{message}
[inventorysystem] 17:31:04 serving gRPC method inventory.Inventory/Hello
[inventorysystem] 17:31:04 HTTP server listening on "localhost:8008"
[inventorysystem] 17:31:04 gRPC server listening on "localhost:8088"
・"HELLO WORLD"と出力してみる。
 % curl http://localhost:8008/hello/WORLD
"HELLO WORLD"
Design関連メモ(後書きしていく)
Field = Attribute + metaタグ(rpc:tag)
"rpc:tag"とは?
・gRPCが利用するプロトコルバッファでのシリアライズでは、事前にフィールドのシリアライズ順序が必要。この順序をmetaタグ(rpc:tag)で各フィールドに指定してあげる必要がある。
Attributeを使った書き方
・Attribute内でMetaを使って"rpc:
Method("hello", func() {
    Payload(func() {
        Attribute("message", String, func() {
            Meta("rpc:tag", "1")
        })
    }
)
Fieldを使った書き方
・Fieldの第1引数に指定したパラメータが自動的にrpc:tagの値として設定される。
Method("hello", func() {
    Payload(func() {
        Field(1, "message", String)
            Required("message")
        })
    }
)
以下Fieldの説明
Field is syntactic sugar to define an attribute that defines a tag, e.g. for protobuf. The result is the same as calling Attribute with the "rpc:tag" meta set with the value of the first argument.