Alexa 開発を始めました。Alexaちゃんの声は、Googleアシスタントの声より個人的には好きです。プログラムで思い通りに喋らせることができると楽しいです。
AWS のチュートリアルは親切でわかりやすい。皆さんもやったと思いますが、「コーヒーショップ」を作りました。
日本語ビデオ版(日本語ブログ版でも)では「永続アトリビュート(データ)」を S3 にテキスト形式で保存するように説明されていますが、Alexa-hosted スキルでも DynamoDB が使えるようになっているので、こちらの方法でやってみます(AWS でも DynamoDB が推奨されています)。
引っかかったところは、ローカルでのデータベーステストでした。本番環境で問題ないコードですが、ローカルテストでは、エラーになってしまいます。
~~~~ Error handled: {"name":"AskSdk.DynamoDbPersistenceAdapter Error"}
解決策として、DynamoDB-local(Docker版)を導入して、こちらのデータベースを読み書きするように設定します。
前提条件
開発環境 Mac
エディタ VSCode
Alexa Skills Toolkit for VSCode を導入ができている(ローカルテストができる)
AWS Command Line Tool がインストールできている
Alexa道場 Session 3 まで終了していること、あるいは
スキル開発 基礎トレーニングシリーズ 第3回目を終了していること
DynamoDB-local の導入
Docker が便利で使いやすいので、こちらを選びました。ポイントは作成したテーブルが accessKeyId, region に関係なく読み書きできるように、SharedDb オプションをつけて起動することです。
$ docker run --name shared-dynamodb-local -p 8000:8000 amazon/dynamodb-local -jar DynamoDBLocal.jar -sharedDb

// 使用するテーブルを作っておく
$ aws dynamodb create-table --endpoint-url http://localhost:8000 --table-name <skill id> --key-schema AttributeName=id,KeyType=HASH --attribute-definitions AttributeName=id,AttributeType=S --billing-mode PAY_PER_REQUEST

// テーブル一覧
$ aws dynamodb list-tables --endpoint-url http://localhost:8000
{
    "TableNames": [
        <skill id>,
    ]
}
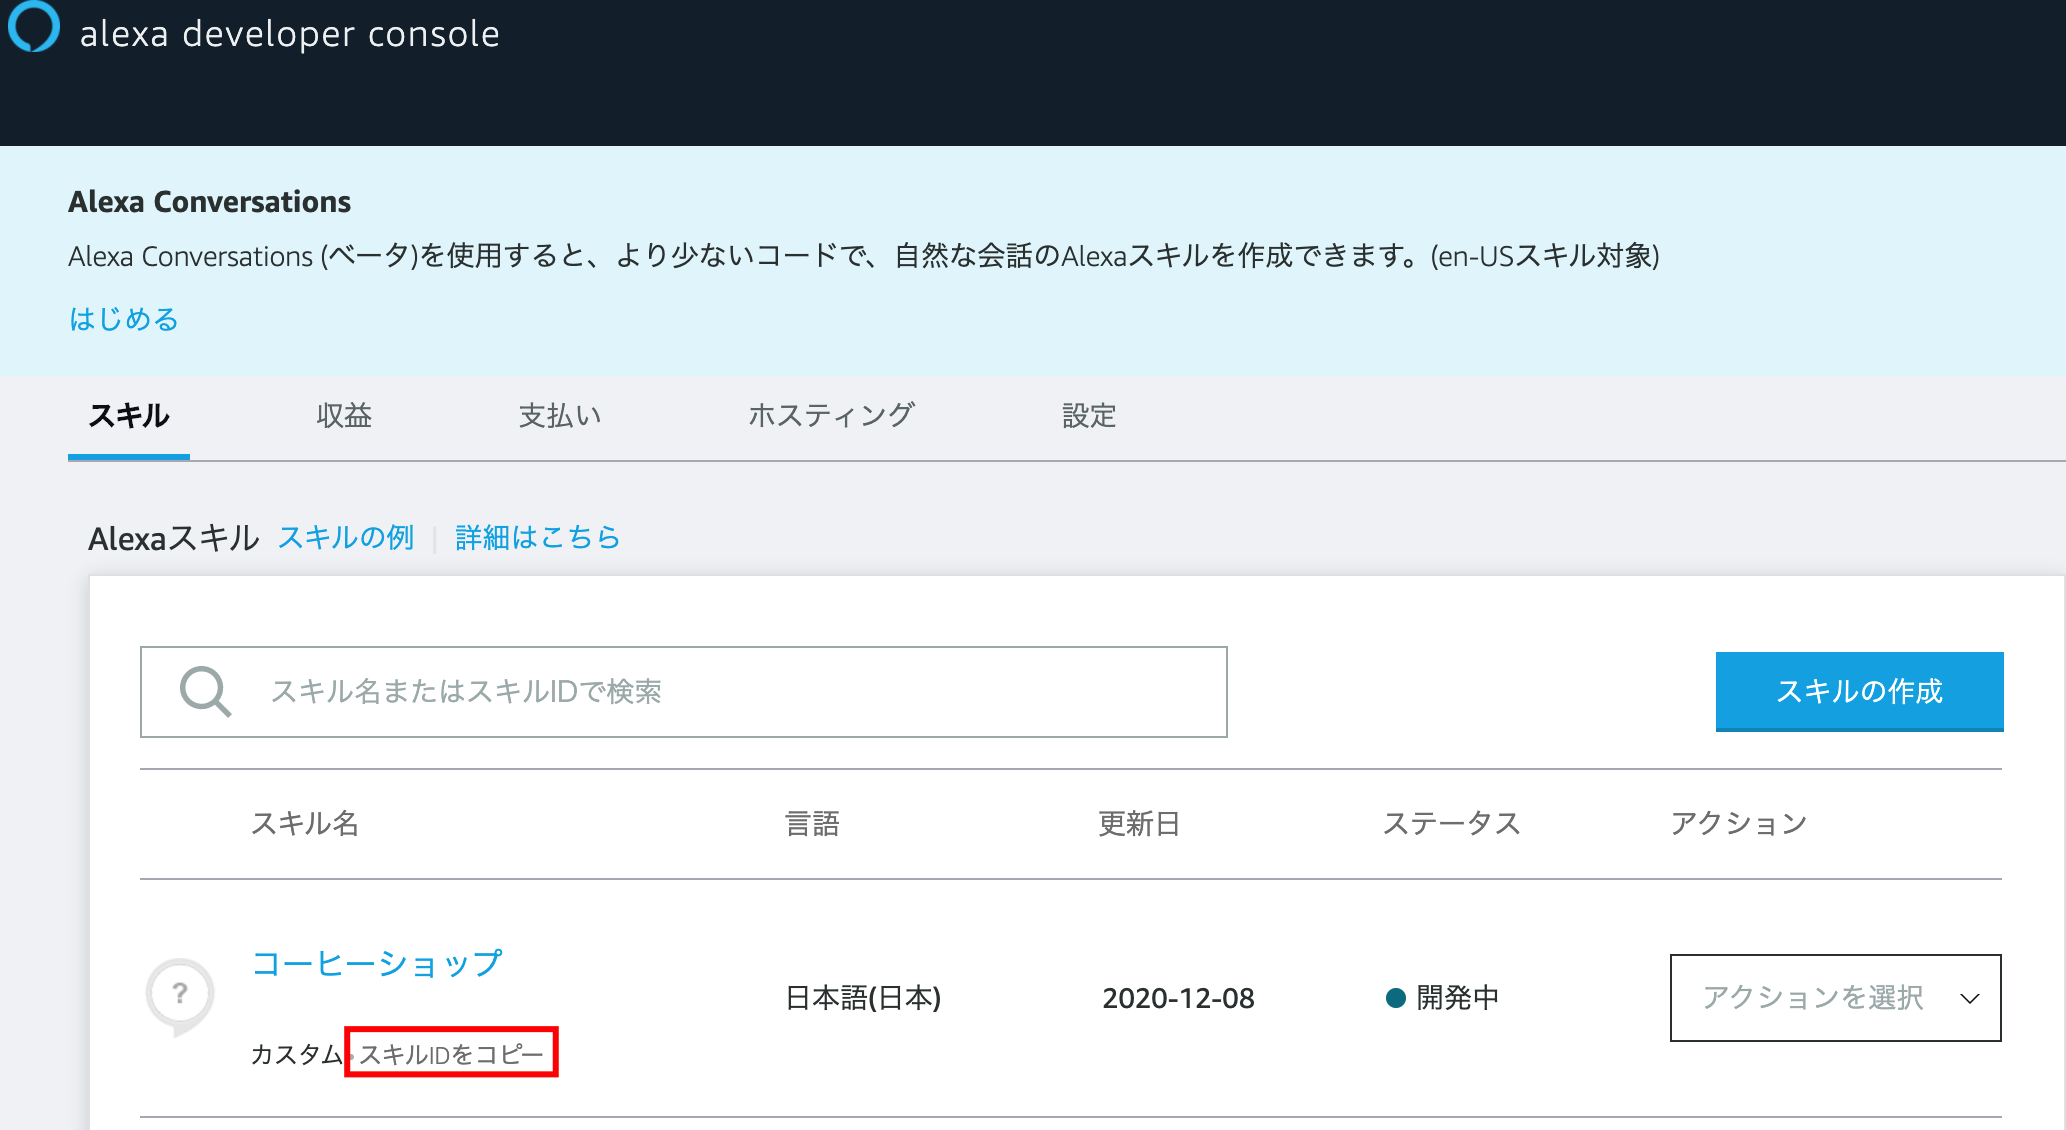
skill id はこちらで確認できます。つまり skill id と同じ名前のテーブルに読み書きすることになります。
永続アトリビュートを保存する
環境変数を設定するため dotenv を導入します
$ npm install -S dotenv
DYNAMODB_PERSISTENCE_REGION=us-west-2
DYNAMODB_PERSISTENCE_TABLE_NAME=<skill id>
NODE_ENV=development でデバッグ起動するように、launch.json を書き換える
{
    "version": "0.2.0",
    "configurations": [
        {
            "name": "Debug Alexa Skill (Node.js)",
            "type": "node",
            "request": "launch",
            "program": "${command:ask.debugAdapterPath}",
            "env": { // 追記
                "NODE_ENV": "development",
            },
            "args": [
                "--accessToken",
                "${command:ask.accessToken}",
                "--skillId",
                "${command:ask.skillIdFromWorkspace}",
                "--handlerName",
                "handler",
                "--skillEntryFile",
                "${workspaceFolder}/lambda/index.js",
                "--region",
                "FE"
            ]
        }
    ]
}
NODE_ENV=development のとき、DynamoDB-local を参照する
require('dotenv').config();

const Alexa = require('ask-sdk-core');
const AWS = require('aws-sdk');
const ddbAdapter = require('ask-sdk-dynamodb-persistence-adapter');

if (process.env.NODE_ENV === 'development') { // 開発環境のとき
    const config = {
        endpoint: 'http://localhost:8000', // DynamoDB-local を参照する
      }
      AWS.config.update(config)
}
async-await で永続アトリビュートを保存
    async handle(handlerInput) { // async をつける
        const attributesManager =handlerInput.attributesManager;
        const attributes = attributesManager.getSessionAttributes();
        const slots = handlerInput.requestEnvelope.request.intent.slots;

        let menu = slots.menu.value || attributes.menu,
            amount = slots.amount.value || attributes.amount;

        if (menu === undefined) {
            attributes.amount = amount;
            handlerInput.attributesManager.setSessionAttributes(attributes);

            const speakOutput = '何を注文しますか?',
                repromptOutput = '何を注文しますか?';

            return handlerInput.responseBuilder
                .speak(speakOutput)
                .reprompt(repromptOutput)
                .getResponse();
        }

        if (amount === undefined) {
            attributes.menu = menu;
            handlerInput.attributesManager.setSessionAttributes(attributes);

            const speakOutput = 'いくつ注文しますか?',
                repromptOutput = 'いくつ注文しますか?';

            return handlerInput.responseBuilder
                .speak(speakOutput)
                .reprompt(repromptOutput)
                .getResponse();
        }

        const speakOutput = `${menu}を${amount}杯ですね。ありがとうございます。`;

        // 永続アトリビュート(追記)
        const data = {"menu": menu, "amount": amount};
        attributesManager.setPersistentAttributes(data);
        await attributesManager.savePersistentAttributes();

        return handlerInput.responseBuilder
            .speak(speakOutput)
            .getResponse();
    }
AWS のチュートリアル通りに書き換える
exports.handler = Alexa.SkillBuilders.custom()
    .addRequestHandlers(
        LaunchRequestHandler,
        OrderIntentHandler,
        HelpIntentHandler,
        CancelAndStopIntentHandler,
        FallbackIntentHandler,
        SessionEndedRequestHandler,
        IntentReflectorHandler)
    .addErrorHandlers(
        ErrorHandler)
    .withCustomUserAgent('sample/hello-world/v1.2')
    .withPersistenceAdapter( // 追記
        new ddbAdapter.DynamoDbPersistenceAdapter({
            tableName: process.env.DYNAMODB_PERSISTENCE_TABLE_NAME,
            createTable: false,
            dynamoDBClient: new AWS.DynamoDB({apiVersion: 'latest', region: process.env.DYNAMODB_PERSISTENCE_REGION})
        })
    )
    .lambda();
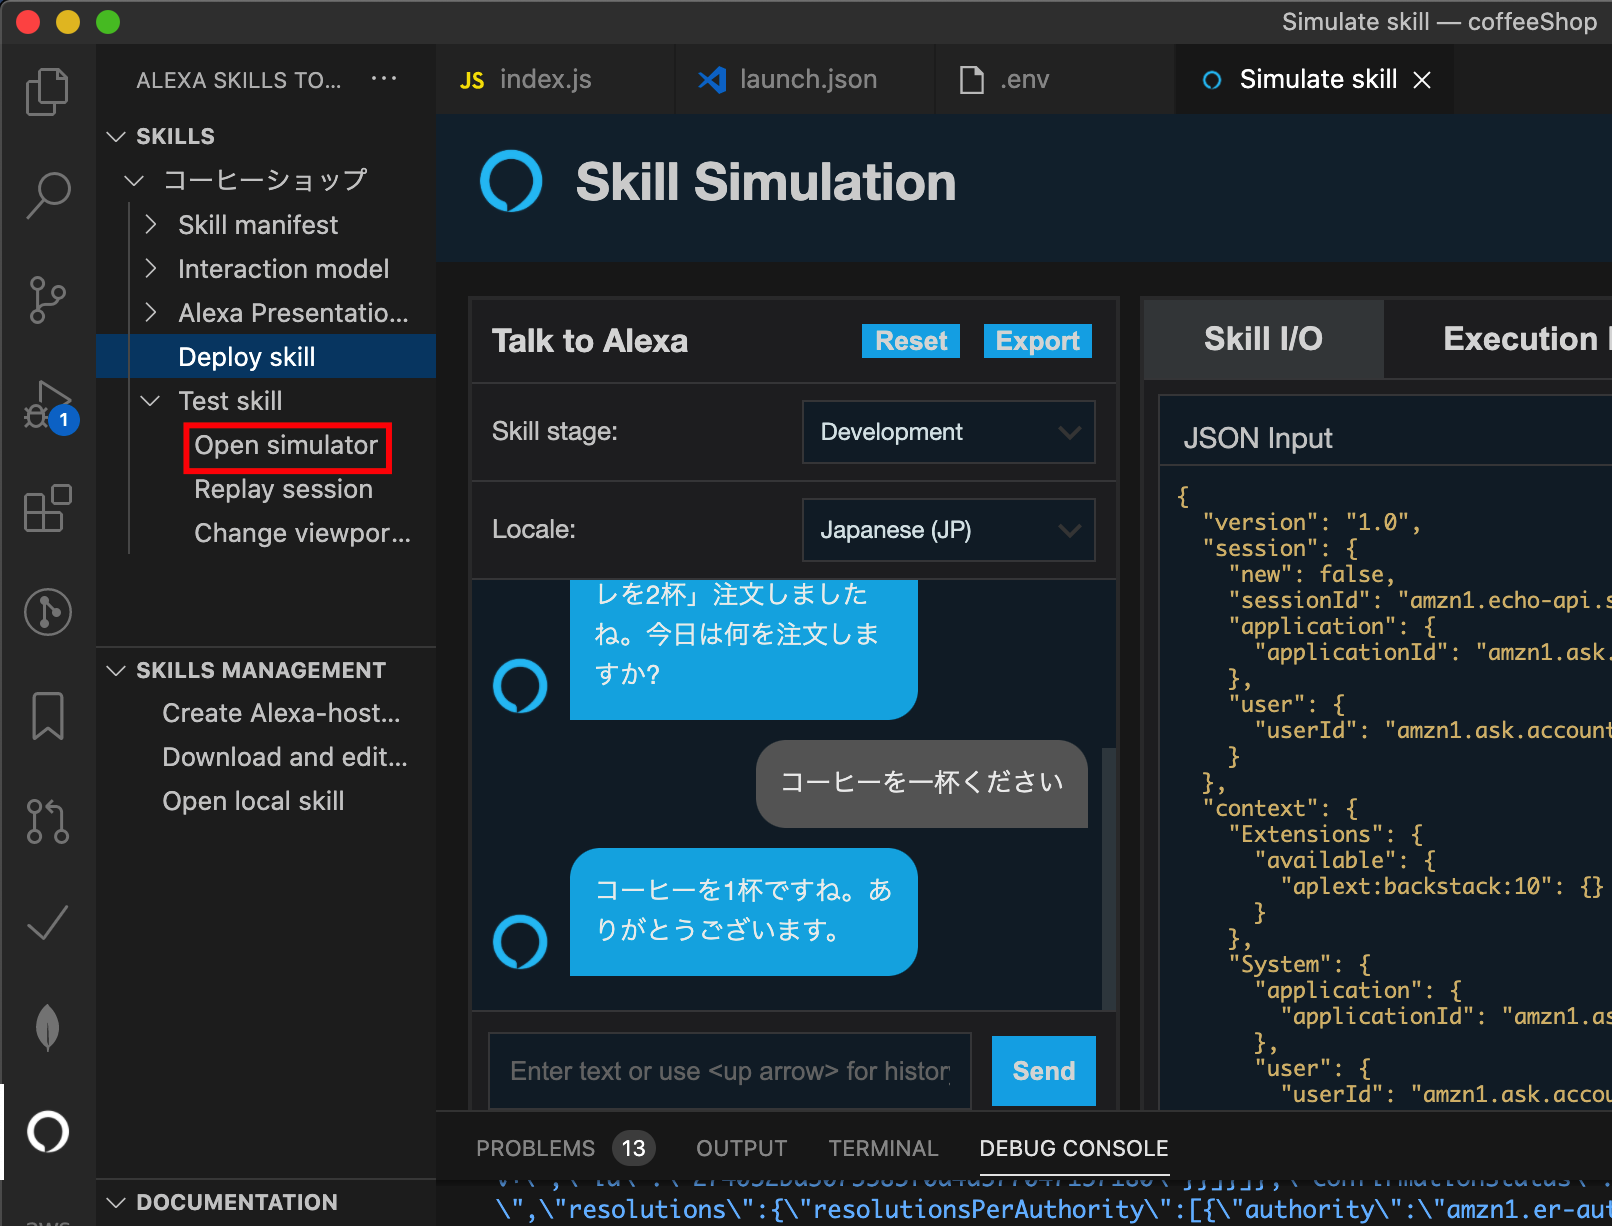
以上で、準備は完了です。Open smulator からテストします。
最後に、DynamoDB-local にデータが正しく書き込まれているか確認します。OK! でした。
$ aws dynamodb scan --table-name <skill id> --endpoint-url http://localhost:8000
{
    "Items": [
        {
            "attributes": {
                "M": {
                    "menu": {
                        "S": "コーヒー"
                    },
                    "amount": {
                        "S": "1"
                    }
                }
            },
            "id": {
                "S": "amzn1.ask.account.AGFxxxxxxxxxxxxxxxx"
            }
        }
    ],
:

