はじめに
前回の記事に引き続き、便利なlodashの関数を紹介します。
isEqual
概要
オブジェクトや配列などの比較に使用します。
ネストされていても、深い比較をするので、完全に同じものかどうかを判定することができます。
基本形
_.isEqual(value, other)
value, other
比較対象です。オブジェクトや配列、マップなど様々なものを指定できます。
使用例
以下のような、更新用フォームがあるとします。

フォームのデータはオブジェクトとして扱い、値の変更がない場合には更新処理を行わないものとします。
ネストされたオブジェクトの場合の比較は複雑になりますが、isEqualを使えば簡単に実装ができます。
import { useState } from "react";
import _ from "lodash";

interface UserProfile {
  name: string;
  email: string;
  preferences: {
    theme: "light" | "dark";
  };
}

const UserProfileComponent = () => {
  const [profile, setProfile] = useState<UserProfile>({
    name: "John Doe",
    email: "john@example.com",
    preferences: {
      theme: "light",
    },
  });

  const [newProfile, setNewProfile] = useState<UserProfile>({ ...profile });

  const handleUpdate = () => {
    if (!_.isEqual(profile, newProfile)) {
      setProfile(newProfile);
      console.log("プロフィールを更新しました。");
    } else {
      console.log("変更はありません。");
    }
  };

  return (
    <div
      style={{
        display: "flex",
        flexFlow: "column",
        width: "50%",
        justifyContent: "space-around",
        height: 150,
      }}
    >
      <input
        value={newProfile.name}
        onChange={(e) => setNewProfile({ ...newProfile, name: e.target.value })}
      />
      <input
        value={newProfile.email}
        onChange={(e) =>
          setNewProfile({ ...newProfile, email: e.target.value })
        }
      />
      <select
        value={newProfile.preferences.theme}
        onChange={(e) =>
          setNewProfile({
            ...newProfile,
            preferences: {
              ...newProfile.preferences,
              theme: e.target.value as "light" | "dark",
            },
          })
        }
      >
        <option value="light">Light</option>
        <option value="dark">Dark</option>
      </select>
      <button onClick={handleUpdate}>更新</button>
    </div>
  );
};

export default UserProfileComponent;
現在の値と、更新後の値をそれぞれ保持し、比較しています。
完全に2つが同じ場合には更新処理を行わない、変更があった場合は更新処理を実行という形にしています。
(ここではどちらもログ出力としている)
flattenDeep
概要
多次元配列を1次元配列にすることができます。
どれだけ深いネストが入り組んでいても、すべて同じレベルの配列にします。
基本形
_.flattenDeep(array)
array
配列です。どんな中身でも大丈夫です。
使用例
nestedMenuのように、社内サイトの構造を配列で保持している場合を考えます。
このサイト構造を一覧でリスト化する場合、1次元配列に直すことができれば簡単に対応できます。
ここでflattenDeepを使って、flatMenuという平坦化した配列を生成しています。
import { flattenDeep } from "lodash";

// メニュー項目の型定義
type MenuItem = string | MenuItem[];

// ネストされたメニュー構造
const nestedMenu: MenuItem[] = [
  "ホーム",
  [
    "製品",
    ["電化製品", "パソコン", "スマートフォン"],
    ["家具", "椅子", "テーブル"],
  ],
  "サービス",
  ["会社概要", "社長挨拶", ["沿革", "創業story", "年表"], "アクセス"],
  "お問い合わせ",
];

// flattenDeepを使用してメニューを平坦化
const flatMenu = flattenDeep(nestedMenu);

const Navigation = () => (
  <nav>
    <h2>サイトマップ</h2>
    <ul>
      {flatMenu.map((item, index) => (
        <li key={index}>{item}</li>
      ))}
    </ul>
  </nav>
);

const FlattenDeep = () => <Navigation />;

export default FlattenDeep;
結果は以下の通り、配列の構造をリストとして出力することができました。

merge
概要
複数のオブジェクトを結合します。
ネストされたオブジェクトであっても、正しく結合することができます。
基本形
`_.merge(object,[sources])
object
マージのもととなるオブジェクトです。
ここに指定したオブジェクトは変更されるので気をつけてください。
[sources]
マージするオブジェクトです。複数指定できます。
存在しなければ追加し、存在する場合は上書きします。
使用例
以下のような、設定を変更できる画面を考えます。
わかりやすいよう、現在の設定を画面に表示しています。
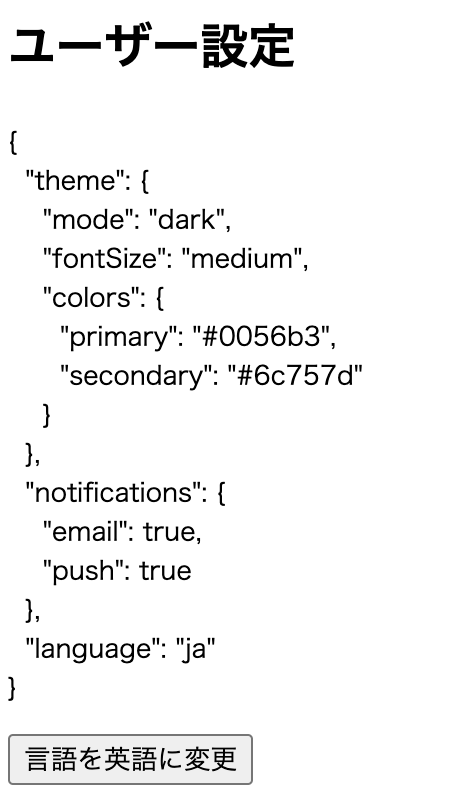
オブジェクトの一部分だけ変えたい、という場合等にmergeは便利です。
import { useState } from "react";
import { merge } from "lodash";

// デフォルトのユーザー設定
const defaultSettings = {
  theme: {
    mode: "light",
    fontSize: "medium",
    colors: {
      primary: "#007bff",
      secondary: "#6c757d",
    },
  },
  notifications: {
    email: true,
    push: false,
  },
  language: "ja",
};

// ユーザーが変更した設定
const userSettings = {
  theme: {
    mode: "dark",
    colors: {
      primary: "#0056b3",
    },
  },
  notifications: {
    push: true,
  },
};

const MergePractice = () => {
  // デフォルト設定とユーザー設定をマージ
  const [settings, setSettings] = useState(() =>
    merge({}, defaultSettings, userSettings)
  );

  const updateLanguage = () => {
    // 既存の設定を変更せずに言語だけを更新
    setSettings((prevSettings) => merge({}, prevSettings, { language: "en" }));
  };

  return (
    <div>
      <h2>ユーザー設定</h2>
      <pre>{JSON.stringify(settings, null, 2)}</pre>
      <button onClick={updateLanguage}>言語を英語に変更</button>
    </div>
  );
};

export default MergePractice;
ここではmergeを2回使用しています。
まず、defaultSettingsとuserSettingsです。
注目すべきは、merge関数の第一引数に空のオブジェクトを指定していることです。
  // デフォルト設定とユーザー設定をマージ
  const [settings, setSettings] = useState(() =>
    merge({}, defaultSettings, userSettings)
  );
第一引数に設定したオブジェクトは変更されてしまうため、あえて空のオブジェクトを指定しています。
これにより、defaultSettingsとuserSettingsはマージの影響を受けません。
このように、デフォルトの設定で維持したい部分は残しつつ、個別の設定で上書きしたいところだけ変える、という場合にも使えます。
次にmergeを使用しているのはupdateLanguage関数内です。
こちらも、空のオブジェクトを使い、既存の設定から変えたい部分のみ(言語設定)をオブジェクトとして指定しています。
まとめ
2回にわたってlodashの関数で、便利なものを紹介してきました。
配列の操作はもちろん、オブジェクトやその他の値に対しても様々な処理が用意されています。
全容を把握するのは難しいですが、紹介したような便利なものたちはいつでも使えるよう、知識の引き出しに入れておきたいと思います。