はじめに
Formikは、Reactでフォームを構築するためのライブラリです。
フォームの状態管理やバリデーション、エラーハンドリングなどの機能を提供し、フォーム開発を大幅に簡略化してくれます。
前回の記事では、Formikの基本的な使い方について解説しました。
今回は、より実践的なFormikの使い方について、紹介していきます。
動的なフォームの構築
実際のプロダクト開発では、フォームの項目が動的に変化することがよくあります。
例えば、ユーザーの選択によって表示するフィールドが変わるようなケースです。
import { Formik, Form, Field, ErrorMessage } from "formik";
import { useState } from "react";
import * as Yup from "yup";

interface MyFormValues {
  userName: string;
  email: string;
  favoriteColor: string;
}

const MyForm: React.FC = () => {
  const [userNameState, setUserNameState] = useState("John");
  return (
    <>
      <select
        name="selectUserName"
        onChange={(e) => setUserNameState(e.target.value)}
      >
        <option value={"John"}>John</option>
        <option value={"Kevin"}>Kevin</option>
      </select>
      <Formik<MyFormValues>
        initialValues={{
          userName: userNameState,
          email: "",
          favoriteColor: "",
        }}
        validationSchema={Yup.object({
          userName: Yup.string().required("Required"),
          email: Yup.string()
            .email("Invalid email address")
            .required("Required"),
          favoriteColor: Yup.string().required("Required"),
        })}
        onSubmit={(values, { setSubmitting }) => {
          setTimeout(() => {
            alert(JSON.stringify(values, null, 2));
            setSubmitting(false);
          }, 400);
        }}
        enableReinitialize={true}
        >
        {({ isSubmitting }) => (
          <Form>
            <div>
              <label htmlFor="userName">userName</label>
              <Field id="userName" name="userName" type="text" />
              <ErrorMessage name="userName" component="div" className="error" />
            </div>

            <div>
              <label htmlFor="email">Email</label>
              <Field id="email" name="email" type="email" />
              <ErrorMessage name="email" component="div" className="error" />
            </div>

            <div>
              <label htmlFor="favoriteColor">Favorite Color</label>
              <Field id="favoriteColor" name="favoriteColor" as="select">
                <option value="">Select a color</option>
                <option value="red">Red</option>
                <option value="green">Green</option>
                <option value="blue">Blue</option>
              </Field>
              <ErrorMessage
                name="favoriteColor"
                component="div"
                className="error"
              />
            </div>

            <div>
              <button type="submit" disabled={isSubmitting}>
                Submit
              </button>
            </div>
          </Form>
        )}
      </Formik>
    </>
  );
};

export default MyForm;
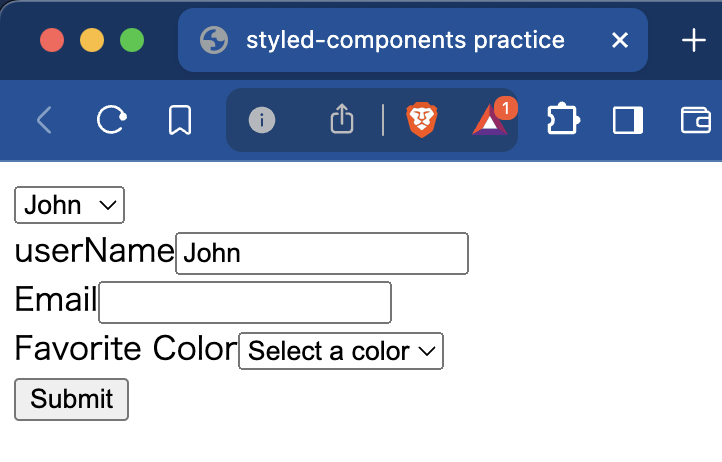
セレクトボックスの値によって、userNameの初期値の値を動的に変更するようにしています。
本来はどこかからデータを受け取って、それを初期値にしたりするのでしょうが、便宜上このような形にしています。
今回のポイントは、FormikコンポーネントのenableReinitializeプロパティです。
これをtrueに設定することで、initialValuesが変更されたときに、フォームの状態を再初期化することができます。
逆にいえば、このプロパティを設定しないと、いくらセレクトボックスの値を変えても反映されません。
プロパティのあるなしで挙動を確認してみてください。
フォームの分割
フォームの項目が多くなると、1つのコンポーネントで全てを管理するのが難しくなります。
そのような場合は、フォームを複数のコンポーネントに分割することで、管理しやすくなります。
先ほどのフォームを分割してみます。
import { Formik, Form, Field, ErrorMessage } from "formik";
import { useState } from "react";
import * as Yup from "yup";

interface MyFormValues {
  userName: string;
  email: string;
  favoriteColor: string;
}

interface Props {
  fieldName: string;
  label: string;
}

const MyTextField: React.FC<Props> = ({ fieldName, label }) => {
  return (
    <div>
      <label htmlFor={fieldName}>{label}</label>
      <Field id={fieldName} name={fieldName} type="text" />
      <ErrorMessage name={fieldName} component="div" className="error" />
    </div>
  );
};

const MySelectField: React.FC<Props> = ({ fieldName, label }) => {
  return (
    <div>
      <label htmlFor={fieldName}>{label}</label>
      <Field id={fieldName} name={fieldName} as="select">
        <option value="">Select a color</option>
        <option value="red">Red</option>
        <option value="green">Green</option>
        <option value="blue">Blue</option>
      </Field>
      <ErrorMessage name={fieldName} component="div" className="error" />
    </div>
  );
};

const MyForm: React.FC = () => {
  const [userNameState, setUserNameState] = useState("John");
  return (
    <>
      <select
        name="selectUserName"
        onChange={(e) => setUserNameState(e.target.value)}
      >
        <option value={"John"}>John</option>
        <option value={"Kevin"}>Kevin</option>
      </select>
      <Formik<MyFormValues>
        initialValues={{
          userName: userNameState,
          email: "",
          favoriteColor: "",
        }}
        validationSchema={Yup.object({
          userName: Yup.string().required("Required"),
          email: Yup.string()
            .email("Invalid email address")
            .required("Required"),
          favoriteColor: Yup.string().required("Required"),
        })}
        onSubmit={(values, { setSubmitting }) => {
          setTimeout(() => {
            alert(JSON.stringify(values, null, 2));
            setSubmitting(false);
          }, 400);
        }}
        enableReinitialize={true}
      >
        {({ isSubmitting }) => (
          <Form>
            <MyTextField fieldName="userName" label="User Name" />
            <MyTextField fieldName="email" label="Email" />
            <MySelectField fieldName="favoriteColor" label="Favorite Color" />

            <div>
              <button type="submit" disabled={isSubmitting}>
                Submit
              </button>
            </div>
          </Form>
        )}
      </Formik>
    </>
  );
};

export default MyForm;
ここでは、MyTextFieldとMySelectFieldという2つのコンポーネントを定義し、それぞれテキスト入力とセレクト入力を表現しています。
これらのコンポーネントはFieldコンポーネントをラップしているだけなので、Formikの機能を全て利用できます。
このように、フォームの項目を別のコンポーネントに切り出すことで、フォームの構造が明確になり、管理がしやすくなります。
上記の例は同じファイルに定義していますが、それぞれコンポーネントごとにファイルを用意することでさらに使い勝手が良くなります。
まとめ
Formikを使った実践的なフォーム開発について、さらに詳しく解説しました。
今回は2つの例だけでしたが、まだまだ実際の開発で使える機能はたくさんあるので、別の機会に紹介したいと思います。
