はじめに
ポートフォリオ作成にあたって通知機能を実装したのでその備忘録を残しておきます。
なお、かなり詳しく解説しているので実装だけできればいいよーと言う方は以下の記事に飛んでください。
実装にあたって下記の記事を参考にさせていただきました。
https://qiita.com/nekojoker/items/80448944ec9aaae48d0a
https://qiita.com/yuto_1014/items/2db1dd4fcd7945b980f7
https://qiita.com/E6YOteYPzmFGfOD/items/c780dd686a81a8ca32e8
前提
- 投稿機能を実装済み(この記事では、Productモデル)
- コメント機能を実装済み(この記事では、Commentモデル)
- いいね機能を実装済み(この記事では、Likeモデル)
- フォロー機能を実装済み(この記事では、Relationshipモデル)
完成形
実装手順
1.Notificationモデルの作成
2.マイグレーションファイルの確認
3.rails db:migarate
4.モデルファイルの確認
5.通知メソッドを作る
6.通知一覧ページ(notifications.controller)
7.通知一覧ページ(view)
8.
9.
10.
1. Notificationモデルの作成
rails g model Notification visitor:references visited:references product:references comment:references action:string checked:boolean
visitor_id : 通知を送ったユーザー
visited_id : 通知を送られたユーザー
product_id : いいねされた投稿のid
comment_id : 投稿されたプロダクトに対するコメントのid
action : 通知の種類(フォロー(follow)、いいね(like)、コメント(comment))
checked : 通知を送られたユーザーが通知を確認したかどうか
2.マイグレーションファイルの確認
t.references :product, null: false, foreign_key: true
t.references :comment, null: false, foreign_key: true
の部分は
t.references :product, null: true, foreign_key: true
t.references :comment, null: true, foreign_key: true
と変更してください。これはフォロー通知を送るときはcomment_idは必要がなく,いいね通知を送るときはproduct_idが必要ないため、null:falseとなっていると空での保存ができないためです。
上記のように変更ができたら3.へ進んでください。
3.rails db:migarate
これは単純に
rails db:migarate
するだけでいいです。
4.モデルファイルの確認
ここからはUserモデルファイル、Productモデルファイル、Commentモデルファイル、Notificationモデルファイルの編集を行っていきます。目的はそれぞれのモデルとNotificationモデルを紐づけるためです。
user.rb
has_many :active_notifications, class_name: "Notification", foreign_key:"visitor_id", dependent: :destroy
  has_many :passive_notifications, class_name: "Notification", foreign_key:"visited_id", dependent: :destroy
を追加。
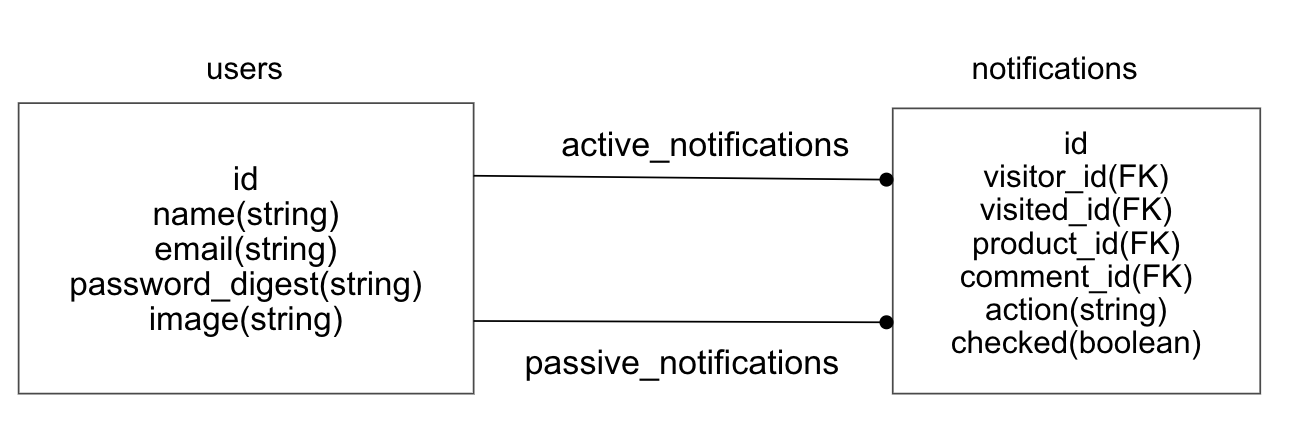
- active_notifications: 自分が送った通知
- passive_notifications:自分が受け取る通知
イメージとしてはこんな感じです。
product.rb
has_many :notifications, dependent: :destroy
を追加。
comment.rb
has_many :notifications, dependent: :destroy
を追加。
notification.rb
class Notification < ApplicationRecord
  default_scope -> { order(created_at: :desc) } #新着順で表示する
  belongs_to :visitor, class_name: "User", optional: true
  belongs_to :visited, class_name: "User", optional: true
  belongs_to :product, optional: true
  belongs
を追加。
optionnal:trueとは外部キーの空を許可するもの。フォロー通知のみではないので空の時もある。
上記でも述べたように、フォロー通知を送るときはcomment_idは必要がなく,いいね通知を送るときはproduct_idが必要ないため、空での保存が可能でないとエラーが出てしまうためです。
5.通知メソッドを作る
Controller内で通知機能を書くこともできますが、それだとcontrollerファイルのコード量が増えてしまい醜いのでモデルファイルの下部にあらかじめ通知メソッドを書いておいて、それをcontroller内で呼び出す形をします。
フォロー通知メソッド
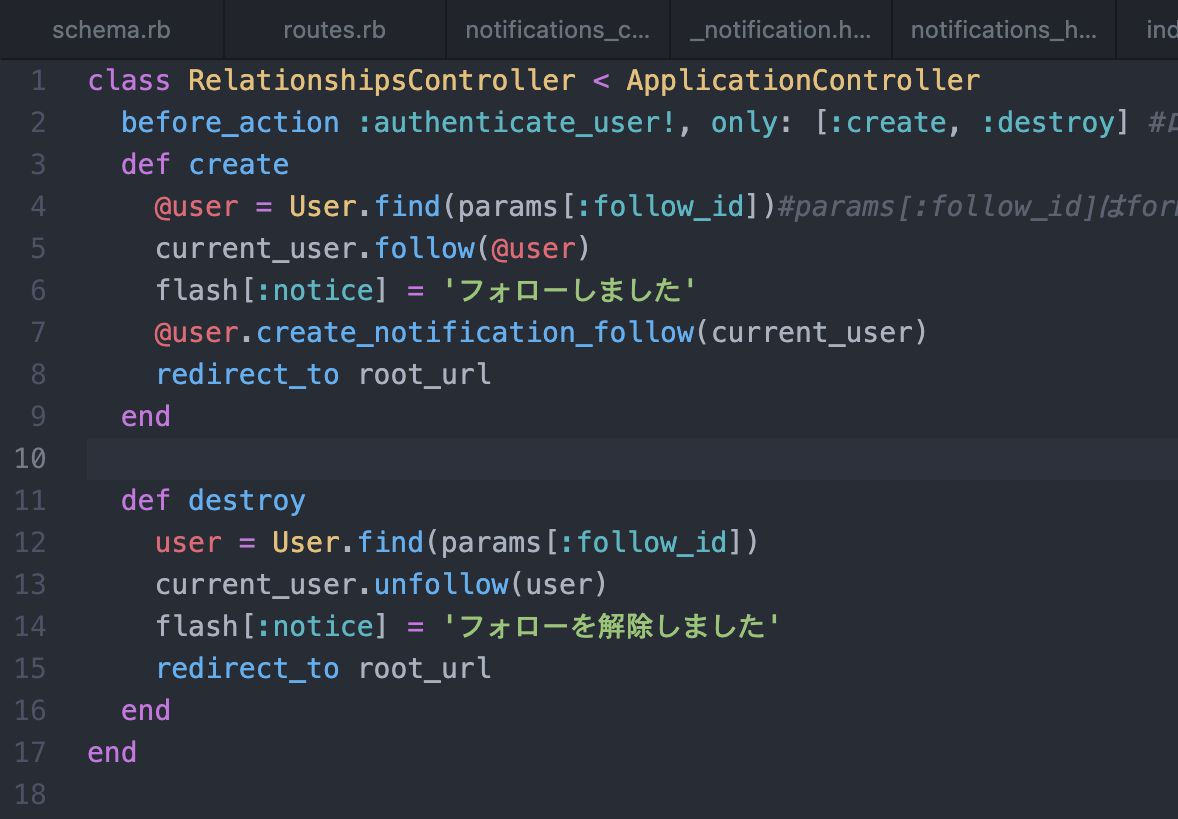
relationships.controllerファイルのcreateアクションで「フォロー」が作成されたときこのメソッドも同時に呼び出します。
def create_notification_follow(current_user)
    notification = current_user.active_notifications.new(
      visited_id: id,
      action: 'follow'
    )
    notification.save if notification.valid?
  end
一つずつ解説していきます。以下のrelationship.controllerのcreateアクションの中で
@user.create_notification_follow(current_user)
でフォロー通知メソッドを呼び出しています。
通知メソッド内では、ログインユーザのactive_notificationsを新しく作成しています。また
visited_id: id,
とありますが、このidとは、
@user.create_notification_follow(current_user)
で呼び出した時の@userのidです。つまりフォローを押された人のidとなります。
ここでのactionはfollowです。
notification.valid?の意味は、notificationにエラーがなければsaveしなさい。と言う意味です。

いいね通知メソッド
def create_notification_like(current_user)
    notification = current_user.active_notifications.new(
      comment_id: nil,
      product_id: id,
      visited_id: user_id,
      action: 'like'
      )
    if notification.visitor_id == notification.visited_id
       notification.checked = true
    end
    notification.save if notification.valid?
  end
一つずつ解説していきます。このメソッドは以下のlikes.controllerのcreateアクションで呼び出しています。
いいね通知メソッド内では、ログインユーザのactive_notificationsを新しく作成しています。また
product_id: id, とありますが、このidとは、
@product.create_notification_like(current_user)
で呼び出した時の@productのidです。つまりいいねを押された投稿のidとなります。
visited_id: user_idのuser_idとは@productに紐づいたuser_id。つまりいいねを押された投稿を作成したuserのidを指す。
if notification.visitor_id == notification.visited_idこれは通知を送っているuserのidと通知を送られているuserのidが同じ場合は通知を送らないと言うもの。つまり自分の投稿に自分でいいねを押したときは通知を送らないようにしている。
コメント通知メソッド
この3つの中で一番めんどくさいですが頑張ってください!!
def create_notification_comment(current_user, comment_id)
    temp_ids = Comment.where(product_id: id).select(:user_id).where.not("user_id = ? or user_id = ?", current_user.id, user_id).distinct
    temp_ids.each do |temp_id|
      save_notification_comment!(current_user, comment_id, temp_id['user_id'])
    end
    save_notification_comment(current_user, comment_id, user_id)
  end

  def save_notification_comment(current_user, comment_id, visited_id)#(通知をした人,通知されたコメント,通知された人)
    notification = current_user.active_notifications.new(
      product_id: id,
      comment_id: comment_id,
      visited_id: visited_id,
      action: 'comment'
    )
    if notification.visitor_id == notification.visited_id
      notification.checked = true
    end
    notification.save if notification.valid?
  end
一つずつ解説していきます。
流れとしては、comments.controllerのcreateアクションでcreate_notification_comment呼び出しています。次にそのcreate_notification_commentの中でsave_notification_commentを呼び出しています。
簡単にそれぞれのメソッドの役割を簡単に説明すると、
create_notification_commentは、フォロー、いいねと違って通知を送るべき人が複数人いるので誰に通知を送るのかを決めている
save_notification_commentは、実際に通知を作成する
create_notification_comment(current_user, comment_id)では引数をふたつ受け取っています。ここでcomment_idが必要な理由としては同じ投稿にコメントしている全ての人に通知を送るためです。
temp_ids = Comment.where(product_id: id).select(:user_id).where.not("user_id = ? or user_id = ?", current_user.id, user_id).distinct
ここでは#同じ投稿にコメントしているユーザに通知を送っています(current_userと投稿ユーザーのぞく)
また,distinctは重複を許さないものです。つまり同じ投稿に複数回コメントをしている人に対しても一回だけの通知を送ることになります。
temp_ids.each do |temp_id| save_notification_comment!(current_user, comment_id, temp_id['user_id']) end
ここでは先ほど取得したユーザー達へ通知を作成しています。
(current_user, comment_id, temp_id['user_id'])引数の説明としては、
現在のユーザ(current_user)がある投稿にコメント(comment_id)している全ユーザ(temp_id['user_id'])に通知を作成するという意味です。
save_notification_comment(current_user, comment_id, user_id)はコメントされている投稿を作成した人への通知です。
そうしてdef save_notification_comment(current_user(通知をした人), comment_id(通知されたコメント), visited_id(通知された人)に渡ってきます。
この中ではフォロー通知、いいね通知同様に必要なカラムに値を代入した上でactive_notificationsを作成しています。
6.通知一覧ページ(notifications.controller)
あと一歩です!!あとは通知一覧画面を作っていきます。頑張りましょー
rails g controller notifications
resources :notifications, only: [:index, :destroy]
def index
    @notifications = current_user.passive_notifications #ユーザが受け取る通知の全て
    @notifications.where(checked: false).each do |notification| #indexページを開いた瞬間に通知のcheckedは全てtrueに変える
      notification.update(checked: true)
    end
  end
  def destroy
    @notifications =current_user.passive_notifications.destroy_all #
    redirect_to notifications_path
  end
indexの中ではユーザが受け取る全ての通知を@notifications の中に入れています。
なんでいきなりpassive_notificationsが登場するのか疑問に思った人もいるかもしれません。
これはuserテーブルとnotificationテーブルの関係が
has_many :active_notifications, class_name: "Notification", foreign_key:"visitor_id"
  has_many :passive_notifications, class_name: "Notification", foreign_key:"visited_id"
となっていたため参照できるのです。わかりやすくするために図にすると以下のようになります。
つまり通知メソッドの中でactive_notificationsを作成したので、同じカラムを持つpassive_notificationsからでも参照できるようになったということです!
destroyの方はそのままです。受け取った通知の全削除です。
7.通知一覧ページ(view)
<h3 class="text-center">通知</h3>
<%= link_to "通知削除", notification_path(@notifications), method: :delete ,class: "fas fa-trash" %>
<% if @notifications.present? %>
    <div class="users-index">
        <%= render @notifications %>
    </div>
<% else %>
    <p>通知はありません</p>
<% end %>
<%= render @notifications %>
は省略形を使っています。もう少し噛み砕くと、
render partial: 'notifications/notification', collection: @notifications
となります。これでも少しわかりにくいのでさらに噛み砕くと、
<% @notifications.each do |notification| %>
  <%= render partial: 'notification', locals: {notification: @notification} %>
<% end %>
となります。つまり受け取った通知を一つずつ順番に_notification.html.erbファイルに入れていく処理となります。
次にその飛ばした先のファイルです。
ここでは飛んできた通知をnotification_form(notification)のヘルパーで設定したメソッドに入れています。
<div class="notification-view">
  <%= notification_form(notification) %><span class="moderate-font"><%= " (#{time_ago_in_words(notification.created_at)}前)" %></span>
  <br>
  <% if !@comment.nil? %>
    <p class="notification-comment"><%= @comment %></p>
  <% end %>
</div>
<% if !@comment.nil? %>はコメントの通知ならそのコメントの内容も同時に表示するものです。
module NotificationsHelper
  def notification_form(notification)
    @visitor = notification.visitor
    @comment = nil
    @visitor_comment = notification.comment_id
    case notification.action
    when 'follow'
      tag.a(notification.visitor.name, href: user_path(@visitor)) + 'があなたをフォローしました'
    when 'like'
      tag.a(notification.visitor.name, href: user_path(@visitor)) + 'が' + tag.a('あなたの投稿', href: micropost_path(notification.micropost_id)) + 'にいいねしました'
    when 'comment' then
      @comment = Comment.find_by(id: @visitor_comment)
      @comment_content =@comment.body
      @micropost_title =@comment.product.title
      tag.a(@visitor.name, href: user_path(@visitor)) + 'が' + tag.a("#{@product_title}", href: product_path(notification.product_id)) + 'にコメントしました'
    end
end
このヘルパー内の処理は、
フォロー通知なら、「〜〜さんがフォローしました。」
いいね通知なら、「〜〜さんがいいねしました。」
コメント通知なら、「〜〜さんがコメントしました。」
とactionによって表示する文章を分ける処理です。
これで以上です!!!ありがとうございました!!


