対応バージョン
swift 1.1
xcode 6.1
iOS 8.1
目標
「yahooニュースのRSSをJSONで配ってるapiを叩いて、JSONデータをゲトして、テーブルでひ項目表示させて、セルをタップしたらwebViewで元記事が見れる」ところまで実装。
Playgroundでやってみました。
import UIKit
import XCPlayground

//make URL of google feed api
var urlString = "http://ajax.googleapis.com/ajax/services/feed/load?v=1.0&q=http://rss.itmedia.co.jp/rss/2.0/news_bursts.xml&num=8"
var url = NSURL(string: urlString)

//download by NSSession
var task = NSURLSession.sharedSession().dataTaskWithURL(url!, completionHandler:{data, response, error in
    //convert json data to dictionary
    var dict = NSJSONSerialization.JSONObjectWithData(data, options: NSJSONReadingOptions.MutableContainers, error: nil) as NSDictionary

    println(dict)
})

task.resume()

XCPSetExecutionShouldContinueIndefinitely(continueIndefinitely: true)
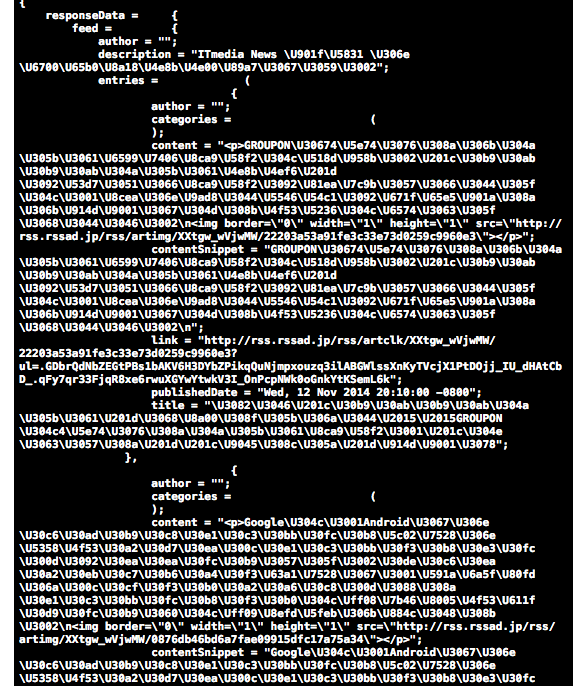
とりあえずこんな感じでゲトできる。
titleだけ表示させてみる
import UIKit
import XCPlayground

//make URL of google feed api
var urlString = "http://ajax.googleapis.com/ajax/services/feed/load?v=1.0&q=http://rss.itmedia.co.jp/rss/2.0/news_bursts.xml&num=8"
var url = NSURL(string: urlString)

//download by NSSession
var task = NSURLSession.sharedSession().dataTaskWithURL(url!, completionHandler:{data, response, error in
    //convert json data to dictionary
    var dict = NSJSONSerialization.JSONObjectWithData(data, options: NSJSONReadingOptions.MutableContainers, error: nil) as NSDictionary

    //get responseData, feed, entries
    var responseData = dict["responseData"] as NSDictionary
    var feed = responseData["feed"] as NSDictionary
    var entries = feed["entries"] as NSArray

    //extract entries
    for entry in entries {
        println(entry["title"])
    }

    println(dict)
})

task.resume()

XCPSetExecutionShouldContinueIndefinitely(continueIndefinitely: true)

できた!!
テーブルで表示させてみる
playgroundを離れ、普通のアプリ制作のフローでいきます。
細かいところは一旦置いといて。
import UIKit

class ViewController: UITableViewController {

    //array of entries
    var entries = NSArray()
    let newsUrlString = "http://ajax.googleapis.com/ajax/services/feed/load?v=1.0&q=http://rss.itmedia.co.jp/rss/2.0/news_bursts.xml&num=8"

    override func viewDidLoad() {
        super.viewDidLoad()
        // Do any additional setup after loading the view, typically from a nib.
    }

    override func didReceiveMemoryWarning() {
        super.didReceiveMemoryWarning()
        // Dispose of any resources that can be recreated.
    }

    //count cell of table view
    override func tableView(tableView: UITableView, numberOfRowsInSection section: Int) -> Int {
        return entries.count
    }

    //make tableView
    override func tableView(tableView: UITableView, cellForRowAtIndexPath indexPath: NSIndexPath) -> UITableViewCell {
        //get cell
        var cell = tableView.dequeueReusableCellWithIdentifier("news") as UITableViewCell

        //get entry
        var entry = entries[indexPath.row] as NSDictionary

        //set title
        cell.textLabel.text = entry["title"] as? String

        return cell
    }

    //make reload button
    @IBAction func refresh(sender: AnyObject) {
        let url = NSURL(string: newsUrlString)!

        var task = NSURLSession.sharedSession().dataTaskWithURL(url, completionHandler: {data, response, error in
            // conver json to dictionary
            var dict = NSJSONSerialization.JSONObjectWithData(data, options: NSJSONReadingOptions.MutableContainers, error: nil) as NSDictionary

            // get responseData entries
            if var responseData = dict["responseData"] as? NSDictionary {
                if var feed = responseData["feed"] as? NSDictionary {
                    if var entries = feed["entries"] as? NSArray {
                        // set array of entries
                        self.entries = entries
                    }
                }
            }
            //switch to main thread to relad table view
            dispatch_async(dispatch_get_main_queue(), {
                //reload table view
                self.tableView.reloadData()
            })
        })
        task.resume()
    }
}
はじめにビルドすると、、、
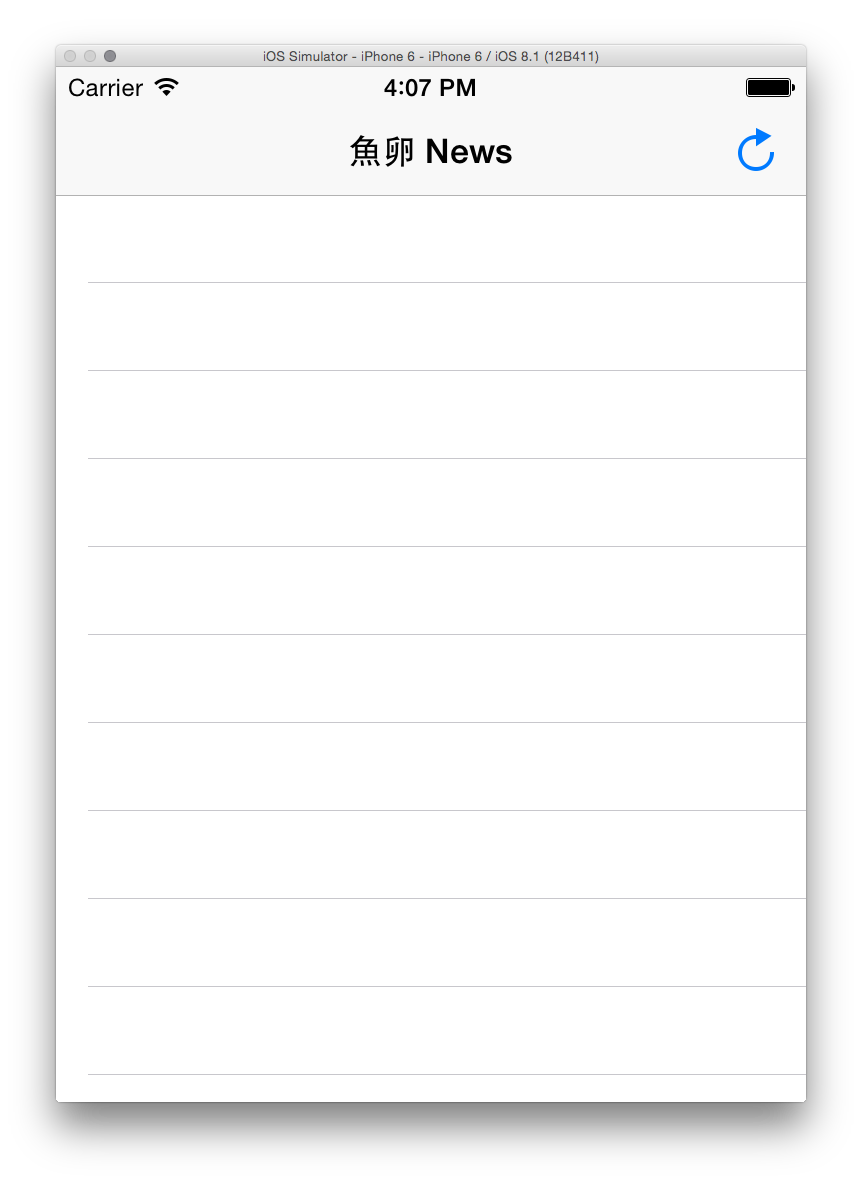
リロードボタンを押すと
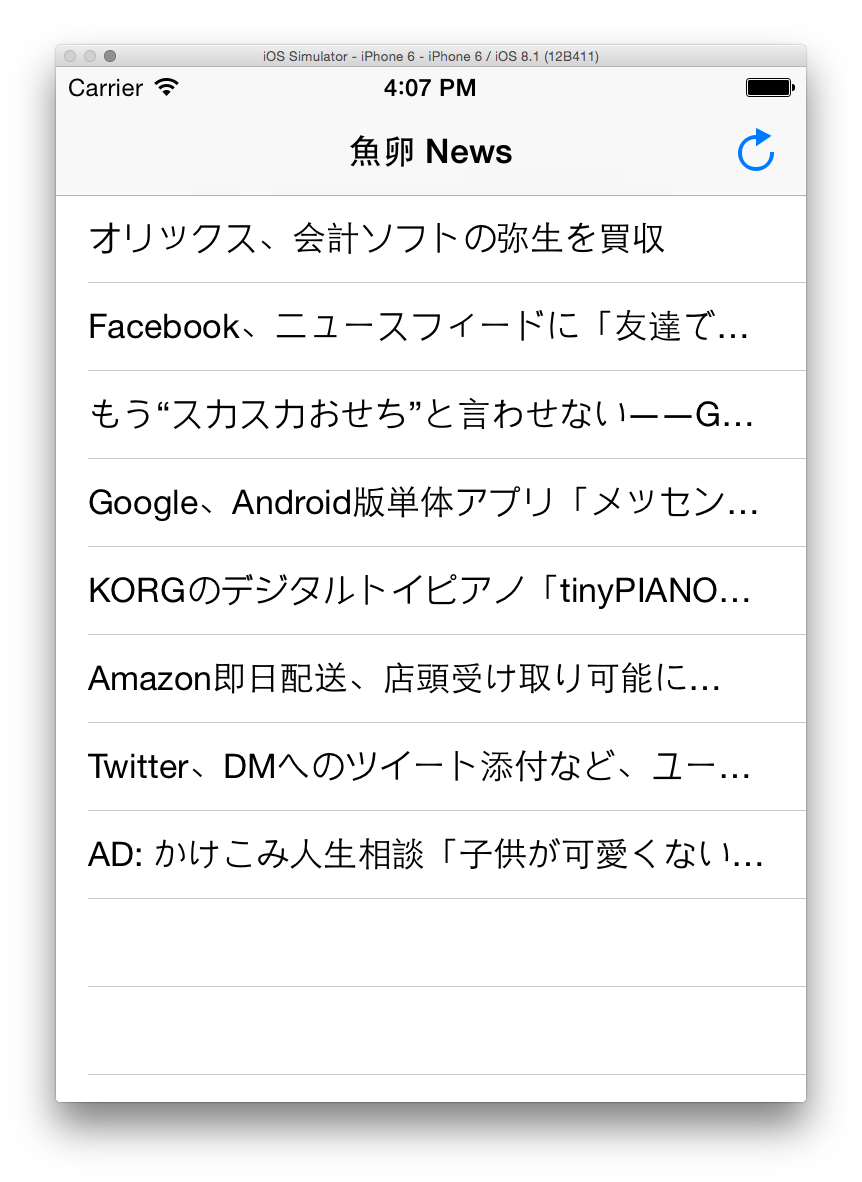
読み込まれた!
リロードボタンの実装はstoryboardからやりました。
navigationbarにbarbuttonitemを載せ、identifierをrefreshにして、assistantEditorを開いてViewControllerにCtrl+ドラッグアンドドロップしただけです。
本文も表示
詳細のViewControllerを増やす
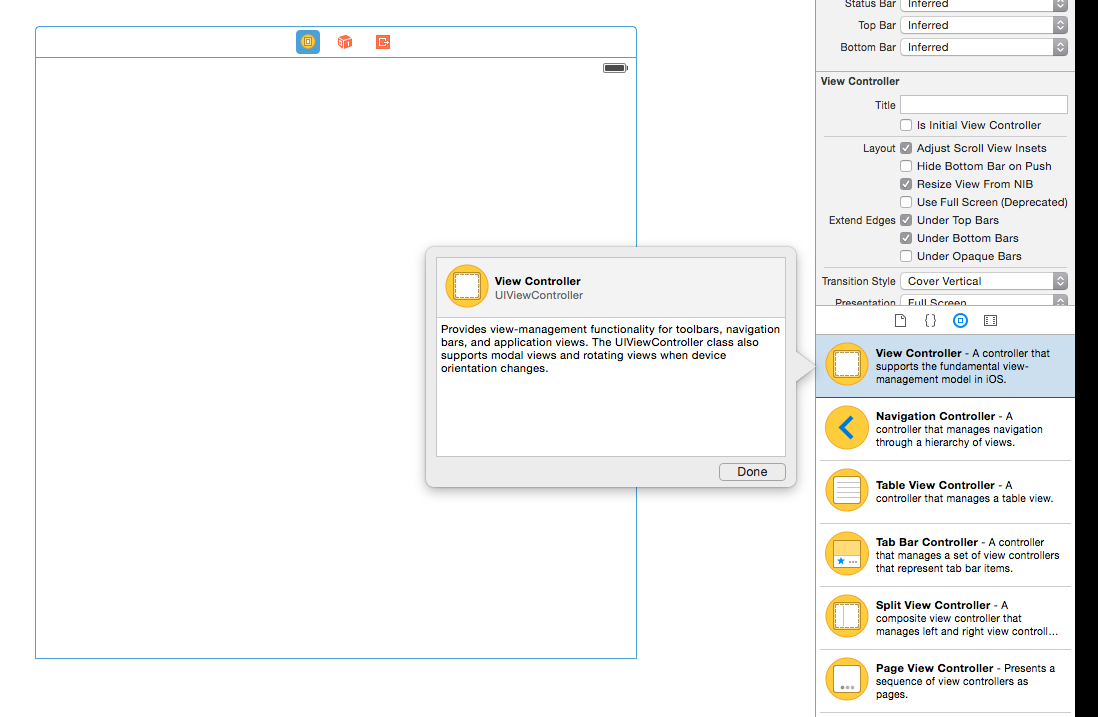
storyboardからViewCotnrollerを選択して、ドラッグアンドドロップ。
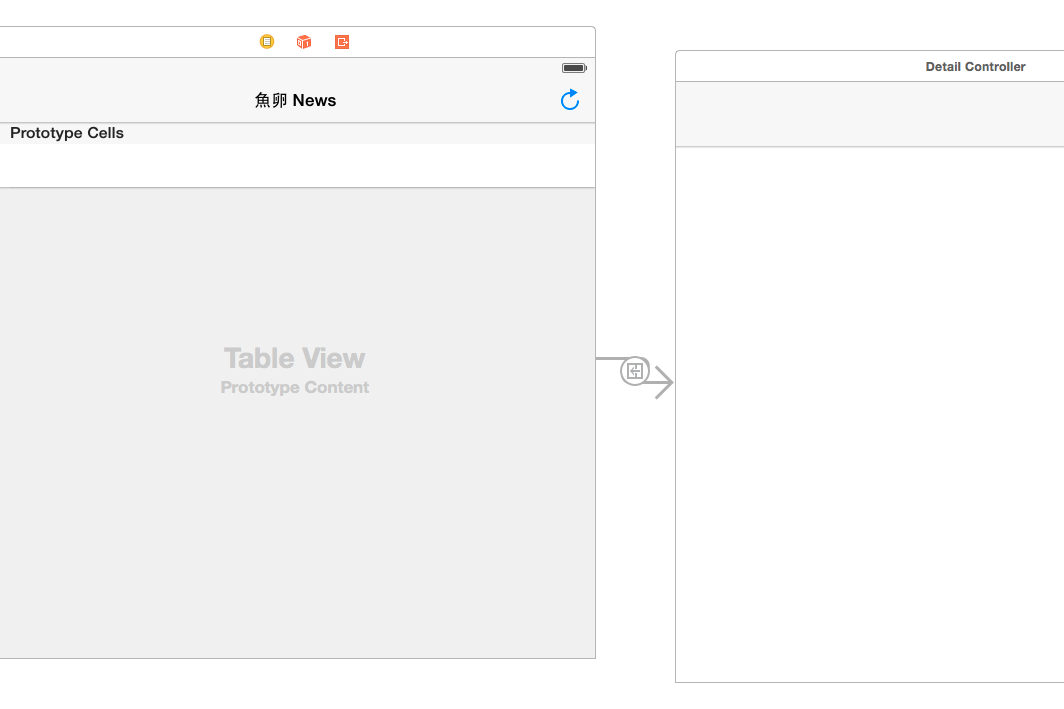
TableViewのViewControllerと今回のViewControllerを紐付け。Segueる。
Storyboardの左っかわで、Ctrl+ドラッグアンドドロップで紐付けできます。
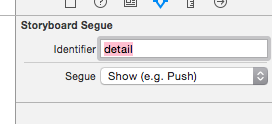
Segueのidentifierを決める
以下のコードを追加して、segueを追加します。
    //add segue
    override func tableView(tableView: UITableView, didSelectRowAtIndexPath indexPath: NSIndexPath) {
        // Segue
        performSegueWithIdentifier("detail", sender: entries[indexPath.row])
    }
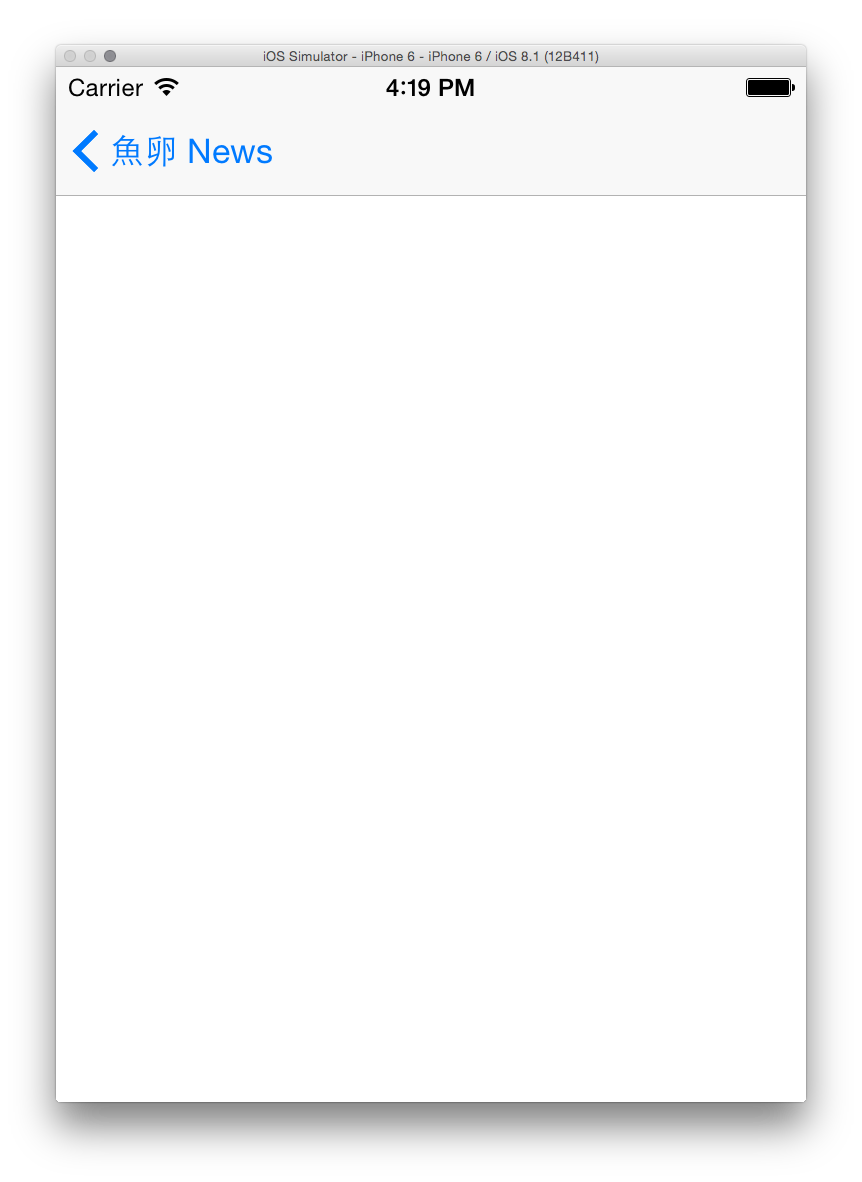
ビルドしてみるとこんな感じ。
テーブルのセルをタップすると新しいViewControllerが呼ばれて遷移する。
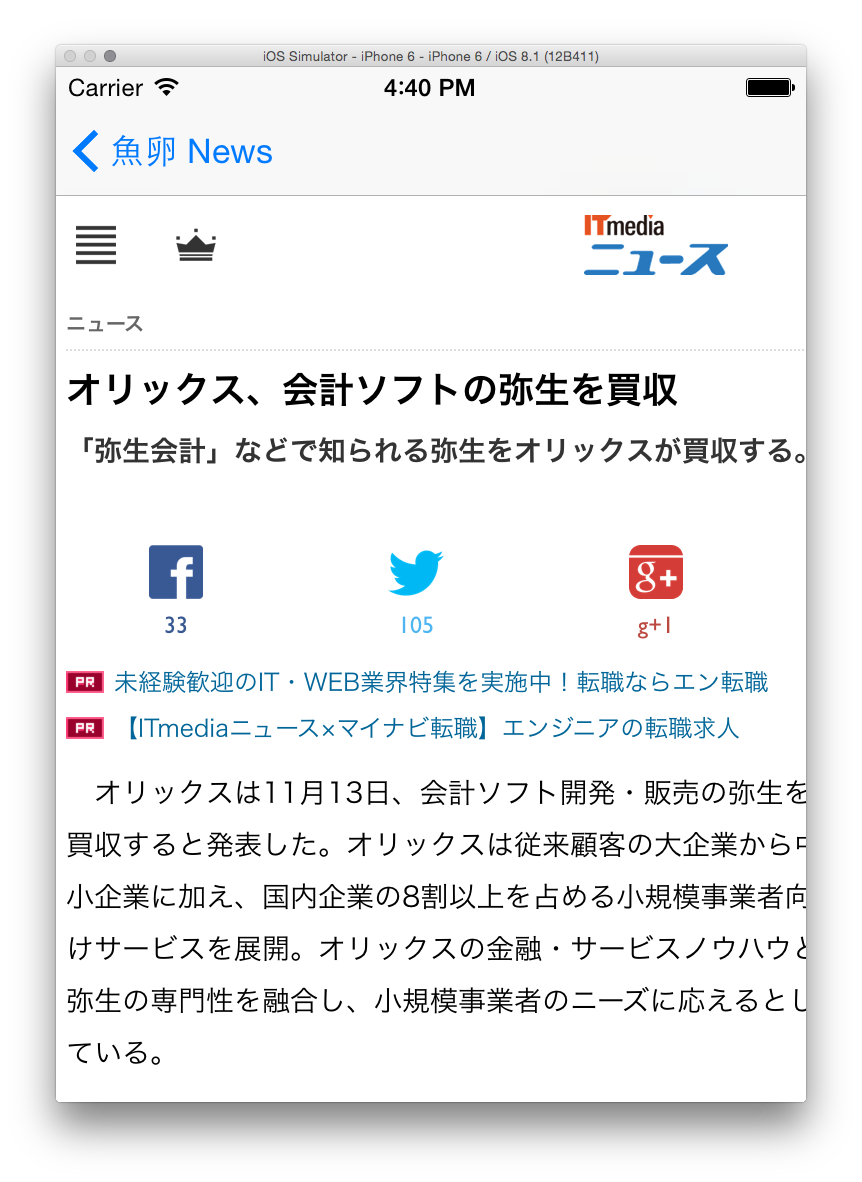
WebView
- DetailControllerにWebViewを追加
storyboardでドラッグアンドドロップしたらOK。
- DetailControllerにアウトレットを追加
assistantEditorを表示して、Ctrl+ドラッグアンドドロップ。

- URLを読み込むコードをかく
import Foundation
import UIKit

class DetailController: UIViewController {

    @IBOutlet weak var webView: UIWebView!

    var entry = NSDictionary()

    override func viewDidLoad() {
        super.viewDidLoad()

        //read URL by webView
        var url = NSURL(string: self.entry["link"] as String)
        var request = NSURLRequest(URL: url!)
        webView.loadRequest(request)
    }
}
- ViewController側で表示するエントリーをDetailControllerに渡すところを何とかする
    // send entry to DetailController
    override func prepareForSegue(segue: UIStoryboardSegue, sender: AnyObject?) {
        if segue.identifier == "detail" {
            // get DetailController
            var detailController = segue.destinationViewController as DetailController

            // set entry
            detailController.entry = sender as NSDictionary
        }
    }
さっきsegueを追加したコードの下あたり、@IBAction func refresh の上辺りに追記。
- ビルド
いい感じー
とりあえず
とりあえず大枠ができたので、これから自分なりにカスタマイズしていくのですが、それはまた次回、、、
(swift1.1と1.0ってかなり違うんですね。。。2.0でいいのでは・・・)