今回は、IDEでデバッグ起動できるところまでやりましょう。
Local Debugging 環境構築
基本的には readme に書いてあることをやることになりますが、
Windowsのローカルマシンでデバッグすることによる読み替えが少し必要です。
virtualenv 生成
${workspaceFolder}> pipenv install --dev
${workspaceFolder}> pipenv shell
${workspaceFolder}> pipenv run pip freeze
...
Flask==1.1.1
...
${workspaceFolder}> pipenv --venv               # 仮想環境のPathを確認する
%USER_PROFILE%\.virtualenvs\panels-ooOOoOOoo
Config設置
$ cp .env.example .env.debug        # for local debugging
$ cp .env.example .env              # for production
$ cp .mysql_env_example .mysql_env
node.js
cookiecutter-flask は bundler に webpack を使う構成になっています。プロジェクト生成時に選択した node_version と同じバージョンの node.js をインストールします。
readme の通りに実行すると Windows 環境では以下のエラーとなります。
> cp .env.example .env
> npm install
> npm run build

...
操作可能なプログラムまたはバッチ ファイルとして認識されていません。
unix shell script 構文で記述された package.json の script 行が、Windows OS 上で実行されたことによりコケているだけなので、Windows DOS Prompt 構文で等価な行を追加して実行します。
> npm run build-win
...
added 861 packages from 509 contributors and audited 11564 packages in 59.983s
found 0 vulnerabilities
node_modules ディレクトリにリソースが生成されます。
IDE
ローカルデバッグに VS Code を使う例で進めていきます。.gitignore に VSCode の環境設定フォルダの除外設定を入れたのち・・・以下のようにします。
{
    "editor.formatOnSaveTimeout": 1500,
    "editor.codeLens": true,
    "terminal.integrated.shell.windows": "C:\\Windows\\sysnative\\WindowsPowerShell\\v1.0\\powershell.exe",
    "autoDocstring.docstringFormat": "google",
    "autoDocstring.quoteStyle": "'''",
    "editor.formatOnSave": true,
    "python.formatting.provider": "autopep8",
    "python.formatting.autopep8Args": [
        "--aggressive",
        "--aggressive",
    ],
    "python.linting.enabled": true,
    "python.linting.pylintEnabled": false,
    "python.linting.lintOnSave": true,
    "python.linting.pep8Enabled": false,
    "python.linting.flake8Enabled": true,
    "python.linting.pylintArgs": [
        "--load-plugins",
        "pylint_flask",
    ],
    "python.linting.flake8Args": [
        "--config=.flake8"
    ],
}
{
    "python.linting.pylintEnabled": false,
    "python.linting.flake8Enabled": true,
    "python.linting.flake8Args": [
        "--config=setup.cfg",
    ],
    "terminal.integrated.shellArgs.windows": [
        "-NoExit",
        "chcp 65001"
    ],
    "python.linting.enabled": true,
    "python.envFile": "${workspaceFolder}/.env.debug",              // debugging config
    "python.pythonPath": "....\.virtualenvs\panels-ooOOoOOoo",      // `pipenv --venv` で得た Path
    "python.venvPath": "....\.virtualenvs\panels-ooOOoOOoo",        // `pipenv --venv` で得た Path
    "python.testing.pytestEnabled": true,
    "python.testing.unittestEnabled": false,
    "python.testing.autoTestDiscoverOnSaveEnabled": false,
    "python.testing.nosetestsEnabled": false,
    "files.associations": {
        "*.html": "jinja-html"
    },
}
{
    "version": "0.2.0",
    "configurations": [
        {
            "name": "Flask Debug",
            "type": "python",
            "request": "launch",
            "module": "flask",
            "args": [
                "run",
                "--no-reload"
            ],
            "jinja": true,
        }
    ]
}
ちなみに、以下の支援を効かせる場合の設定が入っています。邪魔な場合はお好みで削ってください。
- formatter - Autopep8, Better Jinja
- linter - Flake8
- docstring - VSCode autoDocstring, Napoleon
- unittest - pytest
初回起動
ローカルデバッグ用設定調整
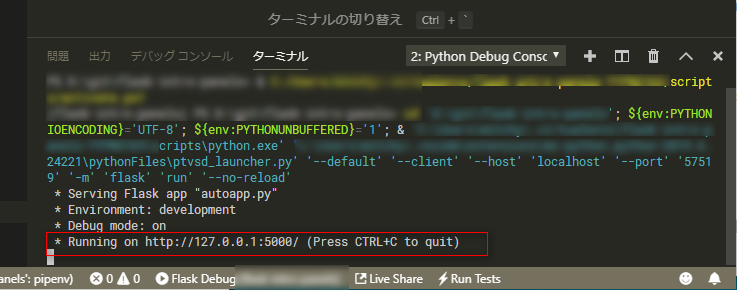
IDE でデバッグしていきますので、docker-compose up -d や node start ではなく、 Flask 単体である autoapp.py をDebug実行してみましょう。VSCode のデフォルト設定ですと F5 Key 押下です。
デフォルトでは、 webpack を介して提供される http://127.0.0.1:5000/static/main_js*.js, http://127.0.0.1:5000/static/main_css*.css など静的リソースのバンドルへのアクセスができず、bootstrap のスタイルがレンダリングされないなど、見た目が悲しいことになっていると思います。Chrome の デベロッパーツール で確認すると、やはりリソースのURLが取れてないですね。

今回は http://127.0.0.1:5000 でアクセスする文脈ですので、webpack.config.js を変更 して、再度 npm run build-win することで、公式 readme で紹介されている通りのページが返ってくるようになります。
以上で、ひとまずのデバッグ起動とコーディング支援設定ができました。
次回は、cookiecutter-flask が整えてくれている Twelve Factor App っぽさを、活かしつつの Config や構成の調整です。
