Djangoのアプリを作り始めるときの手順を忘れてしまうのでメモしておこうと思う
概要
Djangoのアプリを作る際の手順をまとめます。
対象OSはWindowsです。
VisualStudioCode(以下 VSCode)を使用します。
以下の手順で作成します。
- 仮想環境作成
- Djangoインストール
- プロジェクト作成
- Djangoサーバ起動確認
- アプリケーション作成
- アプリケーション登録
- アプリケーション実装
- アプリケーションのURL登録
- アプリケーション動作確認
環境の作成は以下を参照して下さい。
仮想環境作成
Pythonの仮想環境を作成します。
まずは、エクスプローラーで作業用のフォルダを作成します。
Cドライブ直下のwsフォルダの中にsampleフォルダを作成するものとします。
C:\ws\sample
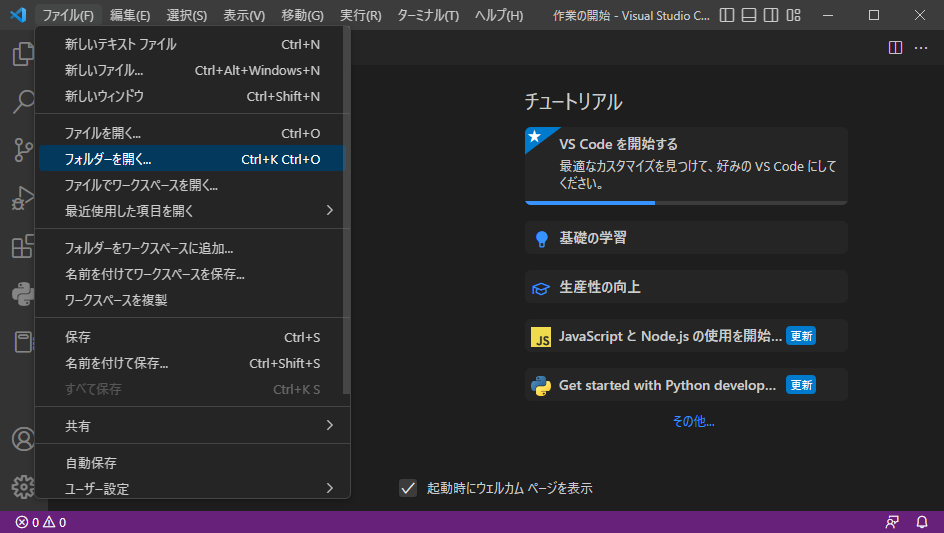
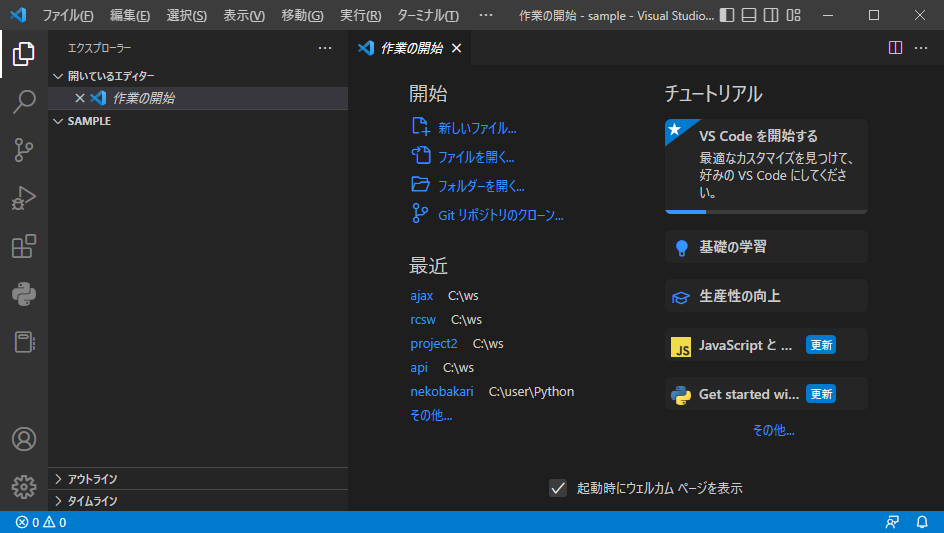
VSCodeでsampleフォルダを開きます。
[ファイル]-[フォルダーを開く]でsampleフォルダを開きます。
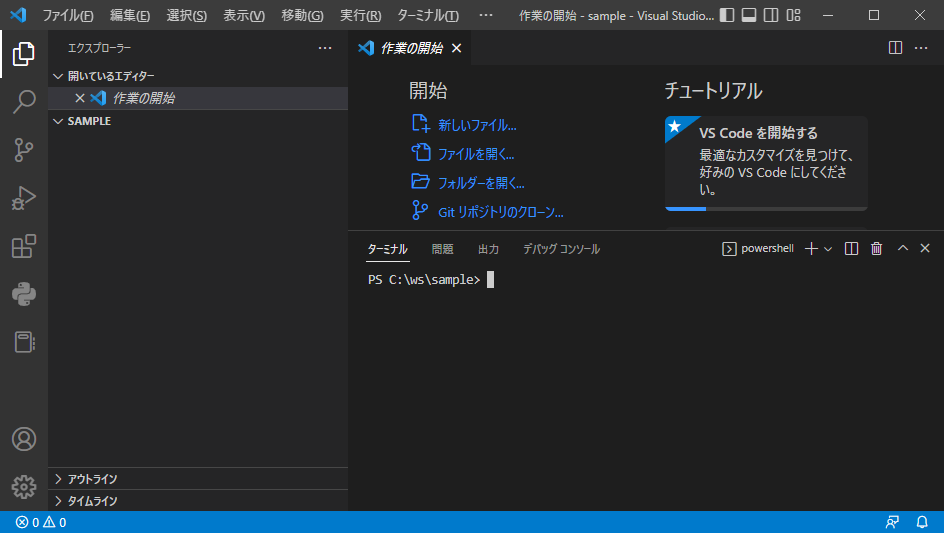
[ターミナル]-[新しいターミナル]でターミナルを開きます。
ターミナルで python -m venv venv と入力するとvenvフォルダが作成されます。

sampleフォルダをカレントフォルダにして .\venv\Scripts\activate を実行することで仮想環境に入ります。
PS C:\ws\sample> .\venv\Scripts\activate
(venv) PS C:\ws\sample>
Djangoインストール
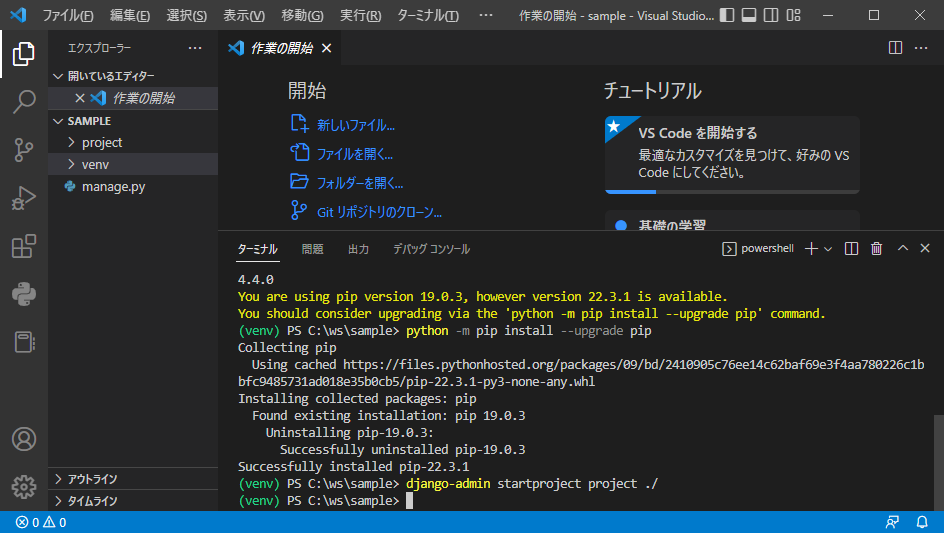
pip install django と入力して仮想環境内にDjangoをインストールします。
(venv) PS C:\ws\sample> pip install django
Collecting django
  Using cached https://files.pythonhosted.org/packages/8a/c4/f946a6b02fcbba84e56074f2fc36866433b009bea2528b09fe0bac4fe1aa/Django-3.2.16-py3-none-any.whl
Collecting pytz (from django)
  Downloading https://files.pythonhosted.org/packages/2e/09/fbd3c46dce130958ee8e0090f910f1fe39e502cc5ba0aadca1e8a2b932e5/pytz-2022.7.1-py2.py3-none-any.whl (499kB)
    100% |████████████████████████████████| 501kB 3.0MB/s
Collecting asgiref<4,>=3.3.2 (from django)
  Downloading https://files.pythonhosted.org/packages/8f/29/38d10a47b322a77b2d12c2b79c789f52956f733cb701d4d5157c76b5f238/asgiref-3.6.0-py3-none-any.whl
Collecting sqlparse>=0.2.2 (from django)
  Using cached https://files.pythonhosted.org/packages/97/d3/31dd2c3e48fc2060819f4acb0686248250a0f2326356306b38a42e059144/sqlparse-0.4.3-py3-none-any.whl
Collecting typing-extensions; python_version < "3.8" (from asgiref<4,>=3.3.2->django)
  Using cached https://files.pythonhosted.org/packages/0b/8e/f1a0a5a76cfef77e1eb6004cb49e5f8d72634da638420b9ea492ce8305e8/typing_extensions-4.4.0-py3-none-any.whl
Installing collected packages: pytz, typing-extensions, asgiref, sqlparse, django
Successfully installed asgiref-3.6.0 django-3.2.16 pytz-2022.7.1 sqlparse-0.4.3 typing-extensions-4.4.0
You are using pip version 19.0.3, however version 22.3.1 is available.
You should consider upgrading via the 'python -m pip install --upgrade pip' command.
(venv) PS C:\ws\sample>
pipを更新するよう表示が出たので python -m pip install --upgrade pip を実行します。
(venv) PS C:\ws\sample> python -m pip install --upgrade pip
Collecting pip
  Using cached https://files.pythonhosted.org/packages/09/bd/2410905c76ee14c62baf69e3f4aa780226c1bbfc9485731ad018e35b0cb5/pip-22.3.1-py3-none-any.whl
Installing collected packages: pip
  Found existing installation: pip 19.0.3
    Uninstalling pip-19.0.3:
      Successfully uninstalled pip-19.0.3
Successfully installed pip-22.3.1
(venv) PS C:\ws\sample>
プロジェクト作成
プロジェクトを作成します。プロジェクトの名前は projectとします。
コマンドは django-admin startproject project ./ です。
(venv) PS C:\ws\sample> django-admin startproject project ./
projectフォルダが作成されます。
project\settings.py の内容を変更し、言語設定とタイムゾーンを日本にします。
# Internationalization
# https://docs.djangoproject.com/en/3.2/topics/i18n/

- LANGUAGE_CODE = 'en-us'
+ LANGUAGE_CODE = 'ja'

- TIME_ZONE = 'UTC'
+ TIME_ZONE = 'Asia/Tokyo'
Djangoサーバ起動確認
python .\manage.py runserver でDjangoサーバーを起動します。
(venv) PS C:\ws\sample> python .\manage.py runserver
Watching for file changes with StatReloader
Performing system checks...
System check identified no issues (0 silenced).
You have 18 unapplied migration(s). Your project may not work properly until you apply the migrations for app(s): admin, auth, contenttypes, sessions.
Run 'python manage.py migrate' to apply them.
January 15, 2023 - 17:07:28
Django version 3.2.16, using settings 'project.settings'
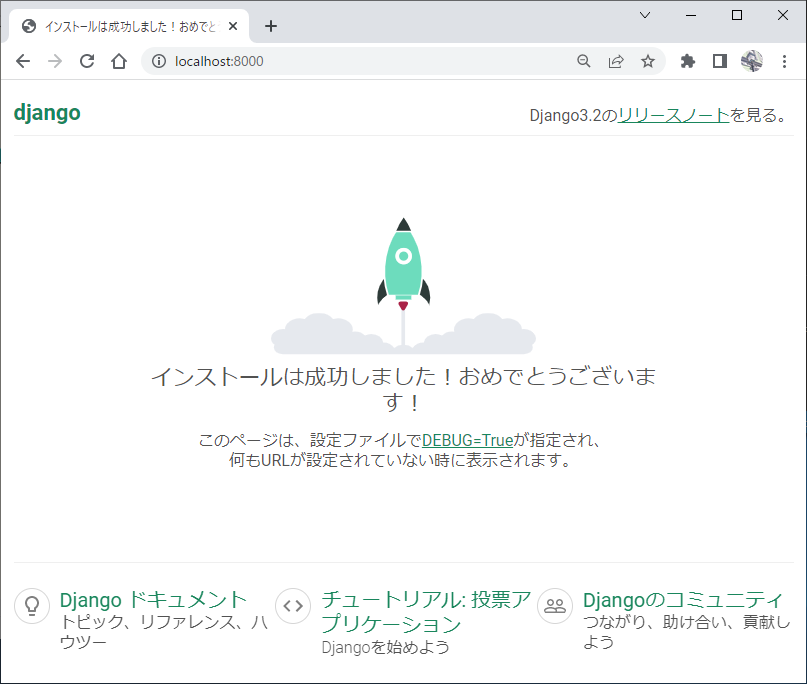
Starting development server at http://127.0.0.1:8000/
Quit the server with CTRL-BREAK.
[15/Jan/2023 17:09:29] "GET / HTTP/1.1" 200 10854
[15/Jan/2023 17:09:29] "GET /static/admin/css/fonts.css HTTP/1.1" 200 423
[15/Jan/2023 17:09:29] "GET /static/admin/fonts/Roboto-Bold-webfont.woff HTTP/1.1" 200 86184
[15/Jan/2023 17:09:29] "GET /static/admin/fonts/Roboto-Regular-webfont.woff HTTP/1.1" 200 85876
[15/Jan/2023 17:09:29] "GET /static/admin/fonts/Roboto-Light-webfont.woff HTTP/1.1" 200 85692
Not Found: /favicon.ico
[15/Jan/2023 17:09:30] "GET /favicon.ico HTTP/1.1" 404 2111
ブラウザーで http://localhost:8000/ を表示します。
Djangoサーバーの終了はターミナルで Ctrl+C です。
アプリケーション作成
アプリケーションを作成します。名前は app01 とします。
コマンドは python ./manage.py startapp app01 です。
(venv) PS C:\ws\sample> python ./manage.py startapp app01
app01フォルダが作成されます。
アプリケーション登録
project\setings.py の中にある INSTALLED_APPS に作成したアプリケーションを登録します。
# Application definition

INSTALLED_APPS = [
    'django.contrib.admin',
    'django.contrib.auth',
    'django.contrib.contenttypes',
    'django.contrib.sessions',
    'django.contrib.messages',
    'django.contrib.staticfiles',
+    'app01',
]
アプリケーション実装
アプリの中身を記載します。
対象は app01/views.py です。
from django.shortcuts import render

# Create your views here.

+ def index(request):
+     message = {
+         'text':'Hello',
+     }
+     return render(request, 'app01/index.html', message)
表示する index.html を作成します。
先に app01フォルダの中に templatesフォルダを作成し、その中に app01フォルダを作成します。index.htmlはさらにその中に作成します。
<!doctype html>
<html lang="ja">
  <head>
    <title>app01</title>
  </head>
  <body>
    {{text}}
  </body>
</html>
アプリケーションのURL登録
作成したアプリを呼び出すようproject/urls.pyに記述します。
from django.contrib import admin
- from django.urls import path
+ from django.urls import path, include

urlpatterns = [
    path('admin/', admin.site.urls),
+     path('', include('app01.urls')),
]
さらに app01/urls.py を作成します。
from django.urls import path
from . import views

urlpatterns = [
    path('', views.index),
]
アプリケーション動作確認
Djangoサーバを起動してアプリの動作を確認します。

あとはアプリを実装するだけです。
Bootstrapを使用する方法はこちら。