はじめに
これは Ionic Advent Calendar 2018 の第20日目の記事です!
今回はタイトル通り、AWS Amplify で遊んだ話がメインになります。じゃあ、何故 Ionic なのか?ということですが、それは後々出てきますので一旦今は不問にしていただけるとありがたいですw
ちなみにぶっちゃけますと、本記事は別に Ionic じゃなくても良かったのですが、自分が簡単にアプリ作れるフレームワークといえばこの子だったので。では参りましょう。
※1 今回は Node.js がインストールされている前提でお話ししますので、事前にインストールをお願いします ![]() ちなみに私の環境はこちらです。
ちなみに私の環境はこちらです。
※2 ぶっちゃけ他の方の二番煎じです! ![]()
$ node -v
# v10.14.2

$ npm -v
# 6.4.1
AWS Amplify とは?
AWS Amplify(以下、amplify) とは物凄く平たく言うと、__JavaScript用のSDK__のようなもので、Webアプリケーション開発から、ビルドまでをもっと楽に、もっとシンプルにしてくれるサービスです。(個人の見解です)
今のフロントエンドですと、いろんなサービスやツールを使ってアプリケーションを開発して行くと思います。
- CLI, フレームワーク
-
Cognito(認証) -
DynamoDB, Firebase(DB) -
CloudFront(CDN) -
S3(静的コンテンツ) -
AppSync(GraphQL)
などなど…
それらを組み合わせて使う時、よしなにサポートしてくれるものなんだなーと、ドキュメントを読んだり軽く触ったりして思いました。中の人は 『Amplify は__1つのフレームワーク__と思って使ってくれ』とおっしゃってましたね。
実践編
では、さっそく使っていきましょう。
▼新規プロジェクト作成および、アプリ起動
amplify を使うにも、まずはアプリを作らないと話は始まらないので、簡単なアプリケーションを作っていきます。
今回は、「ログイン画面(メールアドレス/Password)」のみ作ります。ログインと言えば認証、ということで後ほどお話ししますが、AWS Cognito を利用します。
※本当は認証情報の登録および、その API には AWS AppSync、AWS DynamoDB を利用してみたかったが時間切れ…
# ionic のインストール
$ npm i -g ionic

# 新規プロジェクトの作成
$ ionic start ionic-amplify-demo

# (中略)

? Try Ionic 4? (y/N) y

# (中略)

? Starter template: (Use arrow keys)
❯ blank    | A blank starter project # Enter
  sidemenu | A starting project with a side menu with navigation in the content area
  tabs     | A starting project with a simple tabbed interface

# (中略)

────────────────────────────────────────────────────────────

? Install the free Ionic Appflow SDK and connect your app? (Y/n) n

# (中略)

[INFO] Next Steps:

       - Go to your newly created project: cd ./amplify-demo
       - Run ionic serve within the app directory to see your app
       - Build features and components: https://beta.ionicframework.com/docs/building/scaffolding
       - Get Ionic DevApp for easy device testing: https://bit.ly/ionic-dev-app
これで新規プロジェクト amplify-demo の完成です。
ここで私は驚いたのですが、最新の ionic-cli ではいきなり 『v4を試しちゃう?』って聞いてくるんですね!いやぁ、驚きました。もちろん Yes ですよ。
さて、プロジェクトが作られたので、実際に起動してみましょう。
$ cd amplify-demo
$ ionic serve
少し待つと自動でブラウザが起動し、アプリが立ち上がると思います。(パスは http://localhost:8100/home です)
以下のように表示されていたら大丈夫です。

▼ログイン画面の実装
ではここからログイン画面の実装に入ります。メインは ionic ではないため、詳細な説明はすっ飛ばし、単にコードの変更のみ記載させていただきます。詳しくは 公式ドキュメント にまとまっておりますので、そちらをご参照ください。
※ v3とは デフォルトのデザインが変わっているようですので、もし v3 のドキュメントのまま利用される方はご注意ください。
<ion-content padding>
-  The world is your oyster.
-  <p>If you get lost, the <a target="_blank" rel="noopener" href="https://beta.ionicframework.com/docs/">docs</a> will be your guide.</p>
+   <ion-list>
+     <ion-item>
+       <ion-input type="password" placeholder="email" [(ngModel)]="email"></ion-input>
+     </ion-item>
+     <ion-item>
+       <ion-input type="password" placeholder="password" [(ngModel)]="password"></ion-input>
+     </ion-item>
+   </ion-list>
+
+   <div padding>
+     <ion-button shape="round" color="primary" expand="full" (click)="postLogin(email, password)">Sign In</ion-button>
+   </div>
</ion-content>
export class HomePage {

+  constructor() {} // 今回は不要ですが、習慣です
+  postLogin(email, password) {
+    // ここは後ほど実装します
+  }

}
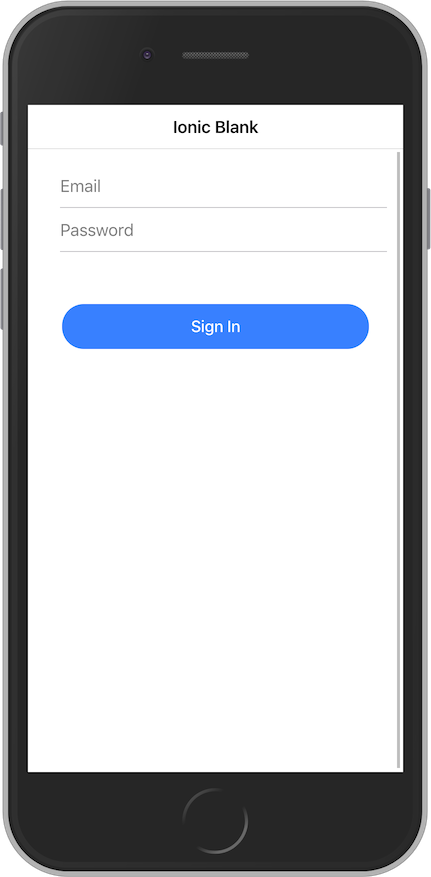
ここまで書き換えると、以下のようになります。
(実装が雑なのは時間があまりなk… ![]() )
)
一旦アプリケーションの実装はこちらでストップし、次に amplify に入っていきましょう!
▼amplify の導入
まずは、本体と Angular 用、Ionic 用のモジュールを導入します。導入は npm からダウンロードします。
$ npm i -S aws-amplify
$ npm i -S aws-amplify-angular
$ npm i -S ionic-angular
次に CLI をインストールしましょう。こちらも npm に amplify 用の CLI モジュールが公開されていますので、今回は(というか amplify を使う方はほぼ全員だと思いますが)利用したいと思います。
$ npm i -g @aws-amplify/cli

# + @aws-amplify/cli@0.1.38
# added 5 packages from 9 contributors, updated 55 packages and moved 1 package in 42.942s

$ amplify -h


  █████╗  ██╗    ██╗ ███████╗      █████╗  ███╗   ███╗ ██████╗  ██╗      ██╗ ███████╗ ██╗   ██╗
 ██╔══██╗ ██║    ██║ ██╔════╝     ██╔══██╗ ████╗ ████║ ██╔══██╗ ██║      ██║ ██╔════╝ ╚██╗ ██╔╝
 ███████║ ██║ █╗ ██║ ███████╗     ███████║ ██╔████╔██║ ██████╔╝ ██║      ██║ █████╗    ╚████╔╝
 ██╔══██║ ██║███╗██║ ╚════██║     ██╔══██║ ██║╚██╔╝██║ ██╔═══╝  ██║      ██║ ██╔══╝     ╚██╔╝
 ██║  ██║ ╚███╔███╔╝ ███████║     ██║  ██║ ██║ ╚═╝ ██║ ██║      ███████╗ ██║ ██║         ██║
 ╚═╝  ╚═╝  ╚══╝╚══╝  ╚══════╝     ╚═╝  ╚═╝ ╚═╝     ╚═╝ ╚═╝      ╚══════╝ ╚═╝ ╚═╝         ╚═╝

(以下略)
現在の最新バージョンは 1.1.8 だそうです。
インストールができましたら、次はユーザー周りや環境周りの設定をしていきます。
$ amplify configure # ここで自動で AWS マネジメントコンソールが開きます

Specify the AWS Region
? region:  (Use arrow keys) ap-southeast-2 #東京リージョンがないため

Specify the username of the new IAM user:
? user name:  (amplify-mxvPk) amplify-mxvPk #自動で IAM ページが開きますので、作成してください

Enter the access key of the newly created user:
? accessKeyId:  (<YOUR_ACCESS_KEY_ID>) A********** #実際はもっと長いです
? secretAccessKey:  (<YOUR_SECRET_ACCESS_KEY>) C******************** #実際はもっと長いです
This would update/create the AWS Profile in your local machine
? Profile Name:  (default) default #あとで使います

Successfully set up the new user.
ちょっと長かったですが、これで設定は完了です。
では、次にプロジェクト用の初期設定をしていきます。(ここでちょっと感動します)
$ amplify init

Note: It is recommended to run this command from the root of your app directory
? Choose your default editor: Visual Studio Code #好きなものを選んでください
? Choose the type of app that you are building (Use arrow keys) javascript #今回はこちらを選んでください
Please tell us about your project
? What javascript framework are you using  ionic #もちろん ionic 一択ですw
? Source Directory Path:  src #変更している方は変更ディレクトリ名を指定してください
? Distribution Directory Path:  www
? Build Command:  npm run-script build
? Start Command:  ionic serve #デフォルトでこれが出てくるってありがたい!
Using default provider awscloudformation

For more information on AWS Profiles, see:
https://docs.aws.amazon.com/cli/latest/userguide/cli-multiple-profiles.html
? Do you want to use an AWS profile?  Yes
? Please choose the profile you want to use  default #先ほど指定した profile name で。

(...以下略)
これでプロジェクトの初期設定も完了です!試しに、以下のコマンドを実行して見てください。
$ amplify status

| Category | Resource name | Operation | Provider plugin |
| -------- | ------------- | --------- | --------------- |
現在は何もアプリを起動していないため、このようになっていると思います。また、ここまで完了すると、自動で以下の2つが作成されているはずです。
- .amplifyrc
- amplify/
プロジェクトの設定はここでストップし、次は cognito の導入にいきましょう!
▼Cognito の導入
ここでもやはり amplify-cli を使います。結論から言うと、以下の処理(cognito ユーザープールの作成)は AWS マネジメントコンソールからもできますが、せっかく CLI があるのでこのまま使い倒していきたいと思います。
$ amplify add auth

Using service: Cognito, provided by: awscloudformation
 The current configured provider is Amazon Cognito.
 Do you want to use the default authentication and security configuration? #No, I will set up my own configuration.

? Select the authentication/authorization services that you want to use:  #User Sign-Up, Sign-In, connected with AWS IAM controls (Enables per-user Storage features for images or other content, Analytics, and more)

? Please provide a friendly name for your resource that will be used to label this category in the project: # cognitoa33e4684(任意の名前を指定してください)

? Please enter a name for your identity pool. # amplifydemoa33e4684_identitypool_a33e4684(デフォルトの方が良いかもです)

? Allow unauthenticated logins? (Provides scoped down permissions that you can control via AWS IAM) # No

? Do you want to enable 3rd party authentication providers in your identity pool? # No

? Please provide a name for your user pool: # amplifydemoa33e4684_userpool_a33e4684(ここもデフォルトで良いかと)

? Multifactor authentication (MFA) user login options: # OFF(二段階認証はオフで)

? Email based user registration/forgot password:  # Enabled (Requires per-user email entry at registration)

? Please specify an email verification subject:  # Your verification code(好きな文言に変更してください)

? Please specify an email verification message:  # Your verification code is {####}(好きな文言に変更してください)

? Do you want to override the default password policy for this User Pool? # Yes

? Enter the minimum password length for this User Pool:  # 8(今回は8文字)

? Select the password character requirements for your userpool:  # Requires Lowercase, Requires Uppercase, Requires Numbers, Requires Symbols(任意に選択してください)

? Userpool users are created with a standard set of attributes defined by the OpenID Connect specification.  Mark the required attributes below: #
 (Press <space> to select, <a> to toggle all, <i> to invert selection) (今回は選択なし)

? Specify the app s refresh token expiration period (in days):  # 30(任意の有効期限を設定してください)

? Do you want to specify the user attributes this app can read and write?  # Yes(今回は読み込み、書き込み権限を付与)

? Specify read attributes: (Press <space> to select, <a> to toggle all, <i> to invert selection) # Email(今回はEmailのみで)

? Specify write attributes: (Press <space> to select, <a> to toggle all, <i> to invert selection) # 選択なし

Successfully added resource cognitoa33e4684 locally
Some next steps:
(略)
こちらも長かったですが、以上で設定は完了です!
cognito の導入はここで終了し、次は Storage である Amazon S3 の導入にいきましょう!
▼Amazon S3 の導入
引き続き、amplify-cli を利用して、Amazon S3(以下、S3) のセットアップを行います。
※本当は、S3 をビルドした静的コンテンツのアップロード先として利用したかったですが、上手くいかなかったので断念…💦
$ amplify add storage
? Please select from one of the below mentioned services (Use arrow keys) # Content (Images, audio, video, etc.) (今回は静的コンテンツですので)

? Please provide a friendly name for your resource that will be used to label this category in the project: # 好きな名前を設定してください

? Please provide bucket name: # こちらも任意の名前を設定してください

? Who should have access: # Auth and guest users(今回はログインしたユーザーもアクセス可とします)

? What kind of access do you want for Authenticated users (Use arrow keys) # read/write(認証済みユーザーは読み書き可)

? What kind of access do you want for Guest users (Use arrow keys) # read(ゲストは読みこみのみ可)

Successfully updated auth resource locally.
Successfully added resource sampleStorage0082 locally

Some next steps:
"amplify push" builds all of your local backend resources and provisions them in the cloud
"amplify publish" builds all of your local backend and front-end resources (if you added hosting category) and provisions them in the cloud
以上で設定は完了です!
ローカルでの cognito, s3 リソースの設定が完了しましたので、AWS に反映します。
$ amplify push

| Category | Resource name   | Operation | Provider plugin   |
| -------- | --------------- | --------- | ----------------- |
| Auth     | cognito14b7e1bb | Create    | awscloudformation |
| Storage  | s3896eac7f      | Create    | awscloudformation |
? Are you sure you want to continue?  Yes #ここでなぜ続ける?って聞かれるんだろう🤔

# (しばし待つ)

✔ All resources are updated in the cloud
どうやら push できたようですので、AWS マネジメントコンソールの cognito, s3 ページにアクセスしてみましょう。新しくユーザープール、s3バケットが作成されていると思います。また、 CloudFormation ページにアクセスすると、スタックが自動で作成されていることが確認できます。さらに、src ディレクトリに aws-exports.js というファイルが作成されているかと思います。
※余談
ここで、先程作成された aws-exports.js の中を見てみると、1行目に以下のようなコメントが書かれておりますw
// WARNING: DO NOT EDIT. This file is automatically generated by AWS Amplify. It will be overwritten.
『AWS Amplify が自動で生成したファイルだから、上書きはしたらいかんよ』とのことですので、皆さん触らないように ![]()
s3 の導入はここで終了です。
▼aws-exports.jsの読み込み
Ionic(Angular) では TypeScript を利用しているため、読み込みファイルも .ts に変換しなければならなりません。ということで、 package.json の script をちょっと書き換えます。(そもそも script の中が Angular 仕様になっているので、そこも合わせて変更します)
"scripts": {
  "start": "[ -f src/aws-exports.js ] && mv src/aws-exports.js src/aws-exports.ts || ionic serve; ionic serve",
  "build": "[ -f src/aws-exports.js ] && mv src/aws-exports.js src/aws-exports.ts || ionic build --prod; ionic build --prod"
}
次に、main.ts にてimportし、読み込みます。
+import Amplify from 'aws-amplify';
+import amplify from './aws-exports';
+
+Amplify.configure(amplify)
続いて、home.module.ts に Amplify のモジュールを登録します。
 import { IonicModule } from '@ionic/angular';
 import { FormsModule } from '@angular/forms';
 import { RouterModule } from '@angular/router';
+import { AmplifyAngularModule, AmplifyService } from 'aws-amplify-angular';

 @NgModule({
   imports: [
     CommonModule,
     FormsModule,
     IonicModule,
+    AmplifyAngularModule,
     RouterModule.forChild([
       {
         path: '',
         component: HomePage
       }
     ])
   ],
+  providers: [AmplifyService],
   declarations: [HomePage]
 })
以上で Ionic(Angular)アプリケーションからAmplifyの各機能を呼び出せるようになりました。
▼最後にアプリを完成させる
ぶっちゃけますと、最後にやることは <amplify-authenticator></amplify-authenticator> を 追加することです。
Angular のデフォルトアプリケーションですと app.component.html ですが、今回は Ionicですので、src/app/home/hoge.page.htmlになります。
 <ion-content padding>
-  <ion-list>
-    <ion-item>
-      <ion-input type="email" placeholder="Email" value="" [(ngModel)]="email"></ion-input>
-    </ion-item>
-    <ion-item>
-      <ion-input type="password" placeholder="Password" [(ngModel)]="password"></ion-input>
-    </ion-item>
-  </ion-list>
-
-  <div padding>
-    <ion-button shape="round" color="primary" expand="full" (click)="postLogin(email, password)">Sign In</ion-button>
-  </div>
+  <amplify-authenticator></amplify-authenticator>
 </ion-content>
これで完成です!では、実際にアカウントを作成し、ログインしてみましょう!
※面倒だったので 簡単にユーザーを作成したかったのでマネジメントコンソールから作成。またUIのスタイリングを全然当ててないです ![]()


よっしゃぁ、ログインできました🎉
以上で、簡単ではございますが、Ionic + Amplifyで遊んでみた話は終わりますm(_ _)m
P.S. アップデートについて(無視しても良いです)
もし amplify-cli のバージョンを上げた場合、何かしらのコマンド(amplify -v とかでも良い)を叩くと、CLI がプロジェクト内の設定ファイルを見て、「migrationをこっちで勝手にしとこうか?」と聞いてくれます。
ちょっと長いですが全文載せます。
$ amplify -h

? We detected the project was initialized using an older version of the CLI. Do you want to migrate th
e project, so that it is compatible with the latest version of the CLI? #true

The CLI is going to take the following actions during the migration step:
1. If you have a GraphQL API, we will update the corresponding Cloudformation stack to support larger annotated schemas and custom resolvers.
In this process, we will be making Cloudformation API calls to update your GraphQL API Cloudformation stack. This operation will result in deletion of your AppSync resolvers and then the creation of new ones and for a brief while your AppSync API will be unavailable until the migration finishes
2. We will be updating your local Cloudformation files present inside the ‘amplify/‘ directory of your app project, for all the added categories so that it supports multiple environments
3. After the migration completes, we will give you the option to either push these Cloudformation files right away or you could inspect them yourselves and later push the updated Cloudformation files to the cloud
4. If for any reason the migration fails, the CLI will rollback your cloud and local changes and you can take a look at https://aws-amplify.github.io/docs/cli/migrate?sdk=js for manually migrating your project so that it’s compatible with the latest version of the CLI
5. ALL THE ABOVE MENTIONED OPERATIONS WILL NOT DELETE ANY DATA FROM ANY OF YOUR DATA STORES
Before the migration, please be aware of the following things:
1. Make sure to have an internet connection through the migration process
2. Make sure to not exit/terminate the migration process (by interrupting it explicitly in the middle of migration), as this will lead to inconsistency within your project
3. Make sure to take a backup of your entire project (including the amplify related config files)

? The CLI would be modifying your Amplify backend configuration files as a part of the migration proce
ss, hence we highly recommend backing up your existing local project before moving ahead. Are you sure
 you want to continue? #true
✔ Migrated your project successfully.
If you have added functions or interactions category to your project, please check the 'Auto-migration' section at https://github.com/aws-amplify/docs/blob/master/cli/migrate.md

Current Environment: NONE

(中略)

? Are you sure you want to continue? (Y/n) #Yes
⠏ Updating resources in the cloud. This may take a few minutes...

(中略)

✔ All resources are updated in the cloud
これはありがたいですね!