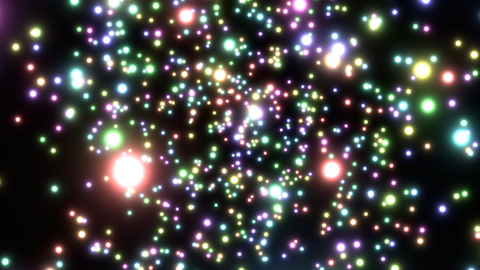
発光してる感じのPImageを色別にいくつか生成して、それを視点に対して常に平行に描画することで3D上に発光するパーティクルがたくさんあるように見せる。
パーティクルは、enumで色配分を定義しておく。1つのパーティクルはだいたい縦横150pxぐらいで、enumのcalculateで中心点からの距離に応じたRGB値を返すようにしてる。ただ、enumはProcessing 2.2.1だと使えないみたいでちょっと困った。StackOverflowに別タブで拡張子をjavaにするとjavaで書けるよって書いてあったのでこれで。
視点の移動はPeasycamを初めて使ってみたんだけど、何もしなくてもマウスでいろいろ動かせるしめっちゃ便利。PImageはgetRotationsの結果のfloat配列をそれぞれrotateX, rotateY, rotateZの引数に与えてからimageで貼り付ければ視点と平行に描画できる。点の配置については、この資料にある「単位球内に一様分布する点」の計算式をそのまま。
blendModeは最初はADDを指定してたけど、手前と奥でパーティクルが重なった時に無駄に光ってしまい気持ち悪かった。いろいろ試した結果、SCREENだといい感じに表示されたので採用。あとhint(DISABLE_DEPTH_TEST) を指定しないとPImageが透過できないみたい。
というわけでこんな感じのコードになりました。
import java.util.*;
import peasy.*;

private PeasyCam cam;
private Particle[] particles = new Particle[1000];

private boolean record = false;

void setup() {
  size(960, 540, P3D);

  hint(DISABLE_DEPTH_TEST);
  blendMode(SCREEN);
  imageMode(CENTER);
  frameRate(30);

  cam = new PeasyCam(this, width);
  cam.setMaximumDistance(width * 2);

  List<PImage> images = new ArrayList<PImage>();
  for (Colors c : Colors.values ()) {
    images.add(createLight(c));
  }

  for (int i = 0; i < particles.length; i++) {
    PImage image = images.get(i % images.size());
    particles[i] = new Particle(image);
  }
}

private PImage createLight(Colors colors) {
  int side = 150;
  float center = side / 2.0;
  PImage img = createImage(side, side, RGB);

  for (int y = 0; y < side; y++) {
    for (int x = 0; x < side; x++) {
      float distance = (sq(center - x) + sq(center - y)) / 10;
      int c = colors.calculate(distance);
      img.pixels[x + y * side] = c;
    }
  }

  return img;
}

void draw() {

  background(0);
  translate(width/2, height/2, 0);

  cam.rotateX(radians(0.25));
  cam.rotateY(radians(0.25));

  float[] rotations = cam.getRotations();
  for (Particle p : particles) {
    p.render(rotations);
  }

  if (record) {
    saveFrame("frame/frame-######.tif");
  }
}

void keyPressed() {
  if (key == 's') {
    record = true;
  }
}

class Particle {

  private final PImage light;
  private final float x, y, z;

  Particle(PImage light) {
    this.light = light;

    float radP = radians(random(360));

    float unitZ = random(-1, 1);
    float sinT = sqrt(1 - sq(unitZ));

    float unitR = pow(random(1), 1.0/3.0);
    float r = width;

    x = r * unitR * sinT * cos(radP);
    y = r * unitR * sinT * sin(radP);
    z = r * unitR * unitZ;
  }

  void render(float[] rotation) {
    pushMatrix();
    translate(x, y, z);
    rotateX(rotation[0]);
    rotateY(rotation[1]);
    rotateZ(rotation[2]);
    image(light, 0, 0);
    popMatrix();
  }
}
public enum Colors {
  RED(8, 4, 4),
  ORANGE(8, 6, 4),
  YELLOW(8, 8, 4),
  LEAF(6, 8, 4),
  GREEN(4, 8, 4),
  EMERALD(4, 8, 6),
  CYAN(4, 8, 8),
  SKY(4, 6, 8),
  BLUE(4, 4, 8),
  PURPLE(6, 4, 8),
  MAGENTA(8, 4, 8);

  private static final float SUPPRESS = 3;
  private float r, g, b;

  private Colors(float r, float g, float b) {
    this.r = r;
    this.g = g;
    this.b = b;
  }

  public int calculate(float d) {
    return 0xff << 24 | color(r, d) << 16 | color(g, d) << 8 | color(b, d);
  }

  private static int color(float a, float distance) {
    int color = (int)(256 * a / distance - SUPPRESS);
    return Math.max(0, Math.min(color, 255));
  }
}
実行するとこんな感じで表示される。
