この記事は「IDOM Engineer Advent Calendar 2017」の24日目の記事です。
はじめまして、IDOMの@hoang.vxです。
はじめに
現在はスマホの時代です。毎日、人々がスマホでニュースを読んだり、ゲームをやったり、仕事したりしています。そのため、アプリの開発をする人が多く人気になっています。
ですが、AndroidとiOSに同時にするとなるとそれぞれ用のPlatformで開発しないといけないです。本記事ではソースを1回だけ書いてAndroidとiOSに対応できる方法を紹介したいと思います。
React-Native(RN)とは何でしょう
ReactはFacebook社が開発したJavaScriptのフレームワークであり、React Native(略称:RN)はそれをモバイルで使えるようにしたものです。
RNを利用するとJavascriptからモバイルアプリ(Android, iOS)をビルドできます。
RNが本当のモバイルアプリをビルドすること。”モバイルウェブアプリ、HTML5アプリ、ハイブリッドアプリ”ではありません。
RNで普通のNativeコードもInjectすることができます。
ホームページ:React Native By Facebook
Reduxはなんでしょう
Reduxは、stateを管理するです。
React以外にもAngularJSやjQueryなどと併せて使用することもできますが、Reactが一番相性がいいです。
Reduxのコンセプトはactions reducers storeでUIのステージを管理すること。
-
actions:アクションはビューのイベントからデータをstoreに送信する -
reducers:アクションはウェブのイベントを発生するときでデータを送信するんですが、ビューのステージを変更することはreducersでやるべきことです。 -
store:actionsは何か起きます、reducersはステージを更新します。storeでは以上の2部分をマッピングする部分です。
簡単TODOサンプル
では、実際のプロジェクトを作成してみましょう。
準備環境
- MacOS(私の場合)
- NodeJS
- React-Native CLI
プロジェクト作成
React Native CLIでプロジェクトを作成します。
$ react-native init todolist
$ cd todolist
$ react-native run-ios
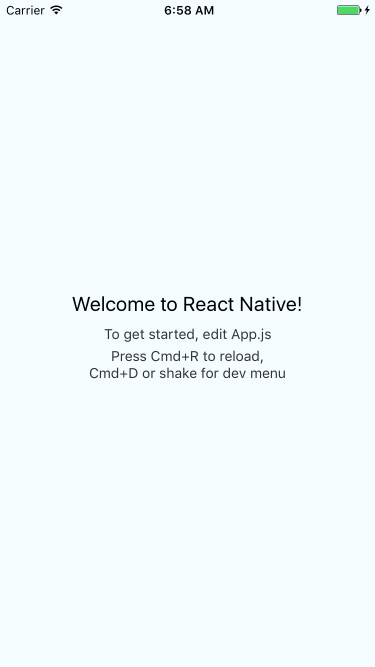
以下の画面が出てきます。
アプリをリロードするにはcmd + Rを押します。
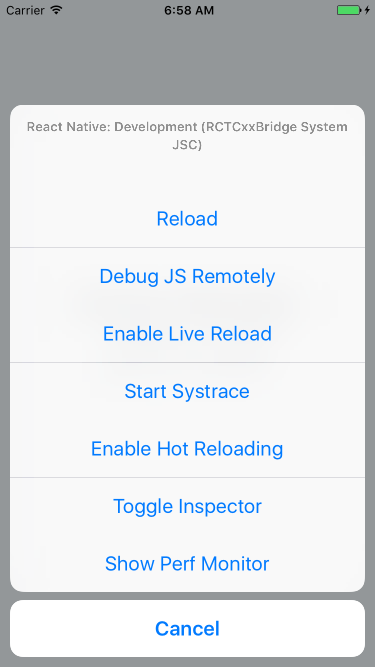
cmd + Dを押すと開発(Dev)メニューが開きます。
プロジェクトの構成説明:
$ ll
total 336
-rw-r--r--    1   1164 11 30 15:39 App.js
drwxr-xr-x    3     96 11 30 15:39 __tests__
drwxr-xr-x   10    320 11 30 15:39 android
-rw-r--r--    1     53 11 30 15:39 app.json
-rw-r--r--    1    124 11 30 15:39 index.js
drwxr-xr-x    8    256 11 30 15:42 ios
drwxr-xr-x  601  19232 11 30 15:41 node_modules
-rw-r--r--    1    425 11 30 15:41 package.json
-rw-r--r--    1 154665 11 30 15:39 yarn.lock
- App.js: アプリの実行コード
- index.js: ビルドファイル
- android/: Androidアプリソースのディレクトリ(Android Studioで開けます)
- ios/: iOSアプリソースのディレクトリ(XCodeで開けます)
- node_modules:
yarnかnpmでインストールするパッケージ
ソースを修正してみましょう。
import React, { Component } from 'react';
import {
  Platform,
  StyleSheet,
  Text,
  View
} from 'react-native';

export default class App extends Component {
  render() {
    return (
      <View style={styles.container}>
        <Text style={styles.welcome}>
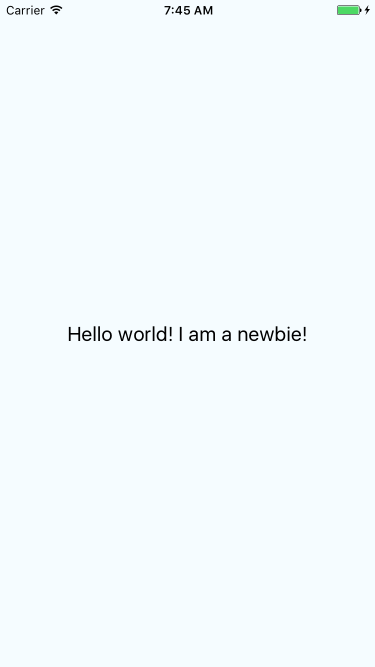
          Hello world! I am a newbie!
        </Text>
      </View>
    );
  }
}

const styles = StyleSheet.create({
  container: {
    flex: 1,
    justifyContent: 'center',
    alignItems: 'center',
    backgroundColor: '#F5FCFF',
  },
  welcome: {
    fontSize: 20,
    textAlign: 'center',
    margin: 10,
  }
});
アプリをリロード(cmd + R)してから、以下のような画面が表示されます。

Reduxを追加しましょう
yarnかnpmで必要なパッケージをインストール
$ yarn add redux react-redux
プロジェクト構成:新しいappディレクトリを作成して、redux用のディレクトリを作成
app$ tree
.
├── actions
├── lib
├── reducers
└── store
はじめに、サンプルタスク一覧を追加してみます。
// 必要なリソース追加する
import React, { Component } from 'react';
import {
  Text,
  View,
  FlatList,
  TextInput,
  StyleSheet,
  Platform,
} from 'react-native';

class MainContainer extends Component {
  render() {
  	// データソース定義
    let todos = [
      { id: 1, title: "create some actions" },
      { id: 2, title: "create some reducer" },
      { id: 3, title: "create store" }
    ];
    // この部分はビューをレンダーです。
    return (
      <View style={styles.container}>
        <FlatList data={todos}
                  renderItem={this._renderItems}
                  keyExtractor={(item, index) => index} />
      </View>
    );
  }

 // このメソッドでは一覧の各アイテムをレンダーするです。
  _renderItems({ item }) {
    return (
      <View>
        <Text>{item.title}</Text>
      </View>
    )
  }
}

// ビューのスタイル修正
const styles = StyleSheet.create({
  container: {
    marginTop: Platform.OS === "ios" ? 20 : 0
  }
});

// このContainerを利用できるためエクスポートします
export default MainContainer;
import { AppRegistry } from 'react-native';

// MainContainerを利用するため
import App from './app/containers/Main';

AppRegistry.registerComponent('todolist', () => App);
すると、以下の画面が表示されます。

以下から redux のコンポーネントを追加していきます。
typesファイル追加する。このファイルではアプリのイベント名あるいはやることを名前付けて管理します。
export const ADD_TODO = "ADD_TODO"
export const TOGGLE_TODO = "TOGGLE_TODO"
export const REMOVE_TODO = "REMOVE_TODO"
export const SET_VISIBILITY_FILTER = "SET_VISIBILITY_FILTER"
actionファイル追加する。このファイルは actions というメソッドを書きます。(これはイベント際に呼びます)
/**
 * 利用する変数をインポートする
 */
import {
  ADD_TODO,
  TOGGLE_TODO,
  SET_VISIBILITY_FILTER
} from './types'

let nextTodoId = 0

/**
 * タスク追加イベント
 * @param {string} text
 */
export const addTodo = text => {
  return {
    type: 'ADD_TODO',
    id: nextTodoId++,
    text
  }
}

/**
 * フィルターする
 * @param {filter} filter
 */
export const setVisibilityFilter = filter => {
  return {
    type: 'SET_VISIBILITY_FILTER',
    filter
  }
}

/**
 * タスクのステータス変更
 * @param {number} id
 */
export const toggleTodo = id => {
  return {
    type: 'TOGGLE_TODO',
    id
  }
}
reducersを追加
- todos.jsファイルはタスク一覧に関する処理
- visibilityFilter.jsファイルは一覧のフィルターです
- index.jsファイルは上の2ファイルをコンパイルして一つの
reducerを返します
import {
  ADD_TODO,
  TOGGLE_TODO
} from '../actions/types'

/**
 * アクションによる次のステートを返す
 * @param state // タスク一覧
 * @param action // actions/index.jsから
 */
const todos = (state = [], action) => {
  switch (action.type) {
    case ADD_TODO:
      return [
        ...state,
        {
          id: action.id,
          text: action.text,
          completed: false
        }
      ]
    case TOGGLE_TODO:
      return state.map(todo =>
        (todo.id === action.id)
          ? {...todo, completed: !todo.completed}
          : todo
      )
    default:
      return state
  }
}

export default todos
import {
  SET_VISIBILITY_FILTER
} from '../actions/types'

/**
 * 次のフィルター返す
 * @param state // 現在のフィルターキー
 * @param action // actions/index.jsから
 */
const visibilityFilter = (state = 'SHOW_ALL', action) => {
  switch (action.type) {
    case SET_VISIBILITY_FILTER:
      return action.filter
    default:
      return state
  }
}

export default visibilityFilter
import { combineReducers } from 'redux'
import todos from './todos'
import visibilityFilter from './visibilityFilter'

/**
 * Reducerコンパイル
 */
const todoApp = combineReducers({
  todos,
  visibilityFilter
})

export default todoApp
store追加。このファイルは actions reducers を連携する部分ですね。そして、middlewareなどを使う場合このファイルに追加します。
-
redux-loggerテスト、デバッグ際にログを書き込む -
redux-thunkajax, asyncメソッドを使う場合
import { createStore, applyMiddleware, combineReducers, compose } from 'redux'
import reducers from '../reducers'
import { createLogger } from 'redux-logger'
import thunkMiddleware from 'redux-thunk'

const loggerMiddleware = createLogger({ predicate: (getState, action) => __DEV__ });

/**
 * Store設定、Middlware設定
 * @param {Object} initialState
 */
const configureStore = initialState => {
  const enhancer = compose(
    applyMiddleware(
      thunkMiddleware,
      loggerMiddleware
    ),
  );
  return createStore(reducers, initialState, enhancer);
}

// initialStateは{}です。
const store = configureStore({});

export default store
ここまで全て redux コンポーネントを作成しましたが、redux と react を連携する設定が必要です。
import React from 'react'
import { AppRegistry } from 'react-native'
import { Provider } from 'react-redux'
import store from './app/store'

// MainContainerを利用するため
import MainComponent from './app/components/Main'

/**
 * Provideを使ってreduxとreact連携する
 */
const App = () => {
  return (
    <Provider store={store}>
      <MainComponent />
    </Provider>
  )
}

AppRegistry.registerComponent('todolist', () => App);
次は画面コンポーネントを追加
便利なUIコンポーネントライブラリー追加
npm i --save react-native-vector-icons
npm i --save react-native-elements
react-native link
// 必要なリソース追加する
import React, { Component } from 'react';
import {
  View,
  StyleSheet,
  Platform
} from 'react-native';

import VisibleTodoList from '../containers/VisibleTodoList'
import AddTodo from '../containers/AddTodo'

class MainContainer extends Component {
  render() {
    // この部分はビューをレンダーです。
    return (
      <View style={styles.container}>
        <VisibleTodoList />
        <AddTodo />
      </View>
    );
  }
}

// ビューのスタイル修正
const styles = StyleSheet.create({
  container: {
    marginTop: Platform.OS === "ios" ? 20 : 0,
    flex: 1,
    justifyContent: "space-between",
    flexDirection: "column",
    backgroundColor: "#1D9FF2"
  }
});

// このContainerを利用できるためエクスポートします
export default MainContainer;
import React, { Component } from 'react'
import { connect } from 'react-redux'
import { addTodo } from '../actions'

import {
  View,
  Text,
  TouchableHighlight,
  TextInput,
  StyleSheet
} from 'react-native';


class AddTodo extends Component {
  constructor(props) {
    super(props)
    this.state = {
      todo: ""
    }
  }

  /**
   * Add todo
   */
  _addTodo () {
    // actions
    this.props.addTodo(this.state.todo)
    this.setState({ todo: "" })
  }

  render() {
    return (
      <View style={style.inputForm}>
        <TextInput
          style={style.inputField}
          value={this.state.todo} onChangeText={(todo) => this.setState({ todo })} />
        <TouchableHighlight style={style.btn} onPress={() => this._addTodo()}>
          <Text style={style.btn_text}>Add</Text>
        </TouchableHighlight>
      </View>
    )
  }
}

/**
 * Redux: mapping action to props
 * @param dispatch
 */
const mapDispatchToProps = dispatch => {
  return {
    addTodo: text => {
      dispatch(addTodo(text))
    }
  }
}

const style = StyleSheet.create({
  inputForm: {
    flex: 0,
    flexDirection: "row",
    padding: 5,
    shadowOffset:{  width: 2,  height: 2,  },
    shadowColor: '#F0FBFF',
    shadowOpacity: 1.0,
  },
  inputField: {
    flex: 1,
    padding: 6,
    backgroundColor: "#F0FBFF",
    borderRadius: 5
  },
  btn: {
    borderRadius: 5,
    backgroundColor: "#167ACC",
    marginHorizontal: 10,
    paddingHorizontal: 10,
    paddingVertical: 5,
    shadowOffset:{  width: 1,  height: 1,  },
    shadowColor: '#F0FBFF',
    shadowOpacity: 0.5,
  },
  btn_text: {
    color: "#F0FBFF",
    fontWeight: "bold"
  }
});

// state null ( {} )
export default connect(() => { return {} }, mapDispatchToProps)(AddTodo)
import { connect } from 'react-redux'
import { toggleTodo, setVisibilityFilter } from '../actions'
import TodoList from '../components/TodoList'

/**
 * filter todos
 * @param todos
 * @param filter
 */
const getVisibleTodos = (todos, filter) => {
  switch (filter) {
    case 'SHOW_COMPLETED':
      return todos.filter(t => t.completed)
    case 'SHOW_ACTIVE':
      return todos.filter(t => !t.completed)
    case 'SHOW_ALL':
    default:
      return todos
  }
}

/**
 * Redux: Map states to props
 * @param state
 */
const mapStateToProps = state => {
  return {
    todos: getVisibleTodos(state.todos, state.visibilityFilter)
  }
}

/**
 * Redux: Map actions to props
 * @param dispatch
 */
const mapDispatchToProps = dispatch => {
  return {
    onTodoClick: id => {
      dispatch(toggleTodo(id))
    },
    filterTodos: filter => {
      dispatch(setVisibilityFilter(filter))
    }
  }
}

// Map props for TodoList
const VisibleTodoList = connect(
  mapStateToProps,
  mapDispatchToProps
)(TodoList)

export default VisibleTodoList
import React, { Component } from 'react'
import PropTypes from 'prop-types'
import Todo from './Todo'
import { List, ButtonGroup } from 'react-native-elements'

import {
  FlatList,
  StyleSheet,
  View,
  ScrollView
} from 'react-native';

class TodoList extends Component {
  constructor (props) {
    super(props)
    this.state = {
      selectedIndex: 0
    }
    this.updateIndex = this.updateIndex.bind(this)
  }

  /**
   * Filter todos
   * @param selectedIndex
   */
  updateIndex (selectedIndex) {
    const filter = [
      { index: 0, filter: "SHOW_ALL" },
      { index: 1, filter: "SHOW_ACTIVE" },
      { index: 2, filter: "SHOW_COMPLETED" }
    ].find(({ index, filter }) => index === selectedIndex).filter
    this.props.filterTodos(filter)
    this.setState({selectedIndex})
  }

  render() {
    let { todos, onTodoClick } = this.props
    const buttons = ['ALL', 'ACTIVE', 'COMPLETE']
    const { selectedIndex } = this.state
    return (
      <View>
        <ButtonGroup
          onPress={this.updateIndex}
          selectedIndex={selectedIndex}
          buttons={buttons}
        />
        <ScrollView>
          <List containerStyle={{ marginTop: 0 }}>
            {
              todos.map(todo => (
                <Todo key={todo.id} {...todo} onClick={() => onTodoClick(todo.id)} />
              ))
            }
          </List>
        </ScrollView>
      </View>
    )
  }
}

const style = StyleSheet.create({
  list: {
    flex: 1,
    padding: 5
  }
});

export default TodoList
import React, { Component } from 'react'
import PropTypes from 'prop-types'
import { CheckBox, ListItem } from 'react-native-elements'

import {
  View,
  Text,
  TouchableHighlight,
  StyleSheet
} from 'react-native';

class Todo extends Component {
  render() {
    let { onClick, completed, text } = this.props
    let completeStyle = completed ? { name: "done", color: "green" } : { name: "work" }
    return (
      <ListItem
        title={text}
        rightIcon={completeStyle}
        onPressRightIcon={onClick}
      />
    )
  }
}

const style = StyleSheet.create({
  todo: {
    flexDirection: "row"
  }
});

export default Todo
ここまでで終わりです。
アプリを実行すると…

まとめ
- React-nativeで一回ソースを書いてからiOSとAndroidアプリを生成できます
- Reduxを使うとstateをprops管理しやすいです。
- React-nativeのソースではES6が使えますので便利です。
プロジェクトのソースです
https://github.com/hoangvx/react-native-redux
以上です。
外国人で日本語はそんなに正しくないですね。〜_〜 誰か直してくれば嬉しです。(;´∀`)


