概要
jupyterlabでは、GitのGUIツールが用意されていて、
GUI操作で staging 〜 push ができます。
そのjupyterlabに、githubを連携させて、
開発をより便利にしたいと、色々調べながら設定を行いました。
本記事はその設定記録です。
前提
- OS : Mac
- jupytelab : version 1.1.4
- 本記事では下記について特別記載はしていません。対応・理解済みの前提で記載しています。
- ローカルPCへのgitインストール
- jupyterlabへgitツールのインストール
- githubへのサインアップ
- github上でのリポジトリ作成方法
手順_概要
- ssh設定_ローカルPC
- ssh設定_github
- リモートリポジトリ作成
- ローカルリポジトリ作成
- [CUI]first push
- パスフレーズ入力の省略化
- [GUI]second push
手順_詳細
1. ssh設定_ローカルPC
ターミナルを開き、下記コマンドで「~/.ssh」フォルダに秘密鍵・公開鍵を作成。
下記コマンドで作成される「id_rsa」が秘密鍵で「id_rsa.pub」が公開鍵です。
$ cd .ssh
$ ssh-keygen -t rsa
Generating public/private rsa key pair.
Enter file in which to save the key (/Users/xxx/.ssh/id_rsa):
Enter passphrase (empty for no passphrase):
Enter same passphrase again:
Your identification has been saved in /Users/xxx/.ssh/id_rsa.
Your public key has been saved in /Users/xxx/.ssh/id_rsa.pub.
The key fingerprint is:
SHA256:xxxxxxxxxx
xxx@yyyyyyyy
The key's randomart image is:
SHA256:xxxxxxxxxxxxxxxxxx
+---[RSA 2048]----+
|        xxx  xxx |
+----[SHA256]-----+
$ ls
id_rsa		id_rsa.pub
$ cat id_rsa.pub
ssh-rsa xxxxxxxxxx
最後のコマンドで公開鍵「id_rsa.pub」を表示しました。
これは、次の手順で使います。
2. ssh設定_github
手順1.で作成した公開鍵をgithubに登録する。
2-1. githubにログインし、右の上のアイコン(下図)をクリックし、「Settings」をグリック

2-2. 左側の項目群から、「SSH and GPG keys」をクリックし、
「New SSH Key」(下図)をクリック。

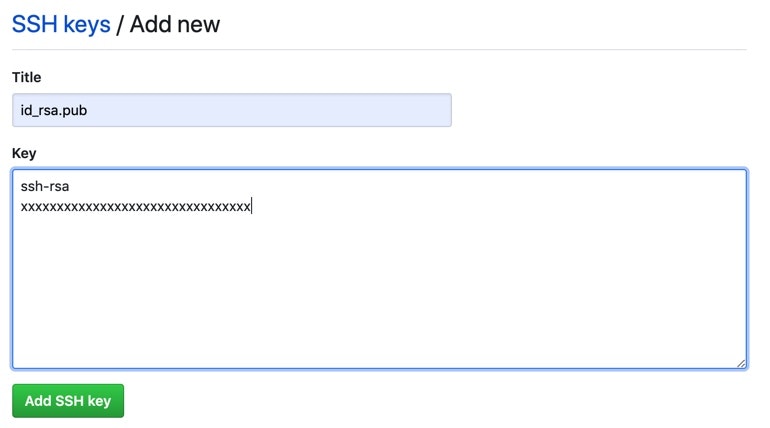
2-3. [Title]を手順1.で作成した公開鍵ファイル「id_rsa.pub」とし、
[Key]には、その公開鍵ファイルの中身(catコマンドでコピー)を貼り付ける。
貼り付けたら、「Add SSH Key」をクリック。
3. リモートリポジトリ作成
github上でリポジトリを作成。
今回は「test」というリポジトリを作成。
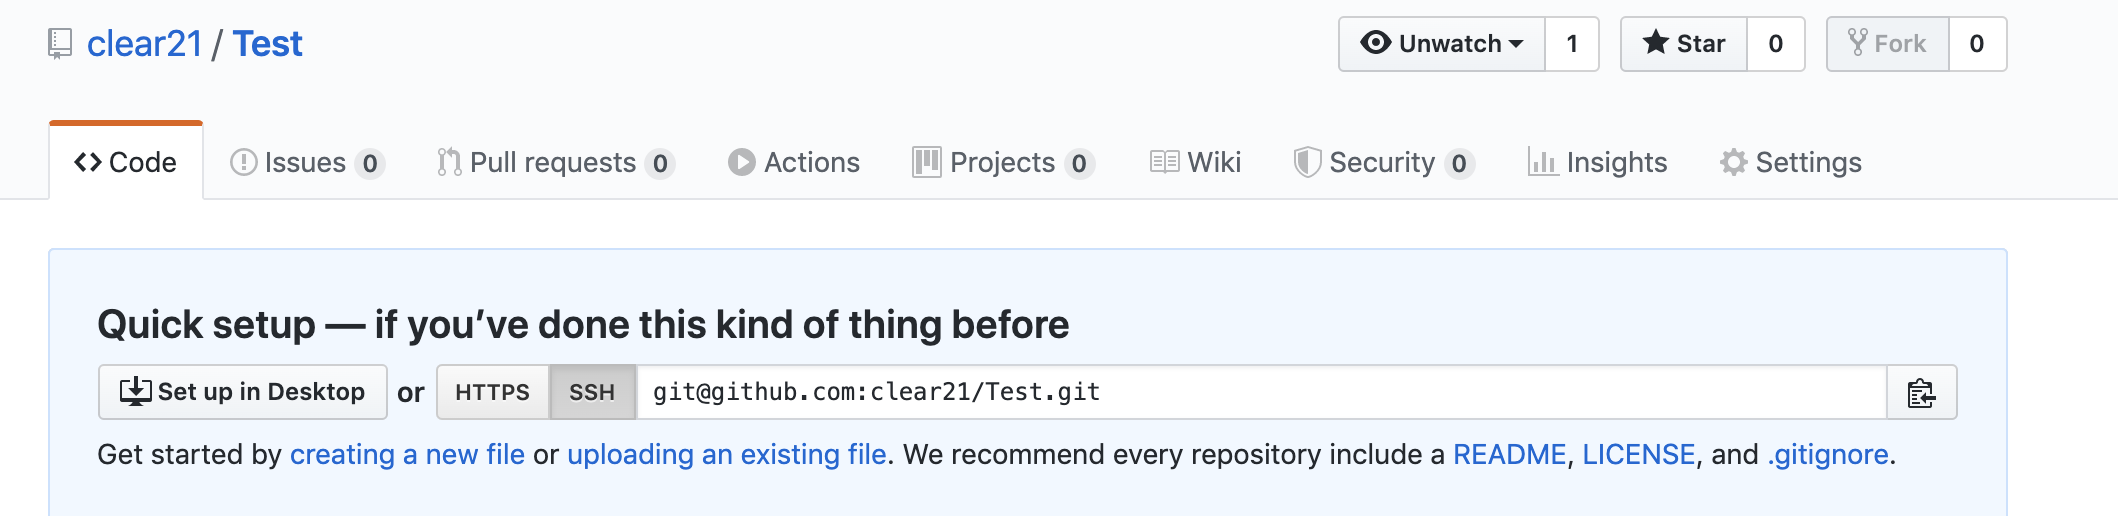
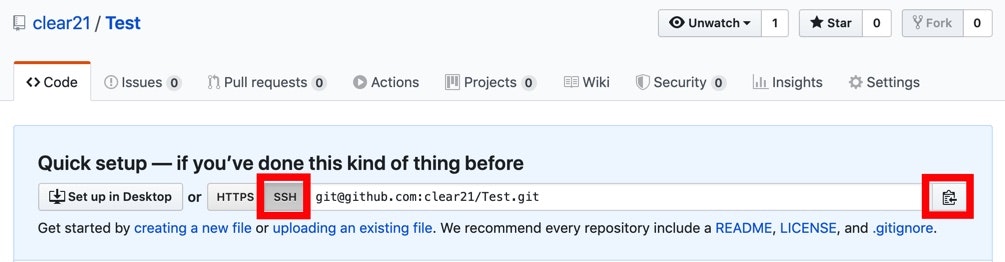
次の手順で使用するため、
"SSH用の(リモート)リポジトリURL"をコピーしておく。(下図赤枠)
4. ローカルリポジトリ作成
jupyterlabでターミナルを開き、フォルダ「test」を作成し、
ローカルリポジトリとして設定。
コマンド「git remote origin xxx」の xxx に、
前手順でコピーした"SSH用の(リモート)リポジトリURL"を設定する。
$ mkdir test
$ cd test
$ git init
Initialized empty Git repository in /Users/xxx/test/.git/
$ git remote add origin "SSH用の(リモート)リポジトリURL"
5. [CUI]first push
早速GUIでpushしたいところですが、
初めのpush時はpush先を設定(--set-upstream)する必要があるため、
CUIで実行。
$ git commit --allow-empty -m 'first commit'
[master (root-commit) xxxxx] first commit
$ git push --set-upstream origin master
6. パスフレーズ入力の省略化
2回目のpushはGUI操作にするため、前準備として、本対応をする。
(現状ではpush時に都度パスフレーズを入力する形であり、
GUIでpush使用とするとエラーが発生する。)
$ eval `ssh-agent`
Agent pid xxxx
$ ssh-add ~/.ssh/id_rsa
Enter passphrase for /Users/xxx/.ssh/id_rsa:
Identity added: /Users/xxx/.ssh/id_rsa
7. [GUI]second push
以上の設定で、GUIでのpushができる。
今回はファイル「test.txt」を作成し、GUIでpushをする。
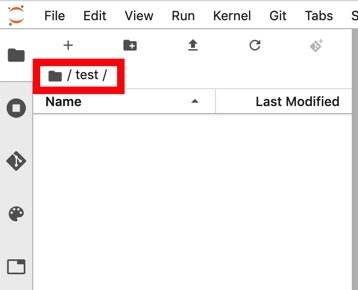
7-1. 左ペインにて、カレントフォルダを「test」にする。
そうすることで、下記のgit操作対象が本リポジトリになる。
7-2. ファイル「test.txt」を作成
$ echo > test.txt
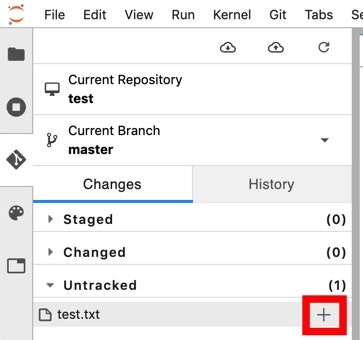
7-3. staging
左ペインにてgitページを開く。[Untracked]にファイル「test.txt」が存在してる。

ファイル左手の「+」をクリックして、Staged状態にする。(staging)
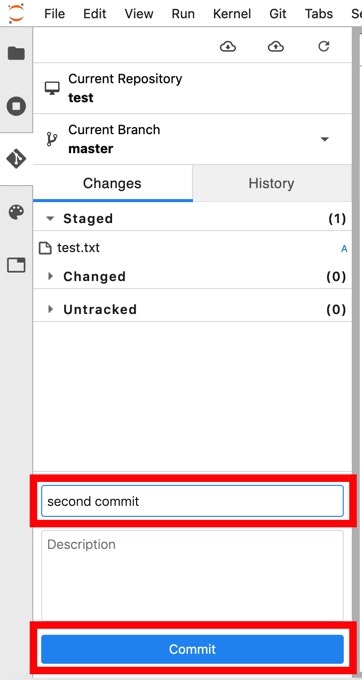
7-4. commit
左ペインの下部にて、コメントを入力し、「commit」をクリック。
7-5. push
左ペインの上部にあるpushボタンをクリック。
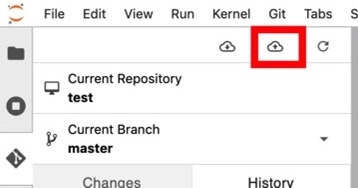
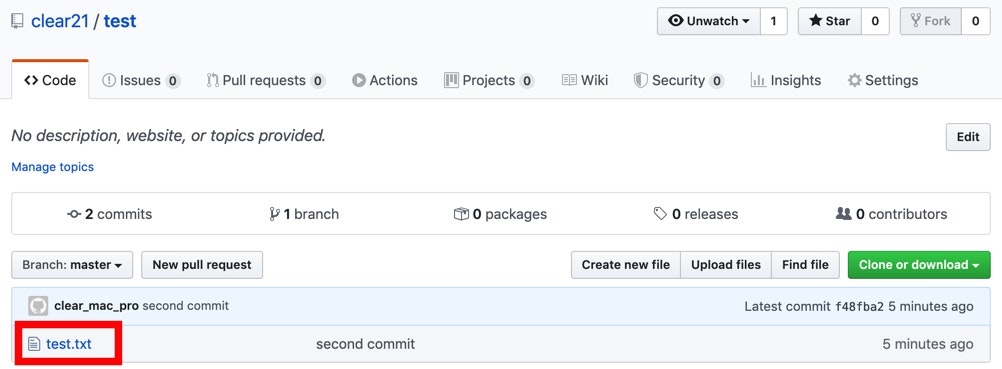
pushが成功したら、下図のポップアップが表示される。

以上より、githubでリポジトリを確認すると、想定通り、更新が反映される。