Gaugeを使ったWeb UI自動化
Gaugeというテスト自動化ツールを使ったWeb UI自動化手法について記載します。
GaugeとSeleniumを組み合わせてブラウザを自動操作し、テスト自動化とその結果をレポートすることができます。
環境
- Windows11
- VSCode
- Java17
Gaugeのインストール
以下の公式サイトからgaugeをインストールします
https://docs.gauge.org/getting_started/installing-gauge?os=windows&language=java&ide=vscode
Gaugeプロジェクトのセットアップ
VSCodeの拡張機能でGaugeを追加します。(拡張機能があるほかのIDEでも大丈夫です)

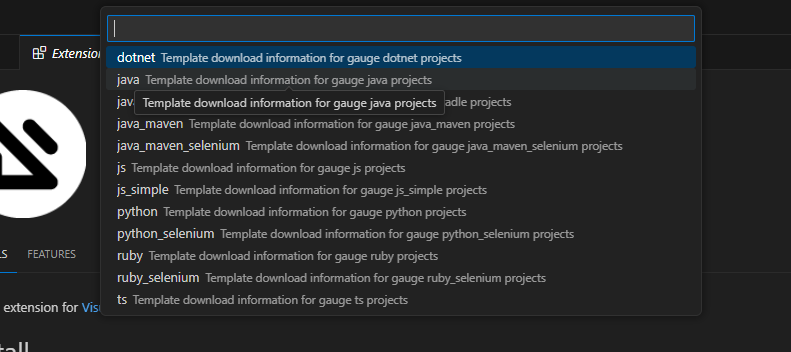
検索欄に「>gauge」と入力して一番上に出てくる「Gauge:Create a new gauge 」候補を選択します

言語を選択して、(今回はjava)
テスト用プロジェクトを生成するための任意のフォルダを選択
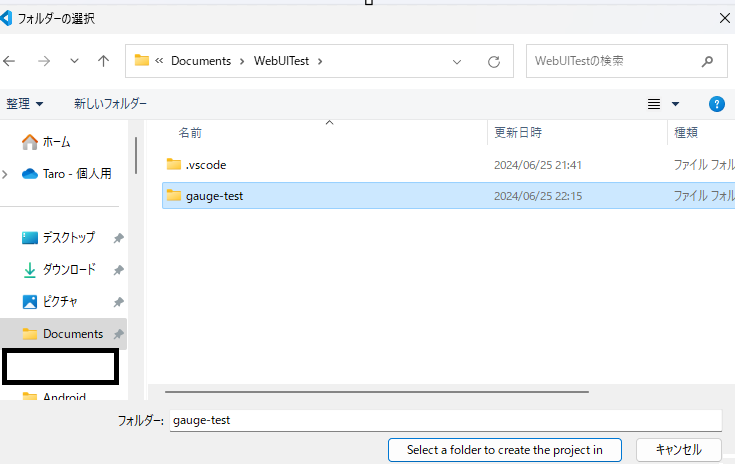
選択したフォルダの配下にgaugeのプロジェクトが展開されるので、VSCodeで開きます。
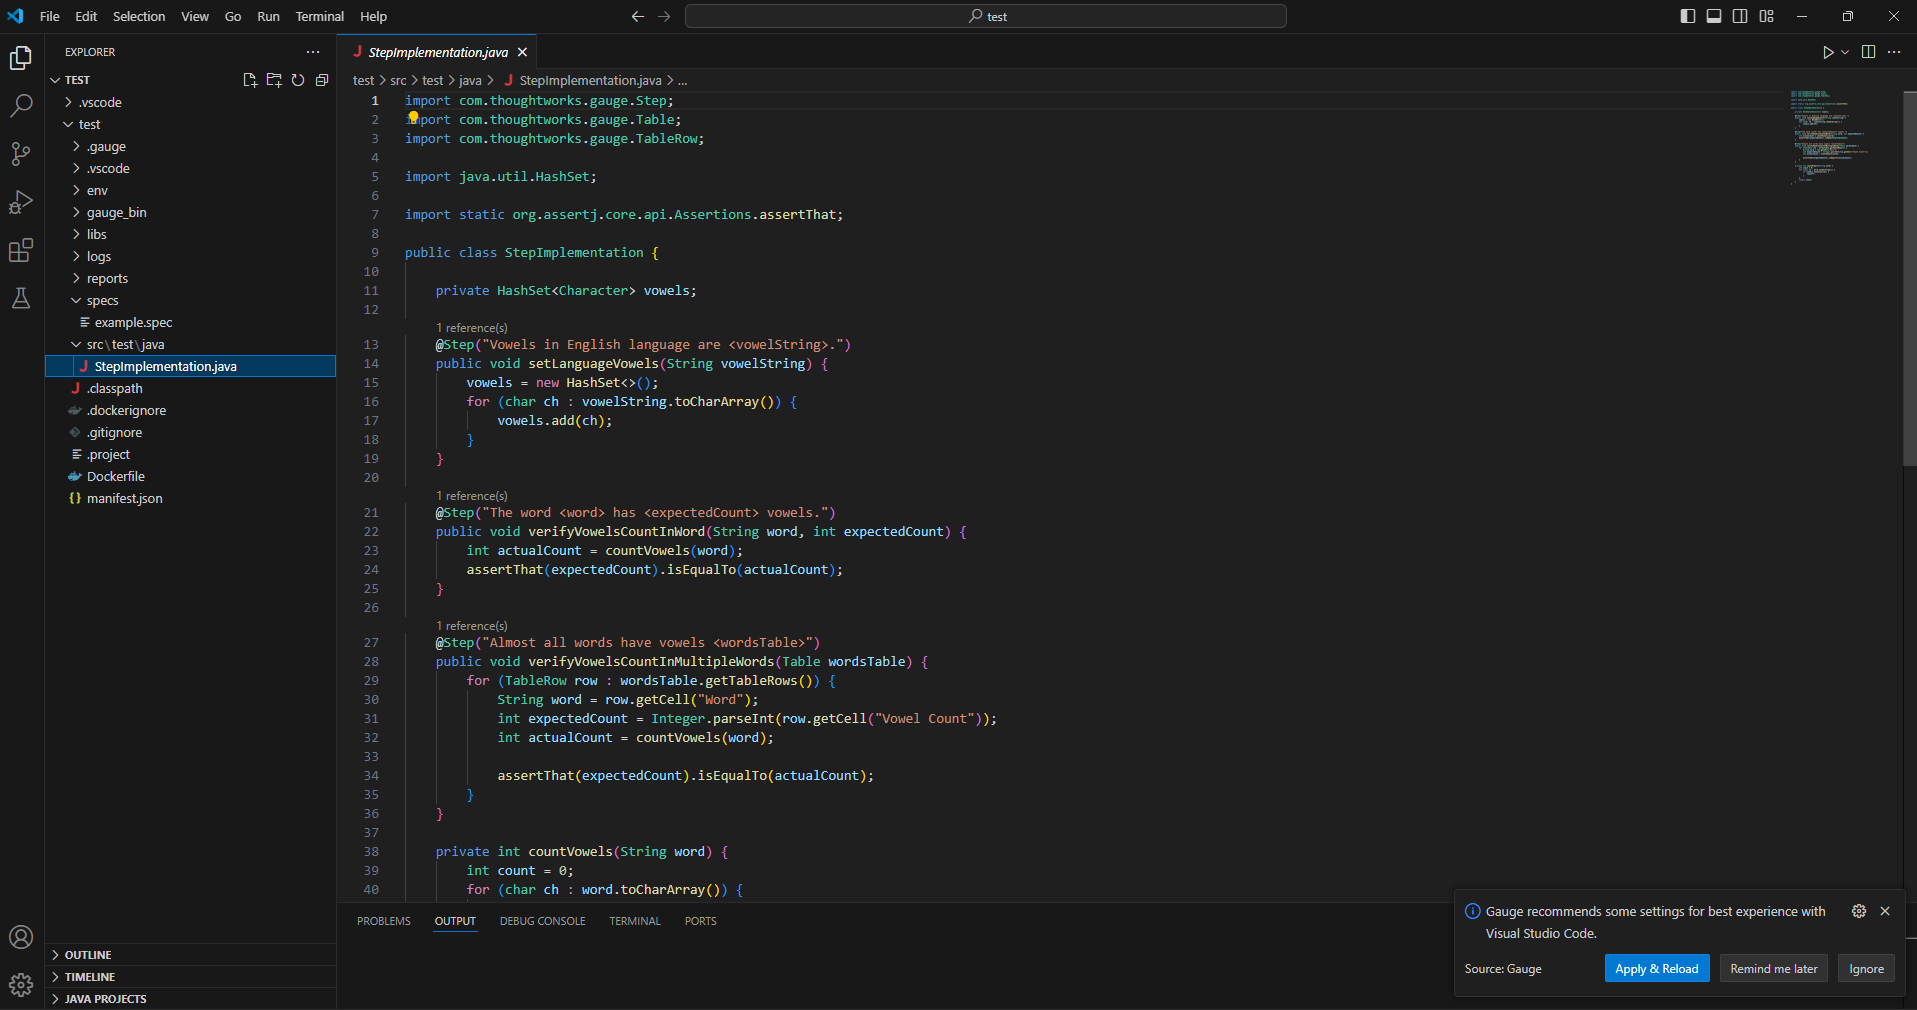
初期状態は以下のようなサンプルコードが用意されてます。(gaugeのバージョンによって内容は多少異なるかもしれないです)
Javaファイル(Path:src\test\java)
specファイル(Path:\test\specs)

重要なのはこのspecファイルとjavaファイルです。
テストケースをspecファイルに記載し、実際のテスト処理をJavaファイルに記載していきます
必要なライブラリのダウンロードと設定
初期状態ではSeleniumの環境の用意がないです。
つまりブラウザの自動操作ができません。
そこで、必要なjarファイルをそれぞれダウンロードし、gauge\plugins\java\0.11.0\libs配下に設置します。
必要なライブラリ一覧
- junit
- https://github.com/junit-team/junit4/wiki/Download-and-Install にアクセスしてjarファイルを入手
- webdrivermanager
- https://github.com/bonigarcia/webdrivermanager/releases にアクセスしてjarファイルを入手
- selenium
- https://www.selenium.dev/downloads/ にアクセスしてjava用のzipファイルを入手
解凍して、 selenium-api、 selenium-chrome-driver、 selenium-chromium-driver、 selenium-remote-driver、selenium-supportのそれぞれのjarファイルを入手 - httpclient
- https://mvnrepository.com/artifact/org.apache.httpcomponents.client5/httpclient5/5.2.1 にアクセスしてjarファイルを入手
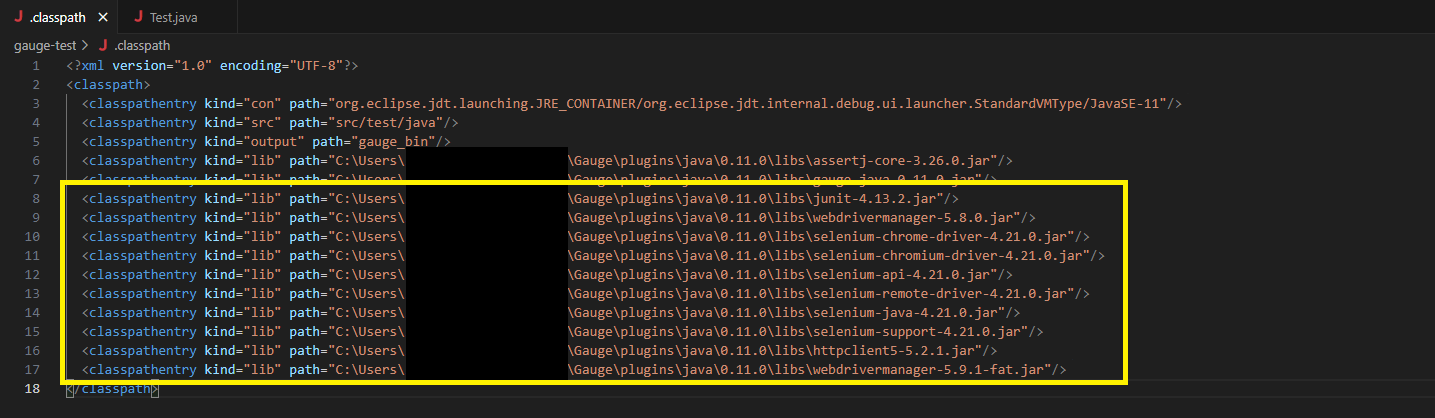
上記でダウンロードした各jarファイルをgauge\plugins\java\0.11.0\libs配下に設置します。
その後、.classpathに以下のように追記します。(黄色の枠線部分が追記箇所)
コーディング
specファイルは以下のようにテストケースを記載します。
gaugeの大きな特徴はテストケースを日本語で記載できることです。
日本語で表現できることによって読みやすい・わかりやすいことはもちろんのこと、非エンジニアでも理解できることがメリットです。
検索後のタイトル設定
=====================

成功ケース
----------------
* グーグルを開く
* 検索文字"テスト"で検索する
* タイトルに"テスト - Google 検索"が設定されていること
失敗ケース
----------------
* グーグルを開く
* 検索文字"テス"で検索する
* タイトルに"テスト - Google 検索"が設定されていること
Javaファイルは以下のようにします
import com.thoughtworks.gauge.AfterSuite;
import com.thoughtworks.gauge.BeforeSuite;
import com.thoughtworks.gauge.Step;
import io.github.bonigarcia.wdm.WebDriverManager;
import org.junit.Assert;
import org.openqa.selenium.By;
import org.openqa.selenium.Keys;
import org.openqa.selenium.WebDriver;
import org.openqa.selenium.WebElement;
import org.openqa.selenium.chrome.ChromeDriver;
public class Test {
    static String APPLICATION_URL = "https://google.com";
    static WebDriver webDriver;
    // テスト開始時にWEBドライバを初期化
    @BeforeSuite
    public void initDriver() {
        WebDriverManager.chromedriver().setup();
        webDriver = new ChromeDriver();
    }
    // テスト終了時にWEBドライバを閉じる
    @AfterSuite
    public void closeDriver() {
        webDriver.close();
    }
    @Step("グーグルを開く")
    public void openApplication() {
        webDriver.get(APPLICATION_URL);
    }
    @Step("検索文字<searchText>で検索する")
    public void searchText(String searchText){
        // googleの検索ボックスはName要素にqが設定されている
        WebElement searchBox = webDriver.findElement(By.name("q"));
        searchBox.sendKeys(searchText);
        searchBox.sendKeys(Keys.chord(Keys.ENTER));
    }
    @Step("タイトルに<title>が設定されていること")
    public void checkTitle(String title) {
        Assert.assertEquals(title, webDriver.getTitle());
    }
}
テスト実行
実行時はGUIでもCUIでもどちらでも可能です。
GUIの場合VSCodeではspecファイルを開いて、左上に「Run Spec」とあり押すと実行されます

CUIの場合
gauge run --hide-suggestion --simple-console <<specファイルのパス>>
で実行できます。
実行するとChromeが自動で起動し、自動でテストされ「\reports\html-report」配下にテストレポートのhtmlファイルが自動生成されるはずです。

参考にさせていただいたサイト