2020/5/19 追記
こちらにて最新のBotの作り方を紹介しております。
2019/10/27 追記
本ページで取り扱っているDiscord4Jライブラリの提供が終了してしまい別のライブラリに置き換わったようです。そのため、現在はこの方法でBotを開発することは非常に困難or不可能となってしまっています。
今までBot開発の際の参考文献としてお読みいただき、本当にありがとうございました。時間があれば新しいDiscord4Jでの開発方法も記事にしてみたいと思っています。
今回はGitHub上に公開されている、__Discord4j__ライブラリを使って簡単なDiscordBotを開発してみます。
なお、Botの使用にはDiscordにアプリ登録をし、トークンを取得する必要があるのでそれについてはページ下部の番外編にて紹介しています。
ライブラリを調達する
Mavenリポジトリ(README引用)
...
<repositories>
  ...
  <repository> <!-- This repo fixes issues with transitive dependencies -->
    <id>jcenter</id>
    <url>http://jcenter.bintray.com</url>
  </repository>
  <repository>
    <id>jitpack.io</id>
    <url>https://jitpack.io</url>
  </repository>
</repositories>
...
<dependencies>
  ...
  <dependency>
    <groupId>com.github.austinv11</groupId>
    <artifactId>Discord4J</artifactId>
    <version>@VERSION@</version>
  </dependency>
</dependencies>
...
Gradle(README引用)
...
repositories {
  ...
  jcenter() //This prevents issues with transitive dependencies
  maven {
    url  "https://jitpack.io"
  }
}
...
dependencies {
  ...
  compile "com.github.austinv11:Discord4J:@VERSION@"
}
...
ライブラリjar
https://austinv11.github.io/Discord4J/downloads.html
ライブラリ(API)をいじる
Discordにログインする
    public static IDiscordClient login(String token) {
        ClientBuilder clientBuilder = new ClientBuilder();
        clientBuilder.withToken(token);
        return clientBuilder.login();
    }
イベントの処理
リスナの登録
イベントを処理するにはまず、リスナを登録しなくてはなりません。
下記のコードをログイン後などに追加してください。
引数にはリスナに使うクラスのインスタンスを入れておいてください。
なお、今回はアノテーション(注釈)を使ったリスナの登録を紹介します。
client.getDispatcher().registerListener(Object listener);
処理
@EventSubscriber
public void onReady(ReadyEvent event) {
    System.out.println("Botの準備完了!");
}

@EventSubscriber
public void onMessage(MessageReceivedEvent event) throws RateLimitException, DiscordException, MissingPermissionsException {
    System.out.println(event.getAuthor().getName() + "さんが「" + event.getMessage().getContent() + "」と投稿しました。");
}
onReadyメソッドはログインが完了したら、onMessageメソッドはチャンネルにチャットが投稿されたら呼ばれます。
EventSubscriberアノテーションをつけることでイベントを拾うことができます。
MessageReceivedEventから取得できる情報
message.getAuthor() //投稿したユーザのIUserオブジェクト
message.getMessage() //投稿されたチャットのIMessageオブジェクト
message.getChannel() //投稿されたちょっとが属するチャンネルのIChannelオブジェクト
//など。
メッセージを投稿
IChannelクラスで用意されています。
IChannel#sendMessage(String);
取得関連のサンプル
ユーザー名を取得
IUser#getName()
メッセージ内容を取得
IMessage#getMessage()
本題: 簡単なBotをつくる
今回はサンプルとして、「こんにちは」と投稿されたら返事をするBotを作ってみたいと思います。
import sx.blah.discord.api.ClientBuilder;
import sx.blah.discord.api.IDiscordClient;
import sx.blah.discord.api.events.EventSubscriber;
import sx.blah.discord.handle.impl.events.ReadyEvent;
import sx.blah.discord.handle.impl.events.guild.channel.message.MessageReceivedEvent;
import sx.blah.discord.handle.obj.IChannel;
import sx.blah.discord.handle.obj.IMessage;
import sx.blah.discord.handle.obj.IUser;
import sx.blah.discord.util.DiscordException;
import sx.blah.discord.util.MissingPermissionsException;
import sx.blah.discord.util.RateLimitException;

public class Example {

	private static String TOKEN = "TOKEN"; //DiscordBotのトークン

	private static IDiscordClient client;

	public static void main(String args[]) {
		Example main = new Example();

		System.out.println("Botを起動中...");

		client = new ClientBuilder().withToken(TOKEN).build();
		client.getDispatcher().registerListener(main);
		client.login();
	}

	@EventSubscriber
	public void onReady(ReadyEvent event) {
		System.out.println("Botの準備完了!");
	}

	@EventSubscriber
	public void onMessage(MessageReceivedEvent event) throws RateLimitException, DiscordException, MissingPermissionsException {
		IMessage message = event.getMessage();
		IUser user = message.getAuthor();
		if (user.isBot()) return;

		IChannel channel = message.getChannel();
		String mes = message.getContent();

		if (mes.contains("こんにちは")) {
			channel.sendMessage("こんにちは、" + user.getName() + "さん!");
		}
	}

}
番外編: アプリ登録&トークンの取得
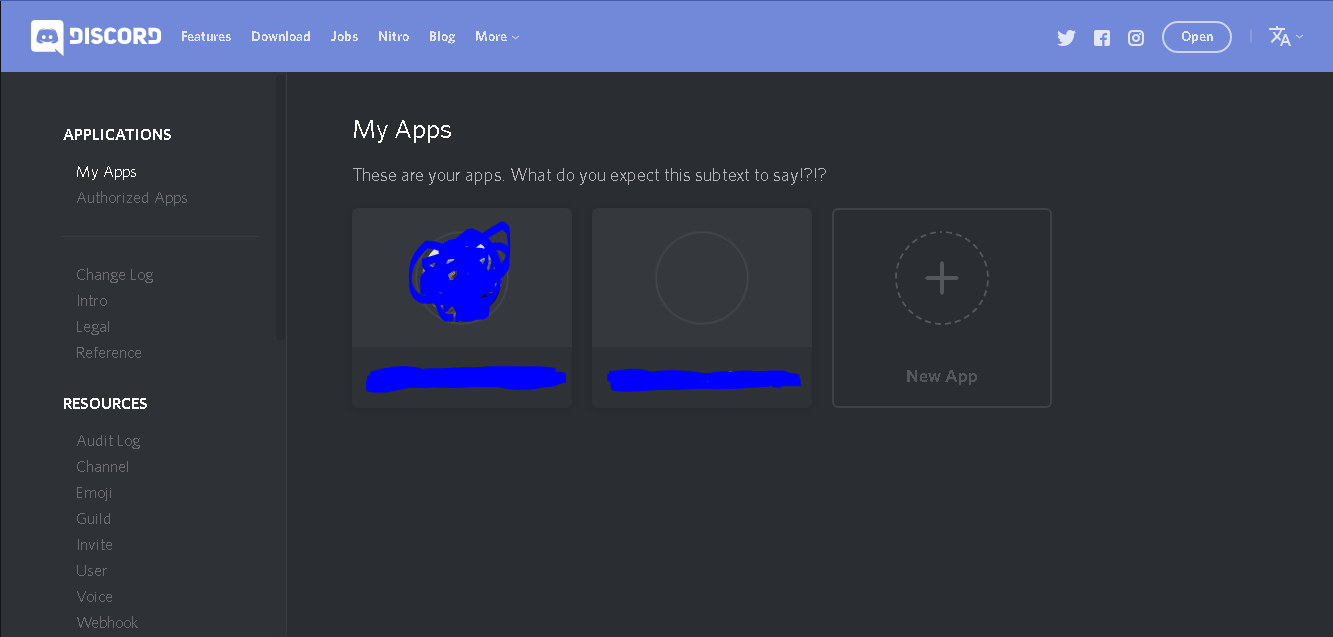
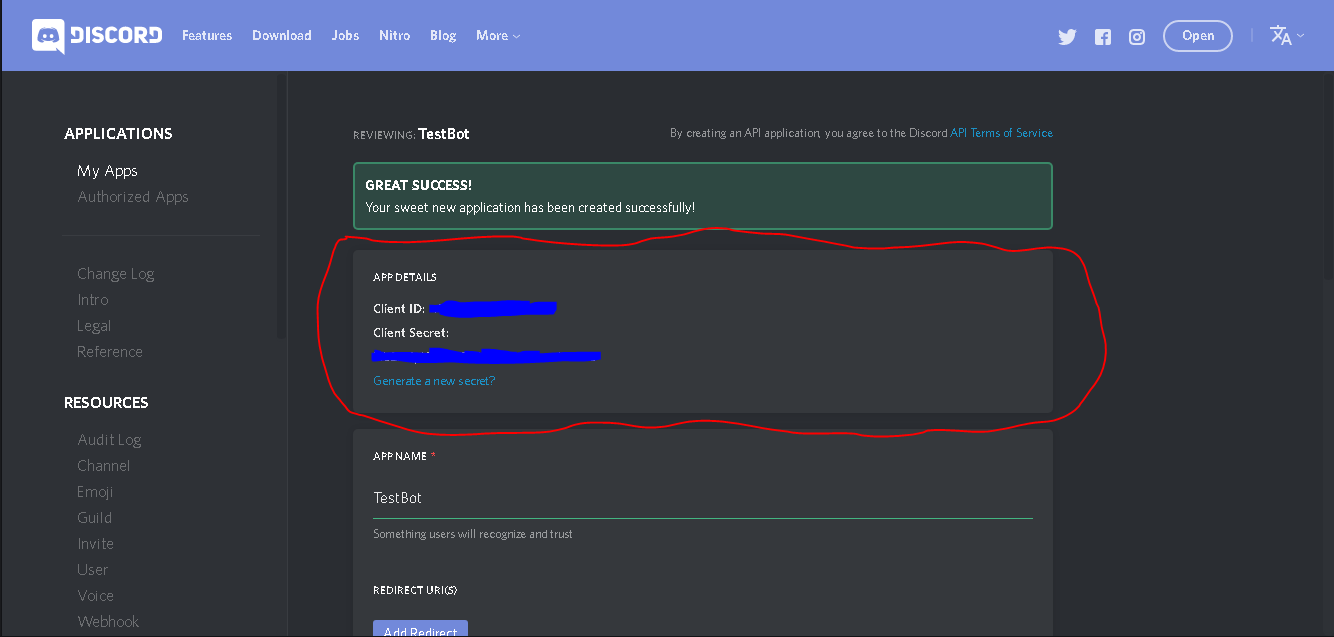
1.__https://discordapp.com/developers/applications/me__にアクセスする
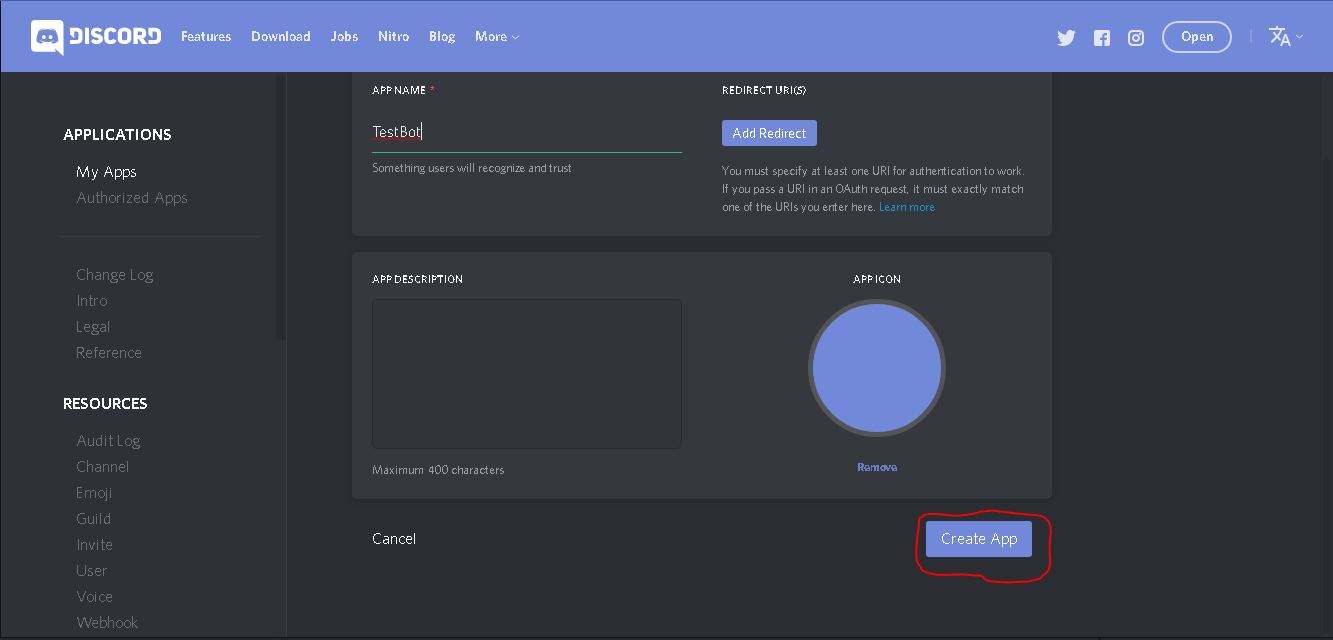
3.APP NAMEに適当な名前を入力してCreate Appをクリック
5.少しスクロールしてこれを見つけ、Create a Bot Userをクリックする

6.Yes, do it!のあと、click to revealをクリックして出てきたトークンを控える。(Public Botにもチェックしておく)
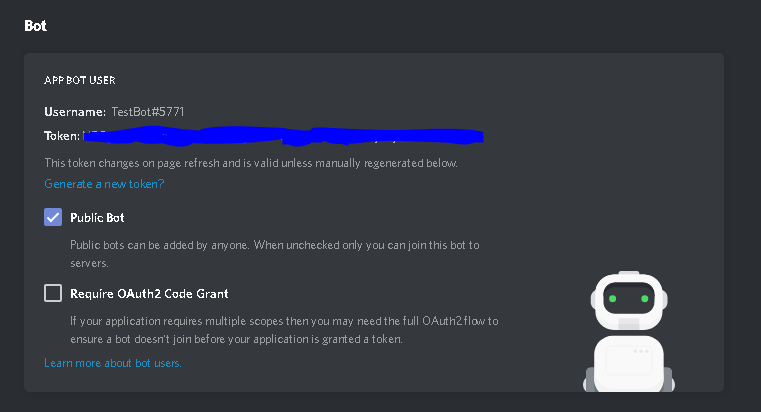
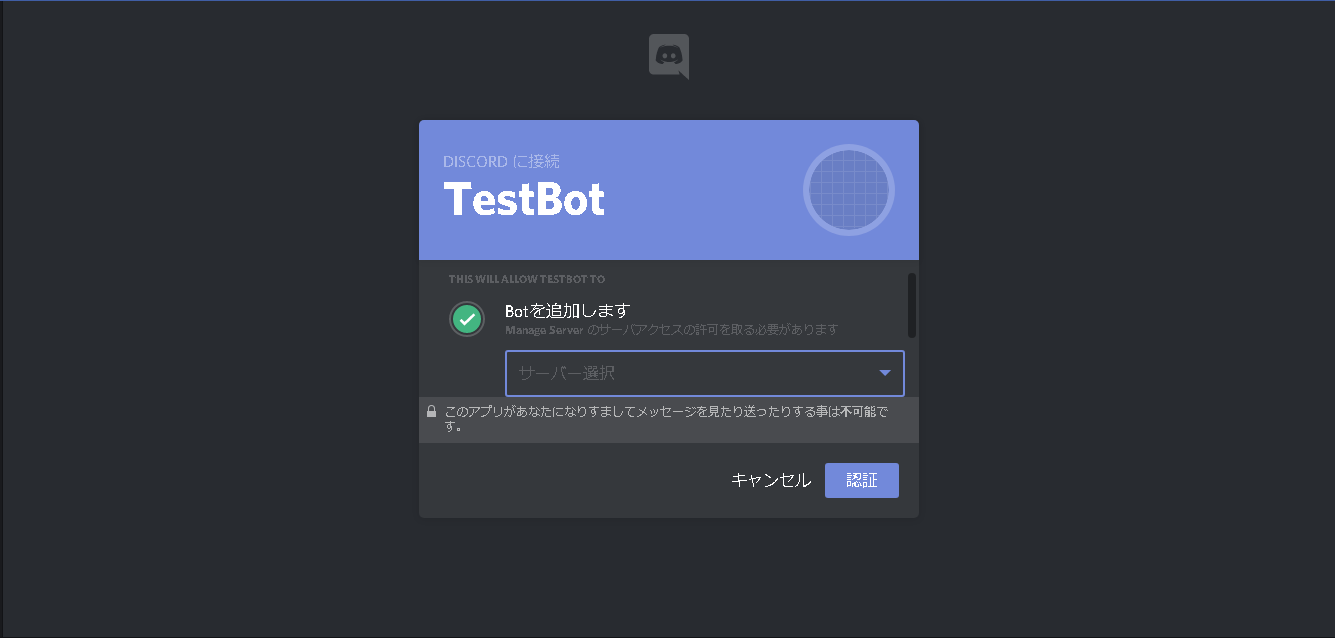
7.下のURLの[CLIENT_ID]を手順4で控えたClient Idに置き換えてアクセスする。
https://discordapp.com/api/oauth2/authorize?client_id=[CLIENT_ID]&permissions=0&scope=bot
