本稿の目指すところ
タイトルの通りですが、Next.js(SSG)で作成したNext.js公式のブログテンプレートサンプルをGitHub ActionsでFirebase Hostingに自動デプロイできるようにします。
細かいNext.jsやGit、Firebaseの設定などは一旦置いておいて、とりあえず私のような初学者向けにサクッとCI/CD環境を構築することを目的としました。
構成/環境
| 名称 | 役割 | 補足 |
|---|---|---|
| React(Next.js) | 画面開発 | SSGで実装 |
| GitHub | バージョン管理 | |
| GitHub Actions | CI/CD | リポジトリ内のソフトウェア開発フローを自動化できる |
| Firebase Hosting | ホスティングサービス | 無料プランを利用します |
- macOS Monterey v12.6.1 (Intel Chip)
- node.js v16.15.0
- yarn v1.22.18
1. Next.jsプロジェクトの作成
1-1. blog-starterテンプレートでプロジェクト作成
# example-blog-sterterは好きなプロジェクト名でOK
% yarn create next-app --example blog-starter example-blog-starter

# 以下が表示されたら作成完了
Success! Created example-blog-starter at /xxxxxxx/example-blog-starter
1-2. ローカル環境起動確認
# 作成したプロジェクトへ移動
% cd example-blog-starter/

# ローカル環境を起動
% yarn dev

# 以下が表示されたら起動成功
ready - started server on 0.0.0.0:3000, url: http://localhost:3000
http://localhost:3000/ へアクセスし、念の為Next.js公式で用意されているデモ画面と同じものが表示されることを確認する。
1-3. 静的HTMLをエクスポート
現状のbuildスクリプトだと静的HTMLの出力ができずサーバー側にnode.jsが必要となるため
buildスクリプトにnext exportを追加し、静的HTMLのエクスポートを可能にする。
デフォルトでは./outにビルドされた資材がエクスポートされます。
{
 "scripts": {
    "dev": "next",
-   "build": "next build",
+   "build": "next build && next export",
  },
}
devDependenciesにserveというパッケージをインストールし
ローカルサーバーで静的ファイルをホスティングし動作確認できるようにする。
% yarn add -D serve
build & serveを実行するため、serveスクリプトを追加する。
{
 "scripts": {
    "dev": "next",
    "build": "next build && next export",
+   "export": "yarn build && serve ./out",
  },
}
このままyarn serveをすると以下のように「画像の最適化に利用しているNext.jsのデフォルトローダーがnext exportに適してない」と怒られるので、./next.config.jsを作成し画像最適化を行わないように設定を追加する。
% yarn serve

Error: Image Optimization using Next.js’ default loader is not compatible with `next export`.
module.exports = {
  images: {
    unoptimized: true, // 画像最適化を行わない
  },
};
改めてyarn serveを行い静的ビルド&ローカルサーバー立ち上げを行い、画面確認をする。
% yarn serve

# 以下が表示されたらhttp://localhost:3000でSSGされた画面を確認できる。
Export successful. Files written to /Users/user_name/xxxxx/example-blog-starter/out

   ┌───────────────────────────────────────────┐
   │                                           │
   │   Serving!                                │
   │                                           │
   │   - Local:    http://localhost:3000       │
   │   - Network:  http://xxxxxxxxxxxxx:3000   │
   │                                           │
   │   Copied local address to clipboard!      │
   │                                           │
   └───────────────────────────────────────────┘
以上でNext.jsのプロジェクト作成は完了です。
2. GitHubリポジトリの作成と資材Push
作成したNext.jsプロジェクトをGitHubで管理できるようにします。
2-1. リポジトリ作成
GitHubにログインし、RepositoriesのNewから今回のプロジェクト用リポジトリを作成します。
Create repository を押下してリポジトリを作成し、リポジトリのURLをコピーしておく。
(https://github.com/user_name/repository_name)
2-2. 資材をリポジトリへプッシュ
# リモートリポジトリを同期させる
% git remote add origin ${コピーしたリポジトリのURL}

# 資材をstagingへ登録
% git add .

# stagingの資材をコミット
% git commit -m 'first commit with next.js project'

# リモートリポジトリへローカルリポジトリの状態をプッシュ
% git push -u origin main

# 以下が表示されたらOK
branch 'main' set up to track 'origin/main'.
以上を実施しリポジトリのページをリロードするとコミットが確認できます。
3. Firebaseプロジェクトの作成とFirebase CLIのインストール
3-1. Firebaseプロジェクトを追加
Firebaseのコンソールへアクセスしプロジェクト作成画面を表示します。
https://console.firebase.google.com/
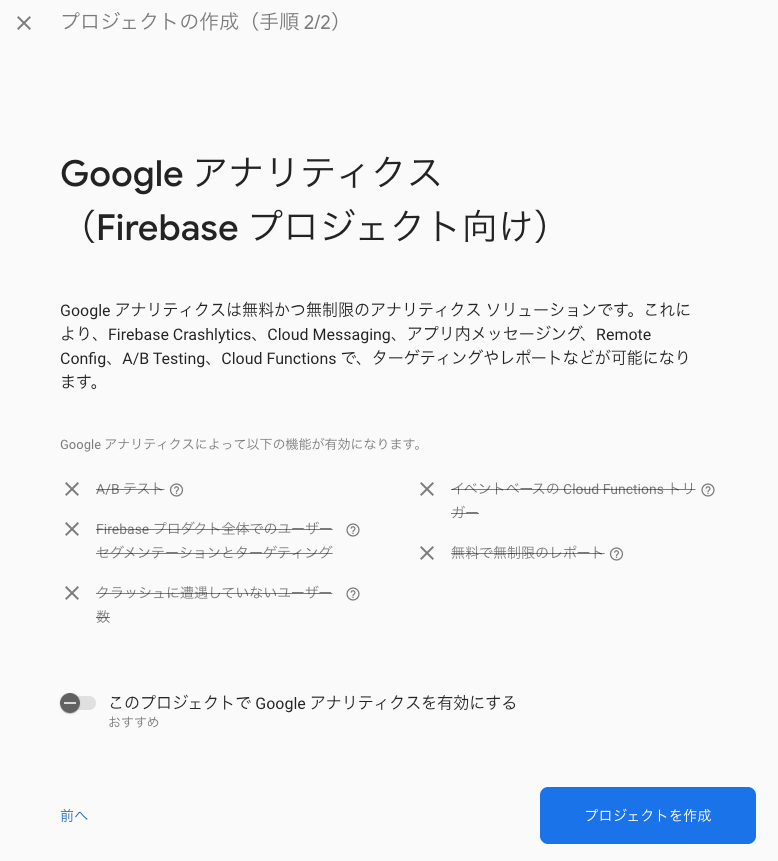
プロジェクトを追加を押下し、今回のアプリをホスティングするためのプロジェクトを作成します。

プロジェクト名はリポジトリ名と同じ名称を入力するとわかりやすくて良きです。

プロジェクト作成に成功したら続行を選択し、プロジェクト概要へ移動します。

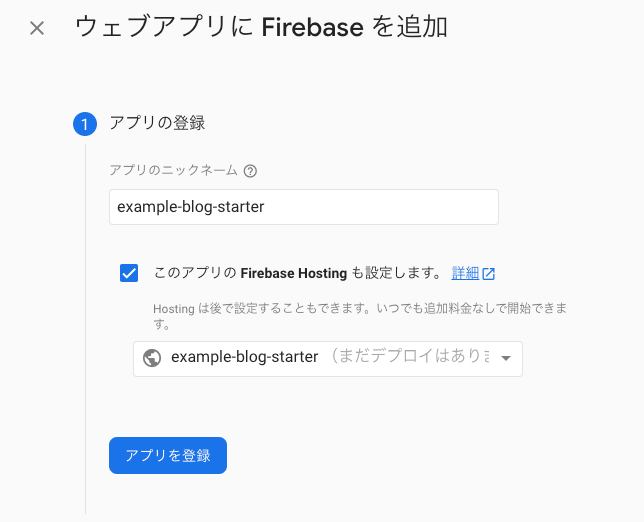
今回はWebアプリを作成するため、</>(ウェブ)を選択します。

Firebaseコンソールで管理する名称としてニックネームを付けます。
無難にリポジトリ名と同じ名称をつけましょう。
「このアプリの Firebase Hosting も設定します。」にチェックを入れ、アプリを登録。

3-2. Firebase SDKをインストール
以下のコマンドか、画面に表示されているnpmコマンドを叩いてインストールしましょう。
# firebase sdkをdevDependenciesへ追加
% yarn add firebase
firebaseConfigについては今回は特に利用しないため割愛します。
3-3. Firebase CLIをインストール
こちらも以下のコマンドか、画面に表示されているnpmコマンドを叩いてインストールしましょう。
# firebase cliをdevDependenciesへ追加
% yarn add firebase-tools
4の「Firebase Hostingへのデプロイ」は追って行うため、「コンソールに進む」を押下して本ステップは完了となります。
4. GitHubActionsの設定
先程インストールしたFirebase CLIを使って、ローカルプロジェクトをFirebaseプロジェクトに連携します。
4-1. Firebaseにログイン
プロジェクトルートにて以下コマンドでfirebaseにログインします。
# firebaseにログイン
% yarn firebase login

# すると以下の質問が表示されるため、Yを入力しエンターを押す
i  Firebase optionally collects CLI and Emulator Suite usage and error reporting information to help improve our products. Data is collected in accordance with Google’s privacy policy (https://policies.google.com/privacy) and is not used to identify you.

? Allow Firebase to collect CLI and Emulator Suite usage and error reporting information? (Y/n)
ブラウザでFirebase CLIでログインするアカウントの選択画面が立ち上がるので、任意のアカウントを選択
選択したアカウントへのアクセスリクエストを許可
Woohoo! Firebase CLI Login Successfulと表示されたらログイン完了です。
yarn firebase loginを実行したshellの方にも、Success! Logged in as 選択したアカウントと表示されます。

4-2. Firebaseプロジェクトの初期設定
firebaseプロジェクトの初期設定のため、プロジェクトのルートディレクトリにて以下を実行します。
% yarn firebase init
するとFIREBASEのデカ文字と共にいくつかの質問が表示されるため、順に答えていきます。

# Q: このディレクトリに対して、どのFirebaseの機能を設定するか?Spaceキーを押して機能を選択し、Enterで選択内容を確定します。
? Which Firebase features do you want to set up for this directory? Press Space to select features, then
Enter to confirm your choices. (Press <space> to select, <a> to toggle all, <i> to invert selection, and
<enter> to proceed)

# 以下を選択 (ホスティングを行います。Firebase Hosting用のファイルを設定し、GitHub Actionのデプロイを設定する)
=> Hosting: Configure files for Firebase Hosting and (optionally) set up GitHub Action deploys


=== Project Setup

# Q: まず、このプロジェクトディレクトリをFirebaseのプロジェクトに関連付けます。
# firebase use --addを実行すると複数のプロジェクトエイリアスを作成することができますが、今回はデフォルトのプロジェクトを設定しましょう。
? First, let’s associate this project directory with a Firebase project.
You can create multiple project aliases by running firebase use --add,
but for now we’ll just set up a default project.

=> Use an existing project # 既存のプロジェクトを使用する を選択


# Q: 現在のディレクトリのデフォルトのFirebaseプロジェクトを選択してください。
? Select a default Firebase project for this directory:
=> example-blog-starter (example-blog-starter) # 先程作成済みのFirebaseプロジェクトを選択

=== Hosting Setup

# firebase deployでアップロードしたいHosting assetsが含まれるパブリックディレクトリについて、もしassetsに対してビルドプロセスがある場合はビルド後assetsのアウトプット先ディレクトリを指定してください。
Your public directory is the folder (relative to your project directory) that
will contain Hosting assets to be uploaded with firebase deploy. If you
have a build process for your assets, use your build’s output directory.

# Q: パブリックディレクトリとしてどれを利用しますか?
? What do you want to use as your public directory? (public)
=> out # SSGのためにnext exportで ./out に出力するため


# Q: SPAとしてすべてのURLを/index.htmlに書き換えますか?
? Configure as a single-page app (rewrite all urls to /index.html)? (y/N)
=> No # SPAではないため


# Q: GitHubで自動ビルドとデプロイを設定しますか?
? Set up automatic builds and deploys with GitHub? (y/N)
=> Yes


# Q: 既に存在するout/404.htmlを上書きするか?
? File out/404.html already exists. Overwrite? (y/N)
=> No


# Q: 既に存在するout/index.htmlを上書きするか?
? File out/index.html already exists. Overwrite? (y/N)
=> No # ここでGitHubアカウント認証を求められたら許可してください。


# Q: どのGitHubリポジトリに対してGitHubのワークフローを設定しますか?
? For which GitHub repository would you like to set up a GitHub workflow? (format: user/repository)
=> git_user_name/example-blog-starter # ${自分のGitHubアカウント}/${リポジトリ}を入力

# するとGitHub Actionsの設定 & Firebase連携に必要な環境変数やkeyなどの設定を自動でやってくれます。
✔  Created service account github-action-xxxxxxxx with Firebase Hosting admin permissions.
✔  Uploaded service account JSON to GitHub as secret FIREBASE_SERVICE_ACCOUNT_EXAMPLE_BLOG_STARTER.


# Q: デプロイする前にビルドスクリプトを実行するように設定しますか?
? Set up the workflow to run a build script before every deploy? (y/N)
=> Yes


# Q: どのスクリプトを使ってビルドを実行しますか?
? What script should be run before every deploy? (npm ci && npm run build)
=> yarn install && yarn build


# Q: プルリクエストがマージされたら自動デプロイを実行するように設定しますか?
? Set up automatic deployment to your site’s live channel when a PR is merged? (Y/n)
=> Yes


# Q: 本番デプロイに利用するブランチ名は何ですか?
? What is the name of the GitHub branch associated with your site’s live channel?
=> main # メインブランチ名がmasterの場合はmasterにすること


# 以下が表示されたら初期設定完了
✔  Firebase initialization complete!
5. Firebaseへデプロイ
Firebase(+GitHub Actions)の設定が完了したので、いよいよデプロイを実行します。
# デプロイ実行
% yarn firebase deploy

=== Deploying to 'example-blog-starter'...

i  deploying hosting
i  hosting[example-blog-starter]: beginning deploy...
i  hosting[example-blog-starter]: found 38 files in out
✔  hosting[example-blog-starter]: file upload complete
i  hosting[example-blog-starter]: finalizing version...
✔  hosting[example-blog-starter]: version finalized
i  hosting[example-blog-starter]: releasing new version...
✔  hosting[example-blog-starter]: release complete

✔  Deploy complete!

Project Console: https://console.firebase.google.com/project/project_name/overview
Hosting URL: https://project_name.web.app
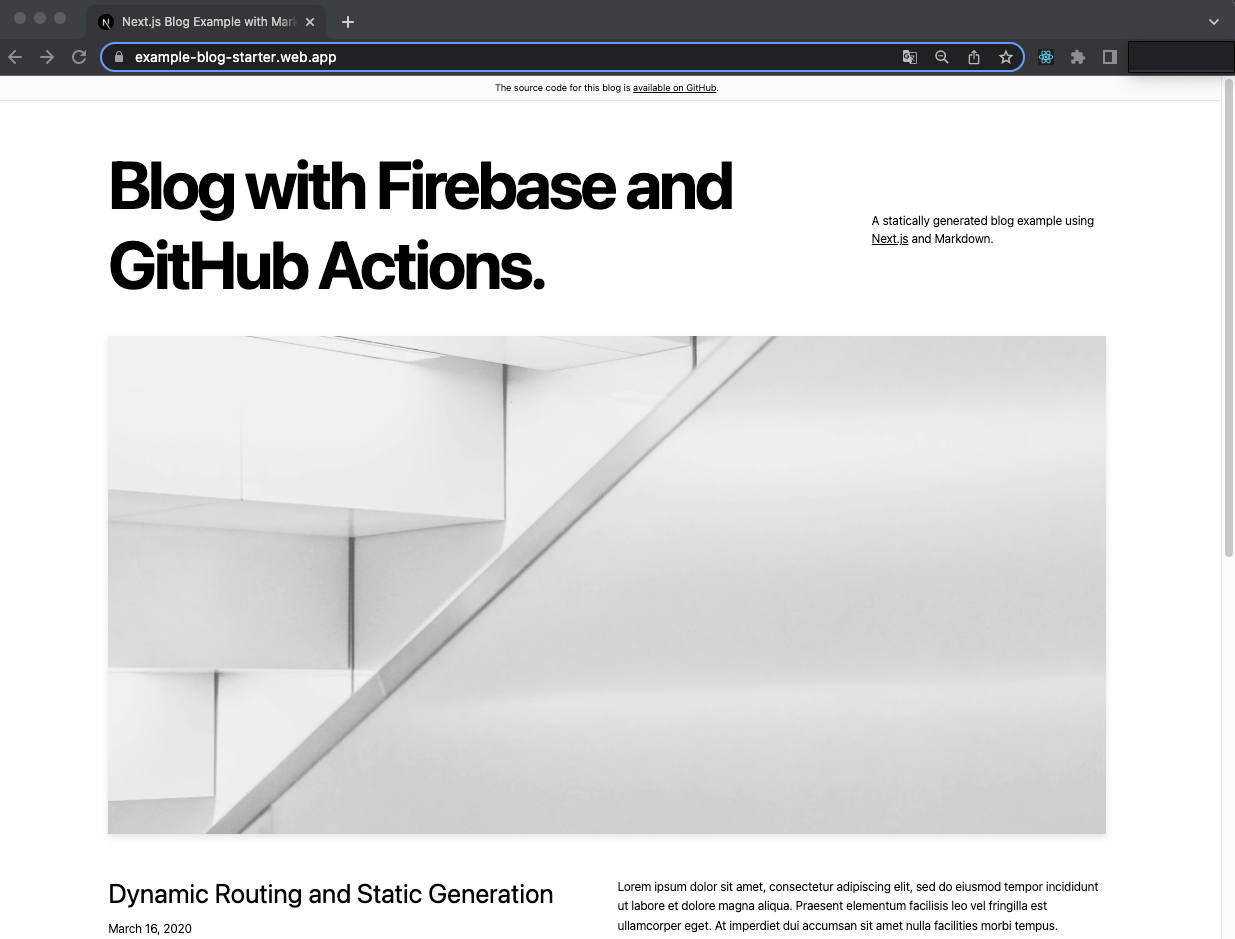
Hosting URL: https://project_name.web.appのURLでデプロイされたサイトにアクセスできます。
6. ここまでの作業をコミット
作業の中で色々とファイルが更新、追加されているので、ここまでの作業進捗をコミットします。
# 差分をステージングへ追加
% git add .

# ステージングの資材を確認
% git status

On branch main
Your branch is up to date with 'origin/main'.

Changes to be committed:
  (use "git restore --staged <file>..." to unstage)
        new file:   .firebase/hosting.b3V0.cache
        new file:   .firebaserc
        new file:   .github/workflows/firebase-hosting-merge.yml
        new file:   .github/workflows/firebase-hosting-pull-request.yml
        new file:   firebase.json
        modified:   package.json
        modified:   yarn.lock

# リモートへコミット
% git commit -m 'init deployment workflow with firebase'

# リモートへプッシュ
% git push
7. 最新資材の自動デプロイ確認
firebaseの初期設定を通してにmainブランチへのマージをトリガーに自動デプロイが走るGitHub Actions workflowが組まれているため、差分を作って自動デプロイの動作確認をしてみます。
7-1. 直接mainブランチへマージする場合
// TOPページのタイトルを適当に変更
<h1 className="text-5xl md:text-8xl font-bold tracking-tighter leading-tight md:pr-8">
-  Blog.
</h1>

<h1 className="text-5xl md:text-8xl font-bold tracking-tighter leading-tight md:pr-8">
+  Blog with Firebase and GitHub Actions.
</h1>
# 作業ブランチを作成
% git checkout -b feature-change-title

# 差分の追加〜リモートへブランチプッシュ
% git add .
% git commit -m '[feat] change title text'
% git push --set-upstream origin feature-change-title

# mainブランチをチェックアウト
% git checkout main

# mainブランチへfeature-change-titleブランチをマージ
% git merge feature-change-title

# 修正をマージしたmainブランチをリモートへプッシュ
% git push
するとGitHubがmainブランチの更新を検知して、GitHubActionsのworkflowが起動します。
以下画面で黄色になっているworkflowが実行中のもので、完了することで緑のチェック状態となります。

workflowが完了したら修正内容を含んだ最新のmainブランチがデプロイ済みとなるので、
画面へアクセスして確認できるようになります。

7-2. GitHubでPRを立てPreviewを見る場合
GitHub上で開発ブランチからmainブランチへのPRを作成すると
マージ前にPreview用URLが出力されるため、レビューの段階で画面確認ができとても便利です。

以上で自動ビルド&デプロイの確認完了となります。
雑記
個人的にはとりあえずやってみる派の人間なので、Firebase CLIが諸々の設定をやってくれてサクッと試せるのが手軽で良いですね。細かな設定は適宜必要になったタイミングで読み込んで対応していけば良いかなと。
今後はreact-testing-libraryやVRTを組み込んでテスト周りの自動化にも挑戦したいですね。
以上、拙い解説ですが読んで頂きありがとうございました!
誤字脱字、指摘などありましたらコメント頂けると幸いです。


