3
6

Delete article

Deleted articles cannot be recovered.

Draft of this article would be also deleted.

Are you sure you want to delete this article?

More than 3 years have passed since last update.

LINE Notifyのトークンを取得方法・備忘録

Last updated at Posted at 2020-12-07

LINE Notifyとは

APIにより連携することで、外部Webサービスやアプリケーションなどからの通知をLINEアカウントのメッセージを通じてユーザーに配信できるサービスです。

毎度取得手順を忘れるので備忘録として残します。
手順等に間違いがございましたら、ご教示よろしくお願いいたします🙇‍♀️

準備物

LINEアカウント

アクセストークン取得手順

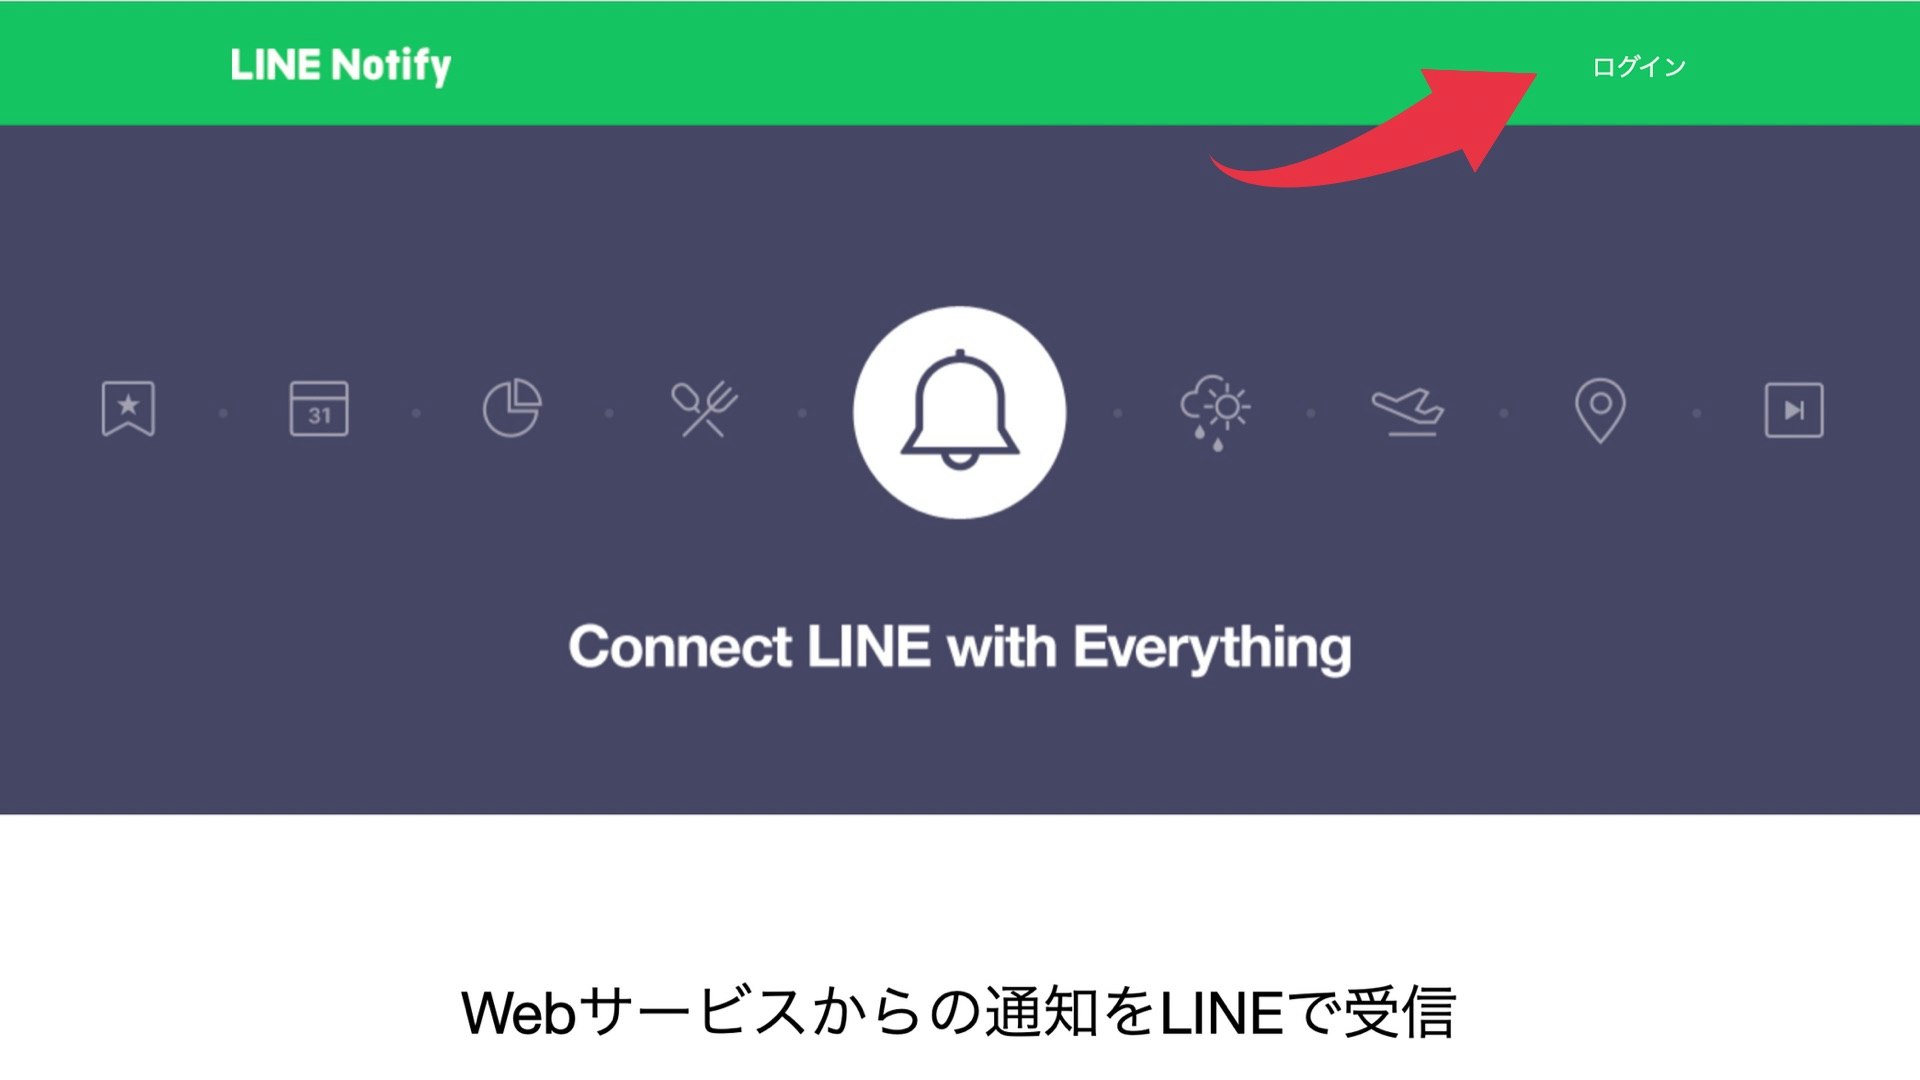
①下記にアクセス
https://notify-bot.line.me/ja/

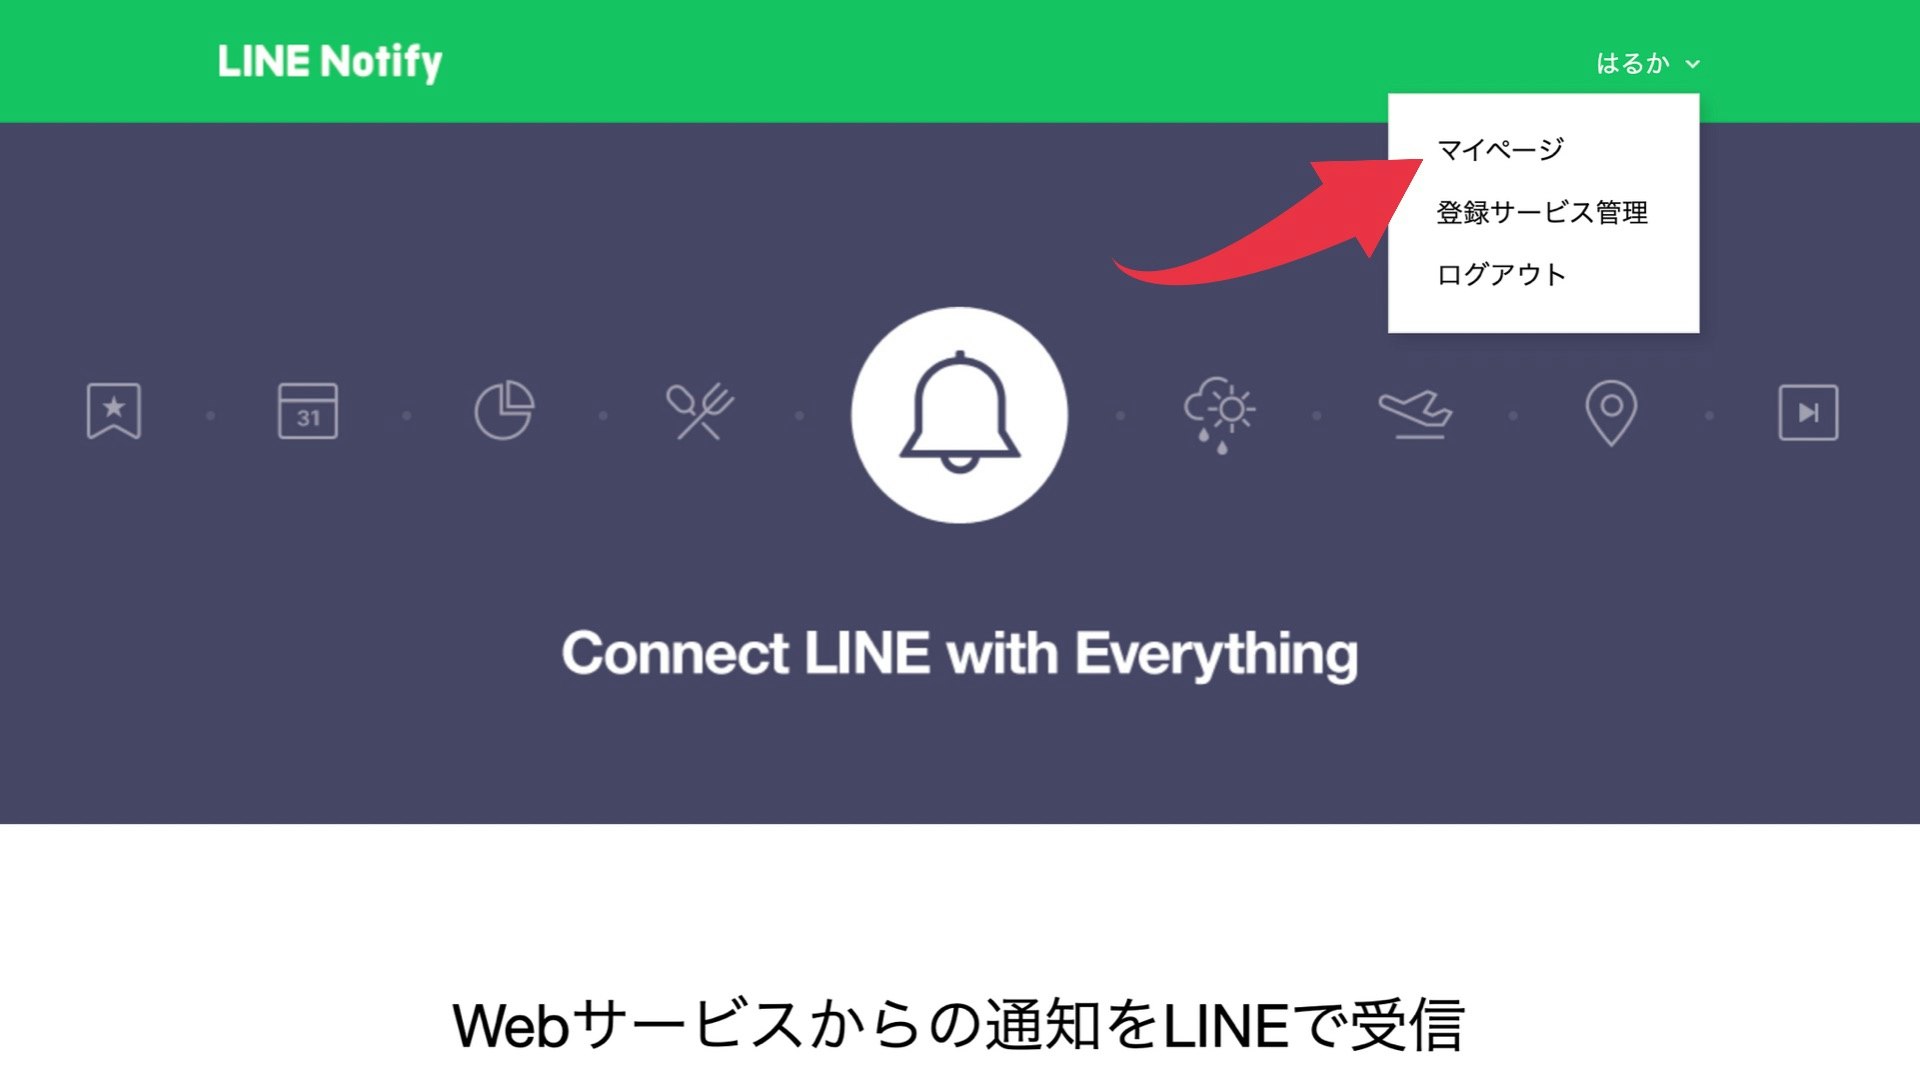
②ログイン→マイページ
IMG_4285.png

IMG_4286.png

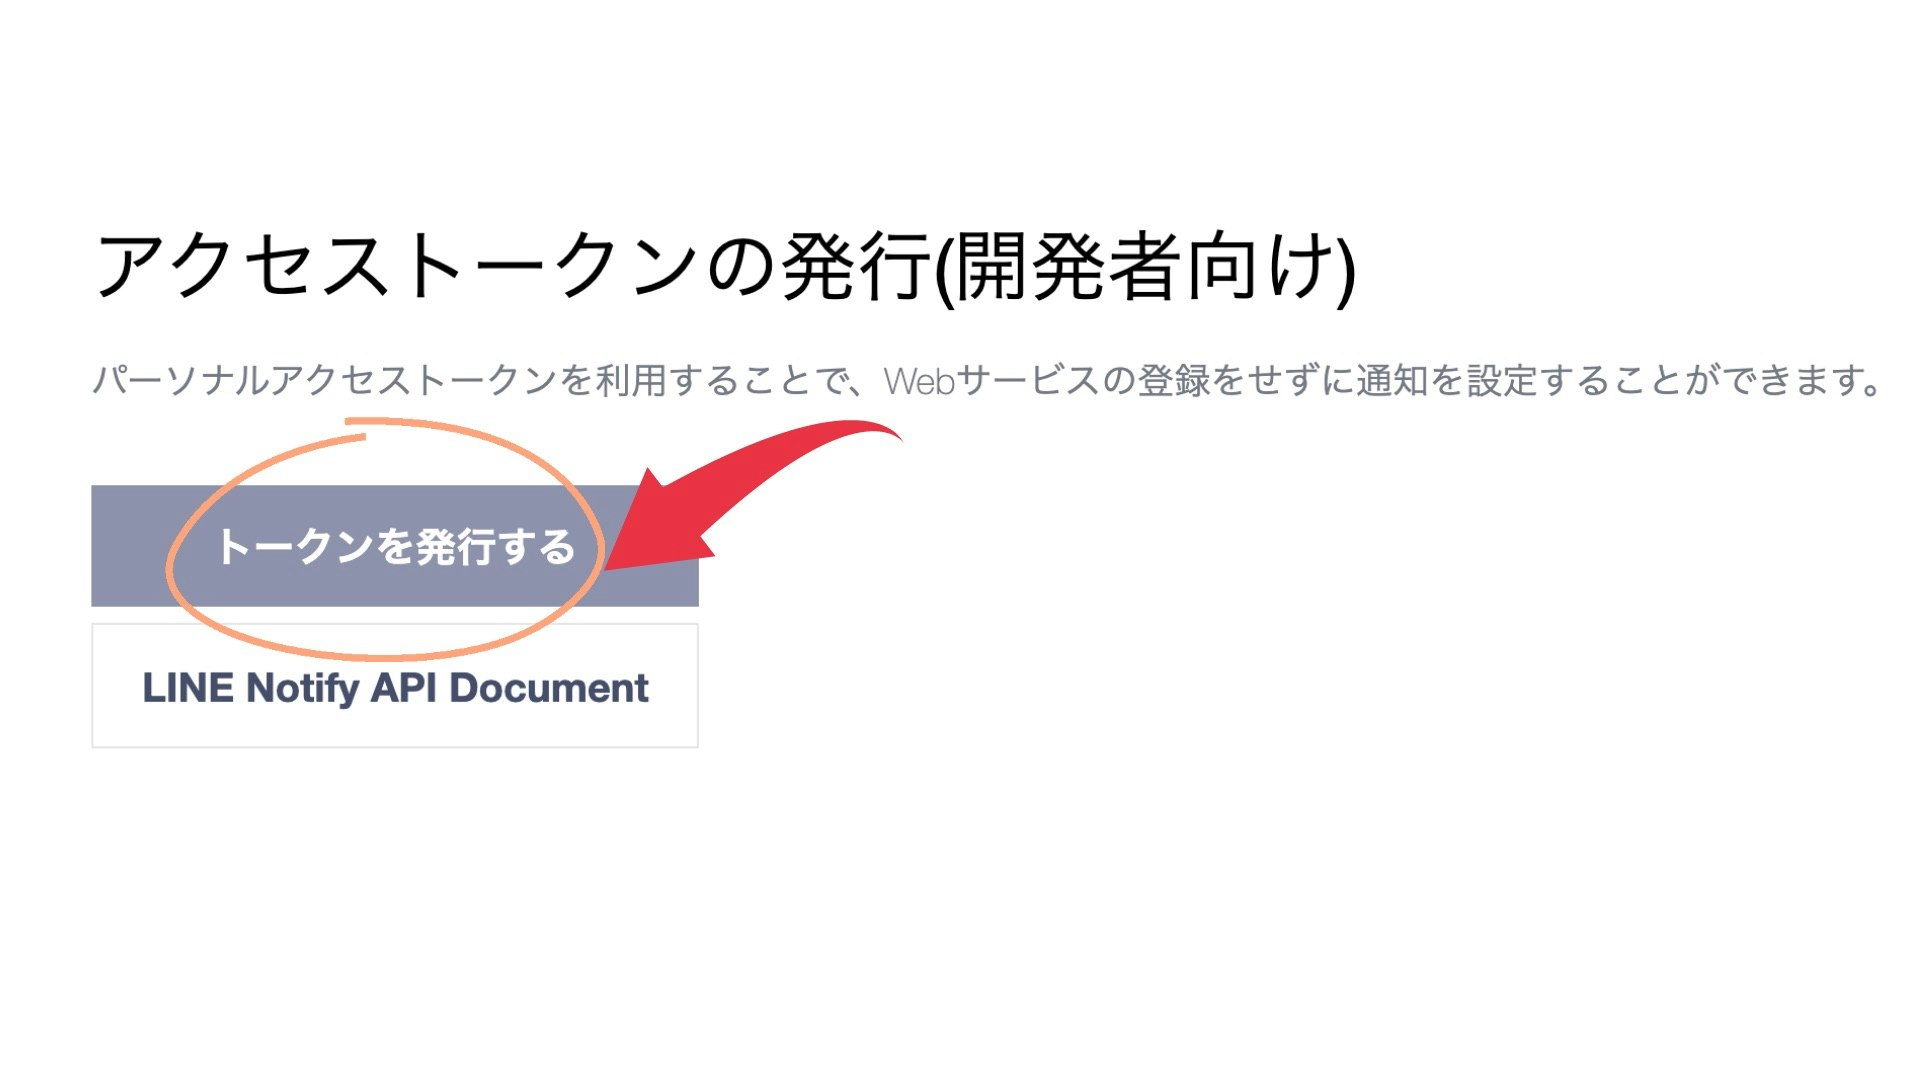
③トークンを発行を押下します。
IMG_4287.png

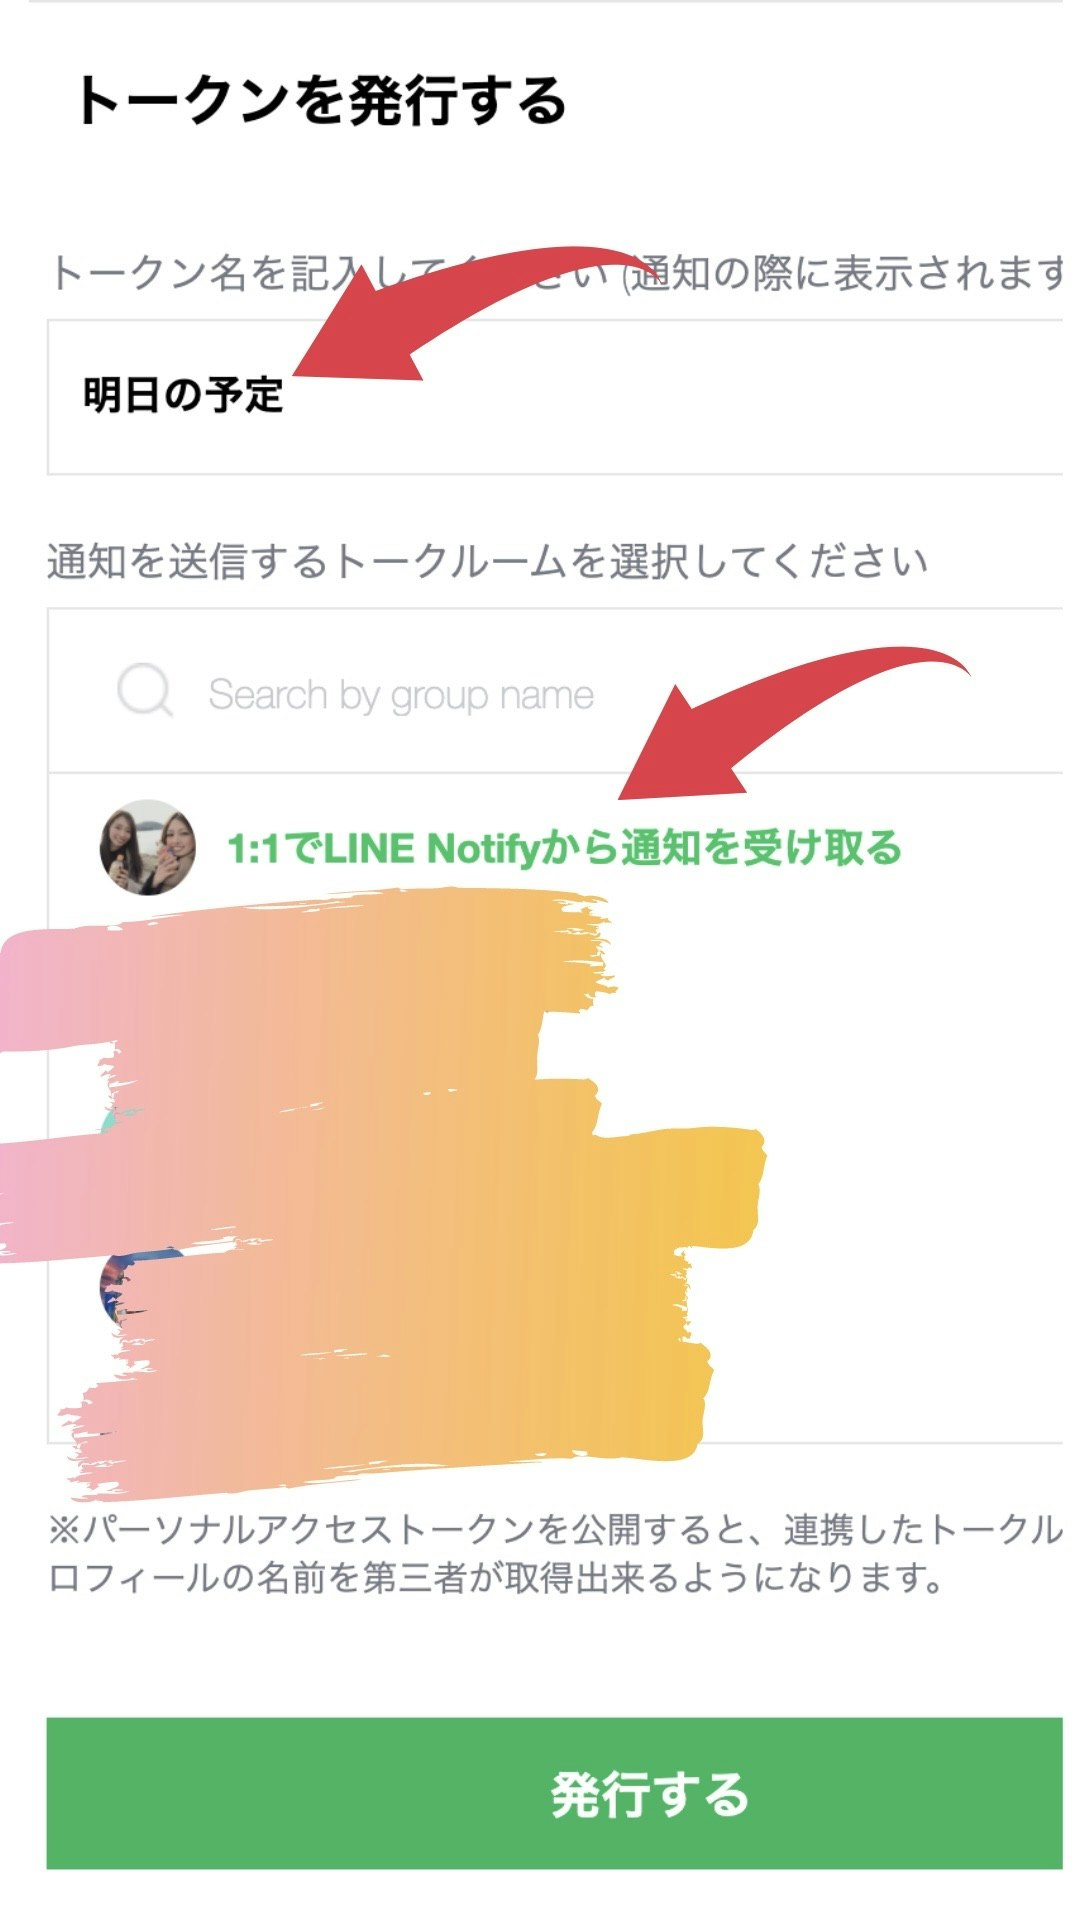
④トークンを発行する、にてトークン名と通知を送信するトークルームを選択、発行するを押下します。
 ex: トークン名→明日の予定 通知を送信するトークルームを選択
IMG_4289.png

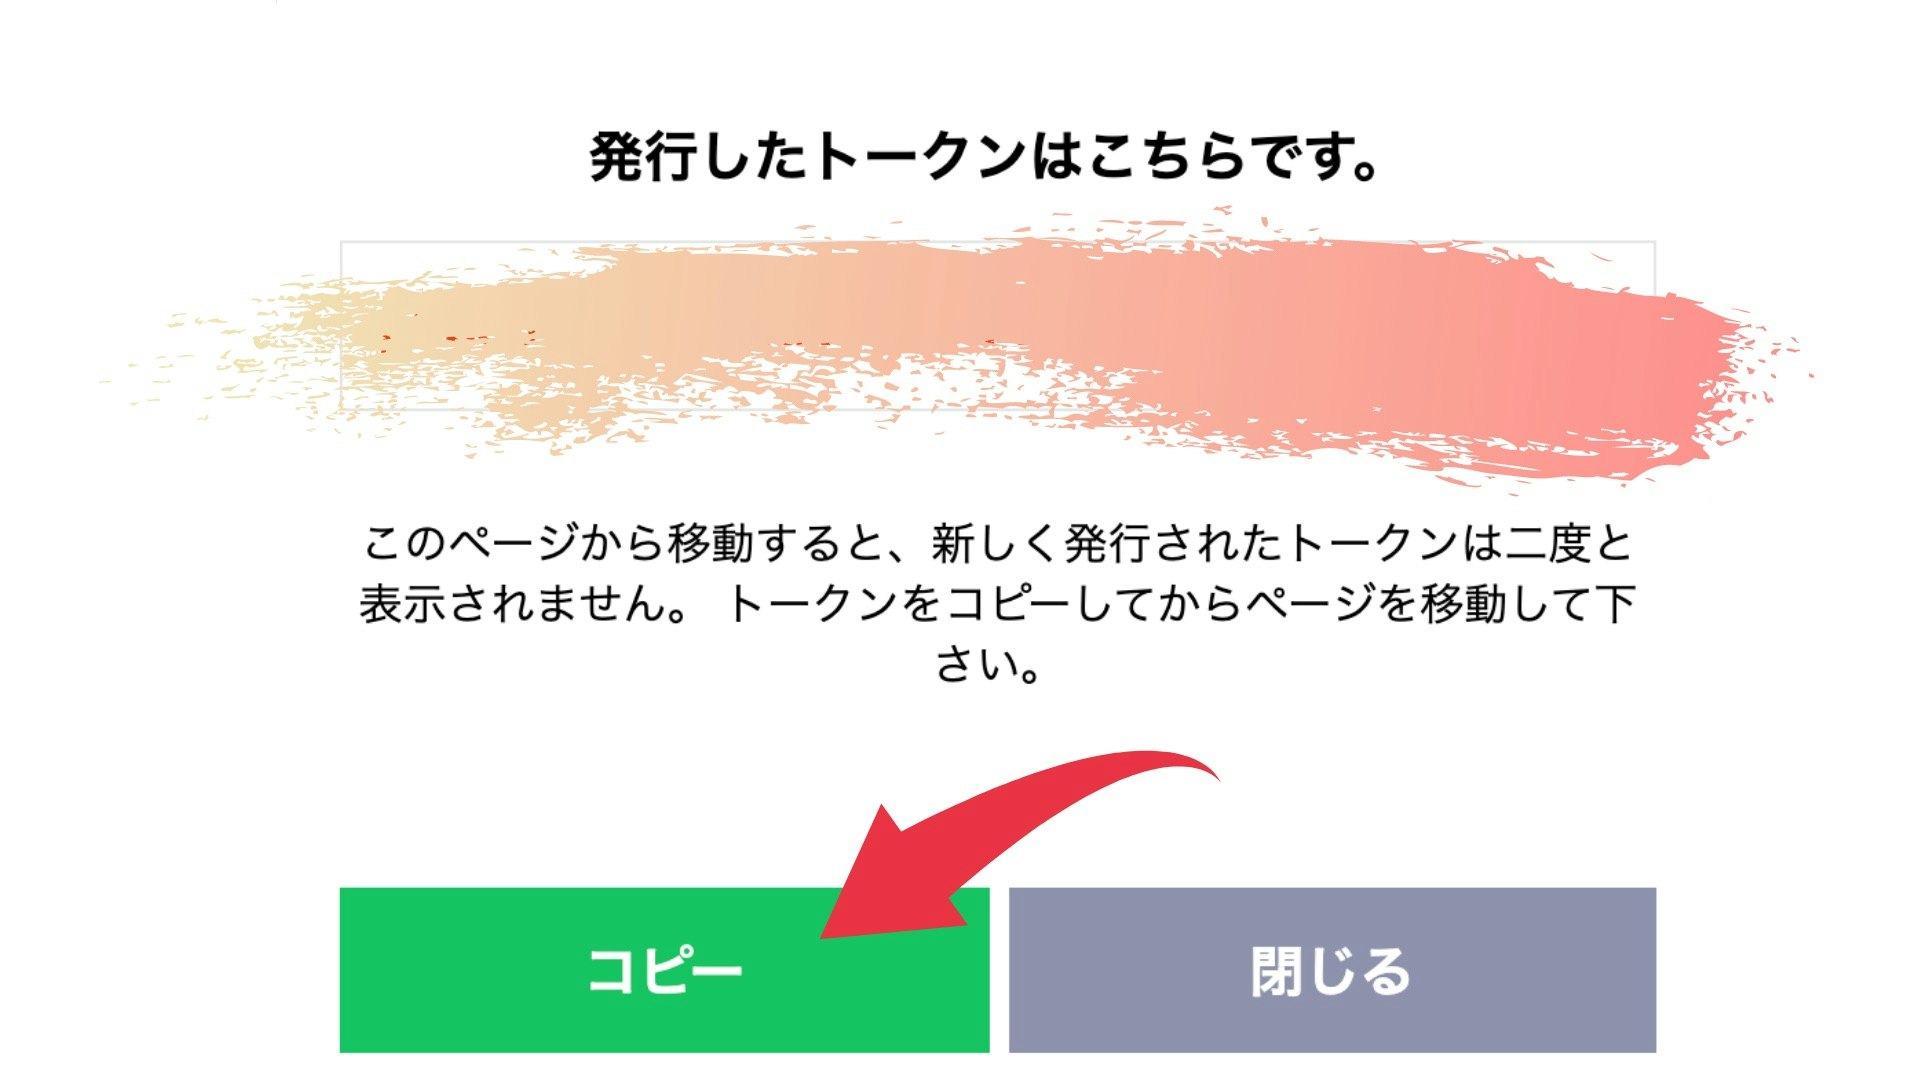
⑤トークンが発行されるため、必ずコピーをします。
IMG_4290.png

本当にトークンが取得されたかの確認します。

①アクセストークンの発行(開発者向け)の下にあるLINE Nortify API Documentにて以下、発行されたか確認ができるcurlコマンドがあります。ちゃんと発行がされていれば自分のLINEに通知が届くので、ターミナルでコマンドを入力。
スクリーンショット 2020-12-07 15.04.51.png

curl -X POST -H "Authorization: Bearer 発行したアクセストークンをペースト" -F "message=ABC" https://notify-api.line.me/api/notify

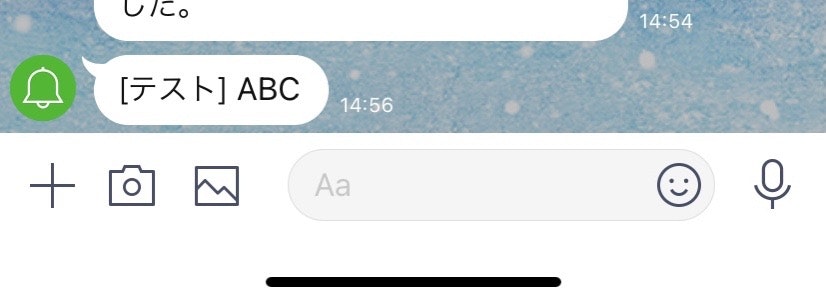
② LINEにてアクセストークンが発行されたことを確認できます。(トークン名:テスト)
確認できたらトークンの取得成功です。
IMG_4313.png

3
6
0

Register as a new user and use Qiita more conveniently

  1. You get articles that match your needs
  2. You can efficiently read back useful information
  3. You can use dark theme
What you can do with signing up
3
6

Delete article

Deleted articles cannot be recovered.

Draft of this article would be also deleted.

Are you sure you want to delete this article?