React Advent Calendar 8日目の記事です。
はじめに
Reactを使用する場合はそれ単体で使用するのは珍しく、WebpackやBrowserifyといったビルドツールを使用すると思います。今回はWebpackに依存したReactコンポーネントのテスト方法について書きます。
本記事で使用したコードはこちらから参照可能です。
ただ、本記事はbabelにどっぷりですので、その点が無理な方は回れ右です。
前提条件
本記事ではテストでJestを使用する前提で書いております。
主な使用ライブラリ
Webpack:1.13.3
React:15.4.1
Jest:17.0.3
テスト対象コード
import React from 'react'
import style from './style.css'
import Config from 'Config'

export default () => {
  return(
    <ul className={style.styletest}>
      <li>first element</li>
      <li>second element</li>
      <li>{Config.thirdElementName}</li>
    </ul>
  )
}
.styletest li{
  margin-right: 10px;
}
var webpack = require('webpack')
var postcssImport = require('postcss-import')
var autoprefixer = require('autoprefixer')
var precss = require('precss')

module.exports = {
  entry: './app/index',
  output: {
    filename: 'bundle.js'
  },
  plugins: [
    new webpack.HotModuleReplacementPlugin()
  ],
  module: {
    loaders: [
      {
        test: /\.js$/,
        exclude: /node_modules/,
        loaders: ['babel-loader']
      },
      {
        test: /\.css$/,
        include: /app/,
        loaders: [
          'style-loader',
          'css-loader?modules',
          'postcss-loader'
        ]
      }
    ]
  },
  postcss(webpack) {
    return [
      postcssImport({
          addDependencyTo: webpack
      }),
      precss,
      autoprefixer
    ]
  },
  resolve: {
    extensions: ['', '.js', '.css']
  },
  devServer: {
    hot: true,
    port: 4000,
    inline: true,
    historyApiFallback: true
  },
  externals: {
    'Config': JSON.stringify({
      thirdElementName: 'third'
    })
  }
}
さて今回テストするはcomponents/sample/index.jsです。この中にはWebpackに依存したコードが2パターン存在します。
まず、1つ目ですが、import style from './style.css'です。これはWebpackのloaderに依存しています。
2つ目ですが、import Config from 'Config'とConfig.thirdElementName部分です。これはWebpackのexternalsに依存しています。
このようにWebpackに依存していると以下のJestのテストコードを動かすと
import sample from '../sample'

describe('toMatchSnapshot example', () => {
  test('render sample', () => {
    expect(sample()).toMatchSnapshot()
  })
})
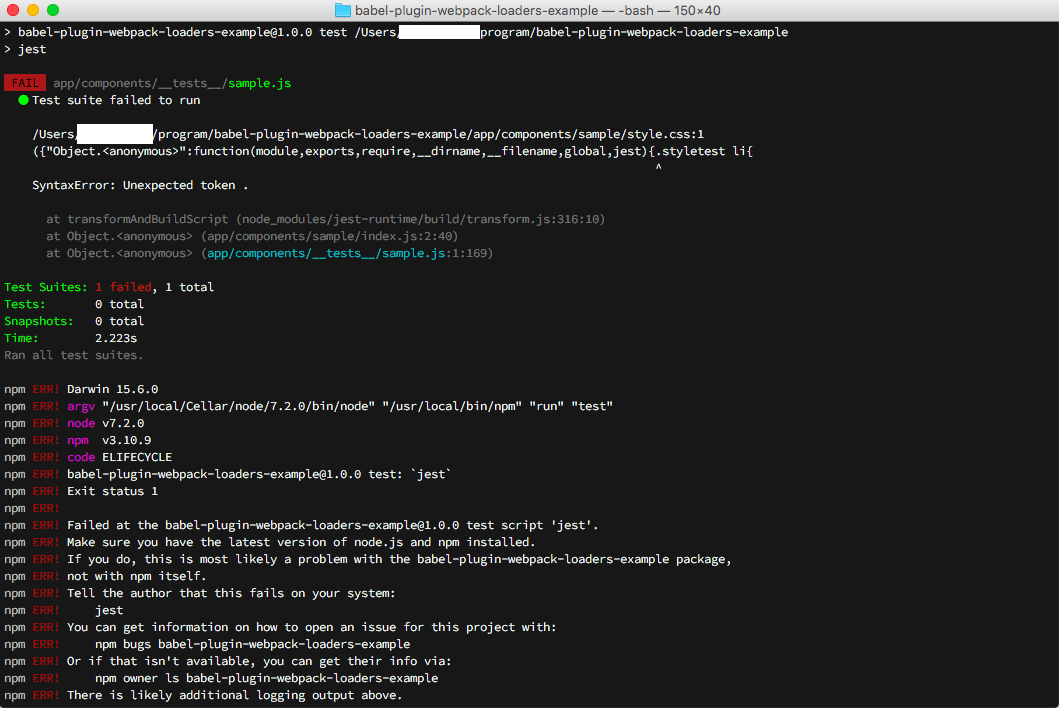
SyntaxError: Unexpected tokenという風にエラーが表示されて動作しません。
そこで今回はこの2つのWebpack依存のコードを解消し、テストする方法例を書きます。
loader依存を解消
こいつは結構簡単でJestのWebpackページに色々とヒントが書いてあります。
方法は大きく分け2つあります。1つ目は「loader部分をモックしてしまう方法」、2つ目は「loader部分を事前にBabel pluginで変換してしまう方法」があります。
せっかくなので両方紹介したいと思います。
loaderをモックする方法
※※テストするだけであればこちらの方法を強く推奨します※※
モックにはidentity-obj-proxyというpackageを使用します。
identity-obj-proxyのインストール
いつもどおり下記のコマンドでインストールします。
$ npm install -D identity-obj-proxy
環境の設定
Jestで使用する場合は以下のようにpackage.jsonに設定を追記し、identity-obj-proxyの使用設定します。
{
...
  "jest": {
    "moduleNameMapper": {
      "\\.(css|less)$": "identity-obj-proxy"
    }
  }
}
見ればわかると思いますが、.cssもしくは.lessのimport部分をモックしてくれるようになります。たったこれだけでOKです。
loaderを事前に変換する方法
loader部分の変換にはbabel-plugin-webpack-loadersというbabelのプラグインを使用します。
babel-plugin-webpack-loadersのインストール
まずはbabel-plugin-webpack-loaders(babel-cliも)を入れます。
$ npm install -D babel-cli babel-plugin-webpack-loaders
環境の設定
次に設定ファイルを編集していきます。まずは.babelrcを以下のように編集します。
{
  "presets": ["es2015", "react"],
+  "env": {
+    "test": {
+      "plugins": [
+        [
+          "babel-plugin-webpack-loaders",
+          {
+            "config": "config/webpack.test.config.js",
+            "verbose": false
+          }
+        ]
+      ]
+    }
+  }
}
追記したのはenv以降です。環境変数のNODE_ENVがtestの場合はインストールしたプラグインを使用する設定にしています。
次に記載したconfig/webpack.test.config.jsを追加します。
module.exports = {
  output: {
    libraryTarget: 'commonjs2',
  },
  module: {
    loaders: [
      {
        test: /\.js$/,
        exclude: /node_modules/,
        loaders: ['babel-loader']
      },
      {
        test: /\.css$/,
        include: /app/,
        loaders: [
          'style-loader',
          'css-loader?modules',
          'postcss-loader'
        ]
      }
    ]
  },
  resolve: {
    extensions: ['', '.js', '.css']
  },
}
必要なのはlibraryTarget: 'commonjs2', とloaderの記述です。これでloader部分を変換してくれるようになります。
次にpackage.jsonのテスト実行コマンド部分を以下のように書き換えます。
  "scripts": {
    "test": "BABEL_DISABLE_CACHE=1 NODE_ENV=test jest"
  },
BABEL_DISABLE_CACHEとNODE_ENVの環境変数を設定しておきます。
解消の確認
どちらの方法を使用してもいいですが、テスト結果が以下のように変わるはずです。
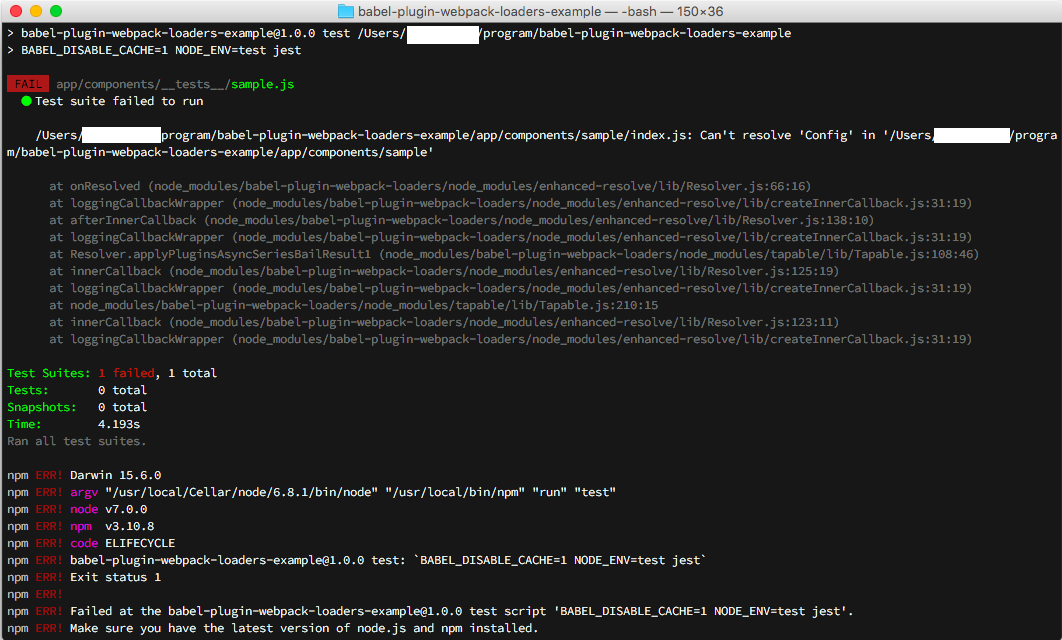
エラーの内容がexternals依存の「Configなんてものが読めない」ってエラーに変わりました。
externals依存を解消
次にexternalsの解消です。
これはそもそもWebpackから剥がしてやります。
じゃあENVごとの設定はどうするのかというとbabel-plugin-transform-defineを使って剥がします。
babel-plugin-transform-defineのインストール
お決まりのnpm installです
$ npm install -D babel-plugin-transform-define
環境の設定
まずはwebpack.dev.config.jsのexternals部分をapp.dev.config.jsというのを作って切り出します。
"use strict"

module.exports = {
  'Config': {
    thirdElementName: 'third'
  }
}
次に.babelrcにbabel-plugin-transform-defineの設定を書きます。
{
  "presets": ["es2015", "react"],
  "env": {
+    "development": {
+      "plugins": [
+        ["transform-define", "config/app.dev.config.js"]
+      ]
+    },
    "test": {
      "plugins": [
        [
          "babel-plugin-webpack-loaders",
          {
            "config": "config/webpack.test.config.js",
            "verbose": false
          }
        ],
+        ["transform-define", "config/app.dev.config.js"]
      ]
    }
  }
}
NODE_ENVがdevelopmentやtestの場合に読み込むファイルを切り替えることができます。(今回は手を抜いて同じものを読み込んでいます。
最後にcomponents/sample/index.jsの依存部分を削除しておきます。
import React from 'react'
import style from './style.css'
//import Config from 'Config' deleted

export default () => {
  return(
    <ul className={style.styletest}>
      <li>first element</li>
      <li>second element</li>
      <li>{Config.thirdElementName}</li>
    </ul>
  )
}
解消の確認
これでテストを動かすと
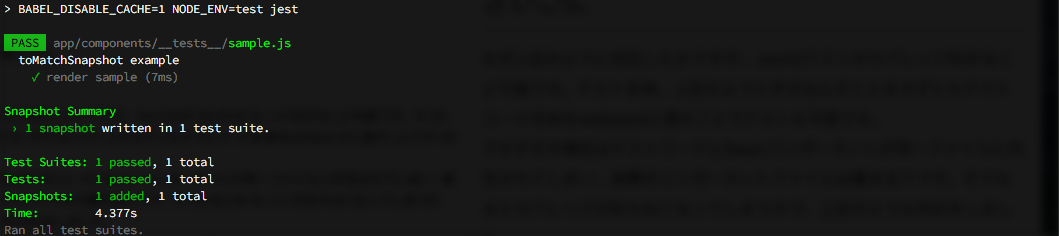
テストが正常に実行でき、完了できました。externals依存の解消は若干例が悪いですが、実コードで使用するとすれば、APIのリクエスト先であるendpointを環境ごとに変える場合とかに設定したりするのではないでしょうか。
さいごに
なぜ上記のように対応したかですが、テストを動作させるのにわざわざWebpackでビルドするのもどうなんだろうと思い、上記のように対応した次第です。
もし同じようなことで悩んでいる方の助けになれば幸いです。
明日のReact Advent Calendar 2016 9日目は @noradaiko さんによる 「remark + ReactでMarkdownをレンダリングする」 です。