EC-CUBE4でのeコマース設定、GTMでの設定方法があまり見当たらなかったのでメモ
ブロック管理、レイアウト管理を利用した設定方法です。
タグマネージャのタグを設置
タグマネージャ用のタグを設置します。ブロックを作成し、レイアウトに配置していきます。
ブロックを作成する
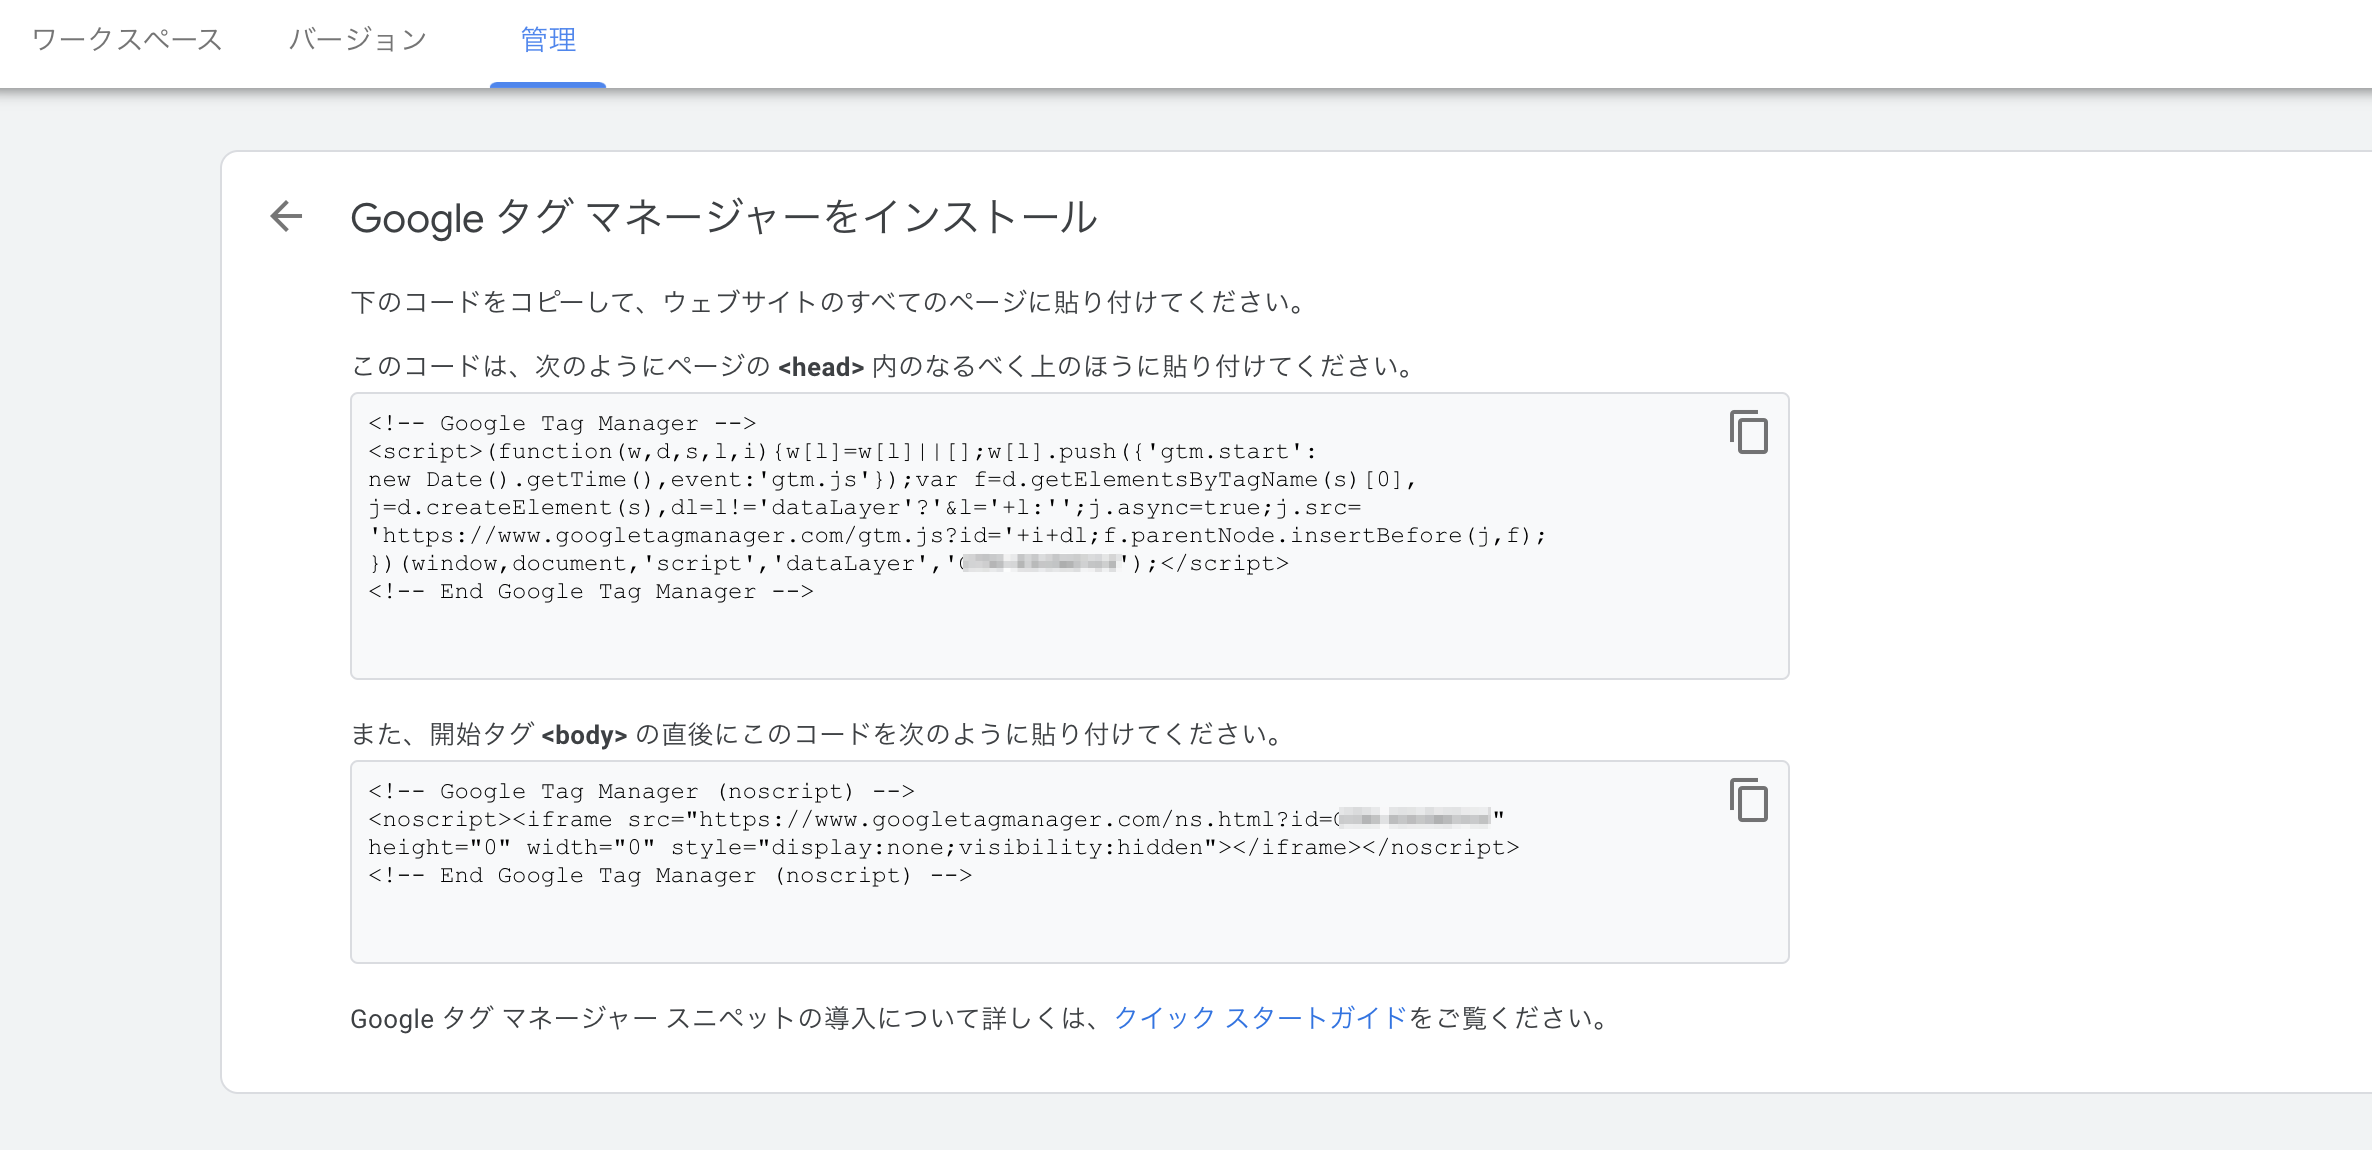
GTMのタグは、Googleタグマネージャーの管理画面から、管理→Google タグ マネージャーをインストールで確認できます。
head内に記述するものと、body内に記述するものの2つがあります。
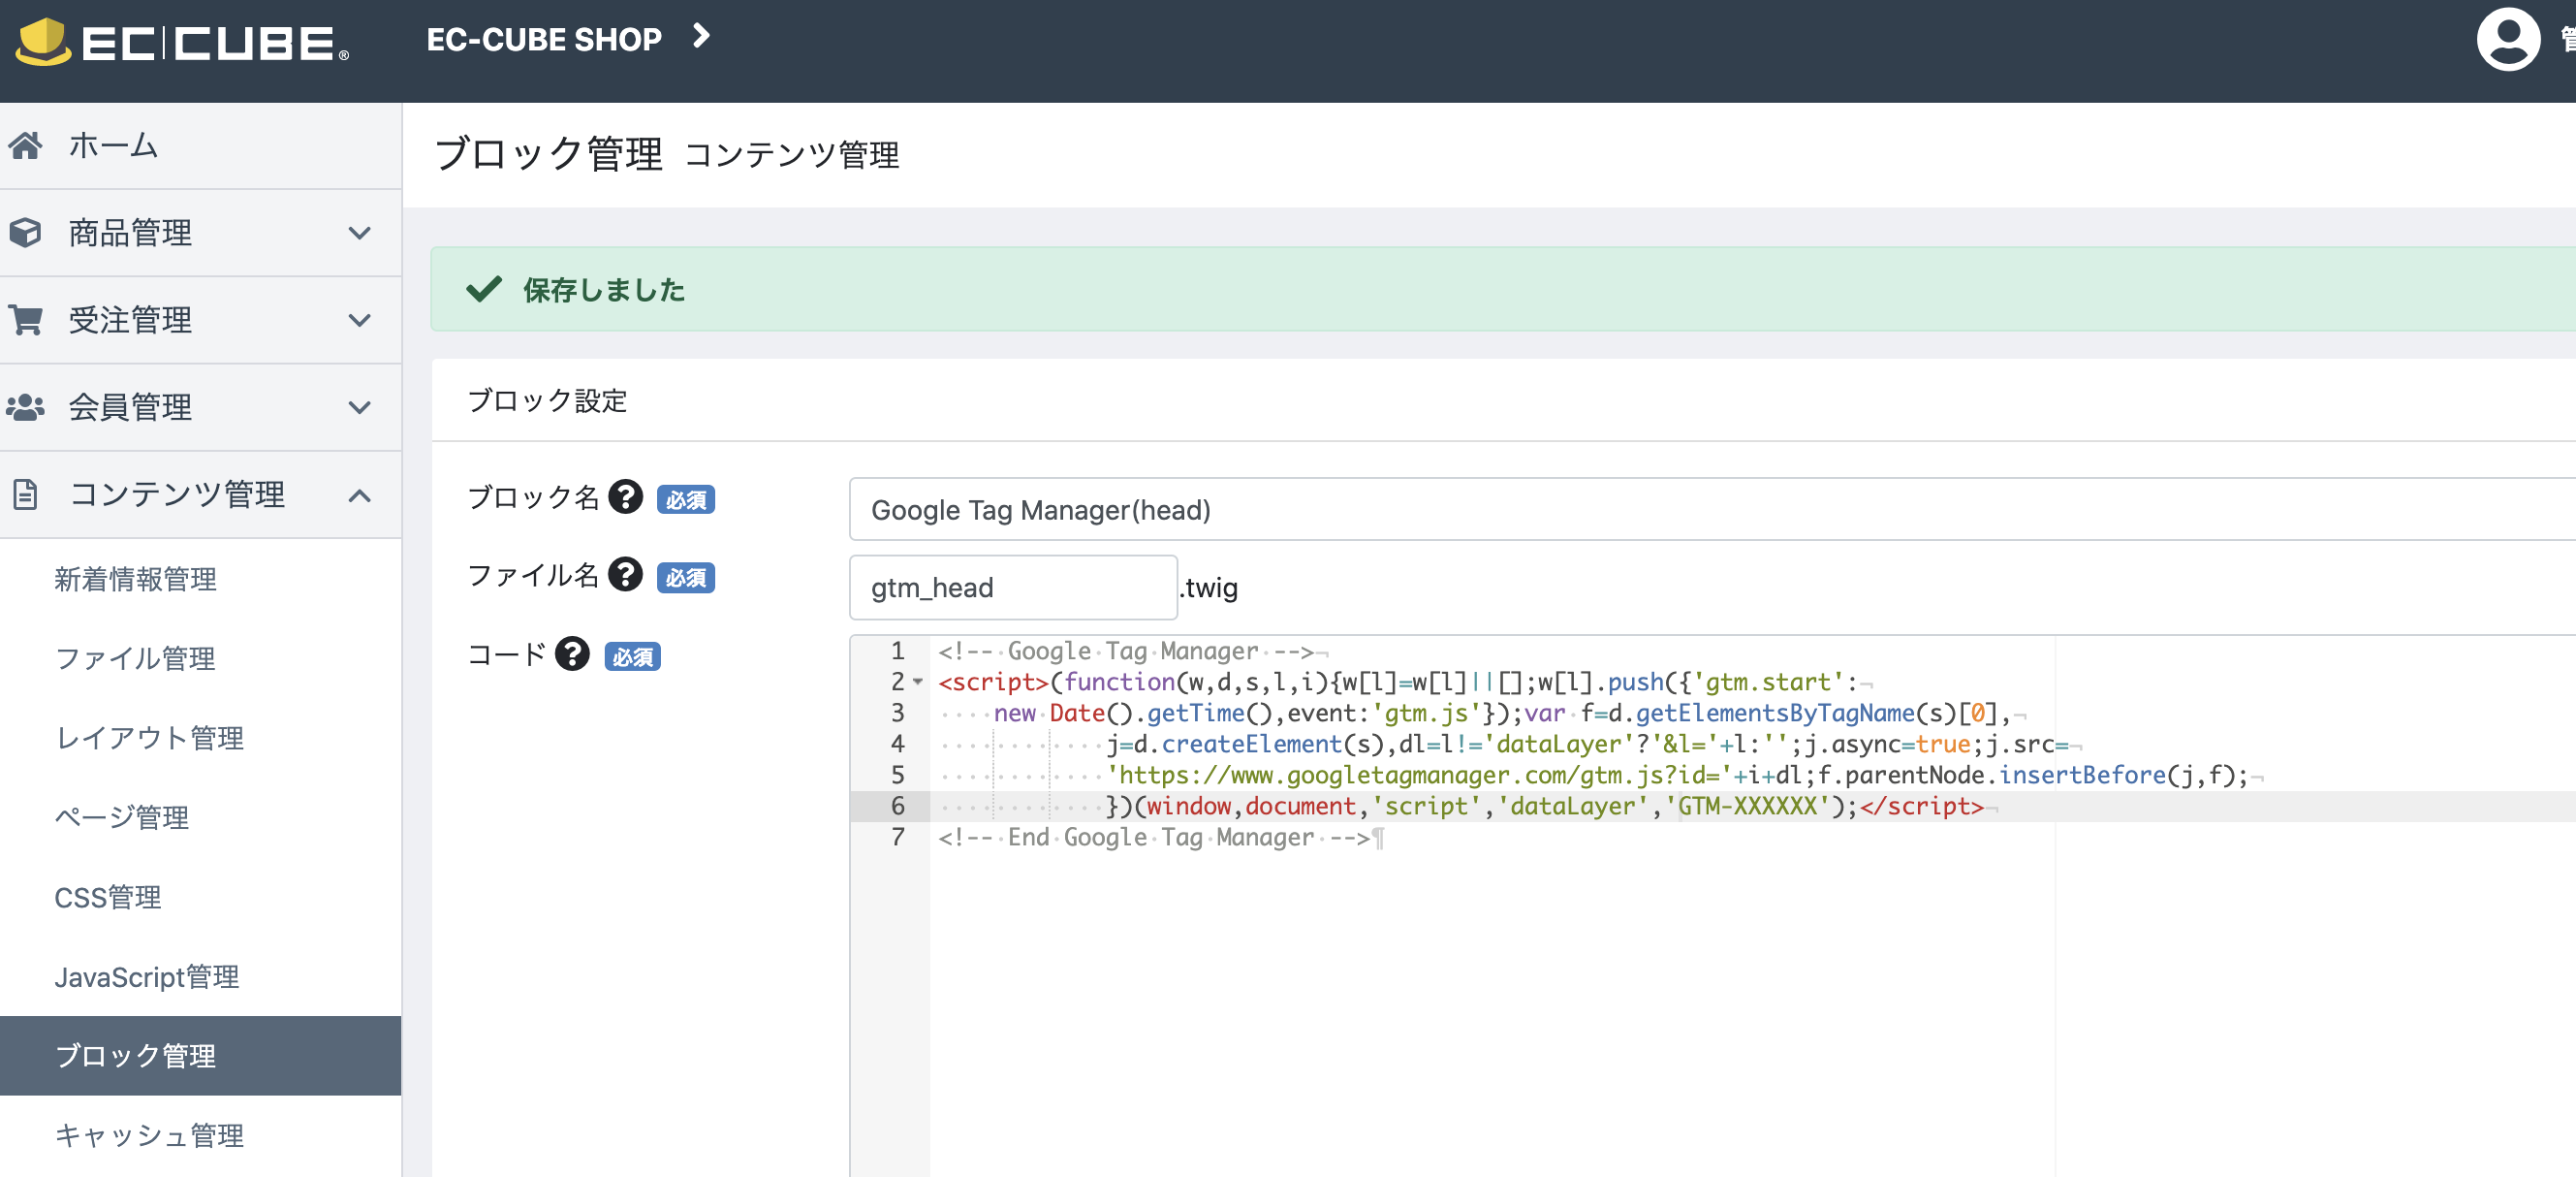
これをコンテンツ管理→ブロック管理で、それぞれブロックを作成します。
head内に設置するブロック
body内に設置するブロック
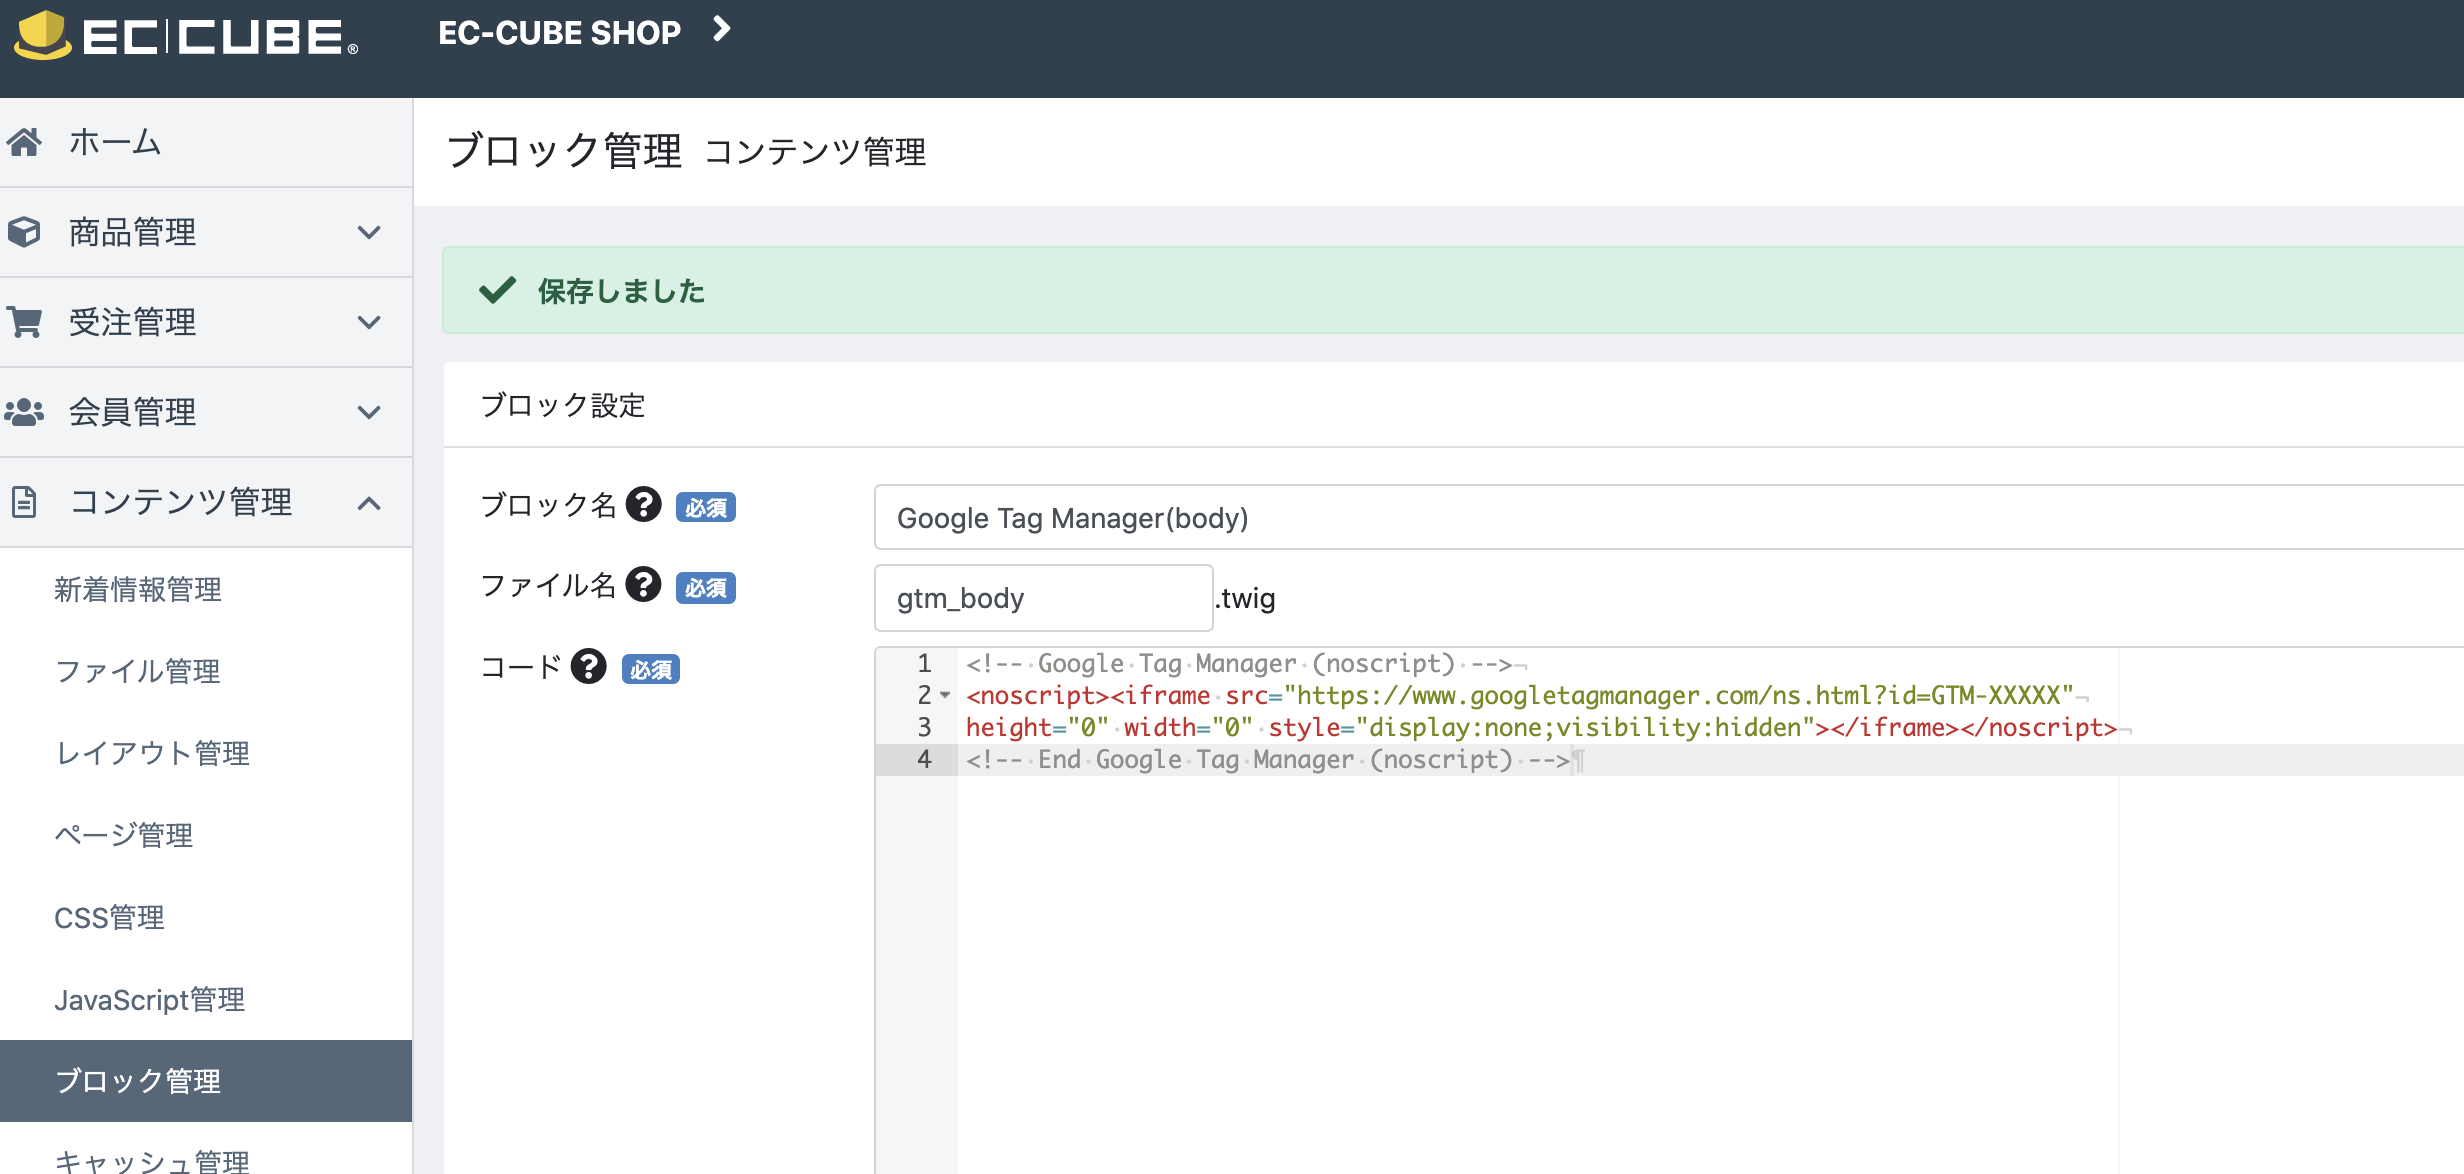
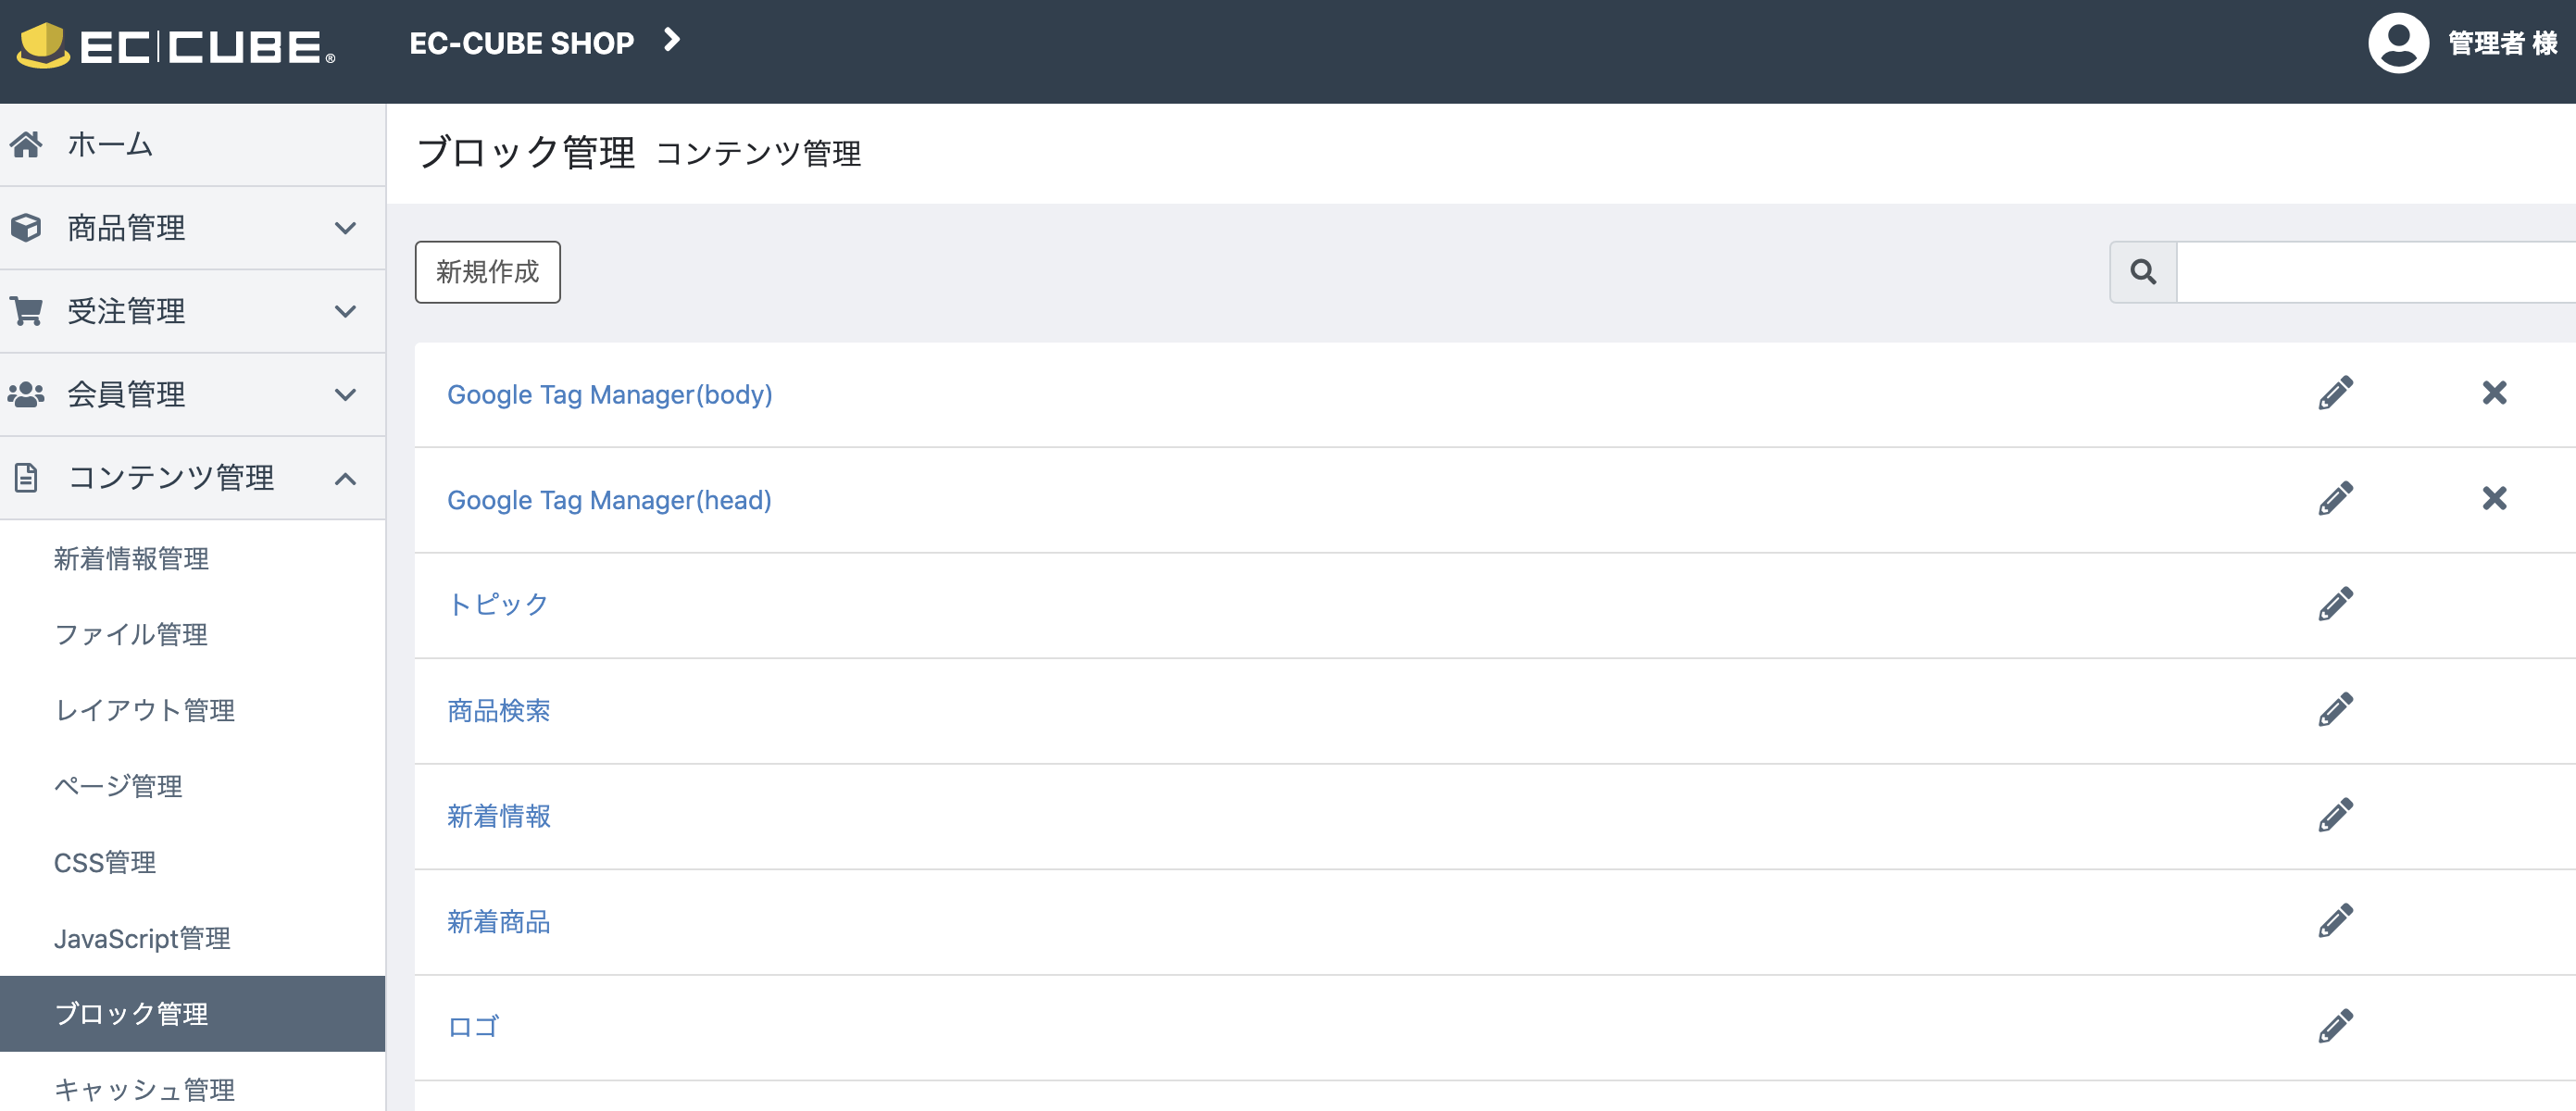
以下のように、Google Tag Manager(head)とGoogle Tag Manager(body)の2つを作成しました。
レイアウトに配置する
次に、作成したブロックをレイアウトに配置します。
コンテンツ管理→レイアウト管理から、作成したブロックを配置します。
<head></head>タグ内に、Google Tag Manager(head)を、<body>タグ直後に、Google Tag Manager(body)を配置します。
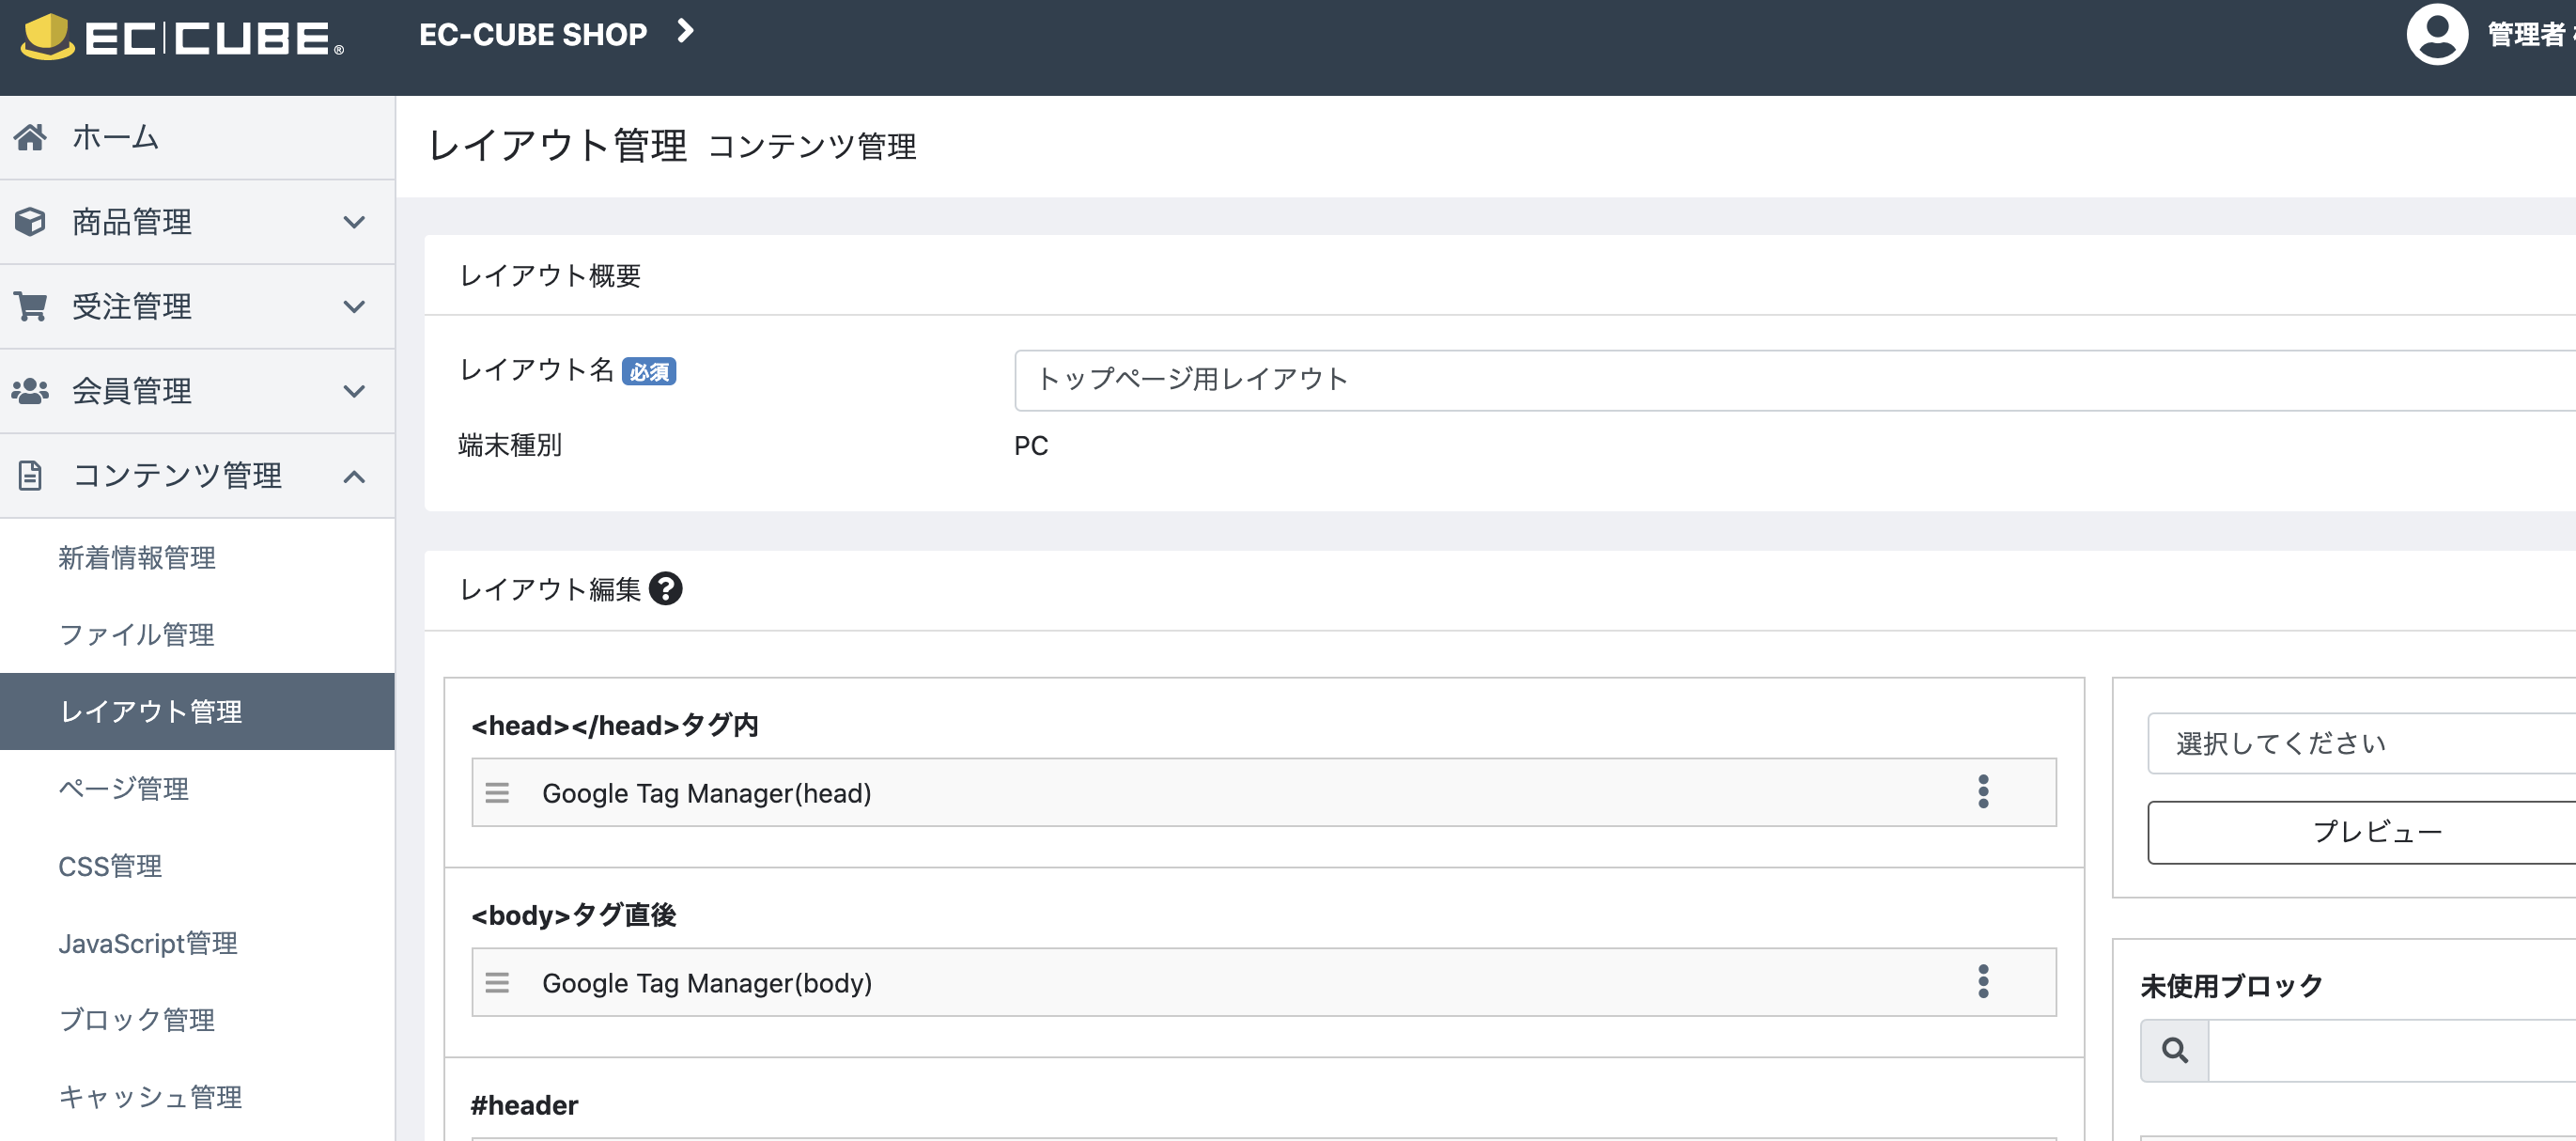
上記は「トップページ用レイアウト」の設定例ですが、「下層ページ用レイアウト」にも同様に設定します。
コンバージョンタグを設置
購入完了ページでコンバージョンを計測できるよう、コンバージョンタグをブロックで作成し、レイアウトに配置します。
ブロックを作成する
コンテンツ管理→ブロック管理から新規ブロックを作成します。
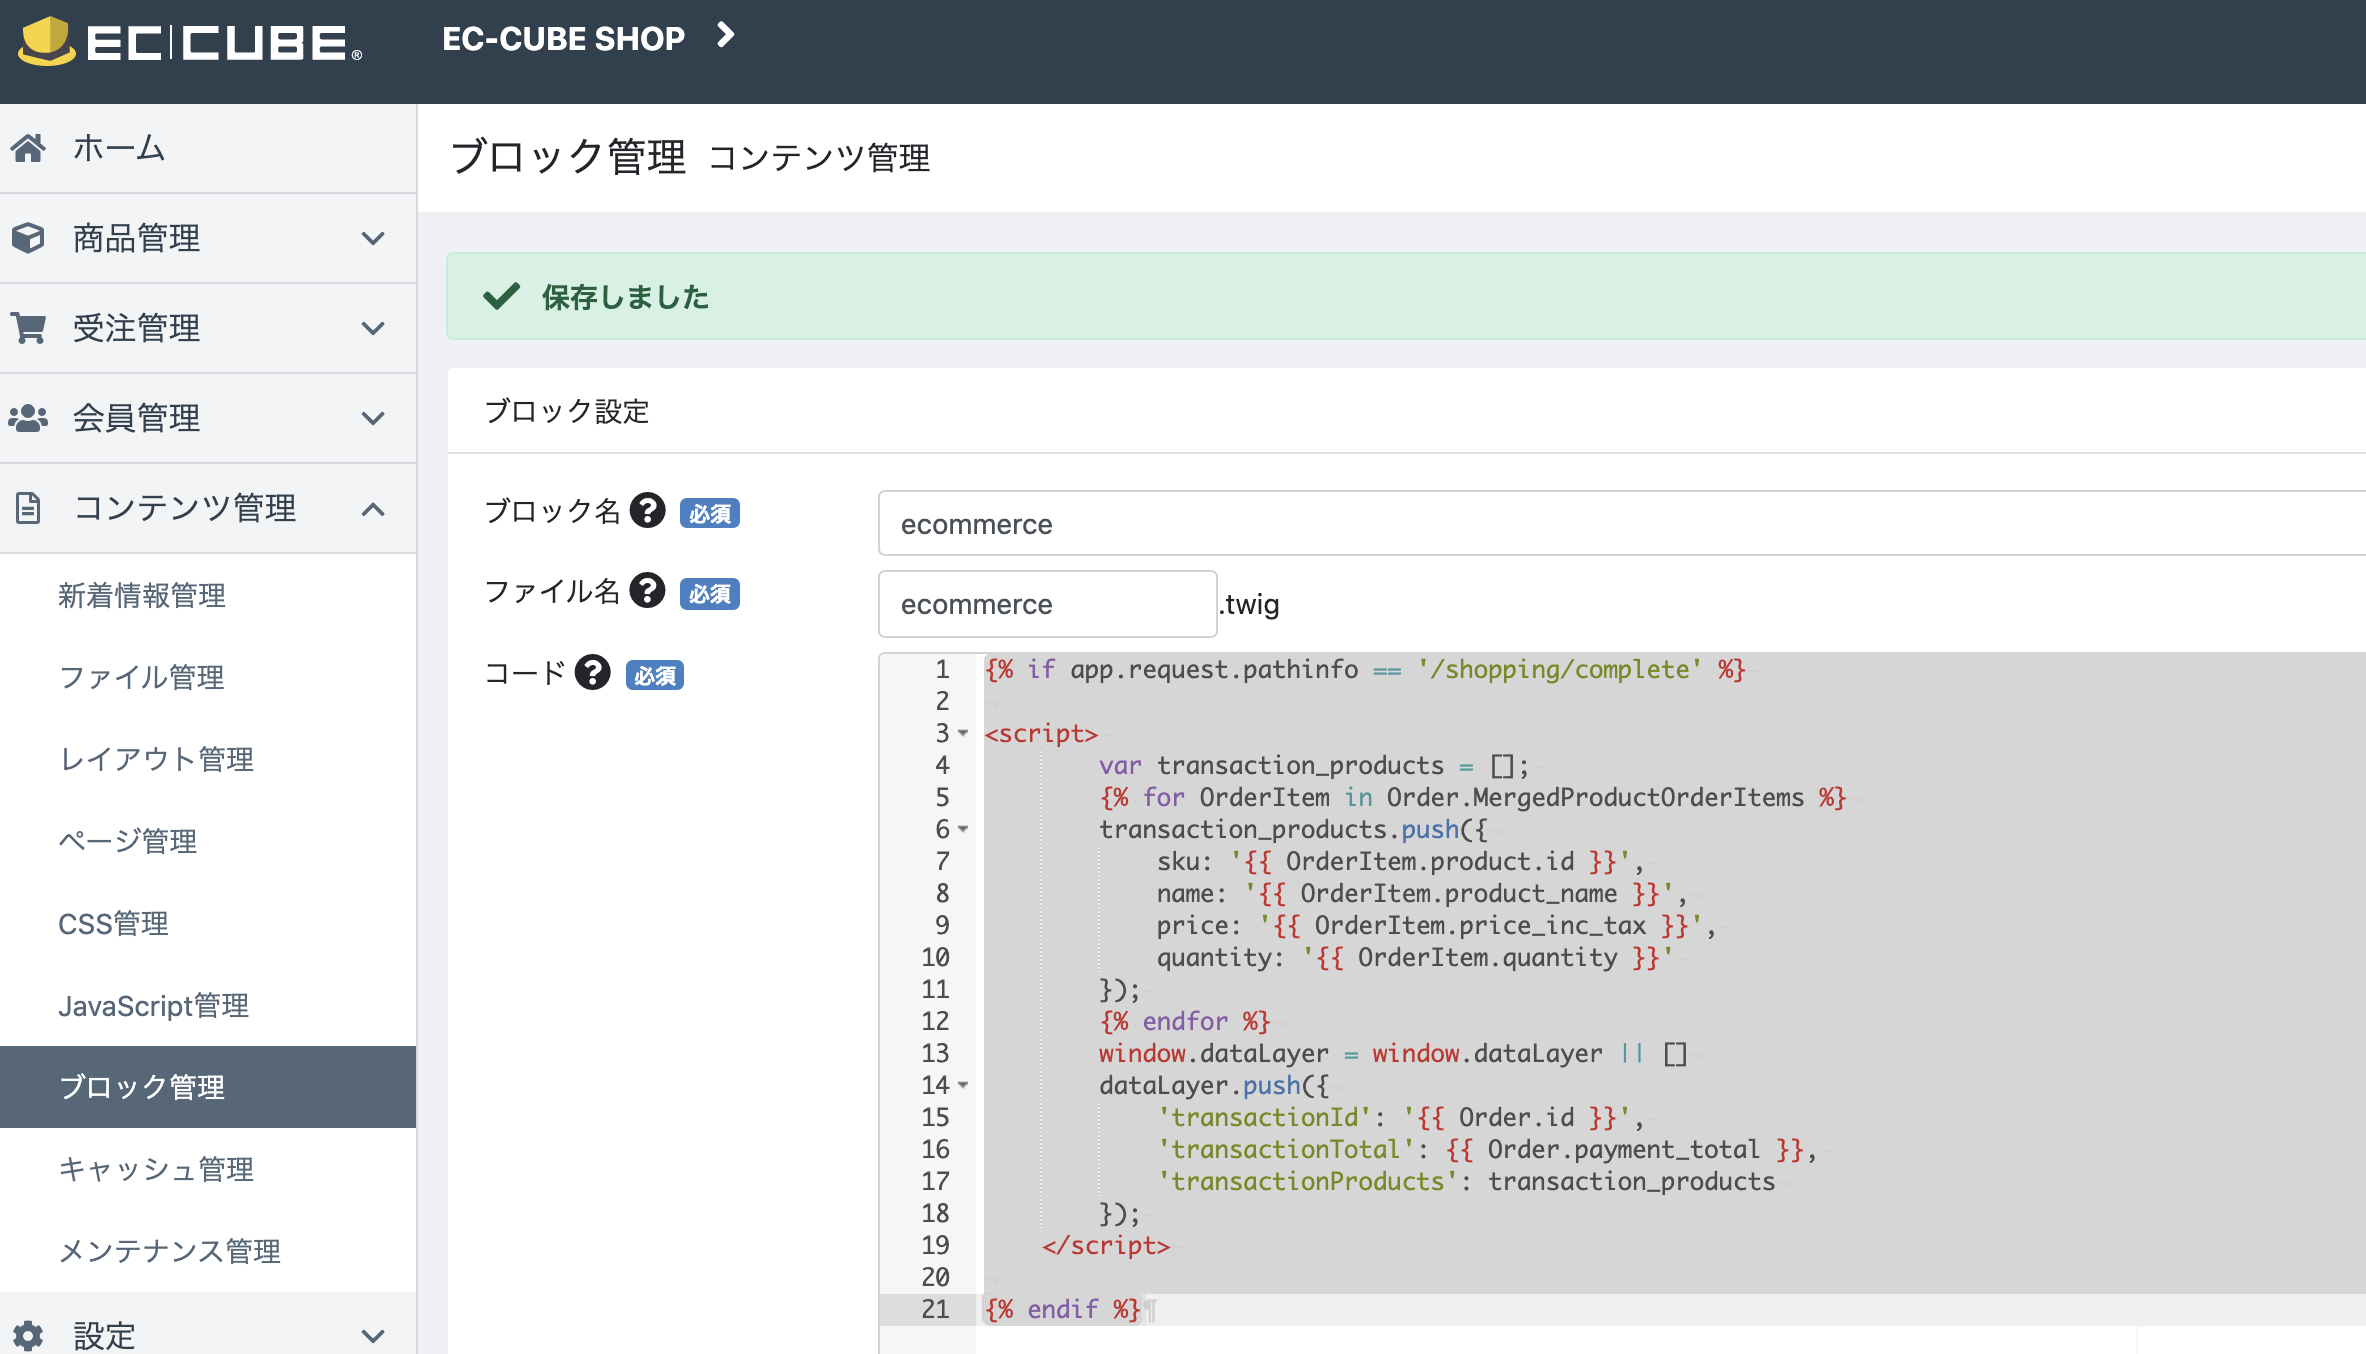
コードは以下のように作成しました。
{% if app.request.pathinfo == '/shopping/complete' %}

<script>
        var transaction_products = [];
        {% for OrderItem in Order.MergedProductOrderItems %}
        transaction_products.push({
            sku: '{{ OrderItem.product_code ? OrderItem.product_code : OrderItem.product.id }}',
            name: '{{ OrderItem.product_name }}',
            price: '{{ OrderItem.price_inc_tax }}',
            quantity: '{{ OrderItem.quantity }}'
        });
        {% endfor %}
        window.dataLayer = window.dataLayer || []
        dataLayer.push({
            'transactionId': '{{ Order.order_no ? Order.order_no : Order.id }}',
            'transactionTotal': {{ Order.payment_total }},
            'transactionProducts': transaction_products
        });
</script>

{% endif %}
必要最低限のパラメータだけ指定していますが、その他にも渡せるパラメータはあるようなので、詳細はタグマネージャのドキュメントを参考にするとよいと思います。
また、EC-CUBE側の値は以下のものを渡すことができます。
| 項目 | 変数 |
|---|---|
| 注文ID | {{ Order.id }} |
| 注文番号 | {{ Order.order_no }} |
| 支払金額 | {{ Order.payment_total }} |
| 商品ID | {{ OrderItem.product.id }} |
| 商品規格ID | {{ OrderItem.product_class.id }} |
| 商品コード | {{ OrderItem.product_code }} |
| 金額 | {{ OrderItem.price }} |
| 金額(税込) | {{ OrderItem.price_inc_tax }} |
| 個数 | {{ OrderItem.quantity }} |
| 規格名1 | {{ OrderItem.class_category_name1 }} |
| 規格名2 | {{ OrderItem.class_category_name2 }} |
| 商品名 | {{ OrderItem.product_name }} |
その他の値はソースコードを参照してみてください。
https://github.com/EC-CUBE/ec-cube/blob/4.0/src/Eccube/Entity/Order.php
https://github.com/EC-CUBE/ec-cube/blob/4.0/src/Eccube/Entity/OrderItem.php
レイアウトに配置する
作成したブロックを、レイアウトに配置します。
こちらのブロックは、「下層ページ用レイアウト」のみ設定します。
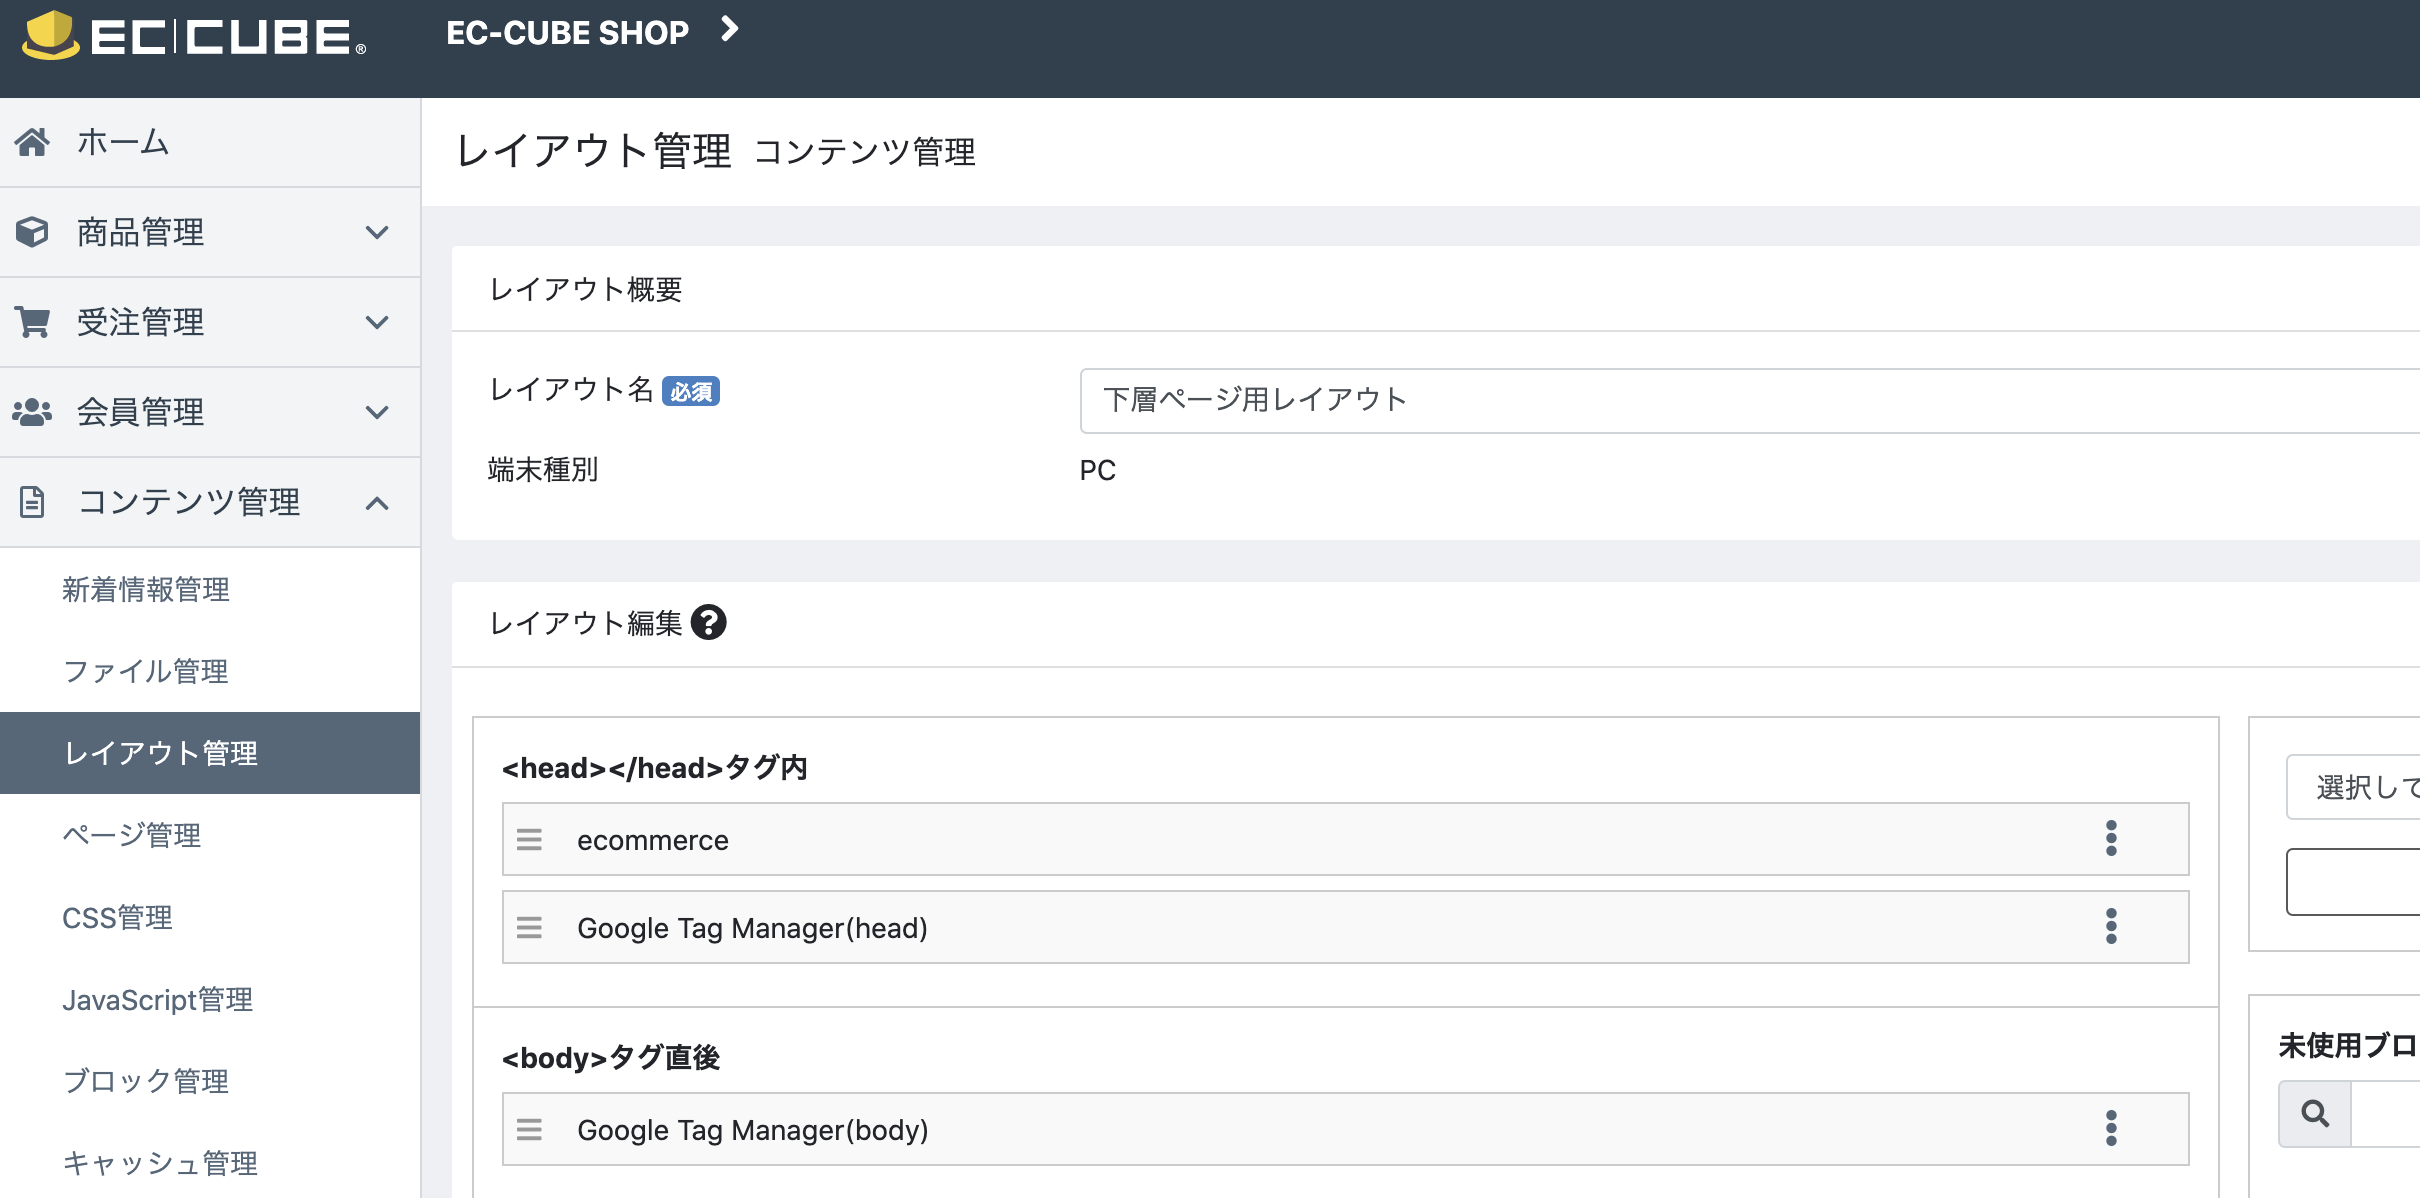
<head></head>タグ内に作成したブロックを配置します。
このとき、Google Tag Manager(head)より上に配置する必要があります。
GTMおよびAnalyticsの設定
あとは、AnalyticsとGTM側で設定が完了すれば計測開始できます。
- Analytics→eコマース設定を有効にする
- GTM→トラッキングタイプをトランザクションに設定したユニバーサル アナリティクス タグを作成する
詳しくはドキュメントを参考にしてみてください。
https://support.google.com/tagmanager/answer/6107169?hl=ja