この記事では BotKit を扱ってみます。
Node の準備や Heroku の準備は HubotをHerokuでSlackに繋げるまで の記事を参考にしてください。
個人的には Hubot よりも BotKit のほうが好き!
coffee script が良くわからないというのがあるかもしれませんが・・・
Slack の準備
Hubot を使うときは Hubot という SlackApps をインストールしましたが、
BotKit では Bots というものを使います。
実際はどちらもトークンを発行するだけなのでどっちでもいい気がする・・・
Bots の登録
https://my.slack.com/services/new/bot
ここから登録できます。
この辺は Hubot と同じです。
Bots の名前を決める
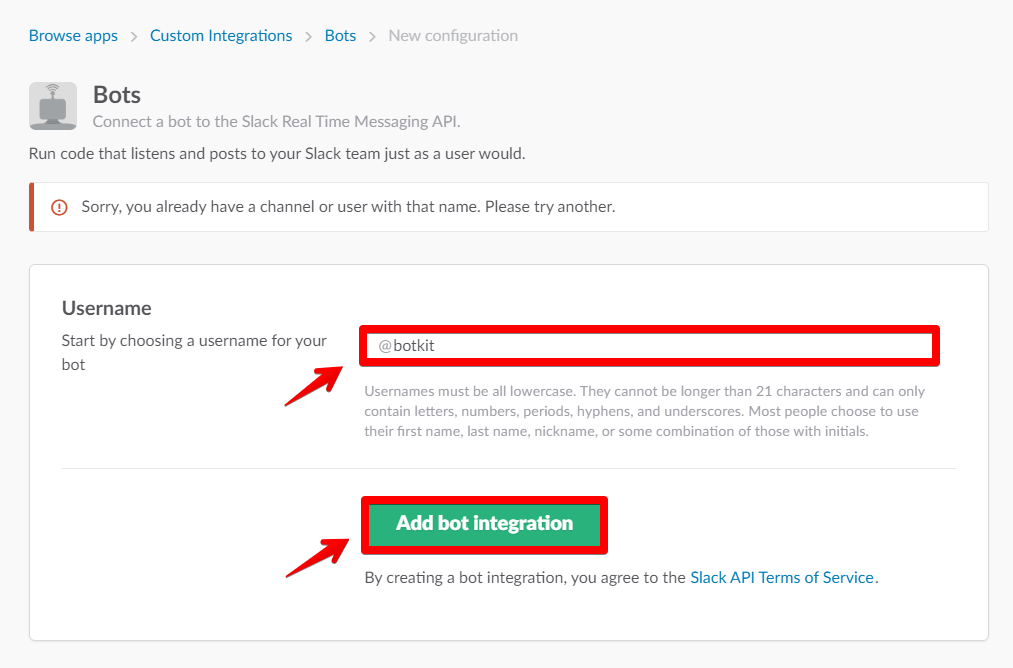
Bots の設定をする
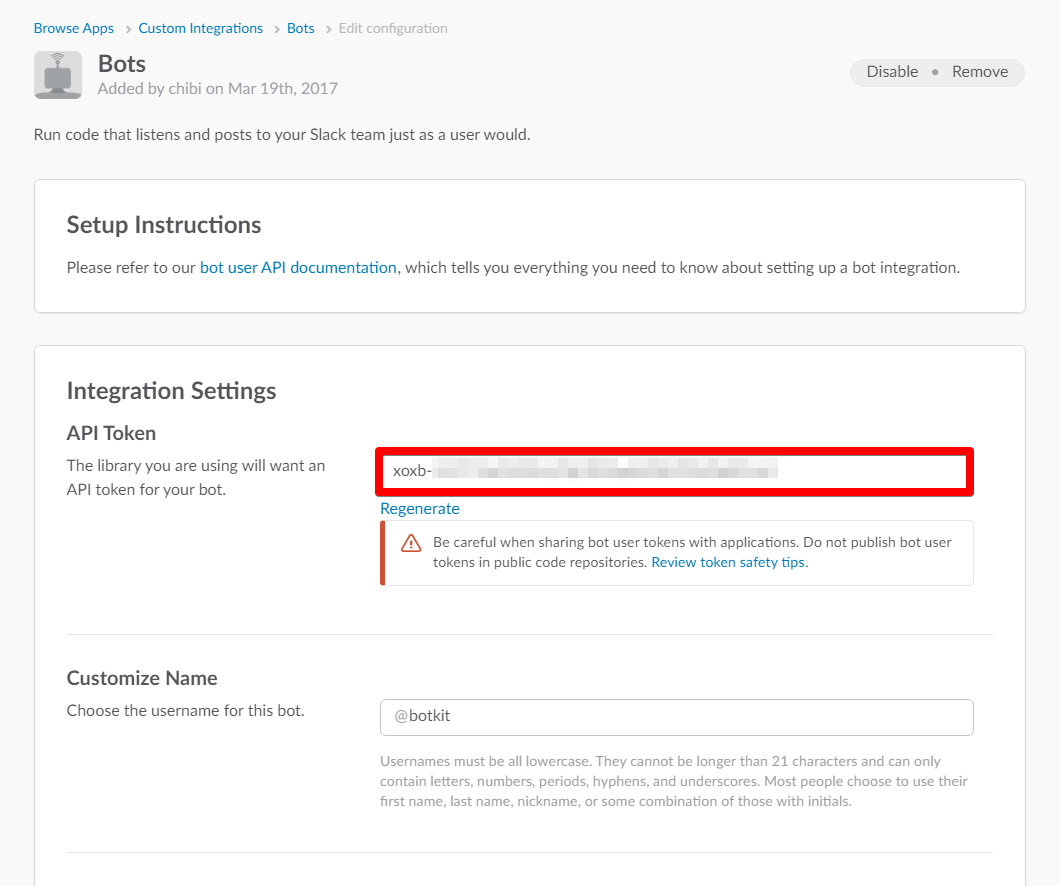
Bots のアイコンなども変更できますが、今回は面倒だったのでそのまま保存です。
BotKit の準備と設定
BotKit の準備には、
- npm でモジュールをインストールする方法
- git でサンプルを含んだプロジェクトをクローンする方法
の2種類あるようです。
git close でサンプルプロジェクトを取得
$ git clone git@github.com:howdyai/botkit.git
$ cd botkit/
$ npm install
これだけで準備完了
動作確認
$ token=xoxb-********************************* node slack_bot.js
動かしたソースコード
~略~
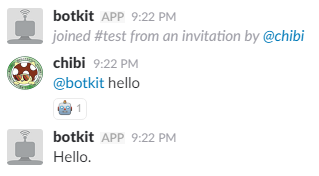
controller.hears(['hello', 'hi'], 'direct_message,direct_mention,mention', function(bot, message) {
bot.api.reactions.add({
timestamp: message.ts,
channel: message.channel,
name: 'robot_face',
}, function(err, res) {
if (err) {
bot.botkit.log('Failed to add emoji reaction :(', err);
}
});
controller.storage.users.get(message.user, function(err, user) {
if (user && user.name) {
bot.reply(message, 'Hello ' + user.name + '!!');
} else {
bot.reply(message, 'Hello.');
}
});
});
~略~
- 1つ目のブロックでリアクションを付ける。
- 2つ目のブロックでメッセージを投げる。
- if文は、何で後者のほうに入ったのかわからない。
- ユーザー名とか持ってそうなのだが・・・
npm でモジュールをインストール
こちらはサンプルのソースコードは付いていません。
ということで、余計なモジュールもインストールしていない最小構成になります。
mkdir hoge
cd hoge
npm init -y
npm install -S botkit
BotKitの最小構成サンプル
せっかくなのでやっておきましょう。
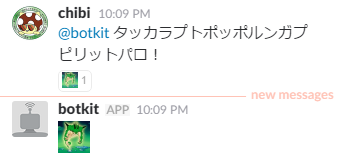
タッカラプトポッポルンガプピリットパロ!
先ほどクローンで実行した slack_bot.js を参考に最小構成を作りました。
if (!process.env.token) {
  console.log('Error: Specify token in environment');
  process.exit(1);
}

var Botkit = require('botkit');
var controller = Botkit.slackbot({
  debug: false
});

var bot = controller.spawn({
  token: process.env.token
}).startRTM();

controller.hears(['タッカラプトポッポルンガプピリットパロ'], 'direct_message,direct_mention,mention', function(bot, message) {
  bot.reply(message, ':polunga:');
});
動作確認
$ token=xoxb-********************************* node example.js

夢の神 来た!
先ほどのクローンしたサンプル付きのものとは異なり、
hi や hello は登録されていないので反応していません。
そもそも英語じゃ合言葉が違うので出てきませんね。
Heroku との連携
Procfile 作成
HubotをHerokuでSlackに繋げるまで では Yoeman さんが、雛形を用意してくれていたので、
Procfile もありました。今回は真似して自分で作成です。
web: node example.js
Heroku へデプロイ
ここは Hubot の時と同じように実施
$ git init
$ heroku git:remote -a {HEROKU_APP_NAME}

$ git add .
$ git commit -m "First commit."
$ git push heroku master
Heroku への設定
$ heroku config:add token=xoxb-xxxxxxxxxxxxxxxxxxxxxxxxxxxxxxxxxxxxx
$ heroku config
token: xoxb-xxxxxxxxxxxxxxxxxxxxxxxxxxxxxxxxxxxxx
動作確認
$ heroku restart
わかりやすいようにコードを少し変えてHerokuへデプロイしました。
リアクション付けました。
if (!process.env.token) {
  console.log('Error: Specify token in environment');
  process.exit(1);
}

var Botkit = require('botkit');
var controller = Botkit.slackbot({
  debug: false
});

var bot = controller.spawn({
  token: process.env.token
}).startRTM();

controller.hears(['タッカラプトポッポルンガプピリットパロ'], 'direct_message,direct_mention,mention', function(bot, message) {
+ bot.api.reactions.add({
+   timestamp: message.ts,
+   channel: message.channel,
+   name: 'polunga'
+ }, function(err, res) {
+   if (err) {
+     bot.botkit.log('Failed to add emoji reaction :(', err);
+   }
+ });

  bot.reply(message, ':polunga:');
});