逆透視マッピング(IPM)で画像のBird's Eye View(BEV)を得る方法を紹介致します。
から
BEV(Bird's Eye View)
BEV画像とは、上空から斜めに見下ろしたような形式のものを言います。鳥瞰図、俯瞰図、パノラマ図とも言えます。
IPM(Inverse Perspective Mapping)
カメラで撮影された画像は、透視投影なので、本来平行だったものは画像内で交差します。IPMでこのような透視投影をBEVに変換できます。そのため、逆透視変換とも呼ばれます。IPM変換方法として、OpenCVの関数を利用します。理論知識について、これを参考ください:https://towardsdatascience.com/a-hands-on-application-of-homography-ipm-18d9e47c152f
1.利用するOpenCVの関数:cv2.getPerspectiveTransformとcv2.warpPerspective
cv2.getPerspectiveTransform(変換するマトリックスをゲット)
- 書き方: cv2.getPerspectiveTransform(src,dst)
- src: Source画像の四角形の頂点の座標
- dst: 生成される画像内の対応する四角形の頂点の座標
cv2.warpPerspective(Mを用いて変換する)
- 書き方: cv2.warpPerspective(src, M, dsize)
- src: Source画像
- M: 変換マトリックス
- dsize: 出力画像のサイズ
2.手順
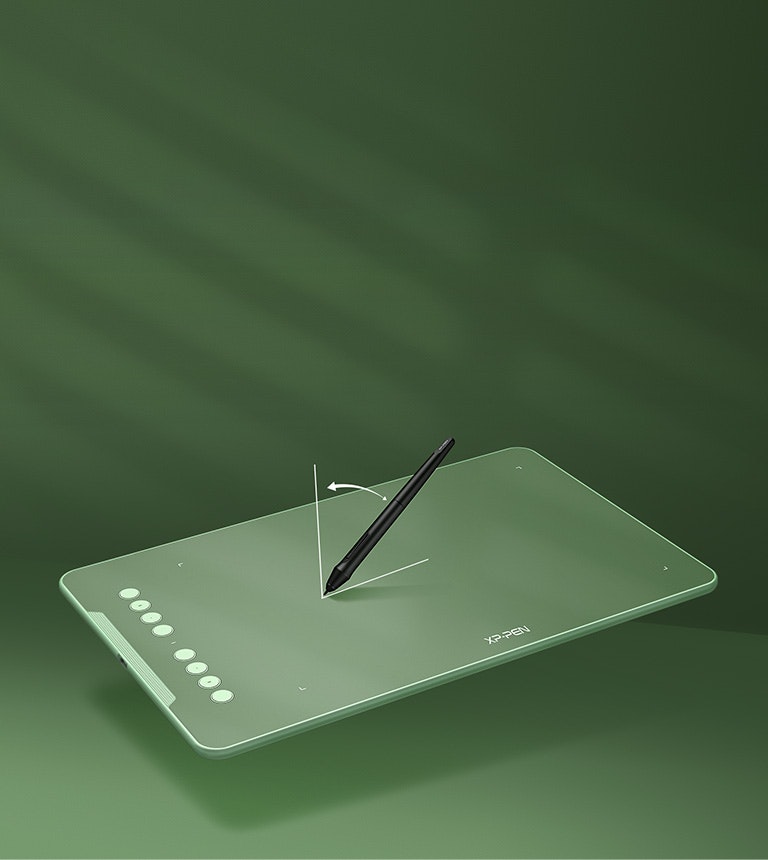
以下の画像を例として使います。
1).4つの点を選びます。タブレットの頂点にします。Matplotlibを利用して、座標を求めます。
get_coordinates.py
import cv2
import numpy as np
import matplotlib.pyplot as plt
import matplotlib
matplotlib.use('Qt5Agg')

img = cv2.imread("tablet.jpg")
img = cv2.cvtColor(img,cv2.COLOR_BGR2RGB)

plt.imshow(img)
plt.show()
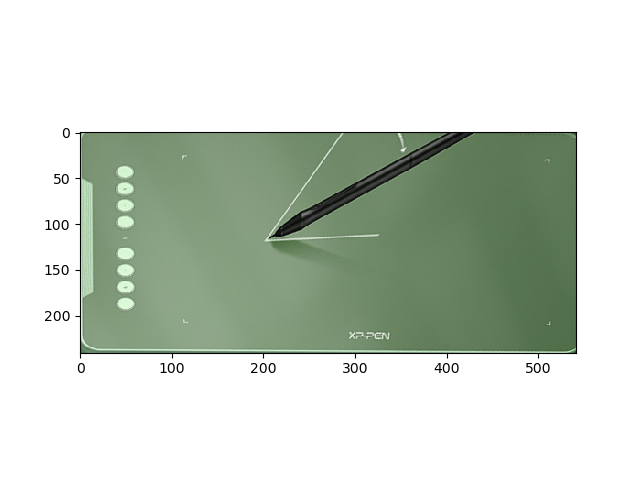
座標を入手します。
結果:
coordinates.
p1 = [58,579]
p2 = [208,758]
p3 = [720,580]
p4 = [520,445]
2).出力画像の長さと高さを求めます。出力画像はソース画像中の選んだ4つの点からなるので、4つの点の間の距離を算出します。
get_H_W.py
p1 = [58,579]
p2 = [208,758]
p3 = [720,580]
p4 = [520,445]

import numpy as np
import math

def getDist_P2P(PointA,PointB):
    distance=math.pow((PointA[0]-PointB[0]),2) + math.pow((PointA[1]-PointB[1]),2)
    distance=math.sqrt(distance)
    return distance

d14 = getDist_P2P(p1,p4)
d23 = getDist_P2P(p2,p3)
d12 = getDist_P2P(p1,p2)
d34 = getDist_P2P(p3,p4)

max_w = max(int(d14),int(d23))
max_h = max(int(d12),int(d34))

print(max_w,max_h)
これでcv2.warpPerspective関数のパラメーターdsize: 出力画像のサイズの値を決定しました。(max_w,max_h)です。
3).OpenCV関数cv2.getPerspectiveTransformとcv2.warpPerspectiveを利用して変換します。
ipm.py
import cv2
import matplotlib.pyplot as plt
import numpy as np

from get_coordinates import img
from get_H_W import p1,p2,p3,p4
from get_H_W import max_w,max_h

src = np.float32([p1,p2,p3,p4])
des = np.float32([[0,0],[0,max_h],[max_w,max_h],[max_w,0]])

M = cv2.getPerspectiveTransform(src,des)

output = cv2.warpPerspective(img,M,(max_w,max_h))

plt.imshow(output)
plt.show()
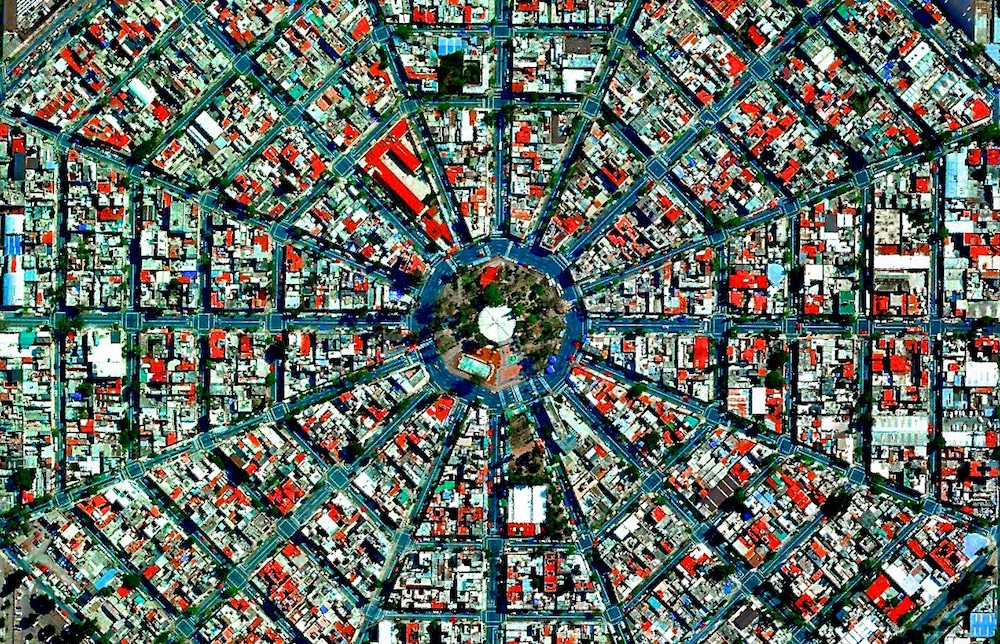
結果: