講習会のネタとしていろいろ試してみる。
今回は、以下の5つのことを行ってみた。
1.外部へのリンクに遷移させる
2.横にコンポーネントを配置する
3.テキストフィールドに入力した文字が送信ボタンを押すと表示される
4.サブウィンドウ表示
5.モーダルウィンドウ表示
ソース
WindowPractice.java
package com.example;

import javax.servlet.annotation.WebServlet;

import com.vaadin.annotations.Theme;
import com.vaadin.annotations.VaadinServletConfiguration;
import com.vaadin.annotations.Widgetset;
import com.vaadin.server.ExternalResource;
import com.vaadin.server.ThemeResource;
import com.vaadin.server.VaadinRequest;

import com.vaadin.server.VaadinServlet;
import com.vaadin.ui.Button;
import com.vaadin.ui.HorizontalLayout;
import com.vaadin.ui.Label;
import com.vaadin.ui.Link;
import com.vaadin.ui.TextField;
import com.vaadin.ui.UI;
import com.vaadin.ui.VerticalLayout;
import com.vaadin.ui.Window;

/**
 *
 */
@Theme("mytheme")
@Widgetset("com.example.MyAppWidgetset")
public class WindowlPractice extends UI {
	@Override
	protected void init(VaadinRequest vaadinRequest) {
		//縦コンテナを生成・配置
		final VerticalLayout layout = new VerticalLayout();
		//マージンをとる
		layout.setMargin(true);
		//縦のスペースをとる
		layout.setSpacing(true);
		setContent(layout);

		//外部へのリンクに遷移するリンクコンポーネントを生成
		Link link1 = new Link("Google",new ExternalResource("http://google.com"));
		//iconをセット。画像はsrc/main/webapp/VAADIN/themes/mytheme/image/に置く
		link1.setIcon(new ThemeResource("image/bedar.gif"));
		//別タブで開く
		link1.setTargetName("_blank");
		layout.addComponent(link1);

		//文字表示用ラベルコンポーネント生成
		Label label = new Label();
		layout.addComponent(label);
		//横並びにコンポーネントを配置するlayout生成
		HorizontalLayout formlayuout = new HorizontalLayout();
		formlayuout.setSpacing(true);
		//テキストフィールドを配置し、送信ボタンを押すと、入力した文字が表示される。
		TextField field = new TextField();
		formlayuout.addComponent(field);
		//送信ボタン配置
		Button button1 = new Button("送信");
		button1.addClickListener(e -> label.setValue(field.getValue()));
		formlayuout.addComponent(button1);
		//横layoutをadd
		layout.addComponent(formlayuout);

		//サブボタンウィンドウを表示させる
		Button button2 = new Button("サブウィンドウ");
		button2.addClickListener( event -> addSubwindow());
		layout.addComponent(button2);

		//モーダルウィンドウを表示させる
		Button button3 = new Button("モーダルウィンドウ");
		button3.addClickListener( event -> addModalWindow());
		layout.addComponent(button3);
	}
	public void addSubwindow(){
		//新たにWindowを作成。
		Window subWindow = new Window("Subwindow");
		//windowを追加
		VerticalLayout layout = new VerticalLayout();
		subWindow.setContent(layout);
		Label label3 = new Label("This is sub window");
		layout.addComponent(label3);
		subWindow.setContent(layout);
		//subwindowをcenterに配置する。
		subWindow.center();
		//addWindow(window)でサブウィンドウができる
		addWindow(subWindow);
	}
	public void addModalWindow(){
		//新たにWindowを作成。
		Window modalWindow = new Window("ModalWindow");
		//ModalWindowにする
		modalWindow.setModal(true);
		//レイアウトをモーダルウィンドウに追加
		VerticalLayout layout = new VerticalLayout();
		layout.setMargin(true);
		modalWindow.setContent(layout);
		Label label3 = new Label("This is Modal window");
		layout.addComponent(label3);
		//subwindowをcenterに配置する。
		modalWindow.center();
		//windowを追加
		addWindow(modalWindow);

	}

	@WebServlet(urlPatterns = "/WindowPractice/*", name = "WindowPractice", asyncSupported = true)
	@VaadinServletConfiguration(ui = WindowlPractice.class, productionMode = false)
	public static class MyUIServlet extends VaadinServlet {
	}
}
実行結果と補足
1,2,3の実行結果と補足
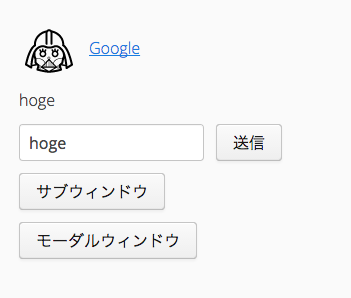
【補足】
・Linkコンポーネントを生成する。
Link link1 = new Link("Google",new ExternalResource("http://google.com"));
・リンクの左側アイコンが表示される。もちろんアイコンをクリックしてもリンク先に遷移する。
link1.setIcon(new ThemeResource("image/bedar.gif"));
4の実行結果と補足
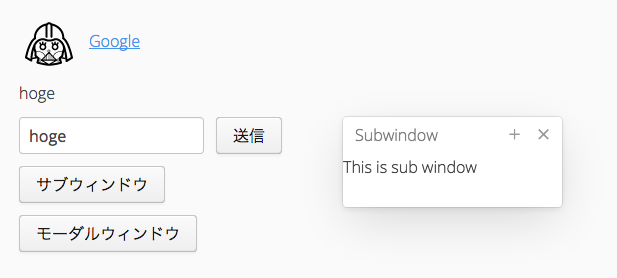
【補足】
ウィンドウを生成し、
Window subWindow = new Window();
それをaddWindowするとサブウィンドができる。
addWindow(subWindow);
5の実行結果と補足
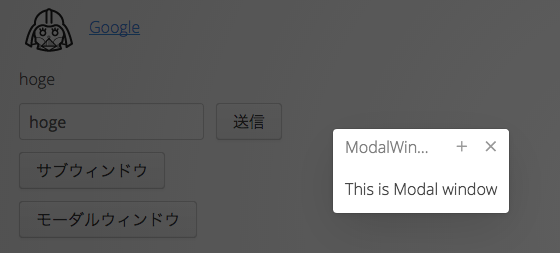
【補足】
サブウィンドウと同様にWindowを生成し
modalWindow.setModal(true);
でモーダルウィンドウになる。