はじめに
Jestでの単体テストを導入しているプロジェクトについて、Github Actionsでテスト自動実行を導入してみたので、得た知見をまとめておきます。
テストはプルリク時に実行させています。
また、テストの結果をコメントする機能も付けてみました。
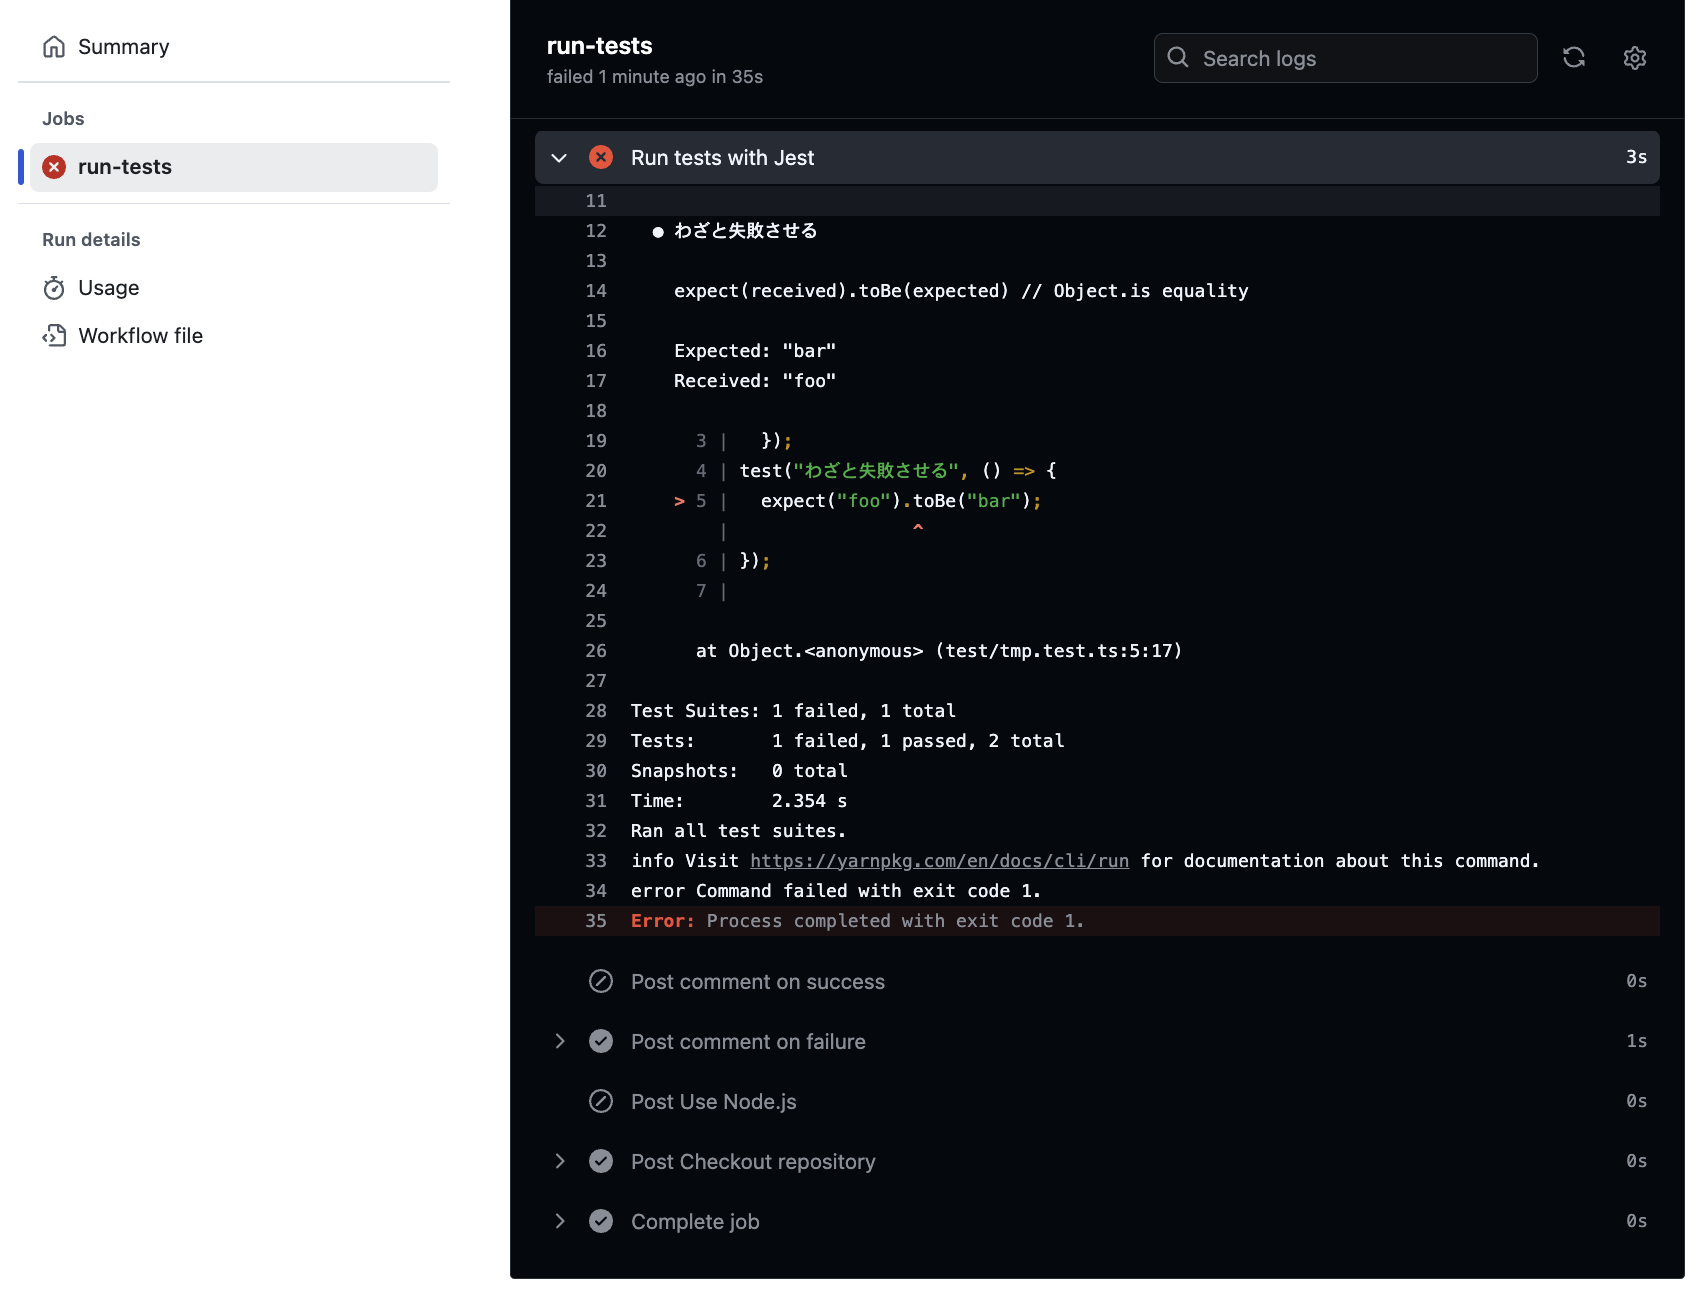
テスト失敗時にはGithub Actionsのジョブ実行結果の詳細画面へのリンクも載せています。
リンクをクリックすると、以下の画面に遷移します。
完成コード
コードは主にGithub Actions公式ドキュメントのものをベースにして書きました。
公式ドキュメントには、他の言語の場合のサンプルも掲載されているので、とても参考になります。
以下が今回作成したGithub Actionsのworkflowのymlファイルです。
実行環境はNode.js、パッケージマネージャーはyarn、テストフレームワークはJestを使用しています。
# Jestのテストを実行します
# mainとdevブランチに対して、プルリクエスト時に実行します

name: Run Tests

on:
  pull_request:
    branches:
      - main
      - dev
    types: [opened, reopened, synchronize, ready_for_review]

jobs:
  run-tests:
    runs-on: ubuntu-latest
    timeout-minutes: 10
    steps:

    - name: Checkout repository
      uses: actions/checkout@v4

    - name: Use Node.js
      uses: actions/setup-node@v4
      with:
        node-version: '20.10.0'
        cache: 'yarn'
        cache-dependency-path: yarn.lock

    - name: Install dependencies
      run: yarn

    - name: Run tests with Jest
      run: yarn jest

    - name: Post comment on success
      if: ${{ success() }}
      uses: actions/github-script@v7
      with:
        script: |
          const message = "## テスト結果 ✅\nテストが成功しました!✨"
          github.rest.issues.createComment({
            issue_number: context.payload.pull_request.number,
            owner: context.repo.owner,
            repo: context.repo.repo,
            body: message,
          })

    - name: Post comment on failure
      if: ${{ failure() }}
      uses: actions/github-script@v7
      with:
        script: |
          const response = await github.rest.actions.listJobsForWorkflowRun({
            owner: context.repo.owner,
            repo: context.repo.repo,
            run_id: context.runId,
          })
          const currentJob = response.data.jobs.find(job => job.name === context.job)
          const jobDetailUrl = currentJob.html_url

          const message = `## テスト結果 ❌\n### ⚠️テストが失敗しました。\n詳細を確認してください。\n[${jobDetailUrl}](${jobDetailUrl})`
          github.rest.issues.createComment({
            issue_number: context.payload.pull_request.number,
            owner: context.repo.owner,
            repo: context.repo.repo,
            body: message,
          })
ちなみに、導入したプロジェクトでジョブを実行させたところ、ジョブの実行時間は3~4分といった感じでした。
ただ、依存関係のインストールで2分半程度かかっているので、結局ここ次第だと思います。
(キャッシュが存在しなかった場合、依存関係のインストールで4分、トータルで5~6分程度)
あとは、余裕があればビルドがきちんとできるかを検証するstepがあるとなお良いですね。
解説
トリガーとなるイベントの指定
mainブランチとdevブランチに対してのプルリク時に実行させます。
プルリクの作成時、再open時、コードがpushされてプルリク内容に変更が生じた時、ready for reviewとなった時にテストを実行させています。
on:
  pull_request:
    branches:
      - main
      - dev
    types: [opened, reopened, synchronize, ready_for_review]
チェックアウト
最初にリポジトリのコードを取得します。
- name: Checkout repository
  uses: actions/checkout@v4
Node.jsの使用
次にNode.jsを使えるようにします。
node-versionには、プロジェクトで使われているバージョンを指定するのが無難かと思います。
また、npmやYarnの依存関係をキャッシュすることもできるようなので、cache: 'yarn'でYarnの依存関係をキャッシュしています。
- name: Use Node.js
  uses: actions/setup-node@v4
  with:
    node-version: '20.10.0'
    cache: 'yarn'
    cache-dependency-path: yarn.lock
cache-dependency-pathには依存関係が記録されているファイルを指定しています1。
ルートディレクトリにのみyarn.lock(npmの場合はpackage-lock.json)がある場合はおそらく省略できると思います。
一方、モノレポなどで依存関係のファイルが複数ある場合は、以下のように指定しておくと良いと思います。
cache-dependency-path: |
  yarn.lock
  packages/foo/yarn.lock
依存関係のインストール
続いてプロジェクトの依存関係をインストールします。
なお、Github Actionsの公式ドキュメントによると、GitHubホストランナーには依存関係マネージャーのnpmとYarnがインストールされているとのことなので、Yarn自体のインストールはここでしていません。
- name: Install dependencies
  run: yarn
テストの実行
ここで、いよいよJestのテストを実行させます。
- name: Run tests with Jest
  run: yarn jest
テスト成功時のコメント送信
最終段階として、コメントの送信をしていきます。
まず、ifを使ってジョブの実行を制御しています。
ステータスチェック関数のsuccess()を使って、テストを含むこれまでのステップがすべて成功している場合のみ実行するようにしています2。
コメント送信については、公式Actionのgithub-scriptを使っています。
- name: Post comment on success
  if: ${{ success() }}
  uses: actions/github-script@v7
  with:
    script: |
      const message = "## テスト結果 ✅\nテストが成功しました!✨"
      github.rest.issues.createComment({
        issue_number: context.payload.pull_request.number,
        owner: context.repo.owner,
        repo: context.repo.repo,
        body: message,
      })
github-scriptを使うと、Github API(を便利に使えるライブラリであるOctokit)を直接呼び出せるようになります。
要するに、GitHubの操作が簡単にできるようになります。
テスト失敗時のコメント送信
ここでも、ifを使ってジョブの実行を制御しています。
ステータスチェック関数のfailure()を使って、これまでのステップのいずれかが失敗した場合にのみ実行するようにしています。
つまりテストが失敗すると、このステップが実行されます。
(厳密には、テスト実行以外のどこかのステップが失敗した場合にも実行されます。)
- name: Post comment on failure
  if: ${{ failure() }}
  uses: actions/github-script@v7
  with:
    script: |
      const response = await github.rest.actions.listJobsForWorkflowRun({
        owner: context.repo.owner,
        repo: context.repo.repo,
        run_id: context.runId,
      })
      const currentJob = response.data.jobs.find(job => job.name === context.job)
      const jobDetailUrl = currentJob.html_url

      const message = `## テスト結果 ❌\n### ⚠️テストが失敗しました。\n詳細を確認してください。\n[${jobDetailUrl}](${jobDetailUrl})`
      github.rest.issues.createComment({
        issue_number: context.payload.pull_request.number,
        owner: context.repo.owner,
        repo: context.repo.repo,
        body: message,
      })
github-scriptの部分については、scriptの前半部分でジョブ実行結果の詳細画面へのリンクを取得し、後半部分でコメント送信をしています。
その他
作業中につまずいた点がいくつかあったので、メモとして残しておきます。
- ディレクトリを移動した場合でも、次のステップ開始時にはカレントディレクトリがリセットされる
- トリガーとなるイベントに
pull_requestを指定した場合、プルリク元かプルリク先のブランチにworkflowのymlファイルが存在しないと実行されない3 - モノレポでローカルのパッケージを使用する場合、(私のプロジェクトでは)以下のようなビルドの実行が必要だった
- name: Install dependencies
  run: yarn

- name: Build local packages
  run: |
    yarn workspace bar rollup -c
    yarn workspace baz rollup -c

- name: Run tests with Jest
  run: |
    cd packages/foo
    yarn jest


