やりたいこと
- Spring Bootアプリケーションのメトリクスを可視化したい
Micrometerというライブラリを使用すると、アプリケーションのメトリクスを簡単に取得できるそうです。
メトリクスとは、CPUやメモリの使用状況から、Spring Bootの場合はURLへのアクセス状況などもメトリクスとしてデフォルトで取得することができます。
このあたりを見ると良いでしょう。
自分で取得する項目を追加することもできるようです。
やったこと
- Spring BootアプリケーションにMicrometerを入れ、Elasticsearchにメトリクス送信
- Kibanaで表示
Micrometerで収集したメトリクスは、どこかのデータストアに保存することになりますが、その保存先は複数選ぶことができます。
CloudWatch、Elasticsearch、Datadog、Prometheusなどなど。
今回は、Elasticsearchにデータを入れ、それからKibanaで可視化してみることにしました。
環境
今回の実施環境です。
$ lsb_release -a
No LSB modules are available.
Distributor ID:	Ubuntu
Description:	Ubuntu 18.04.1 LTS
Release:	18.04
Codename:	bionic


$ java -version
openjdk version "1.8.0_191"
OpenJDK Runtime Environment (build 1.8.0_191-8u191-b12-0ubuntu0.18.04.1-b12)
OpenJDK 64-Bit Server VM (build 25.191-b12, mixed mode)


$ mvn -version
Apache Maven 3.6.0 (97c98ec64a1fdfee7767ce5ffb20918da4f719f3; 2018-10-25T03:41:47+09:00)
Maven home: /path/to/.sdkman/candidates/maven/current
Java version: 1.8.0_191, vendor: Oracle Corporation, runtime: /usr/lib/jvm/java-8-openjdk-amd64/jre
Default locale: ja_JP, platform encoding: UTF-8
OS name: "linux", version: "4.15.0-39-generic", arch: "amd64", family: "unix"
対象のアプリケーション
超簡単に、小さなアプリケーションを作成します。
pom.xmlでの依存関係。
    <dependencyManagement>
        <dependencies>
            <dependency>
                <groupId>org.springframework.boot</groupId>
                <artifactId>spring-boot-dependencies</artifactId>
                <version>2.1.1.RELEASE</version>
                <type>pom</type>
                <scope>import</scope>
            </dependency>
        </dependencies>
    </dependencyManagement>

    <dependencies>
        <dependency>
            <groupId>org.springframework.boot</groupId>
            <artifactId>spring-boot-starter-web</artifactId>
        </dependency>
        <dependency>
            <groupId>org.springframework.boot</groupId>
            <artifactId>spring-boot-starter-actuator</artifactId>
        </dependency>
        <dependency>
            <groupId>io.micrometer</groupId>
            <artifactId>micrometer-registry-elastic</artifactId>
        </dependency>
    </dependencies>

    <build>
        <plugins>
            <plugin>
                <groupId>org.springframework.boot</groupId>
                <artifactId>spring-boot-maven-plugin</artifactId>
                <version>2.1.1.RELEASE</version>
                <executions>
                    <execution>
                        <goals>
                            <goal>repackage</goal>
                        </goals>
                    </execution>
                </executions>
            </plugin>
        </plugins>
    </build>
Spring BootでMicrometerを使う時には、spring-boot-starter-actuatorを追加し、メトリクスの送信先をElasticsearchにするのでmicrometer-registry-elasticを追加します。
送信間隔は、ちょっと短く5秒にしました。
src/main/resources/application.properties
management.metrics.export.elastic.step=5s
設定は、こちらを参照です。
Metrics / Supported monitoring systems / Elastic
用意したアプリケーションは、このくらい。
src/main/java/com/example/micrometer/elastic/App.java
package com.example.micrometer.elastic;

import org.springframework.boot.SpringApplication;
import org.springframework.boot.autoconfigure.SpringBootApplication;

@SpringBootApplication
public class App {
    public static void main(String... args) {
        SpringApplication.run(App.class, args);
    }
}
今回はControllerもなにも用意していませんが、Spring BootアプリケーションではMicrometerを追加した際に、Spring Web MVCなどに合わせてメトリクスを取得することができます。
Elasticsearchのインストールと起動
tar.gzをダウンロードして、展開。
$ wget https://artifacts.elastic.co/downloads/elasticsearch/elasticsearch-6.5.2.tar.gz
$ tar xf elasticsearch-6.5.2.tar.gz
$ cd elasticsearch-6.5.2
起動。
$ bin/elasticsearch
確認。
$ curl localhost:9200{
  "name" : "qd3p2vS",
  "cluster_name" : "elasticsearch",
  "cluster_uuid" : "6kr__MvLRsuxV5-8d8j5UQ",
  "version" : {
    "number" : "6.5.2",
    "build_flavor" : "default",
    "build_type" : "tar",
    "build_hash" : "9434bed",
    "build_date" : "2018-11-29T23:58:20.891072Z",
    "build_snapshot" : false,
    "lucene_version" : "7.5.0",
    "minimum_wire_compatibility_version" : "5.6.0",
    "minimum_index_compatibility_version" : "5.0.0"
  },
  "tagline" : "You Know, for Search"
}
Kibanaのインストールと起動
tar.gzをダウンロードして、展開。
$ wget https://artifacts.elastic.co/downloads/kibana/kibana-6.5.2-linux-x86_64.tar.gz
$ tar xf kibana-6.5.2-linux-x86_64.tar.gz
$ cd kibana-6.5.2-linux-x86_64
起動。
$ bin/kibana
http://localhost:5601にアクセスすると、Kibanaが確認できます。
アプリケーションを起動して、メトリクスを可視化してみる
起動。
$ mvn spring-boot:run
起動した後は、Kibanaにアクセスしてみます。
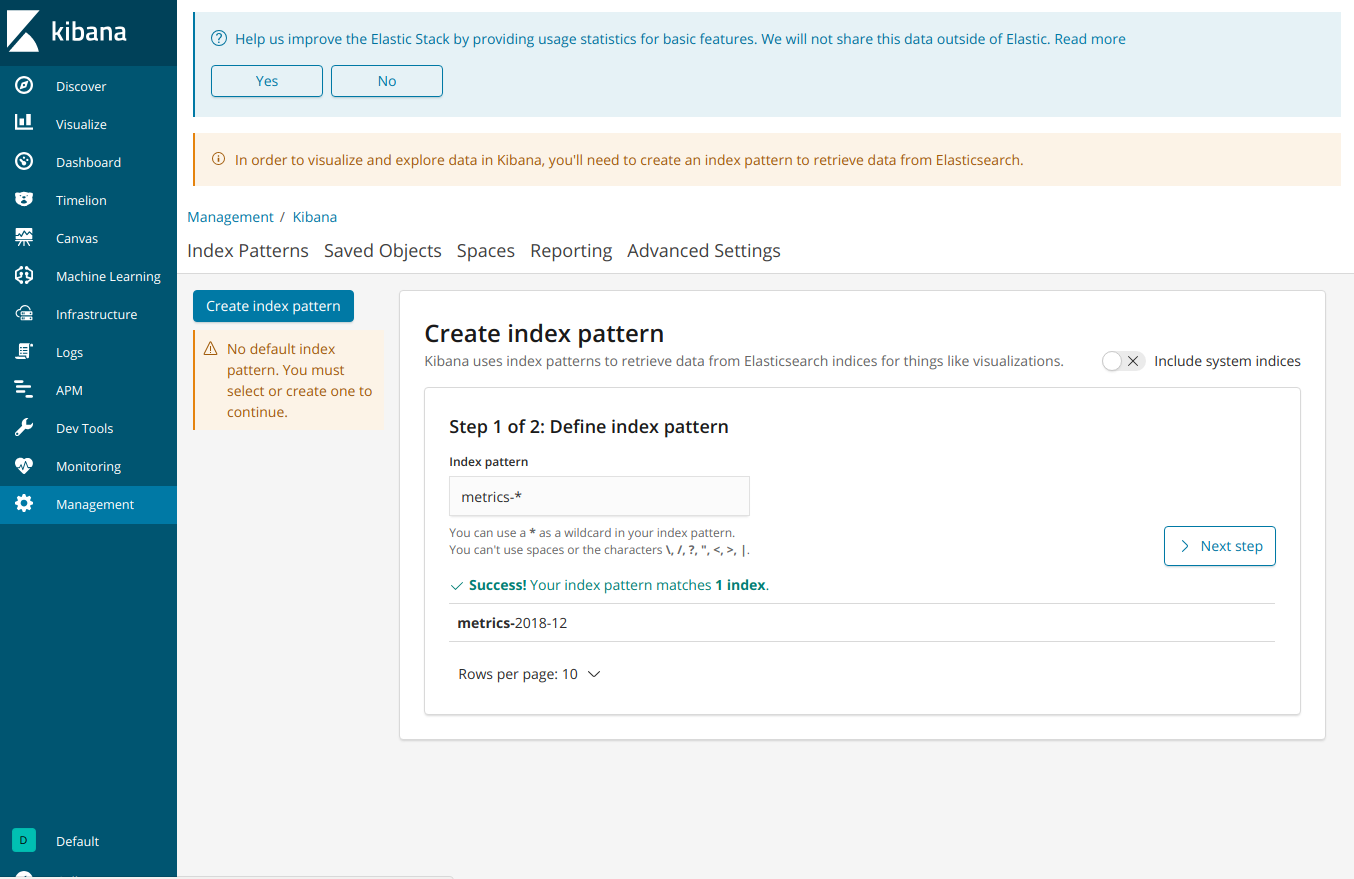
すでに、「metrics-yyyy-mm」というインデックスにメトリクスが送信されているので、「
Discover」でこれを登録します。
時間のフィールドは@timestampですね。
「Discover」で見ると、送信されたデータを見ることができます。
では、「Visualize」を選んで表示してみましょう。
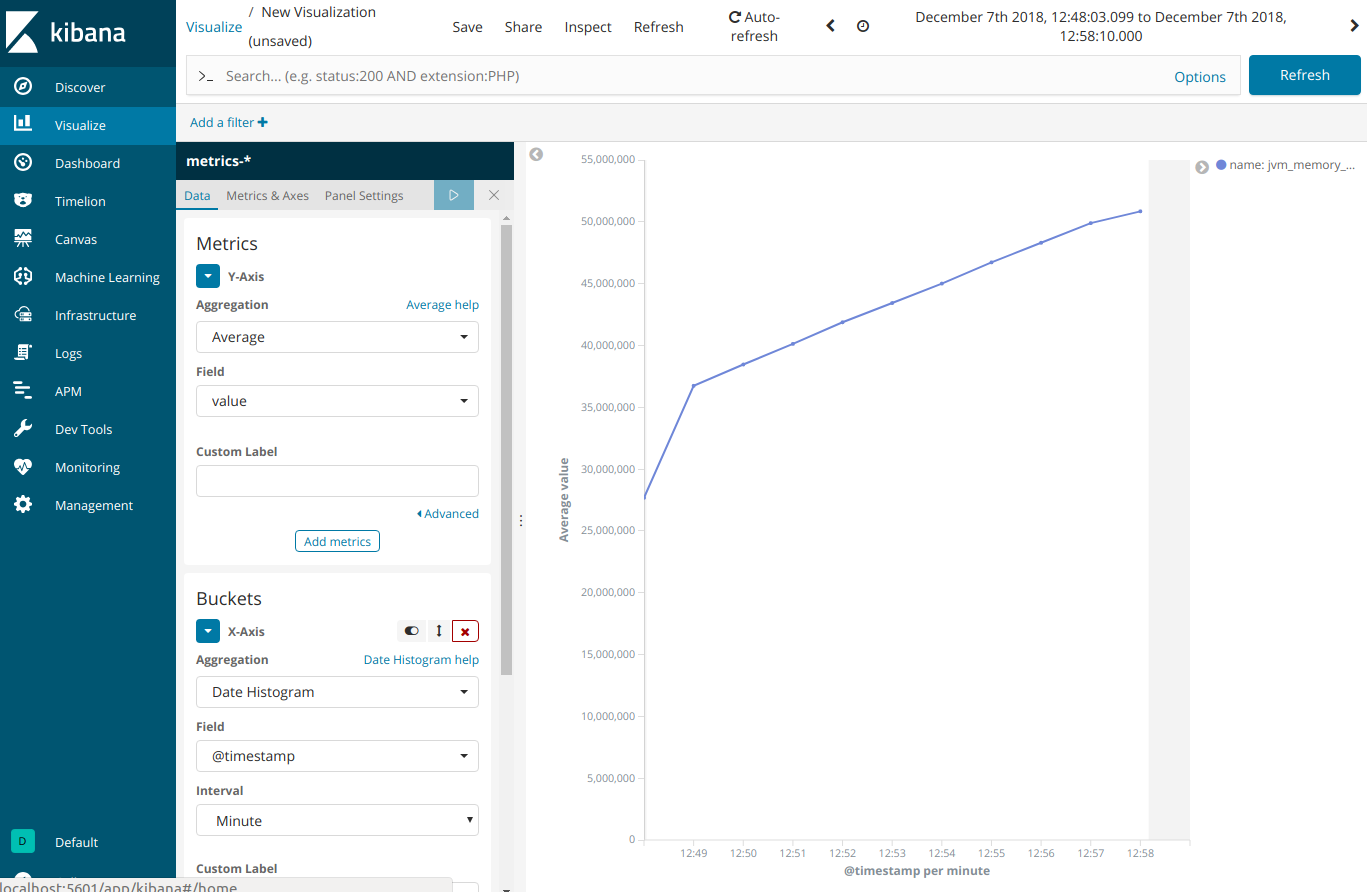
今回はJavaVMのメモリについて、可視化してみます。
Y軸はvalueのAverageで、X軸はDate Histgram、フィールドは@timestamp、インターバルはMiniteで絞り込み。
X軸は、さらにFiltersをかけてname: jvm_memory_usedで表示対象のメトリクスを絞り込みました。
それっぽく表示されました。


