目的
- よく使うであろうTableViewを使用したアプリをStoryboardありとなしでサクッと作れるようになる
- ありなしの両方を試すことで、Storyboardが何をやっているのかなんとなくイメージできるようになる
Step1. 爆速でTableViewアプリ作成
ひとまず5分でTableViewアプリを作る。
初心者がstoryboardを使うと色々とハマる気がするので、storyboardなしの方が手っ取り早い。
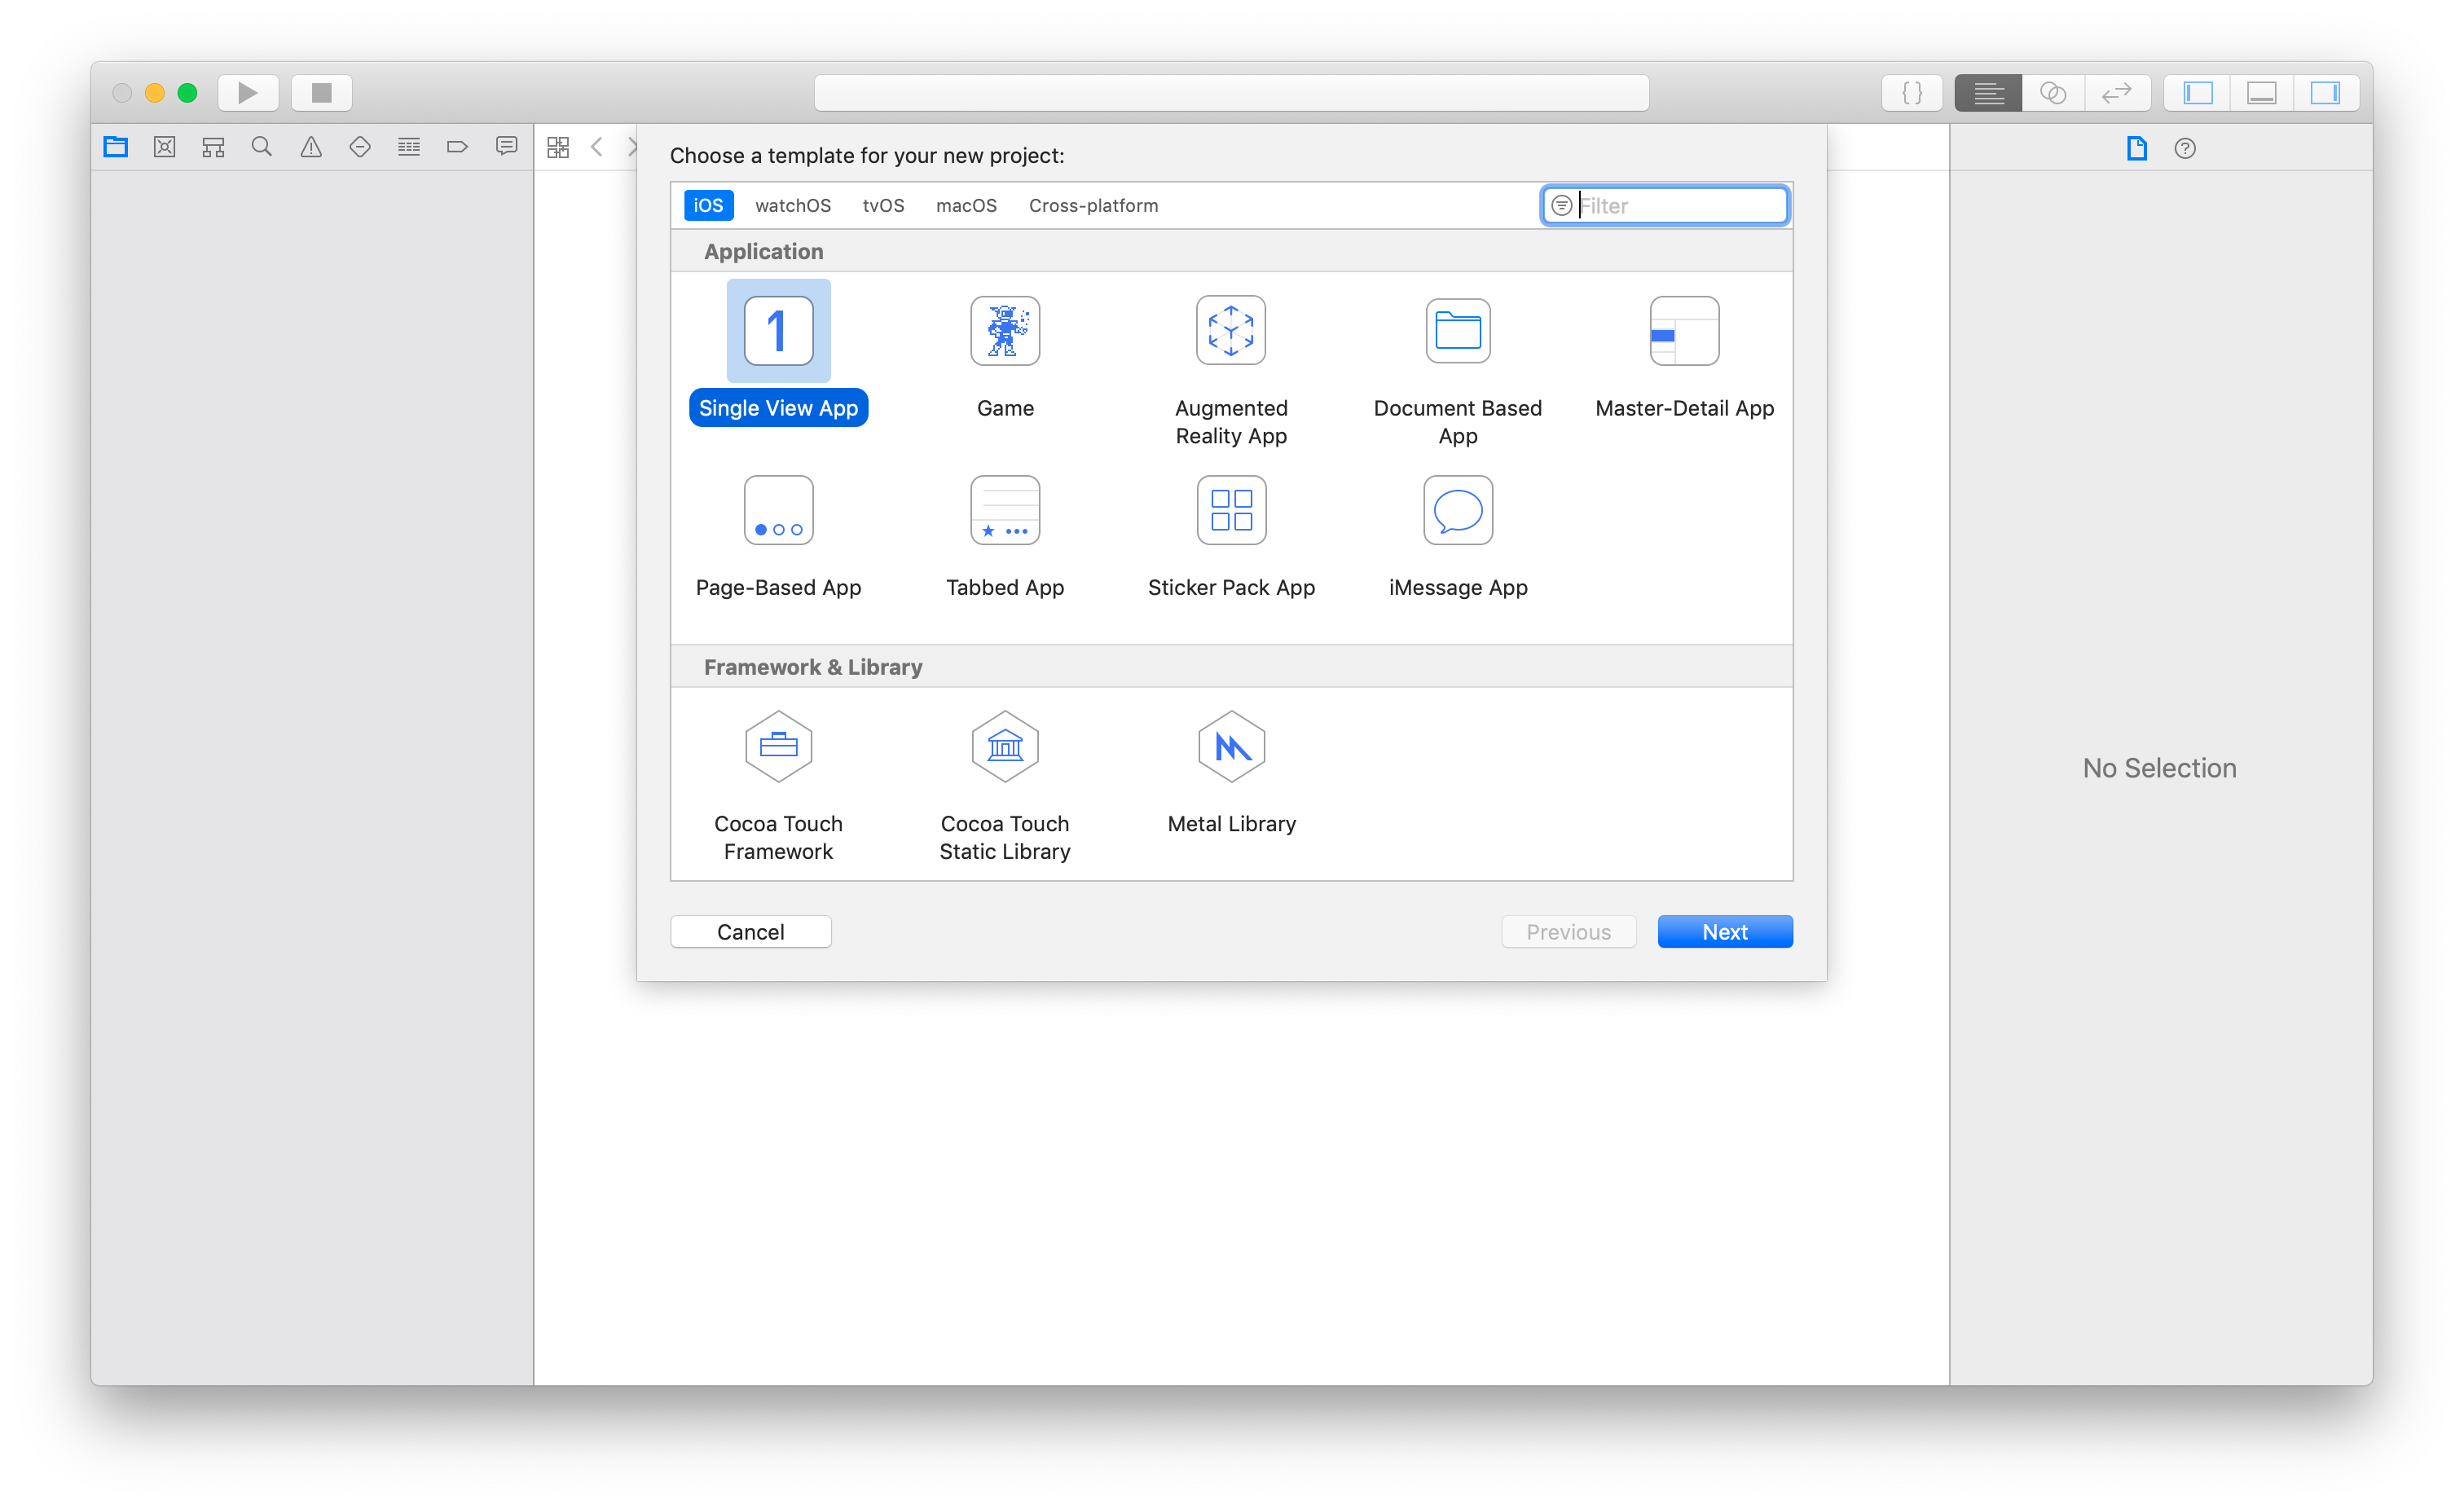
1.1. XCodeでProject作成
「Single View App」で「Next」
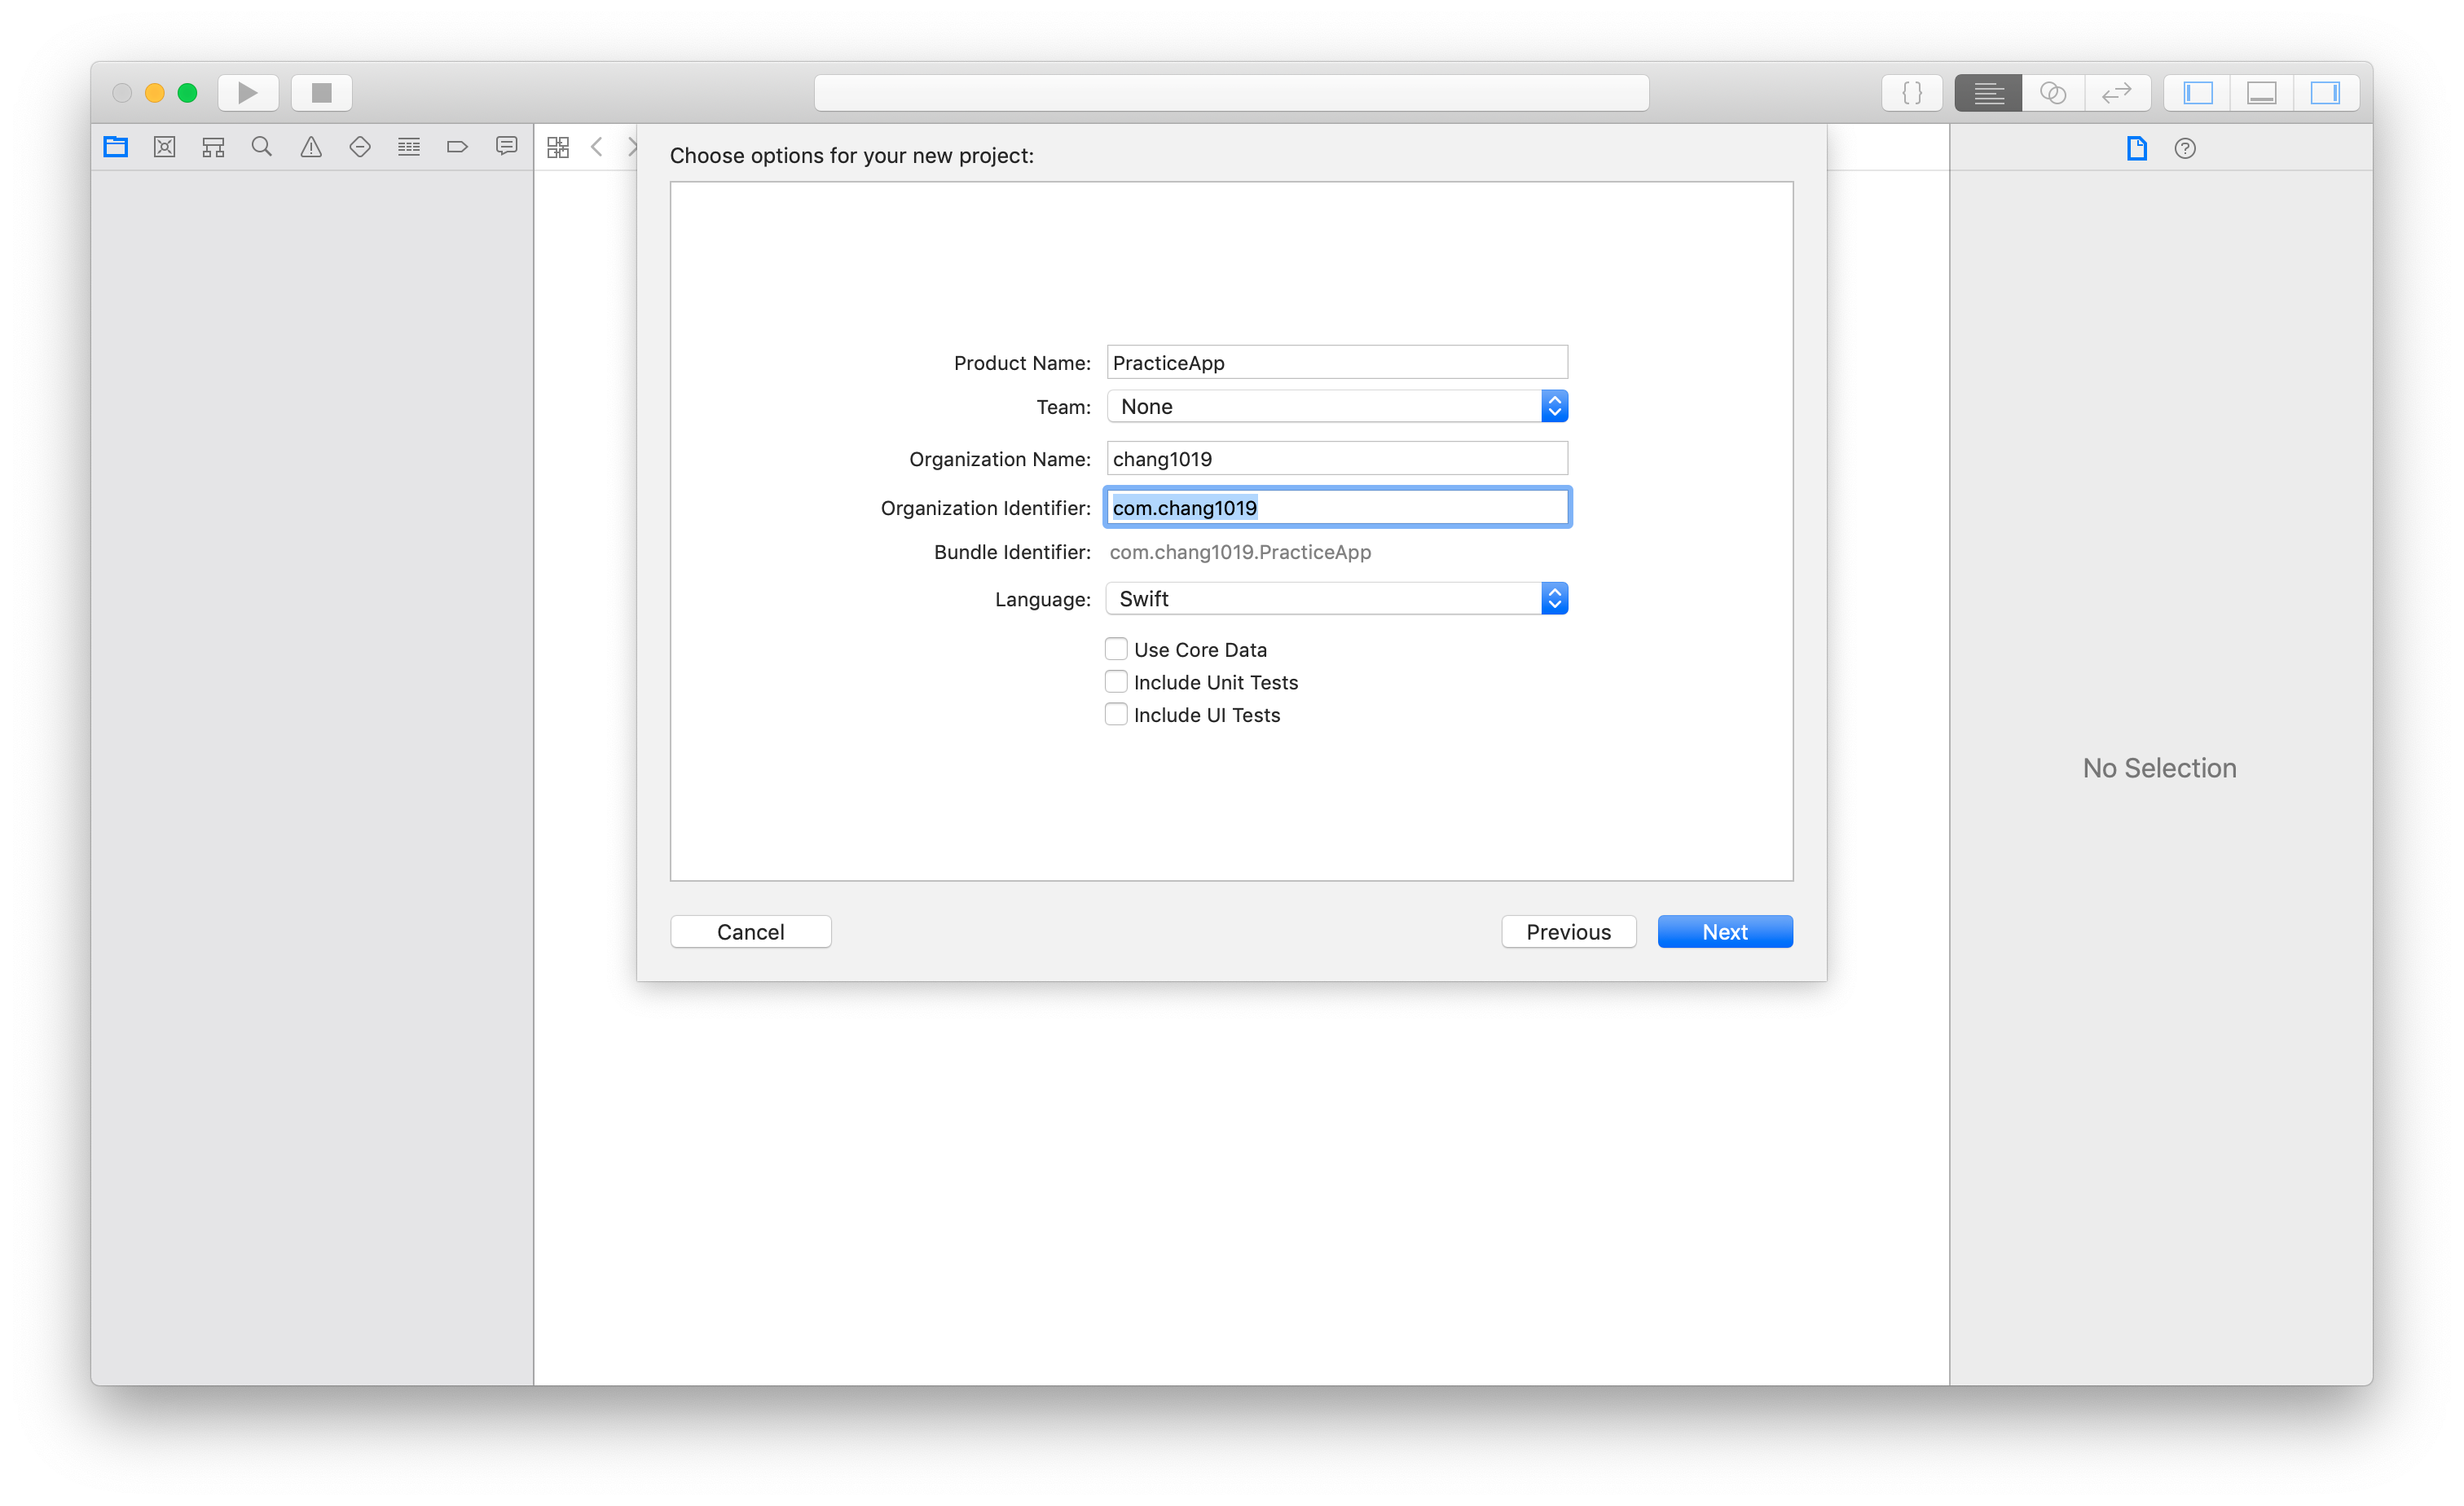
1.2. Project情報入力
適当にProject情報入力
1.3. いきなりViewController編集
爆速でいきたいので他の設定やファイルには目もくれずViewControllerを編集する
import UIKit

class ViewController:
    UIViewController,
    UITableViewDelegate,
    UITableViewDataSource
{

    override func viewDidLoad() {
        super.viewDidLoad()

        let tableView: UITableView = UITableView(frame: view.frame, style: .plain)
        tableView.register(UITableViewCell.self, forCellReuseIdentifier: "cell")
        tableView.delegate = self
        tableView.dataSource = self
        view.addSubview(tableView)
    }

    // UITableViewDataSource

    func tableView(_ tableView: UITableView,
                   numberOfRowsInSection section: Int) -> Int
    {
        return 10
    }

    func tableView(_ tableView: UITableView,
                   cellForRowAt indexPath: IndexPath) -> UITableViewCell
    {
        let cell: UITableViewCell = tableView.dequeueReusableCell(withIdentifier: "cell",
                                                                  for: indexPath)
        cell.textLabel?.text = "\(indexPath[1] + 1)行目"
        return cell
    }
}
ポイントとしては
- インスタンス変数「view」にaddSubViewで表示したいTableViewを追加する
- 追加するTableViewに表示したいTableViewCellをregisterする
- 追加するTableViewのdelegateとdataSourceに必要なインタフェースの実装(この場合はself)を渡す
- 各行の表示にはcellForRowAtで返却されるTableViewCellが使用される
- その際、dequeueReusableCellを使用することでTableViewCellインスタンスを再利用しつつ表示に利用できる
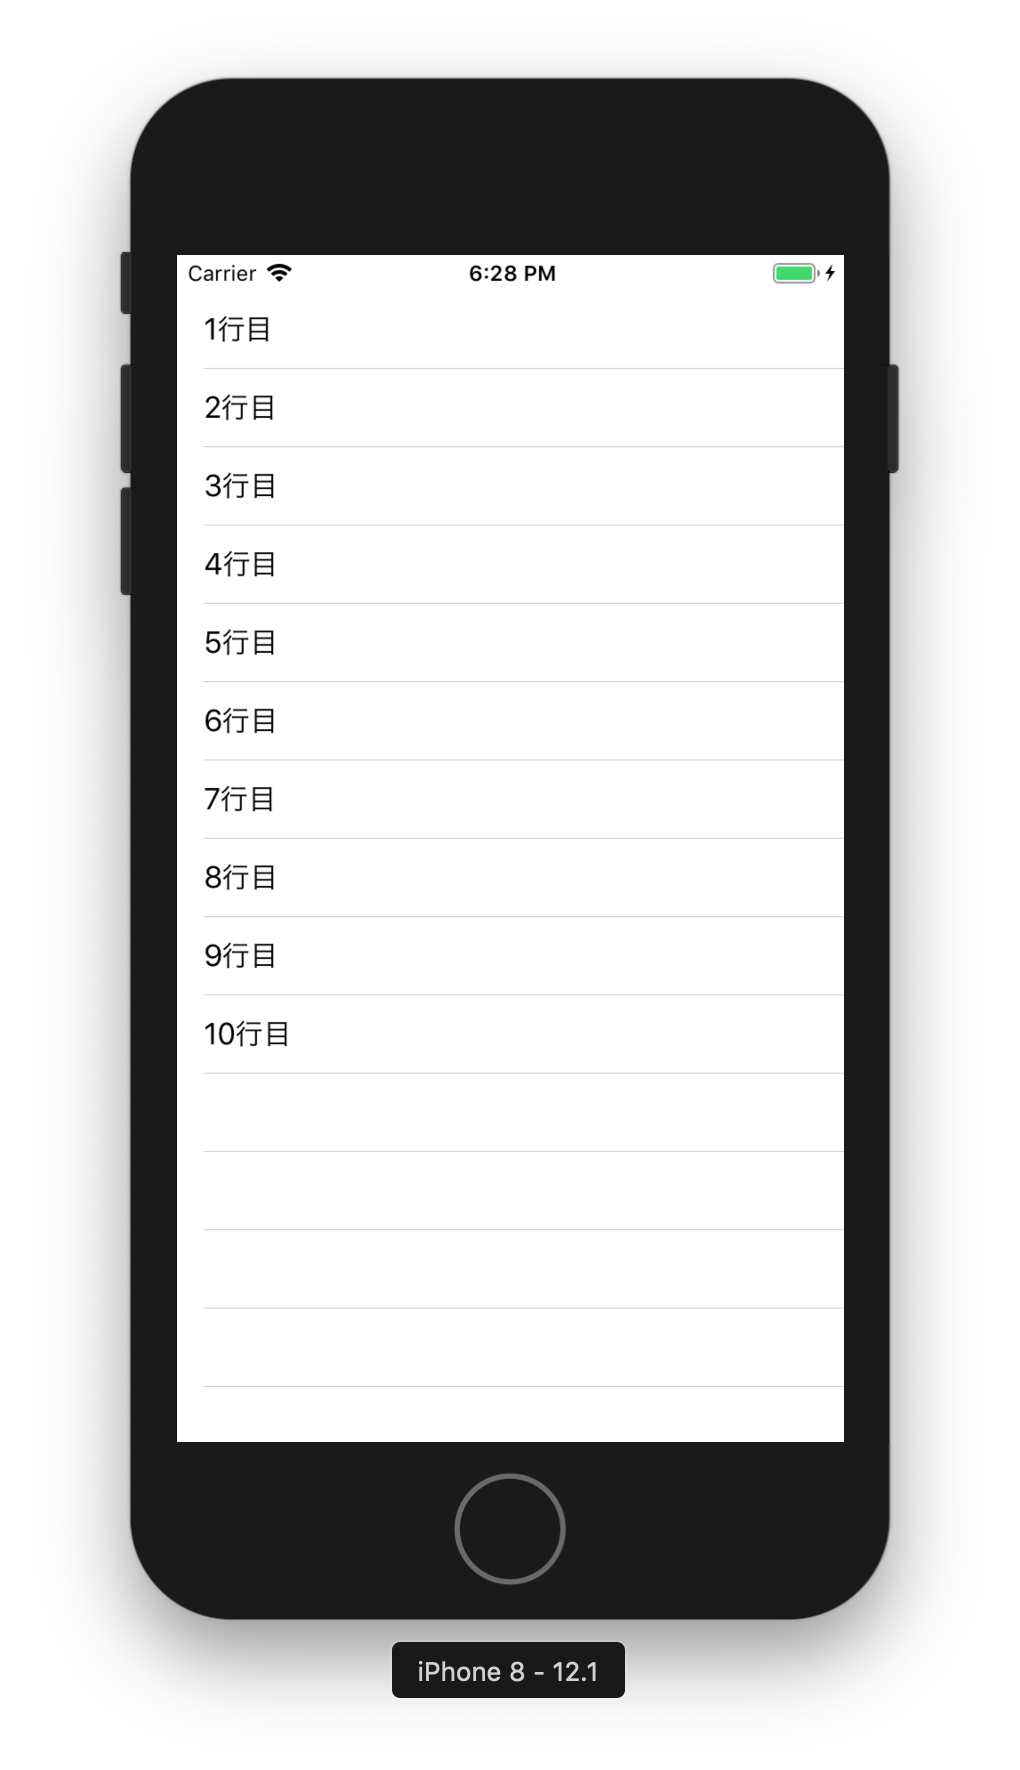
1.4. 起動
これで完了。シミュレータでRunすれば以下のような10行だけ表示されるアプリの完成。
Step2. Cellのカスタマイズ+動的レコード
Tableっぽくdataをもとに行数を動的に変更しつつ、UICellViewのカスタマイズをコードだけでやってみる。
2.1. ViewControllerをもう少し弄ってみる
import UIKit

class ViewController:
    UIViewController,
    UITableViewDelegate,
    UITableViewDataSource
{
    private let data: [(String,String)] = [
        ("りんご", "Apple"),
        ("みかん", "Orange"),
        ("ぶどう", "Grape"),
    ]

    override func viewDidLoad() {
        super.viewDidLoad()

        let tableView: UITableView = UITableView(frame: view.frame, style: .plain)
        tableView.register(TableCellView.self, forCellReuseIdentifier: TableCellView.ID)
        tableView.delegate = self
        tableView.dataSource = self
        view.addSubview(tableView)
    }

    // UITableViewDataSource

    func tableView(_ tableView: UITableView,
                   numberOfRowsInSection section: Int) -> Int
    {
        return data.count
    }

    func tableView(_ tableView: UITableView,
                   cellForRowAt indexPath: IndexPath) -> UITableViewCell
    {
        let cell: TableCellView = tableView.dequeueReusableCell(withIdentifier: TableCellView.ID,
                                                                for: indexPath) as! TableCellView

        let rowIndex: Int = indexPath[1]
        cell.setCellInfo(title: data[rowIndex].0, detail: data[rowIndex].1)
        return cell
    }
}

class TableCellView: UITableViewCell
{
    static let ID: String = "cell"
    private let cellStyle: CellStyle = CellStyle.subtitle
    private let cellColor: UIColor = UIColor(red: 0.6, green: 0.8, blue: 0.9, alpha: 0.9)

    required init?(coder aDecoder: NSCoder) {
        fatalError("not implemented")
    }

    override init(style: UITableViewCell.CellStyle, reuseIdentifier: String?) {
        super.init(style: cellStyle, reuseIdentifier: reuseIdentifier)
        self.backgroundColor = cellColor
    }

    // original methods

    func setCellInfo(title: String, detail: String) {
        self.textLabel?.text = title
        self.detailTextLabel?.text = detail
    }
}
ポイントとしては
- registerしていたUITableViewCellを自作クラスのTableViewCellに変更
- TableViewCellはUITableViewCellのサブクラス
- overrideしたinitで表示ロジックを実装
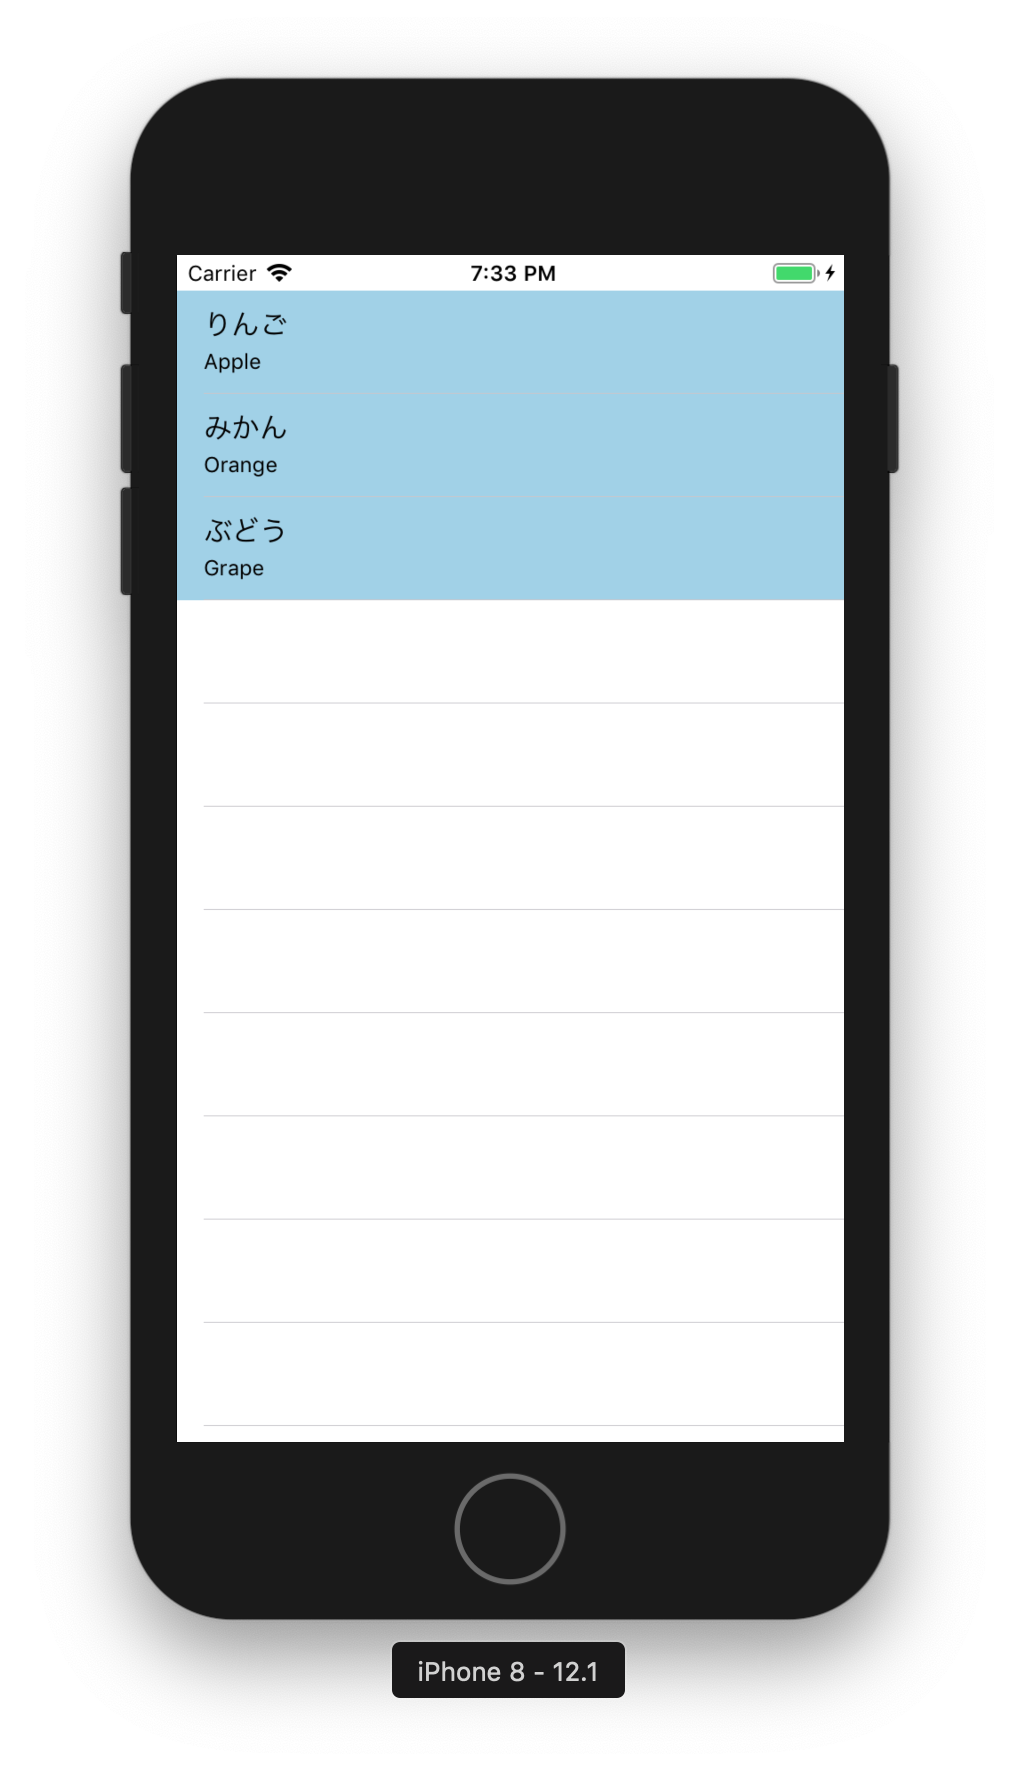
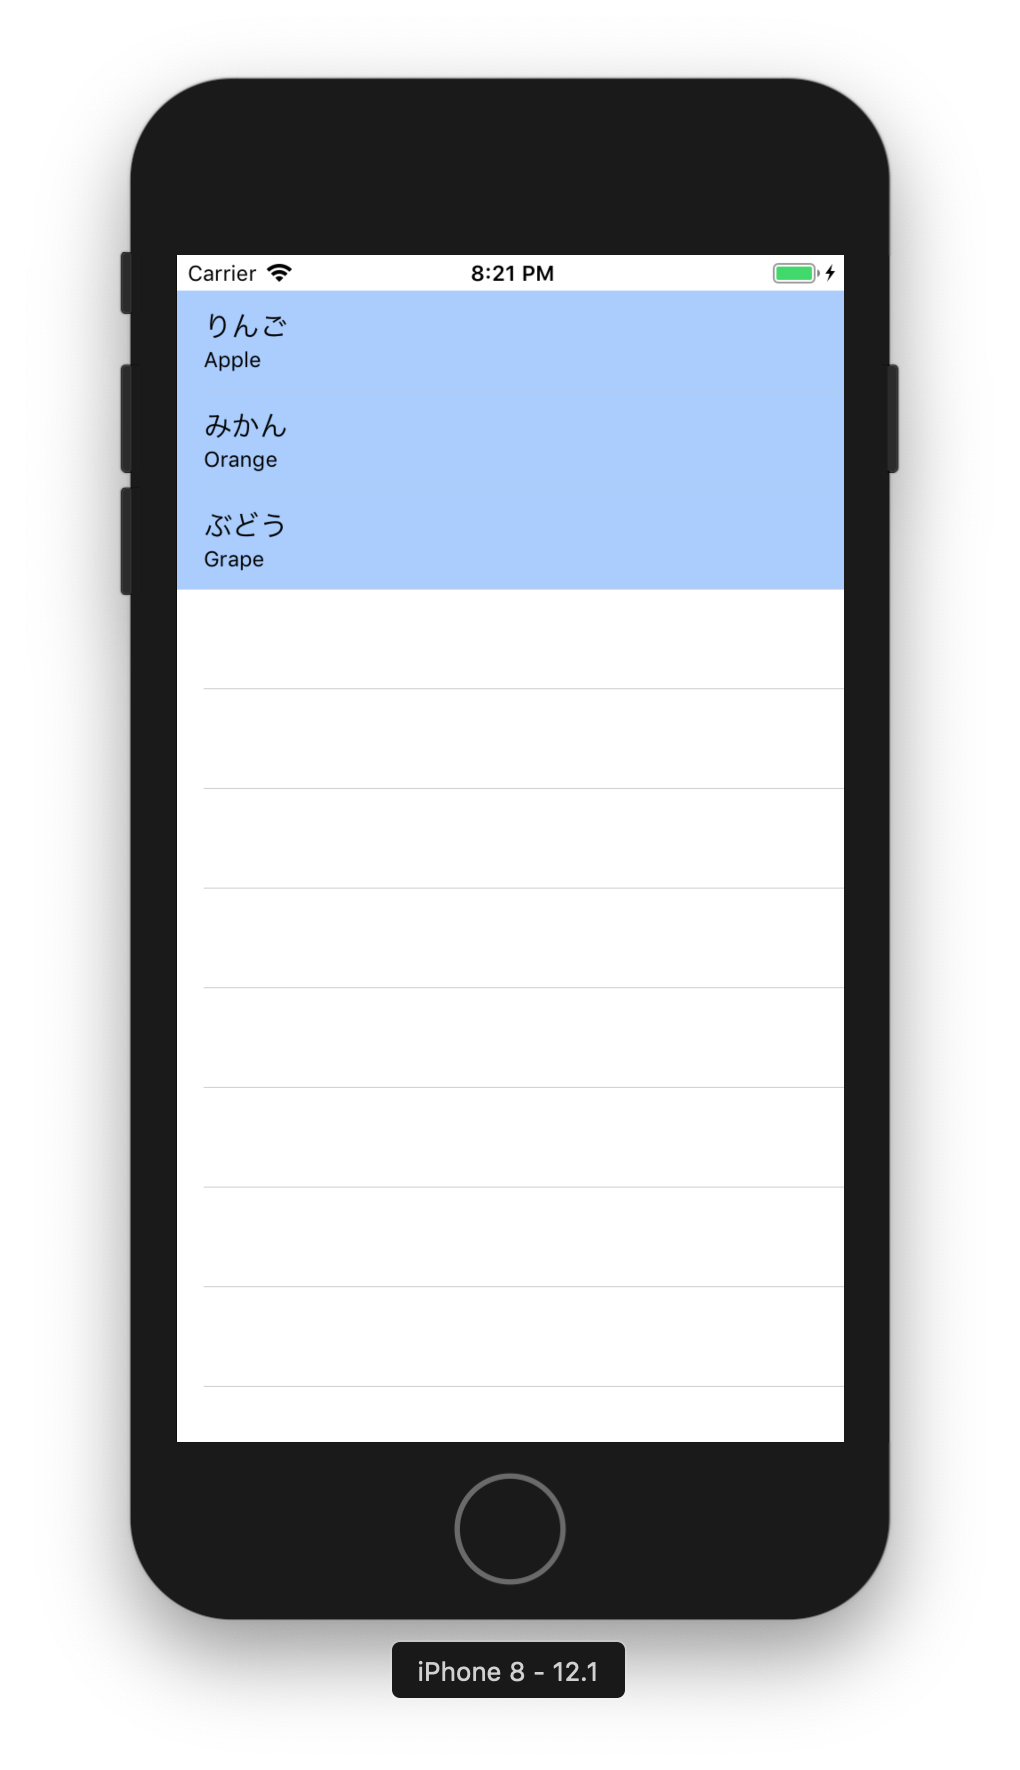
2.2. 起動
Runする
Step3. Storyboardを使ってみる
コードで地道に書いているところをStoryboardにお任せしてみよう
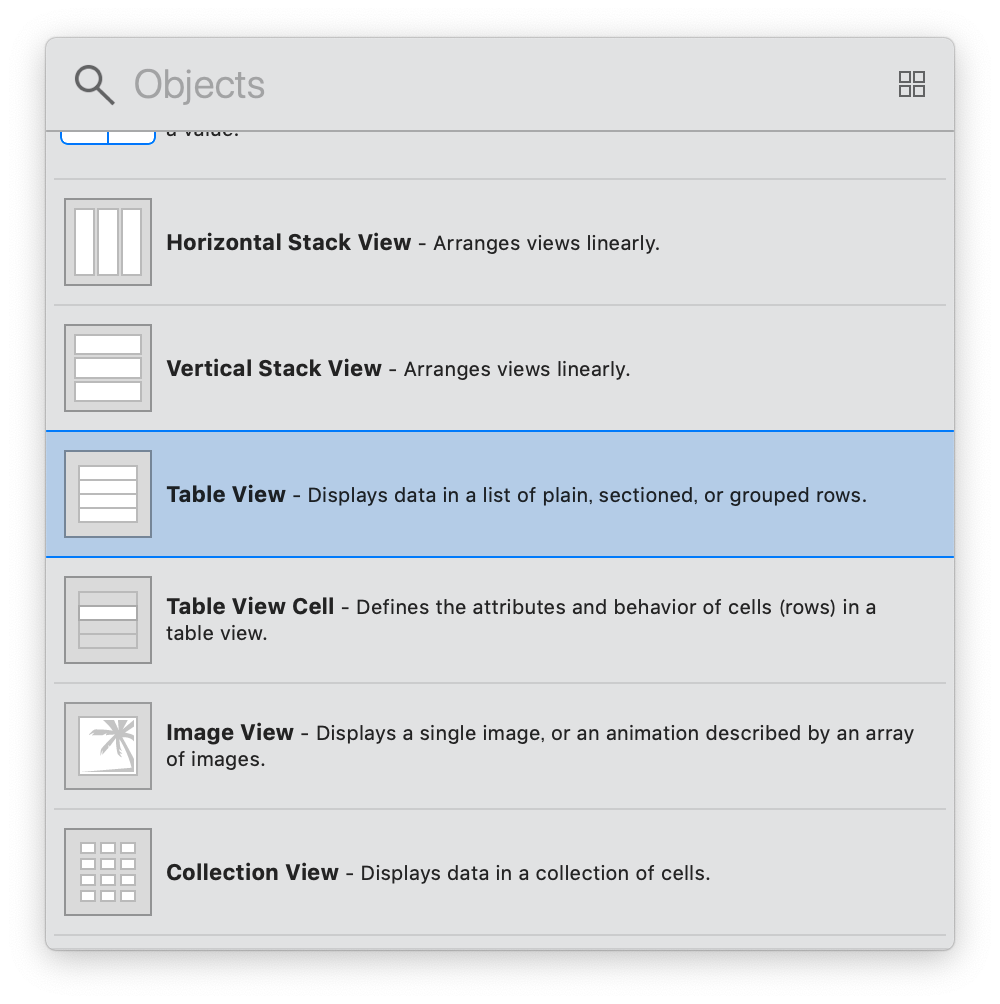
3.1. TableViewをStoryboardへ
Main.storyboardを開き、View Controllerに対してTableViewを追加する。
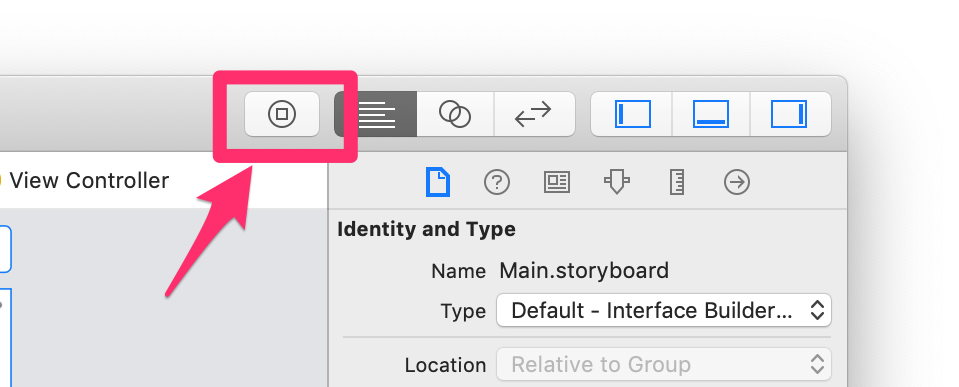
画面右上のUIコンポネント追加ボタンから
TableViewを選択
Codeと並べて表示
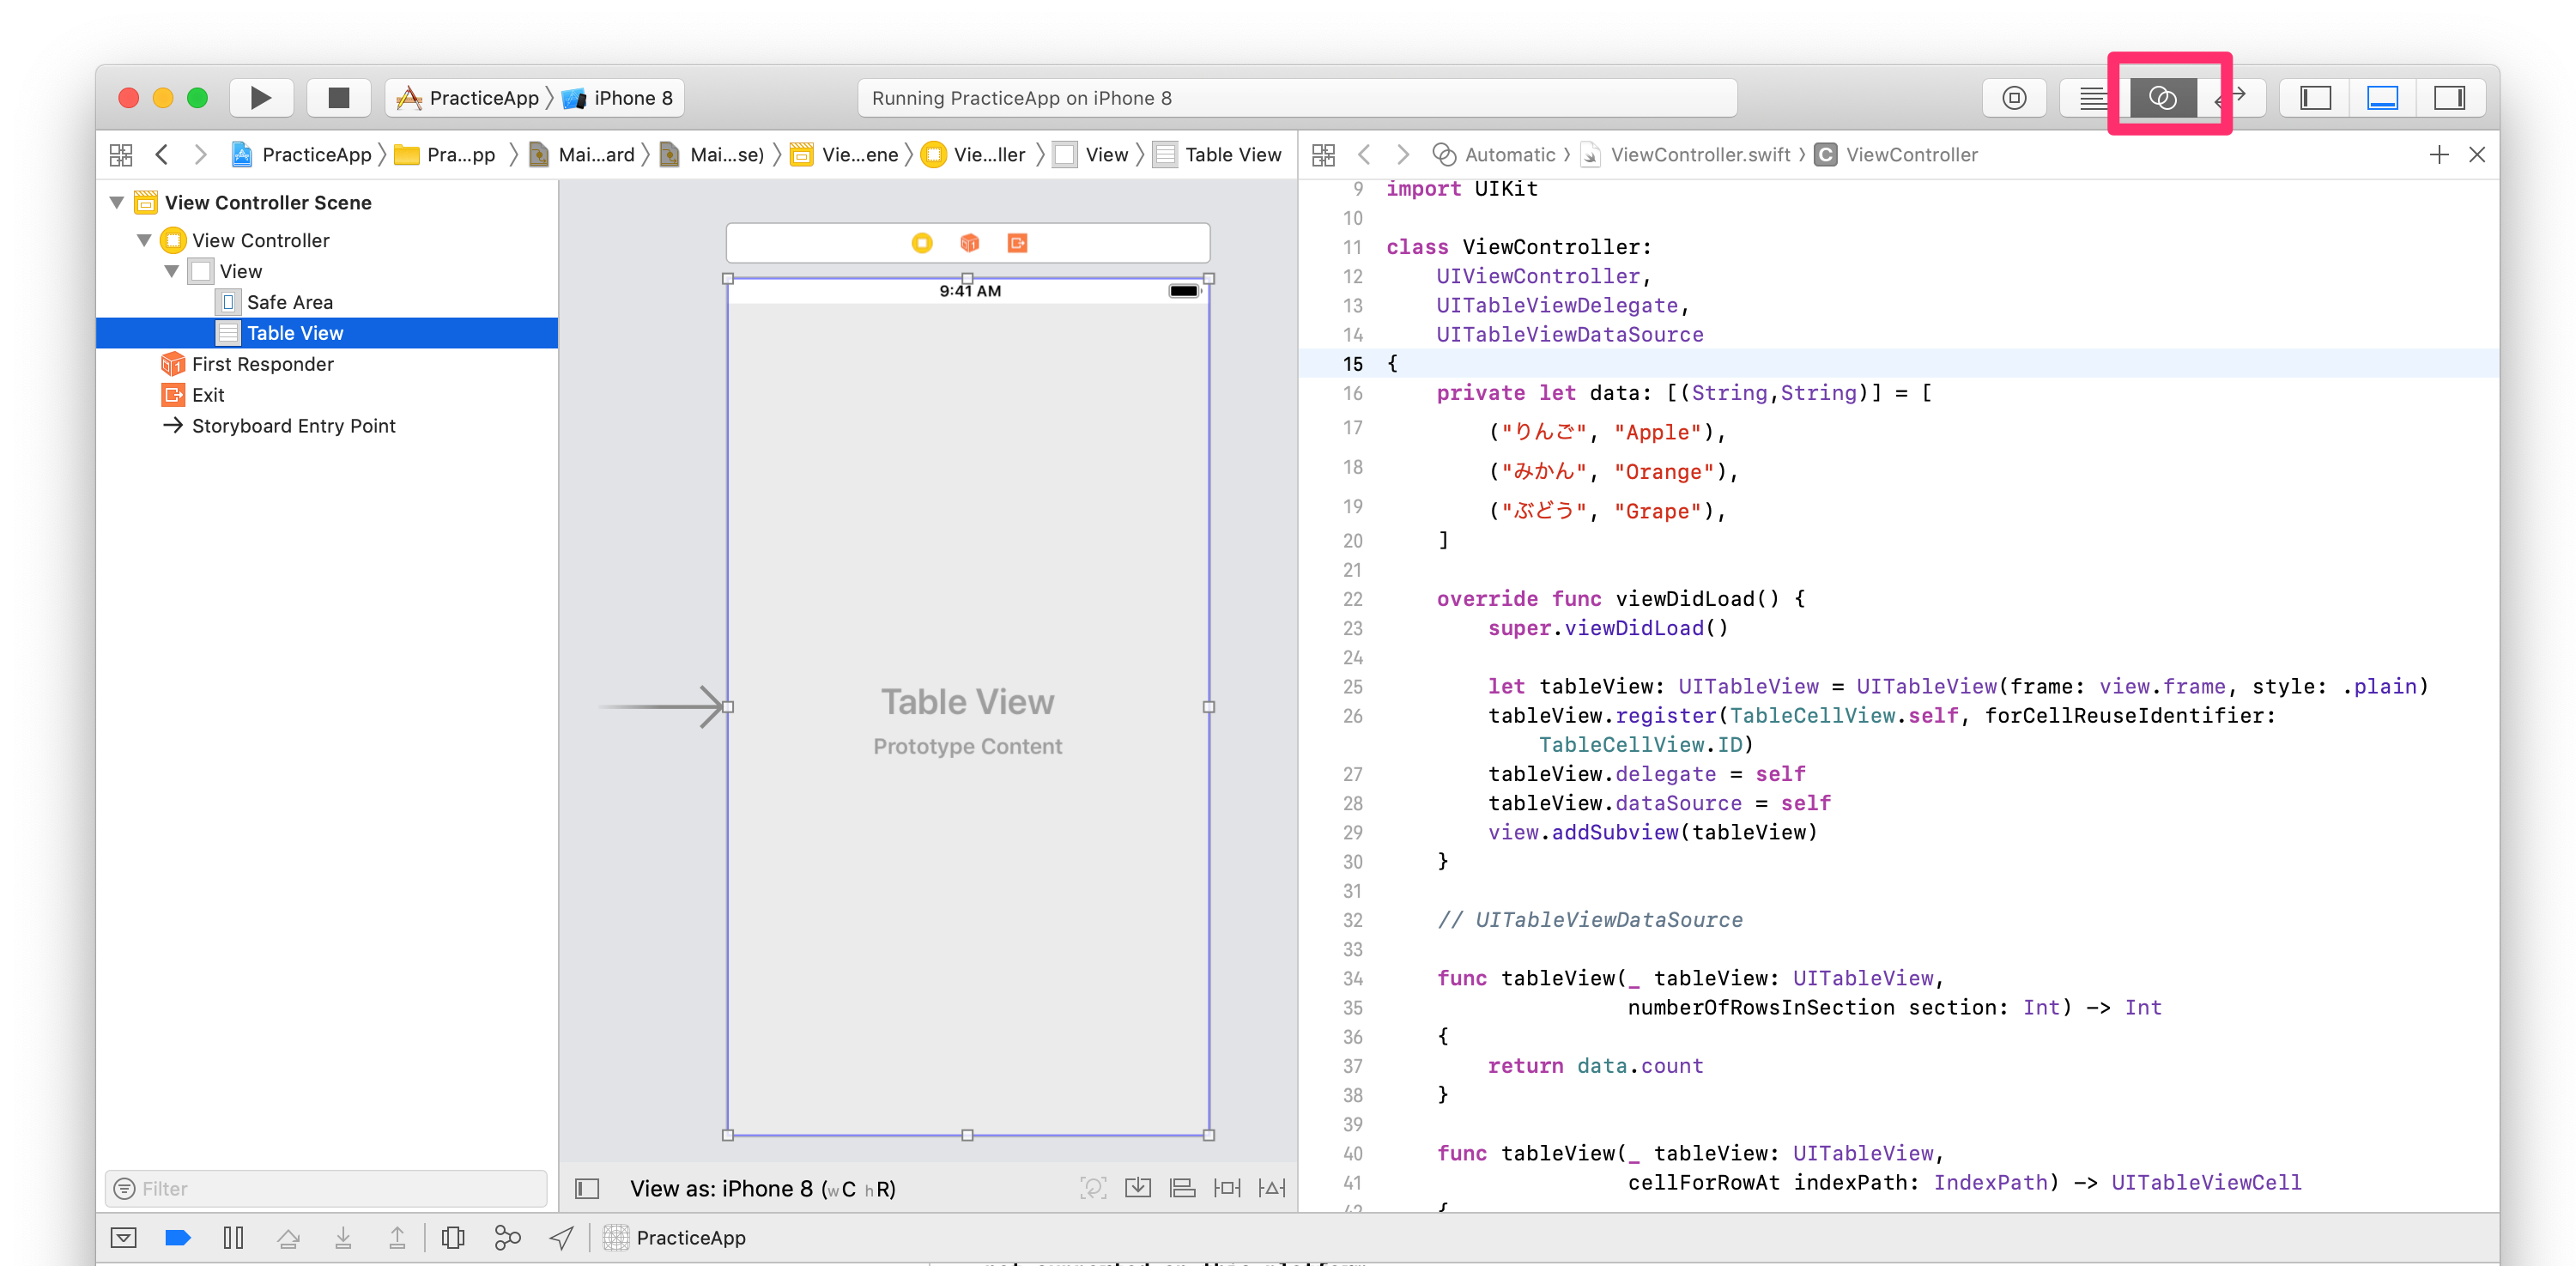
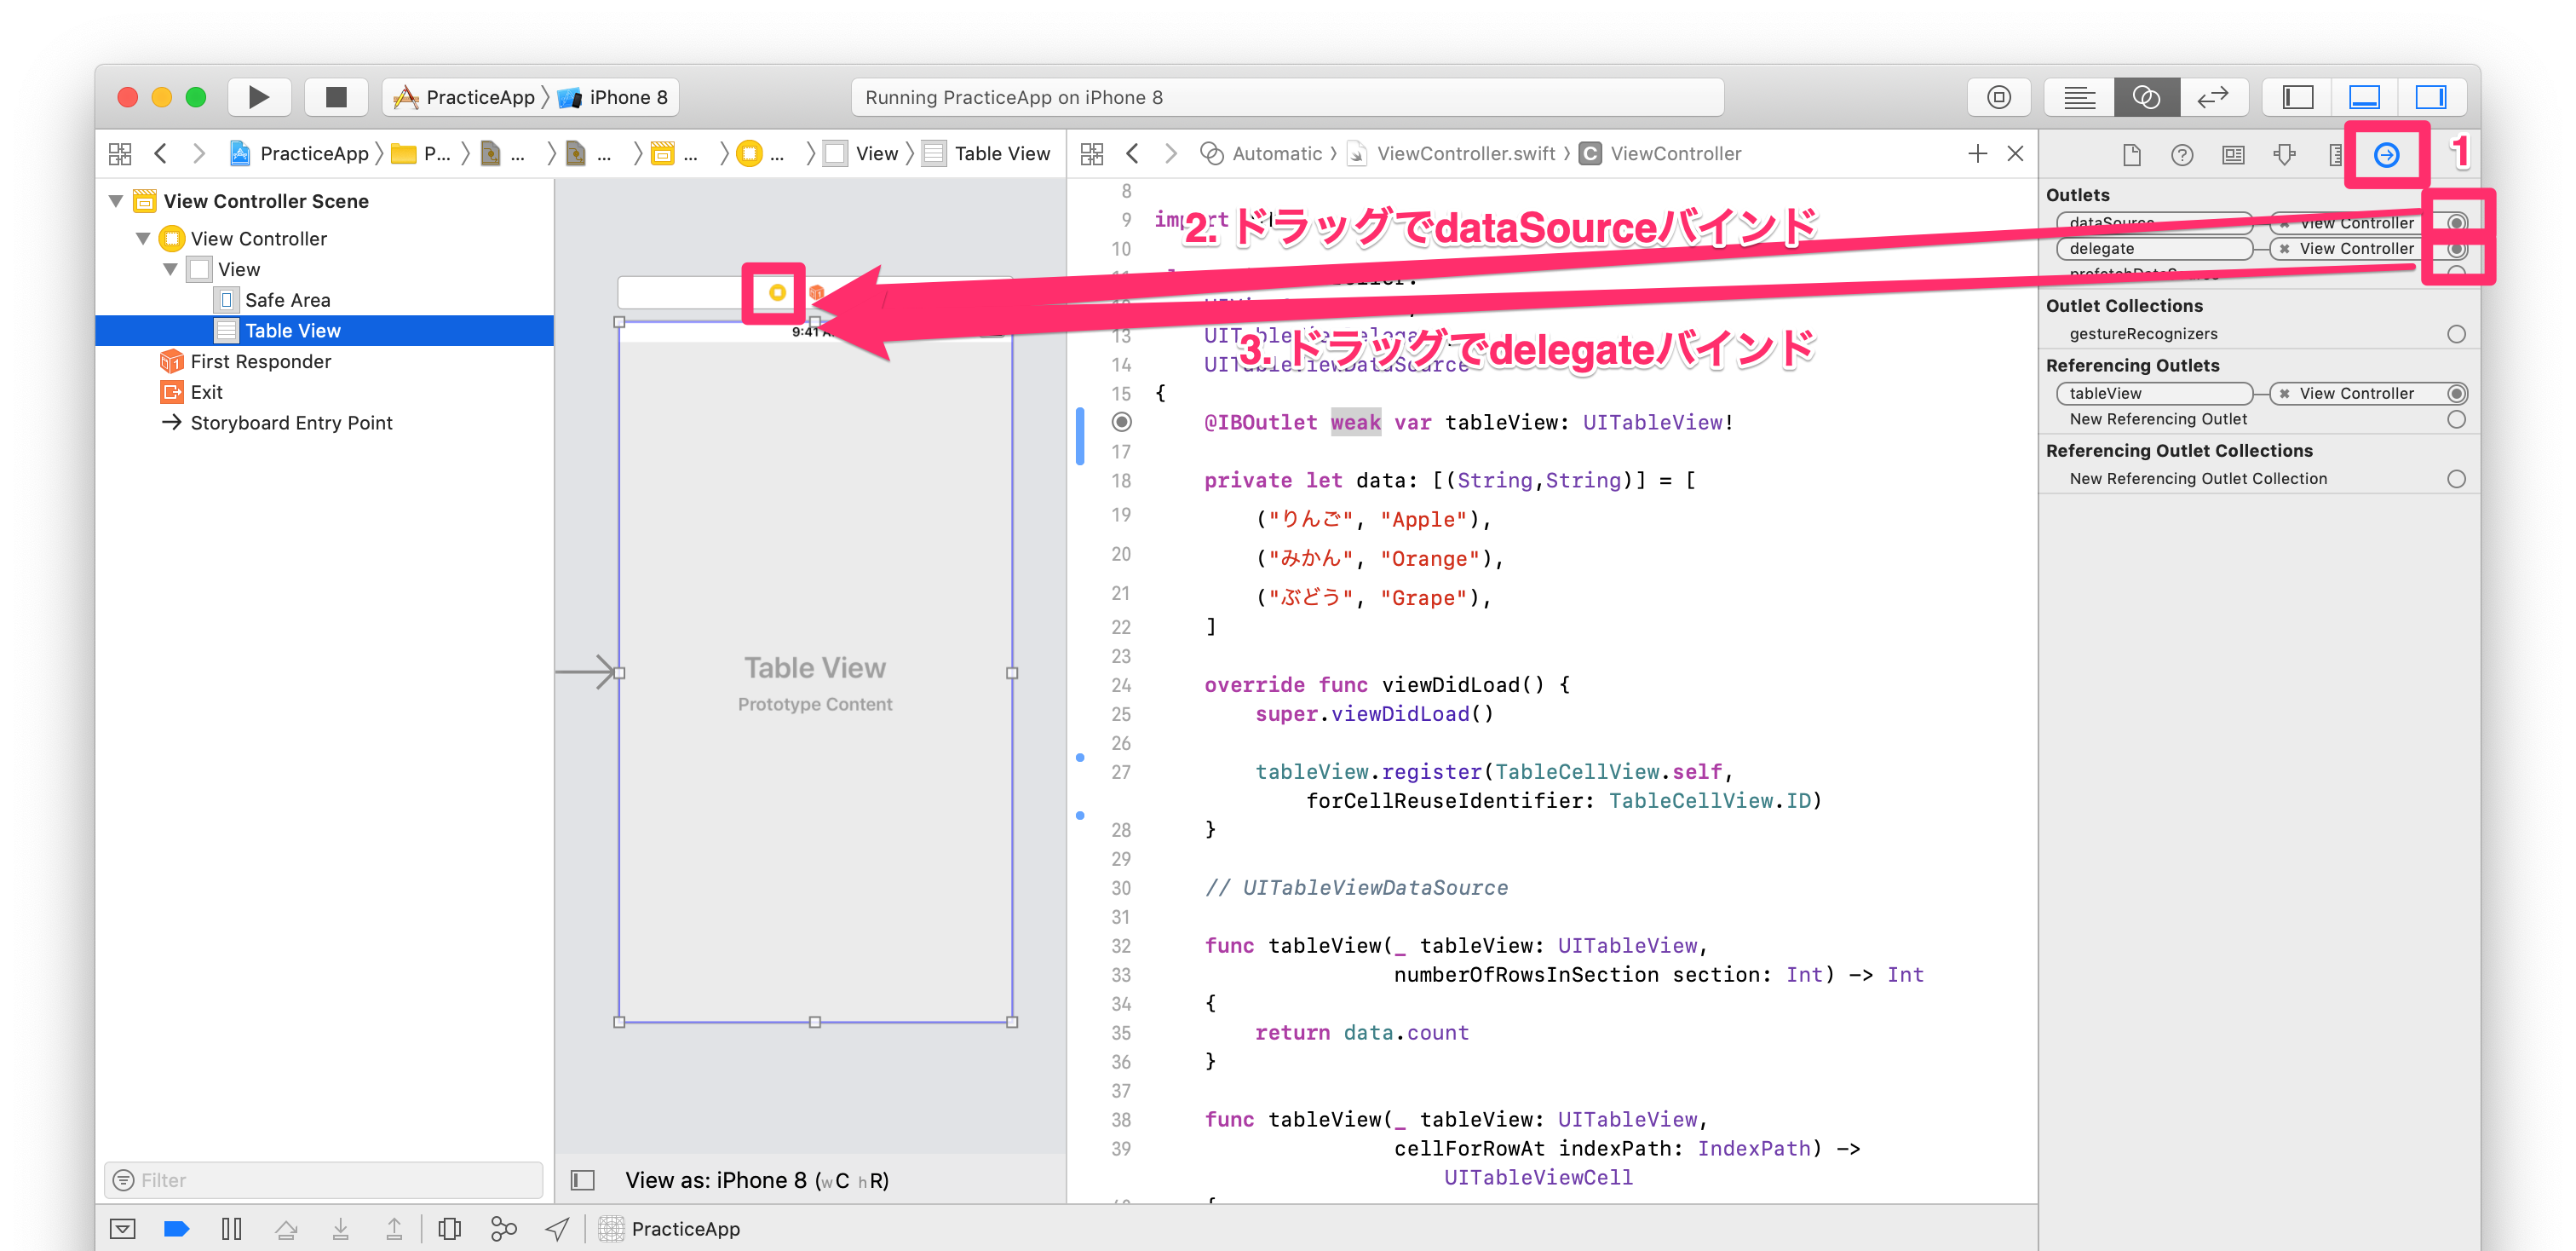
ここでCtrlキーを押したまま、TableViewからコードの方へドラッグ&ドロップすると、該当のTableViewとバインドされた変数が定義される。
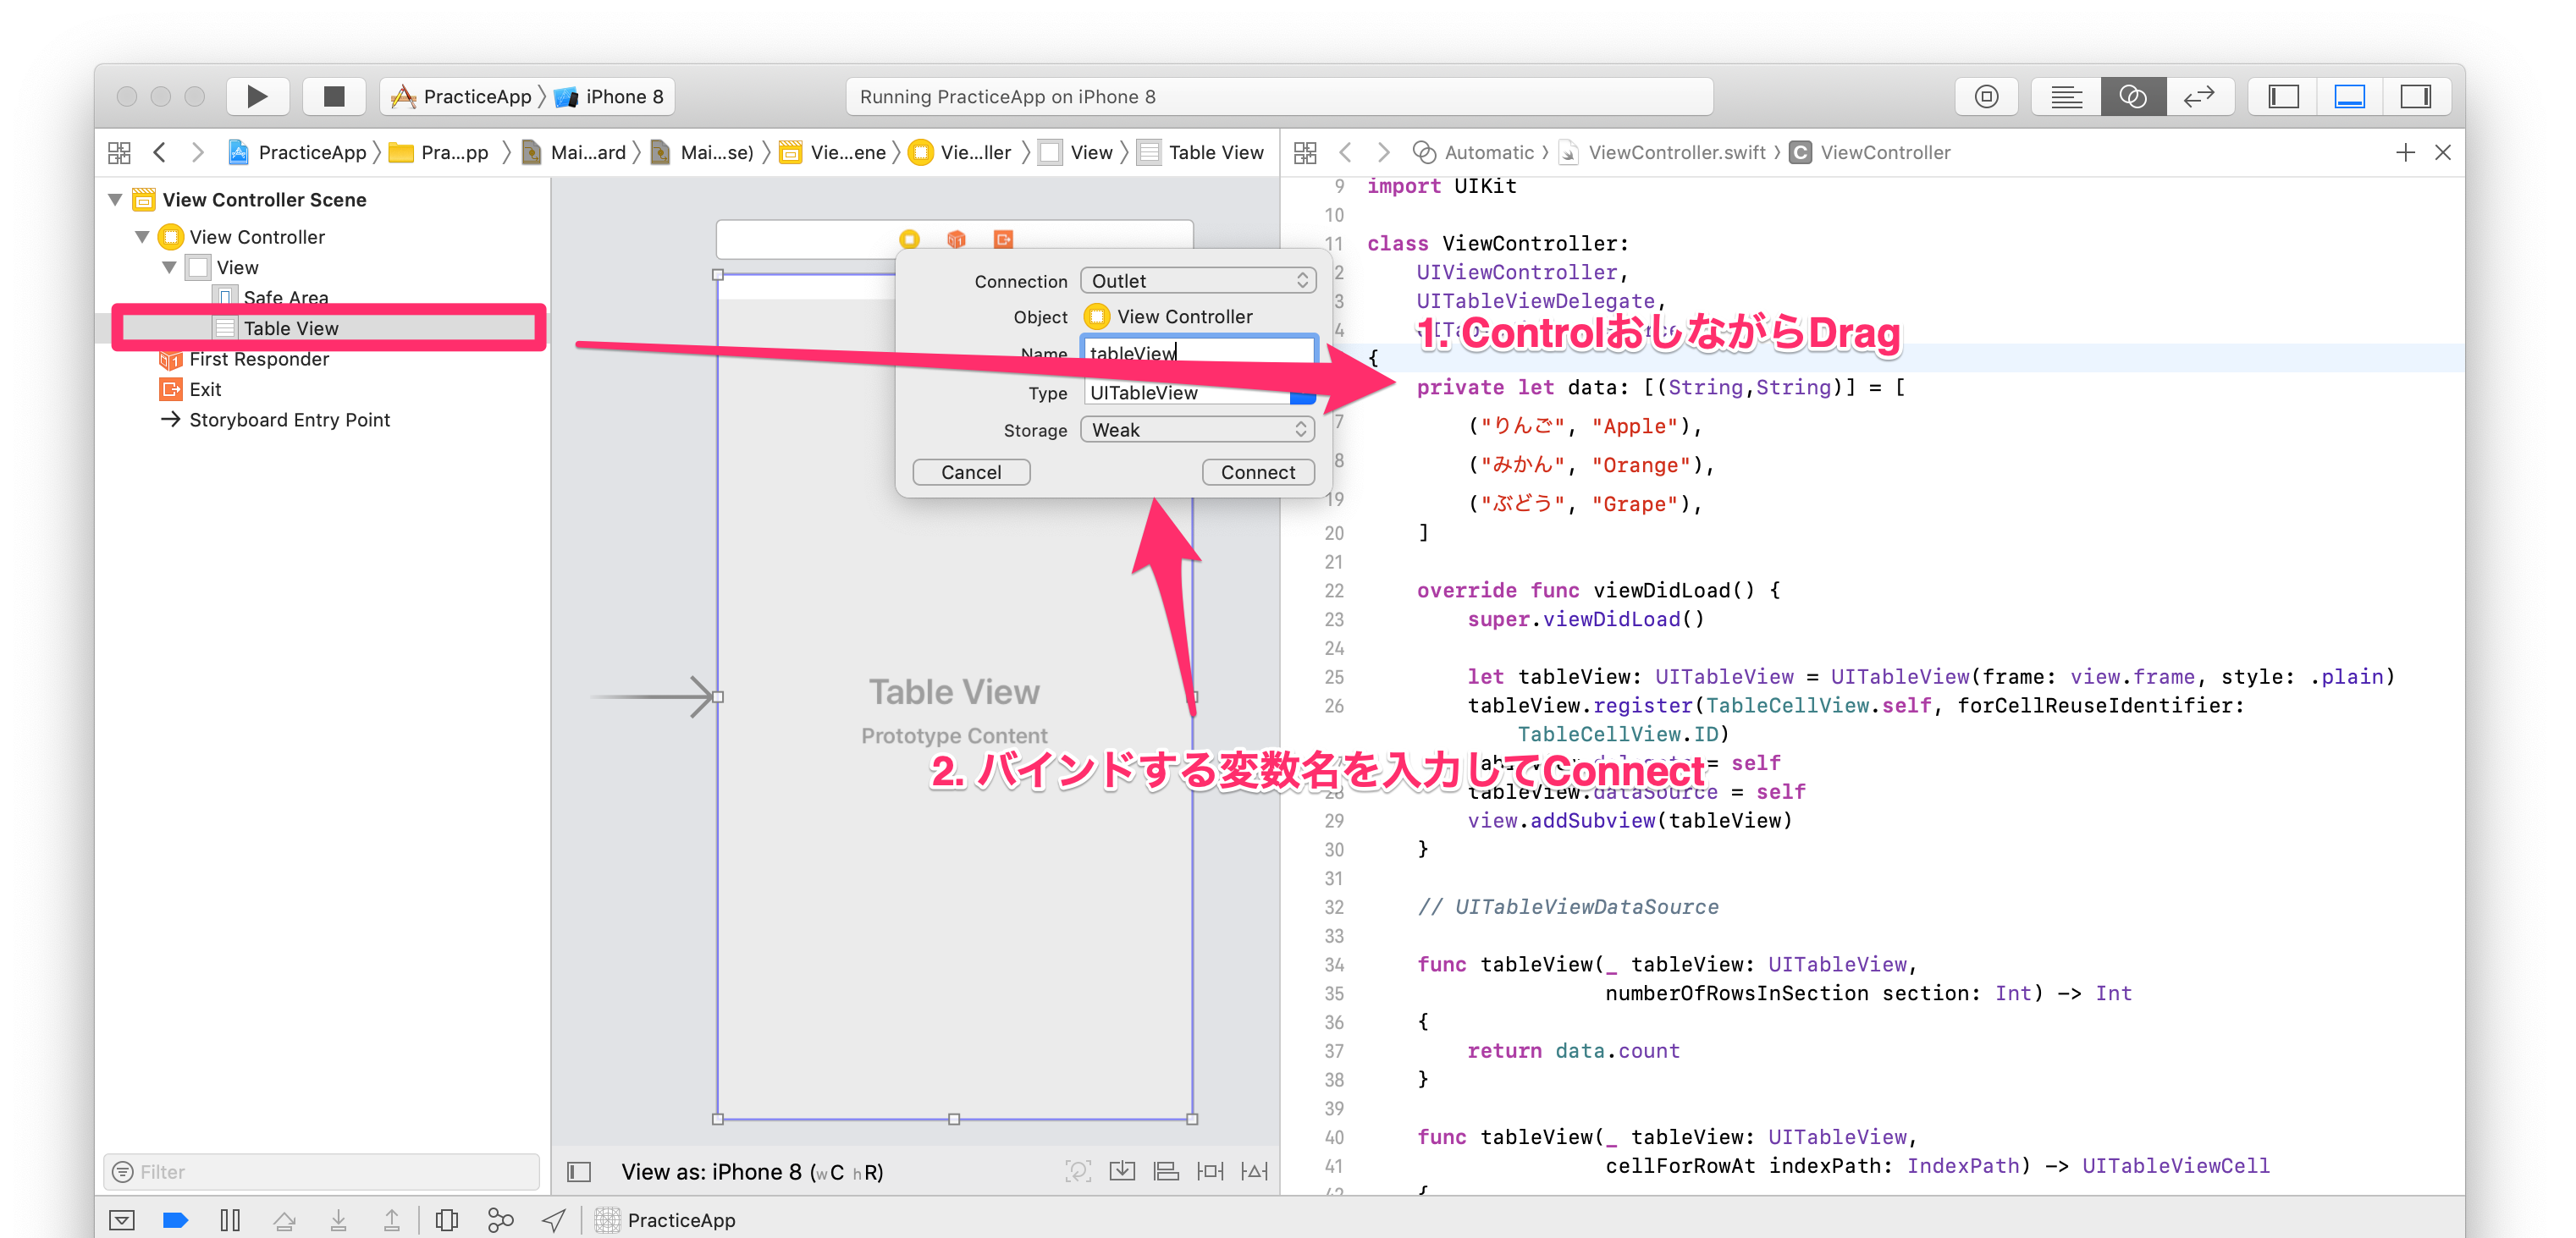
さらにTableViewのOutletsについて、delegateとdataSourceをドラッグ&ドロップでView Controllerとバインドする(このあたり、慣れればどうってことないのだろうけど、初心者にやさしいかどうかは微妙な気がする)
これらの作業により、ViewController.swiftからは以下のコードが削減できる
--- a/PracticeApp/ViewController.swift
+++ b/PracticeApp/ViewController.swift
@@ -13,6 +13,8 @@ class ViewController:
     UITableViewDelegate,
     UITableViewDataSource
 {
+    @IBOutlet weak var tableView: UITableView!
+
     private let data: [(String,String)] = [
         ("りんご", "Apple"),
         ("みかん", "Orange"),
@@ -22,11 +24,7 @@ class ViewController:
     override func viewDidLoad() {
         super.viewDidLoad()

-        let tableView: UITableView = UITableView(frame: view.frame, style: .plain)
         tableView.register(TableCellView.self, forCellReuseIdentifier: TableCellView.ID)
-        tableView.delegate = self
-        tableView.dataSource = self
-        view.addSubview(tableView)
     }

     // UITableViewDataSource
正直、この程度のtableViewであればあまりstoryboardのありがたさが実感できないが、おそらくlayout変更とかstyle変更とか諸々盛り込んでいく過程でありがたくなるはずだと信じる。
3.2. TableViewCellをStoryboardへ
引き続きTableViewCellもStoryboardへ移行してみよう
さっきのノリで今度はMain.storyboardのTableView内部に対してTableViewCellを追加する
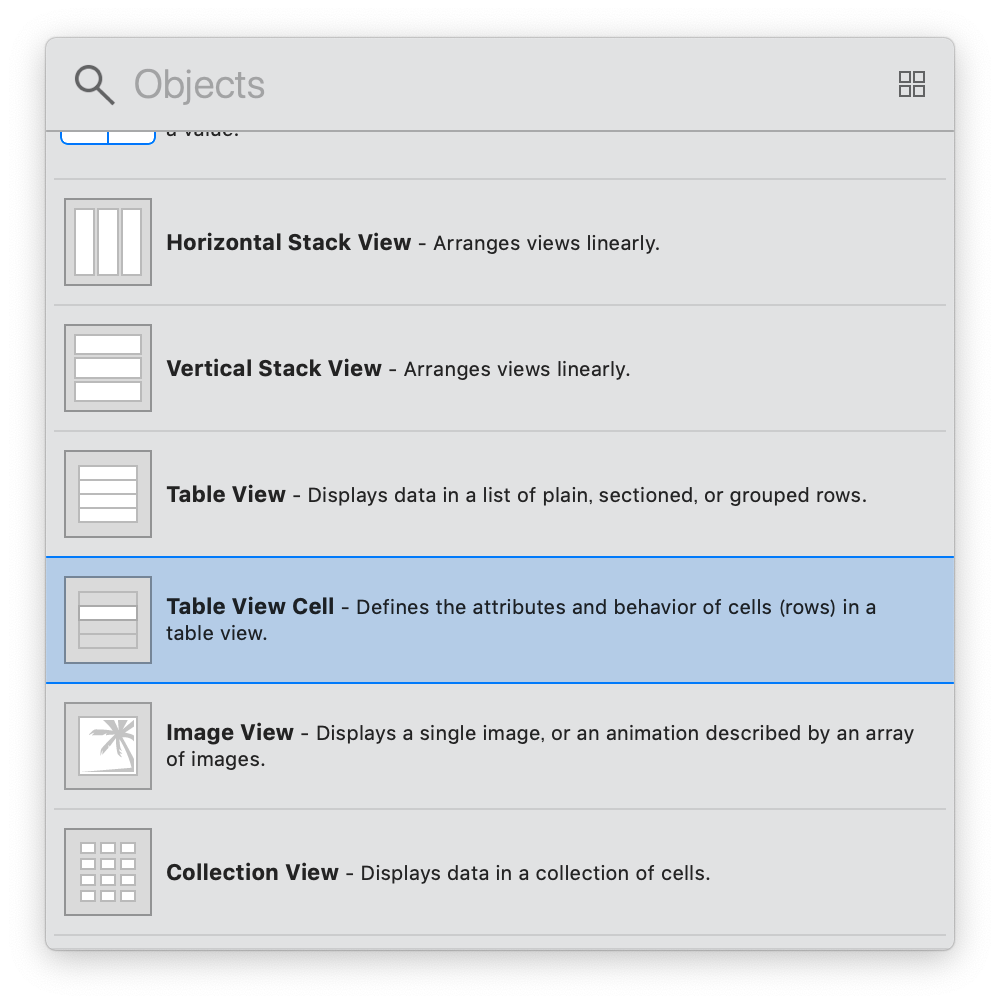
このようにPrototype Cellsと表示される
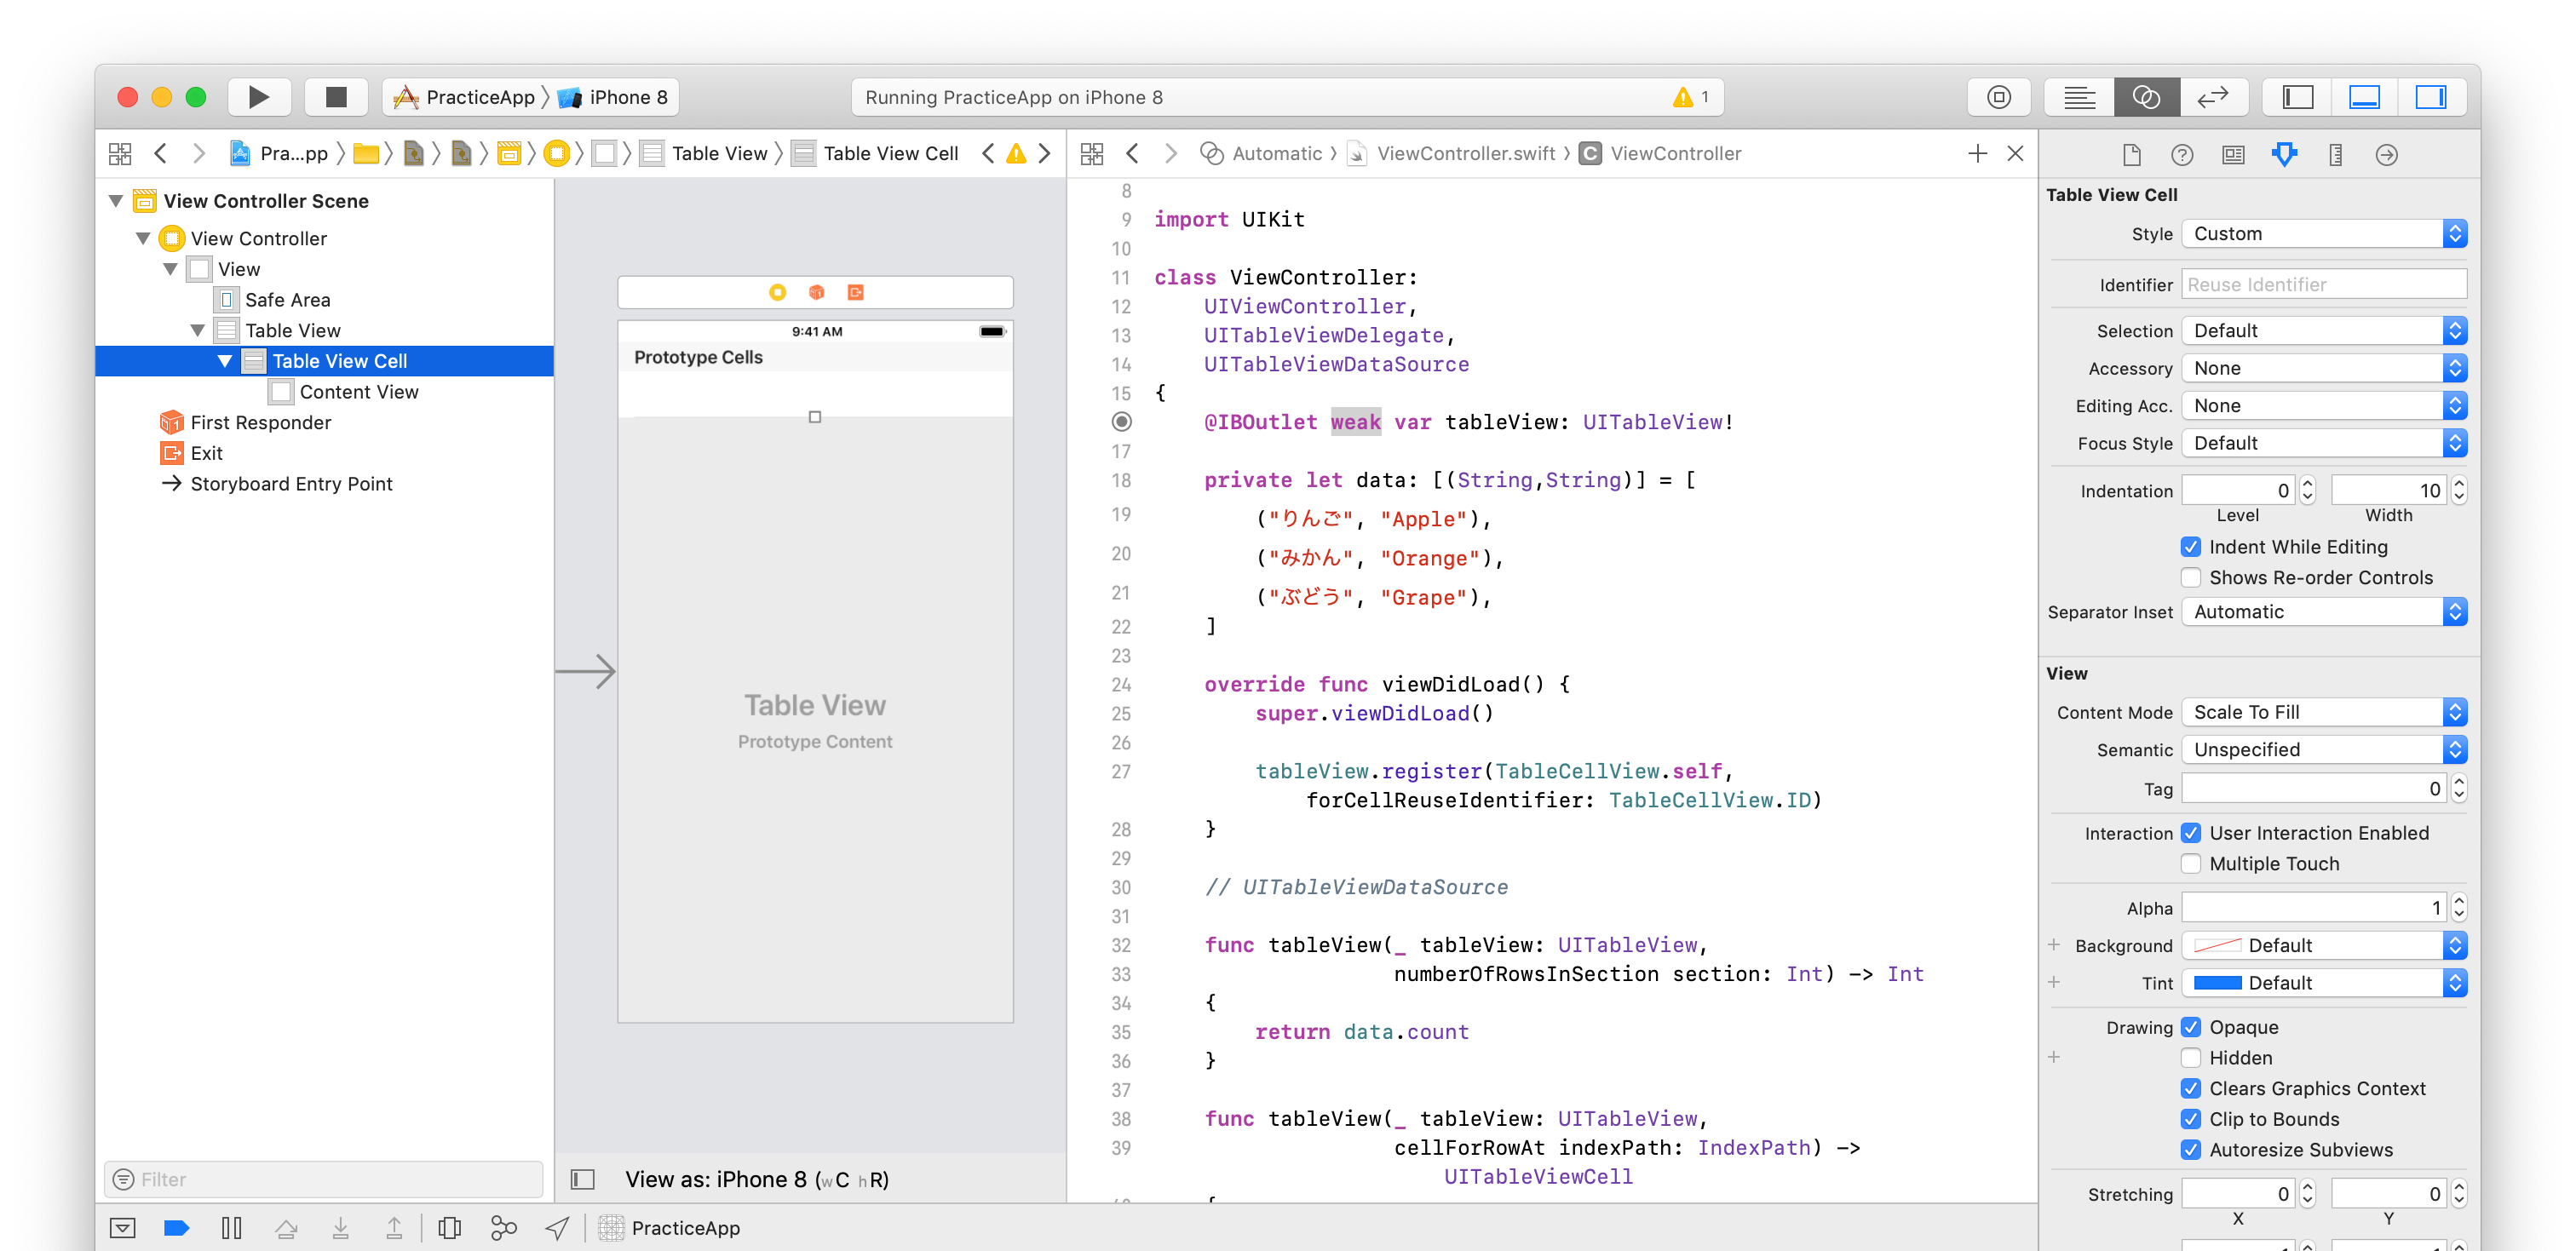
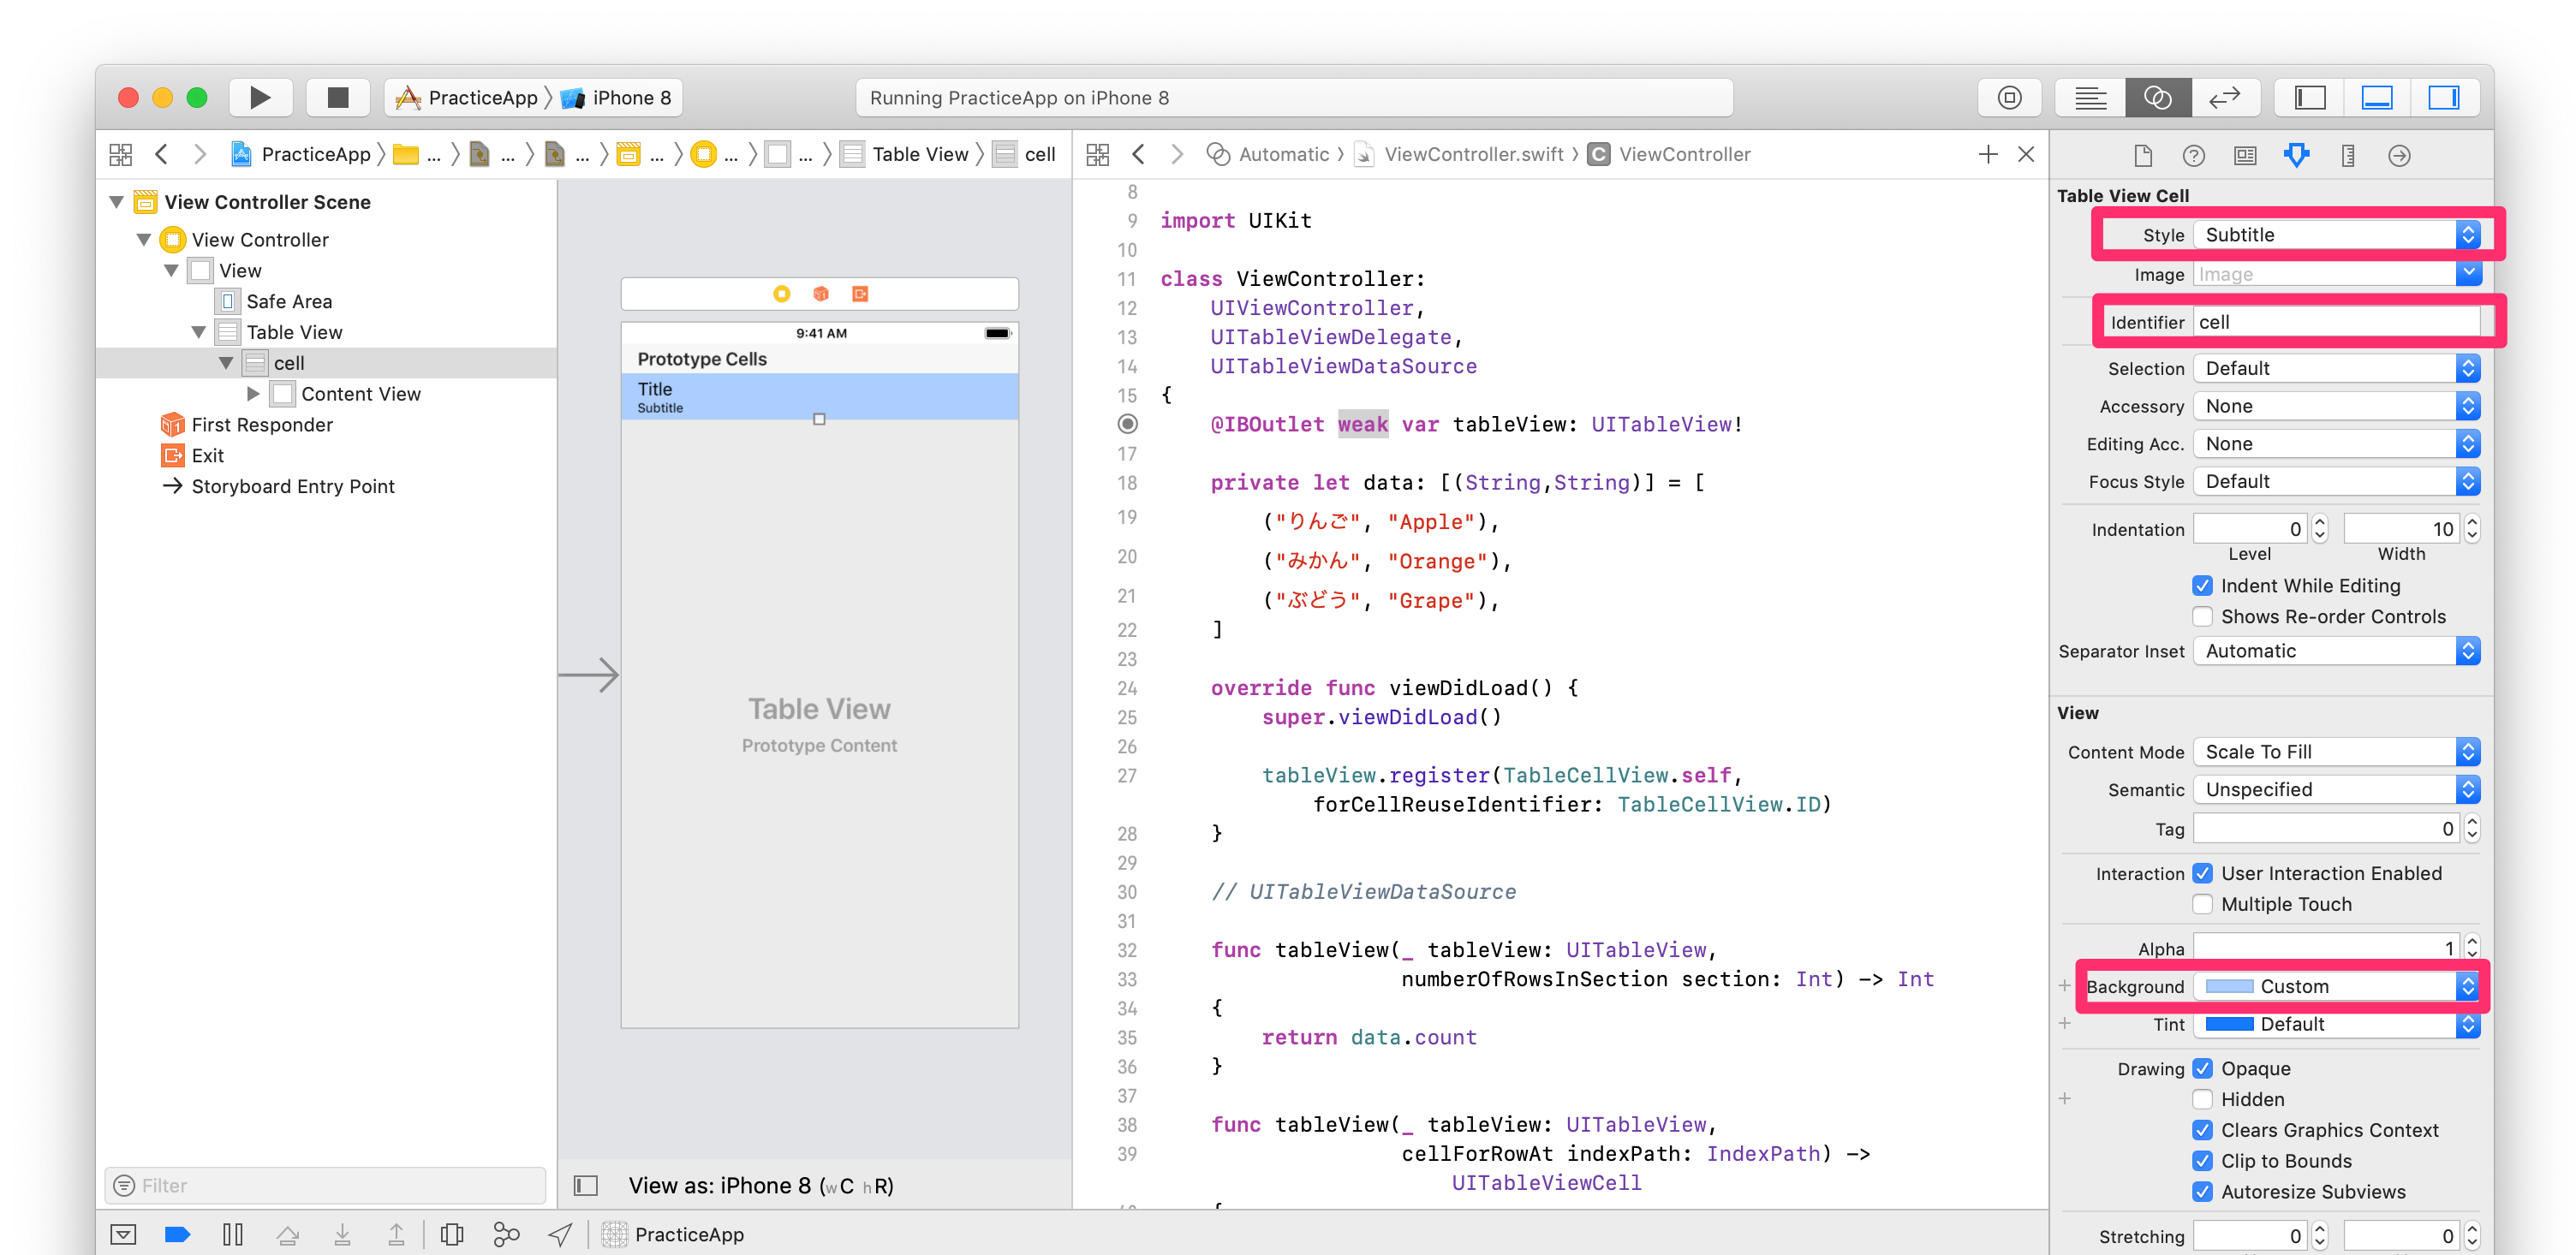
あとはStoryboard上でこのTableViewCellをさきほどと似せた感じで設定する。
具体的には
- Style: Subtitle
- Identifier: cell
- Background: Customから適当に色選択
といった具合。
これによって、さらに以下のコードが削減できる。
--- a/PracticeApp/ViewController.swift
+++ b/PracticeApp/ViewController.swift
@@ -23,8 +23,6 @@ class ViewController:

     override func viewDidLoad() {
         super.viewDidLoad()
-
-        tableView.register(TableCellView.self, forCellReuseIdentifier: TableCellView.ID)
     }

     // UITableViewDataSource
@@ -38,34 +36,13 @@ class ViewController:
     func tableView(_ tableView: UITableView,
                    cellForRowAt indexPath: IndexPath) -> UITableViewCell
     {
-        let cell: TableCellView = tableView.dequeueReusableCell(withIdentifier: TableCellView.ID,
-                                                                for: indexPath) as! TableCellView
+        let cell: UITableViewCell = tableView.dequeueReusableCell(withIdentifier: "cell",
+                                                                  for: indexPath)

         let rowIndex: Int = indexPath[1]
-        cell.setCellInfo(title: data[rowIndex].0, detail: data[rowIndex].1)
+        cell.textLabel?.text = data[rowIndex].0
+        cell.detailTextLabel?.text = data[rowIndex].1
         return cell
     }
 }

-class TableCellView: UITableViewCell
-{
-    static let ID: String = "cell"
-    private let cellStyle: CellStyle = CellStyle.subtitle
-    private let cellColor: UIColor = UIColor(red: 0.6, green: 0.8, blue: 0.9, alpha: 0.9)
-
-    required init?(coder aDecoder: NSCoder) {
-        fatalError("not implemented")
-    }
-
-    override init(style: UITableViewCell.CellStyle, reuseIdentifier: String?) {
-        super.init(style: cellStyle, reuseIdentifier: reuseIdentifier)
-        self.backgroundColor = cellColor
-    }
-
-    // original methods
-
-    func setCellInfo(title: String, detail: String) {
-        self.textLabel?.text = title
-        self.detailTextLabel?.text = detail
-    }
-}
3.3. 起動
Runする
4. まとめ
最終的には以下のように、よくTableViewのチュートリアルで見かける風なコードになっているはず。
import UIKit

class ViewController:
    UIViewController,
    UITableViewDelegate,
    UITableViewDataSource
{
    @IBOutlet weak var tableView: UITableView!

    private let data: [(String,String)] = [
        ("りんご", "Apple"),
        ("みかん", "Orange"),
        ("ぶどう", "Grape"),
    ]

    override func viewDidLoad() {
        super.viewDidLoad()
    }

    // UITableViewDataSource

    func tableView(_ tableView: UITableView,
                   numberOfRowsInSection section: Int) -> Int
    {
        return data.count
    }

    func tableView(_ tableView: UITableView,
                   cellForRowAt indexPath: IndexPath) -> UITableViewCell
    {
        let cell: UITableViewCell = tableView.dequeueReusableCell(withIdentifier: "cell",
                                                                  for: indexPath)

        let rowIndex: Int = indexPath[1]
        cell.textLabel?.text = data[rowIndex].0
        cell.detailTextLabel?.text = data[rowIndex].1
        return cell
    }
}