はじめに
昔作ったアプリケーションがpython2系だったため、3系に書き換えるついでにまとめてみる。フレームワークはflaskです。
環境
各種キー取得
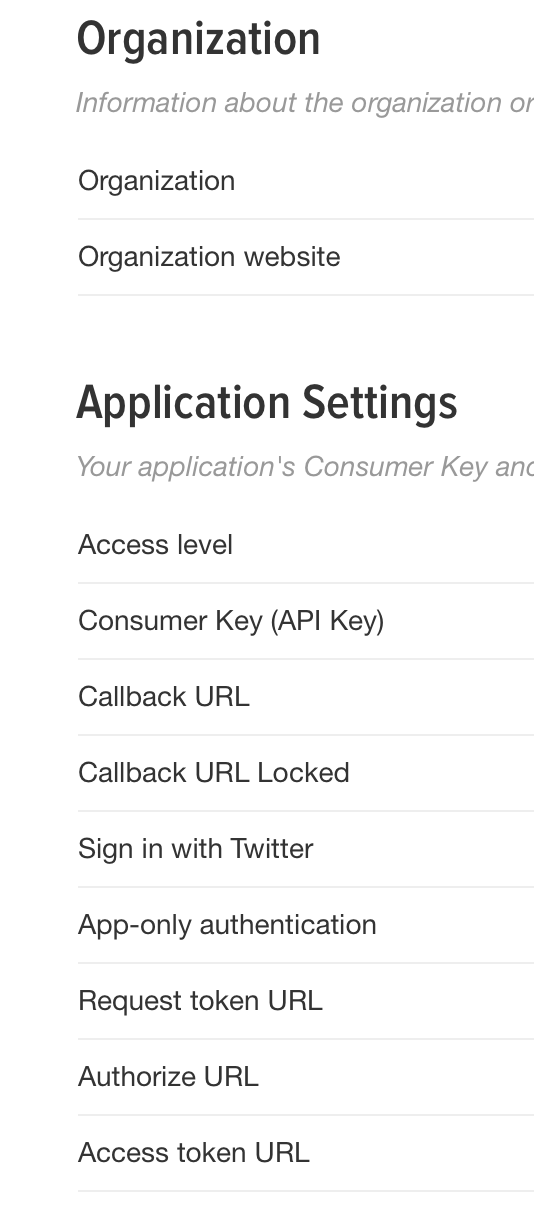
以下のURLのアプリケーション登録でconsumer_key,consumer_secretの2つが取得できるとおもいます。
Twitter APIでつぶやきを取得する
flaskを使う
pip install flask
アプリケーションサーバー
flaskをつかった最低限のアプリケーションサーバーのスクリプト。
from flask import Flask, request, jsonify, make_response, render_template
import requests
import json

app = Flask(__name__)

@app.route('/test/', methods=['GET'])
def test():
    return _make_response(json.dumps({
                'test':'test'
            }))

def _make_response(json_data=None):
    response = make_response(json_data)
    response.headers["Content-Type"] = "application/json"
    response.headers['Access-Control-Allow-Origin'] = '*'
    return response

if __name__ == '__main__':
    app.run(host='0.0.0.0', port=8080)
これを実行して、http://localhost:8080/test/ にアクセスすると、{test:test}と表示されていると思います。testは確認用なので確認できたら消しても大丈夫です。
make_responseは受け取った辞書型のデータをjsonに変換してレスポンスを返します。render_templateでhtmlを表示する場合はいらないと思うのですが、以前flaskでAPIサーバーを作り、別のフロントとの通信を行う際にresponse.headersの2行がないとうまくいかなかったので一応書いておきます。
tweepy
twitterAPIをpythonからいじるのにtweepyライブラリを使用します。
pip install tweepy
先ほど取得したconsumer_keyとconsumer_secretを使って登録したアプリケーションと連携できるようにします。
import tweepy

auth = tweepy.OAuthHandler('-consumer_key-','-consumer_secret-')

@app.route('/', methods=['GET'])
def accept_use():
    return render_template("index.html", url=auth.get_authorization_url())
今回は簡単にブラウザで触れる感じにするので、flaskのrender_templateを使います。
以下のindex.htmlも用意してください。本当に簡単なものですが(笑)
ちなみにディクトリ構造は、こんな感じです。
wordcloud_app
|- app.py
|- static
|-cloud_pic.jpg
|- templates
|-index.html
|-show.html
|- config.ini
<!DOCTYPE html>
<html>
  <head>
    <title>wordcloudを作るよ</title>
  </head>
  <body>
    <a href="{{url}}">Twitterの認証画面へGo!!</a>
  </body>
</html>>
auth.get_authorization_url()は登録したアプリケーションとの連携をアプリケーションを使うユーザーに対して許可をとる画面のurlを生成してくれます。
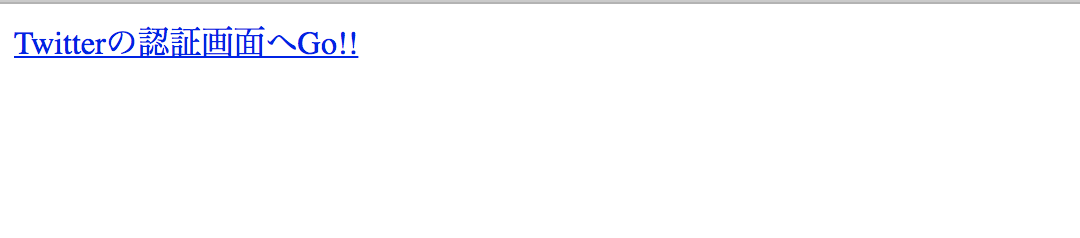
これをクリックすると、
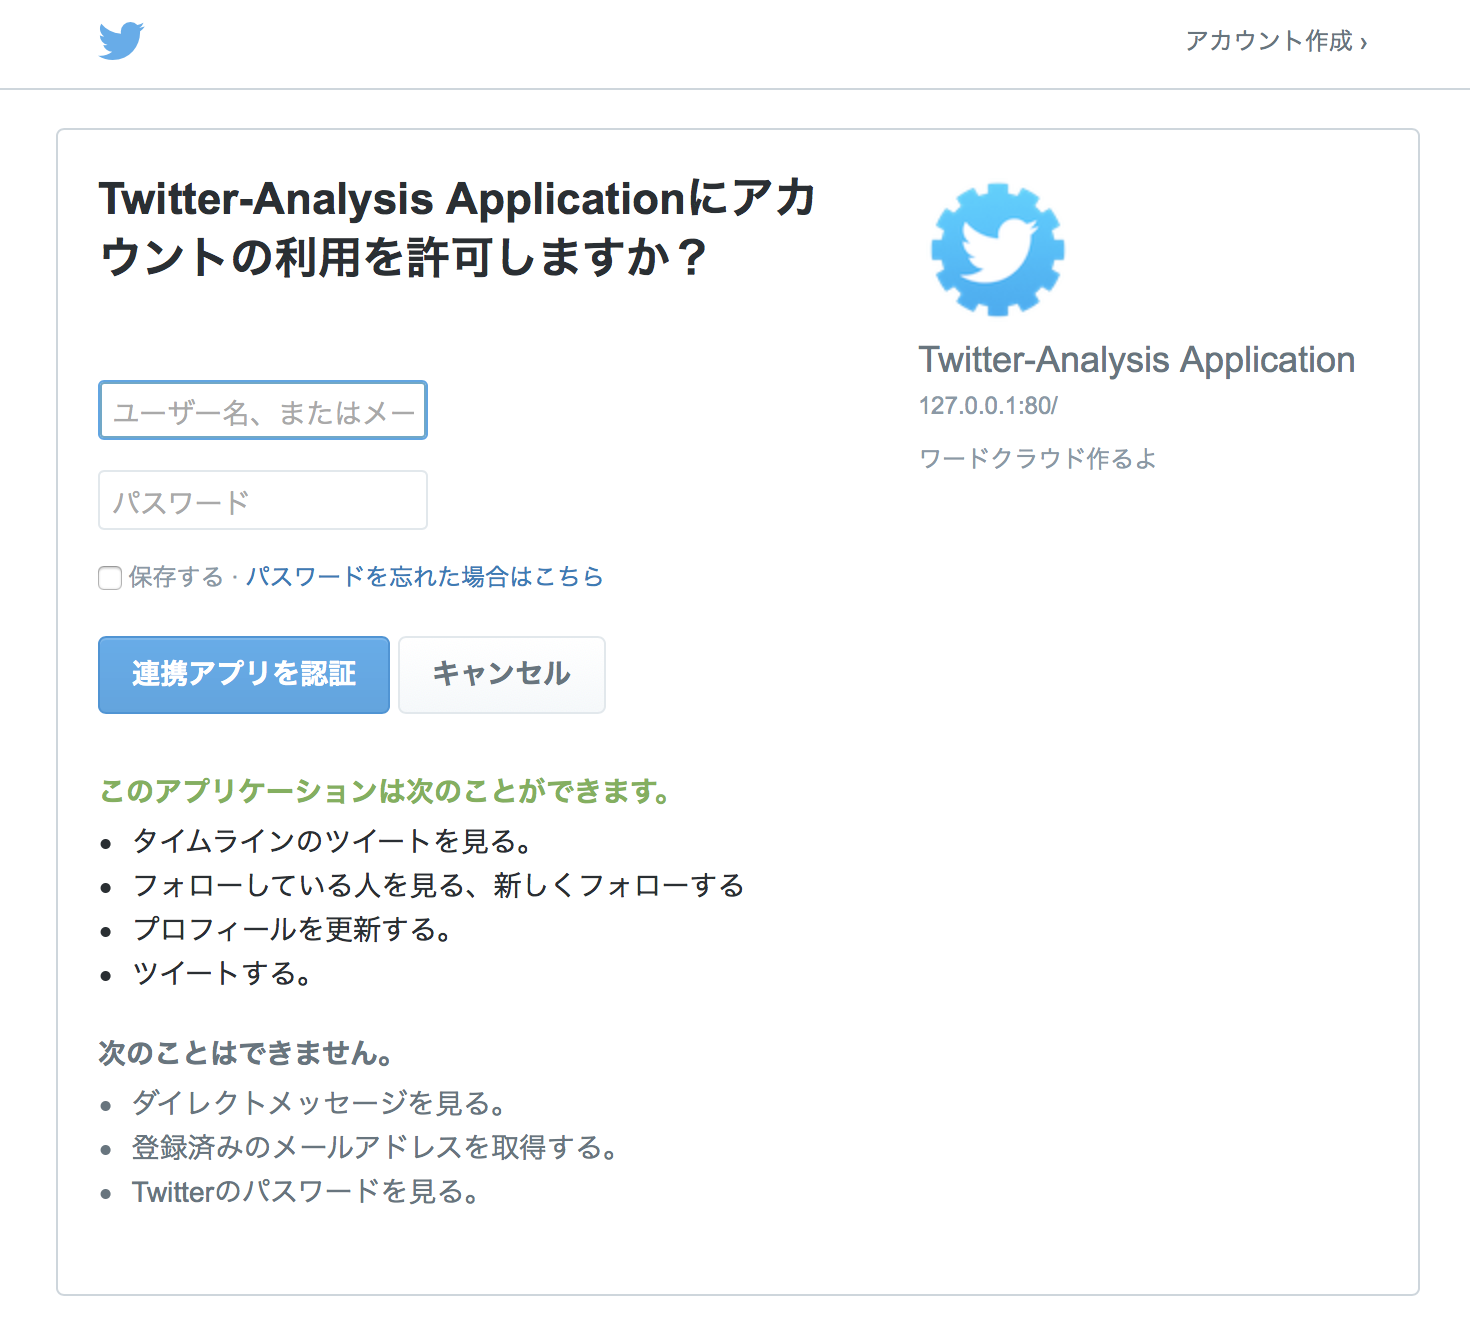
この画面に飛ぶと思います。ユーザーに対して登録したアプリケーションと連携してもいいかという許可を得ようとしている画面になります。
ここで連携アプリを認証を押すと、
登録したアプリケーションで設定したCallback URLにリダイレクトされます。
このCallback URLをhttp://127.0.0.1:8080/show に設定して、とりあえずshow.htmlとshow_wordcloudという関数でてきとーに表示させておきます。
@app.route('/', methods=['GET'])
def accept_use():
    return render_template("index.html",url=auth.get_authorization_url())

@app.route('/show', methods=['GET'])
def show_wordcloud():
    return render_template("show.html")
<!DOCTYPE html>
<html>
  <head>
    <title>wordcloudを作るよ</title>
  </head>
  <body>
    wordcloudを表示予定
  </body>
</html>
これで連携許可後の戻ってくるページができました。
このとき、URLにクエリで認証されたことを証明する文字列がついてきます。この文字列でユーザーのtwitterにアクセスすることができます。
wordcloud生成
工程は大きく分けて二つあります。1つ目は、ユーザーのツイートの収集です。これはtweepyの関数でできます。2つ目は、wordcloudの画像生成です。これは他のライブラリを使って行います。
ツイートの収集
requestを使ってクエリの文字列を取得します。その次に、ユーザーのtwitterへアクセスできるようにします。
@app.route('/show', methods=['GET'])
def show_wordcloud():
    return render_template("show.html")

def get_apikey():
    user_oauth = request.args.get("oauth_verifier", "Not defined")
    auth.get_access_token(user_oauth)
    auth.set_access_token(auth.access_token,auth.access_token_secret)
    return tweepy.API(auth)

import MeCab
NUMWORDS = 10
MC = MeCab.Tagger("mecabrc")
TYPELSIT = ['名詞', '形容詞']

def generate_wordlist(api_key):
    target_words = ''
    user_name = (api_key.me()._json)['screen_name']
    for tweet in tweepy.Cursor(api_key.user_timeline, id=user_name).items(NUMWORDS):
        if '@' in tweet.text: continue
        result = [word.split(',')[0].split('\t')[0] for word in MC.parse(tweet.text).split('\n')[:-2] if word.split(',')[0].split('\t')[1] in TYPELIST]
        target_words += ' '.join(check_sentece(result))
        target_words += ' '
    return target_words
get_apikey()ではユーザー認証を元にそのユーザーのtwitterにアクセするAPIを返します。そのAPIをgenerate_wordlist()に渡してユーザー名を抽出し、ユーザーのタイムラインから抽出したユーザー名が発言しているツイートをNUMWORDSの分収集します。
この後の処理が少し言語処理っぽいのですが、後々wordcloud画像を生成する際に収集したツイートの単語が必要になります。そこでこの収集したツイートを形態素解析にかけて、単語レベルに分割しようと思います。
mecabの導入
形態素解析とは自然言語処理の分野でつかわれる手法です。簡単にいうと、文章を解析にかけると単語に分解してくれて、さらにその単語の品詞といった情報を抽出してくれるものです。
pythonの形態素解析としては、mecabが有名です。
こちらの記事を参考にするとpipでいけるみたいですね。
Python3でmecabを使う
pip install mecab-python3
続き
mecabがつかえるようになったらmecab.parse(tweet.text)で文章を単語に分解します。助動詞などwordcloudにしても面白くないものはぶくためにTYPELISTで必要な品詞を指定しておきます。また、後々省きたい単語などがでてくるかもしれないのでcheck_setence()で追加処理しておくといいかもです。自分はとりえあえずURLとか省きたかったので正規表現で単語リストから除外しました。指定した品詞でかつ追加処理をした単語群をスペースでつなげるところまでがgenerate_wordlistになります。
def check_sentece(words):
    return ['' if re.search(r'[a-z]+', word) or '/' in word else word  for word in words]
wordcloudの生成
ライブラリをpipでinstallします。
pip install wordcloud
generate_pictureではwordcloudライブラリ使って画像を生成します。ほとんどサンプルコード使ってます。ポイントは日本語を表示するためにfont_pathを指定しないといけない点です。各自の環境に合わせて日本語対応しているフォントを指定してください。あとはスペースでくっつけた単語群をgenerateに渡して、matplotlibで画像に変換・保存する感じです。
github https://github.com/amueller/word_cloud
import matplotlib.pyplot as plt
from wordcloud import WordCloud

def generate_picture(words):
    picture = WordCloud(background_color="black", font_path = "/Library/Fonts/kit.ttc", width=780, height=1024).generate(words)
    plt.figure(figsize=(13,16))
    plt.imshow(picture)
    plt.axis('off')
    plt.savefig('./static/cloud_pic.jpg', bbox_inches='tight', pad_inches=0.0)
表示
最後にブラウザに表示させます。
先ほどのshow_wordcloudとshow.htmlは以下のように変更します。
@app.route('/show', methods=['GET'])
def show_wordcloud():
    api_key = get_apikey()
    words = generate_wordlist(api_key)
    generate_picture(words)
    return render_template("show.html", img='./static/cloud_pic.jpg')
<!DOCTYPE html>
<html>
  <head>
    <title>wordcloudを作るよ</title>
  </head>
  <body>
    wordcloudに表示画面
    <img src={{img}}>
  </body>
</html>
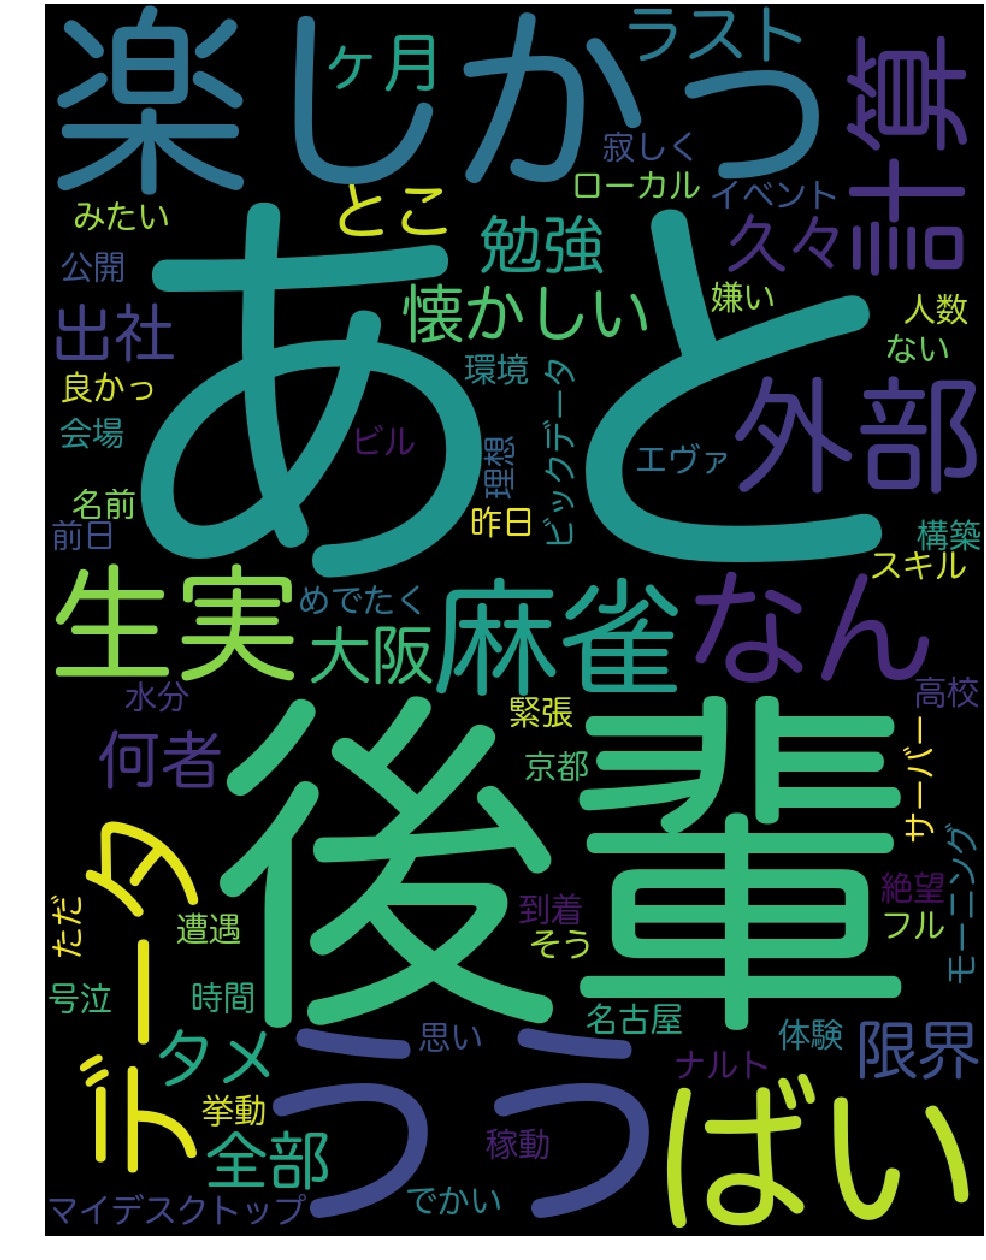
連携アプリを認証ボタンを押すと生成された画像が表示されると思います。単語の処理をしているため、NUM_WORDSの数値によって表示までに時間がかかると思います。こんな感じ。
ついでに、ちょっとコードすっきりさせたいのでconfigに数値をまとめます。
[ENV]
host = 0.0.0.0
port = 8080

[KEY]
consumer_key = SamPlecOnSuMERkey
consumer_secret = SampLECOnSumeRSecRerKey
import configparser

config = configparser.ConfigParser().read('./config.ini')
ENV = config.items('ENV')
KEY = config.items('KEY')
AUTH = tweepy.OAuthHandler(KEY[0][1], KEY[1][1])

~~

if __name__ == '__main__':
    app.run(host=ENV[0][1], port=int(ENV[1][1]))
コード
from flask import Flask, request, jsonify, make_response, render_template
import requests
import json
import tweepy
import MeCab
import re
import matplotlib.pyplot as plt
from wordcloud import WordCloud
import configparser

app = Flask(__name__)
config = configparser.ConfigParser()
config.read('./config.ini')
ENV = config.items('ENV')
KEY = config.items('KEY')
AUTH = tweepy.OAuthHandler(KEY[0][1], KEY[1][1])

NUMWORDS = 100
MC = MeCab.Tagger("mecabrc")
TYPELIST = ['名詞', '形容詞']

@app.route('/', methods=['GET'])
def accept_use():
    return render_template("index.html", url=AUTH.get_authorization_url())

@app.route('/show', methods=['GET'])
def show_wordcloud():
    api_key = get_apikey()
    words = generate_wordlist(api_key)
    generate_picture(words)
    return render_template("show.html", img='./static/cloud_pic.jpg')

def get_apikey():
    user_oauth = request.args.get("oauth_verifier", "Not defined")
    AUTH.get_access_token(user_oauth)
    AUTH.set_access_token(AUTH.access_token, AUTH.access_token_secret)
    return tweepy.API(AUTH)

def generate_wordlist(api_key):
    target_words = ''
    user_name = (api_key.me()._json)['screen_name']
    for tweet in tweepy.Cursor(api_key.user_timeline, id=user_name).items(NUMWORDS):
        if '@' in tweet.text: continue
        result = [word.split(',')[0].split('\t')[0] for word in MC.parse(tweet.text).split('\n')[:-2] if word.split(',')[0].split('\t')[1] in TYPELIST]
        target_words += ' '.join(check_sentece(result))
        target_words += ' '
    return target_words

def generate_picture(words):
    picture = WordCloud(background_color="black", font_path = "/Library/Fonts/kit.ttc", width=780, height=1024).generate(words)
    plt.figure(figsize=(13,16))
    plt.imshow(picture)
    plt.axis('off')
    plt.savefig('./static/cloud_pic.jpg', bbox_inches='tight', pad_inches=0.0)

def check_sentece(words):
    return ['' if re.search(r'[a-z]+', word) or '/' in word else word  for word in words]

def _make_response(json_data=None):
    response = make_response(json_data)
    response.headers["Content-Type"] = "application/json"
    response.headers['Access-Control-Allow-Origin'] = '*'
    return response

if __name__ == '__main__':
    app.run(host=ENV[0][1], port=int(ENV[1][1]))
さいごに
twitterAPIとかflaskとか色々使ってみました。
アプリとは言い難い感じになりましたがよかったら参考にしてください。
品詞の指定や追加処理で結果が変わってくると思うので工夫してみると面白いと思います。