今回の目的
題名のとおりなのですが、ちょっと案件で検証したこともあって、バージョンによって挙動が違うこともありなかなか苦戦したので備忘録です。
もともと、別サービスのサーバーにYellowfinのJavascriptAPIのversion3を組み込んで、ダッシュボードを表示させたいというのがやりたいことだったのですが、間にサーバーが2つあることもあり、設定もなかなか大変でした。。
結構基本的なことなのですが、少しずつ解説していきます。
※ちなみに、この方法はYellowfinのバージョン9.2.2で動作確認しており、9.2.1では動作しません。
SSOに関する設定
これは組み込み元のサーバーに配置するHTMLファイルの中のRequestBodyのJSONObjectの中に設定があります。
ポイントはSSO対応のためのRESTのBodyのオブジェクトの中のnoPasswordにtrueを設定することです。
このプロパティをTrueにすることでauthUserPassの値が何であっても実行できるようになります。
逆にFalseにすると、ID/Passどちらも必須になります。
リポジトリDBに以下のSQLを実行する
Yellowfinのリポジトリに対して、以下のSQLで設定を追加します。
これは簡易認証を許可する設定で、これがなければパスワードなしのSSO設定は不可能です。
INSERT INTO Configuration (IpOrg, ConfigTypeCode, ConfigCode, ConfigData) VALUES (1, 'SYSTEM', 'SIMPLE_AUTHENTICATION', 'TRUE');
アクセスするHTMLファイルのソース
ここでAPIのリクエストをフロントエンドwebサーバーに投げています。
RESTAPIの公式ドキュメントについてはこちら
https://developers.yellowfinbi.com/dev/api-docs/yf-api.html
ダッシュボードのロードについてはこちら
https://wiki.yellowfin.co.jp/pages/viewpage.action?pageId=6591542
<html>
  <head>
    <script src="https://code.jquery.com/jquery-3.5.1.js"></script>
  </head>
<body>
  <div id="reportDiv"></div>
  <script>
    var authUserId = 'authUserId@auth.com';
    var authUserPass = 'dammy for noPass=true';
    var adminId = 'admin@yellowfin.com.au';
    var adminPassword = 'test';

    var body = {
      signOnUser: {
        userName: authUserId,
        password: authUserPass,
        clientOrgRef: ""
      },
      noPassword: true,
      adminUser: {
        userName: adminId,
        password: adminPassword
      }
    };
    //encode to JSON
    var json_text = JSON.stringify(body);

    $.ajax({
      type: 'POST',
      contentType: "application/json;charset=UTF-8",
      data: json_text,
      crossDomain: true,
      url: "http://frontend.web.server/api/rpc/login-tokens/create-sso-token",
      headers: {
        'Authorization': 'YELLOWFIN ts=' + new Date().getTime() + ', nonce=123',
        "Accept": 'application/vnd.yellowfin.api-v1+json'
      },
      success: function (res, textStatus, jqXHR) {
        securityToken = res.securityToken;
        let url = 'http://frontend.web.server/JsAPI/v3?token=' + securityToken;
        let tp = 'text/javascript';
        let sc = document.createElement('script');
        sc.src = url;
        sc.type = tp;
        document.body.appendChild(sc);

        setTimeout(function () {
          yellowfin.showLoginPrompt = false;
          yellowfin.init().then(() => {
            yellowfin.loadDashboard({
              dashboardUUID: '417a0ff3-6adf-4c92-8328-98d0eeb3fd6a',
              element: document.querySelector('div#reportDiv')
            });
          });
        }, 1000);
      },
      error: function (responseData, textStatus, errorThrown) {
        alert("error!");
      }
    });

  </script>
</body>
</html>
フロントエンドwebサーバーの設定(AJPでのアクセス設定用)
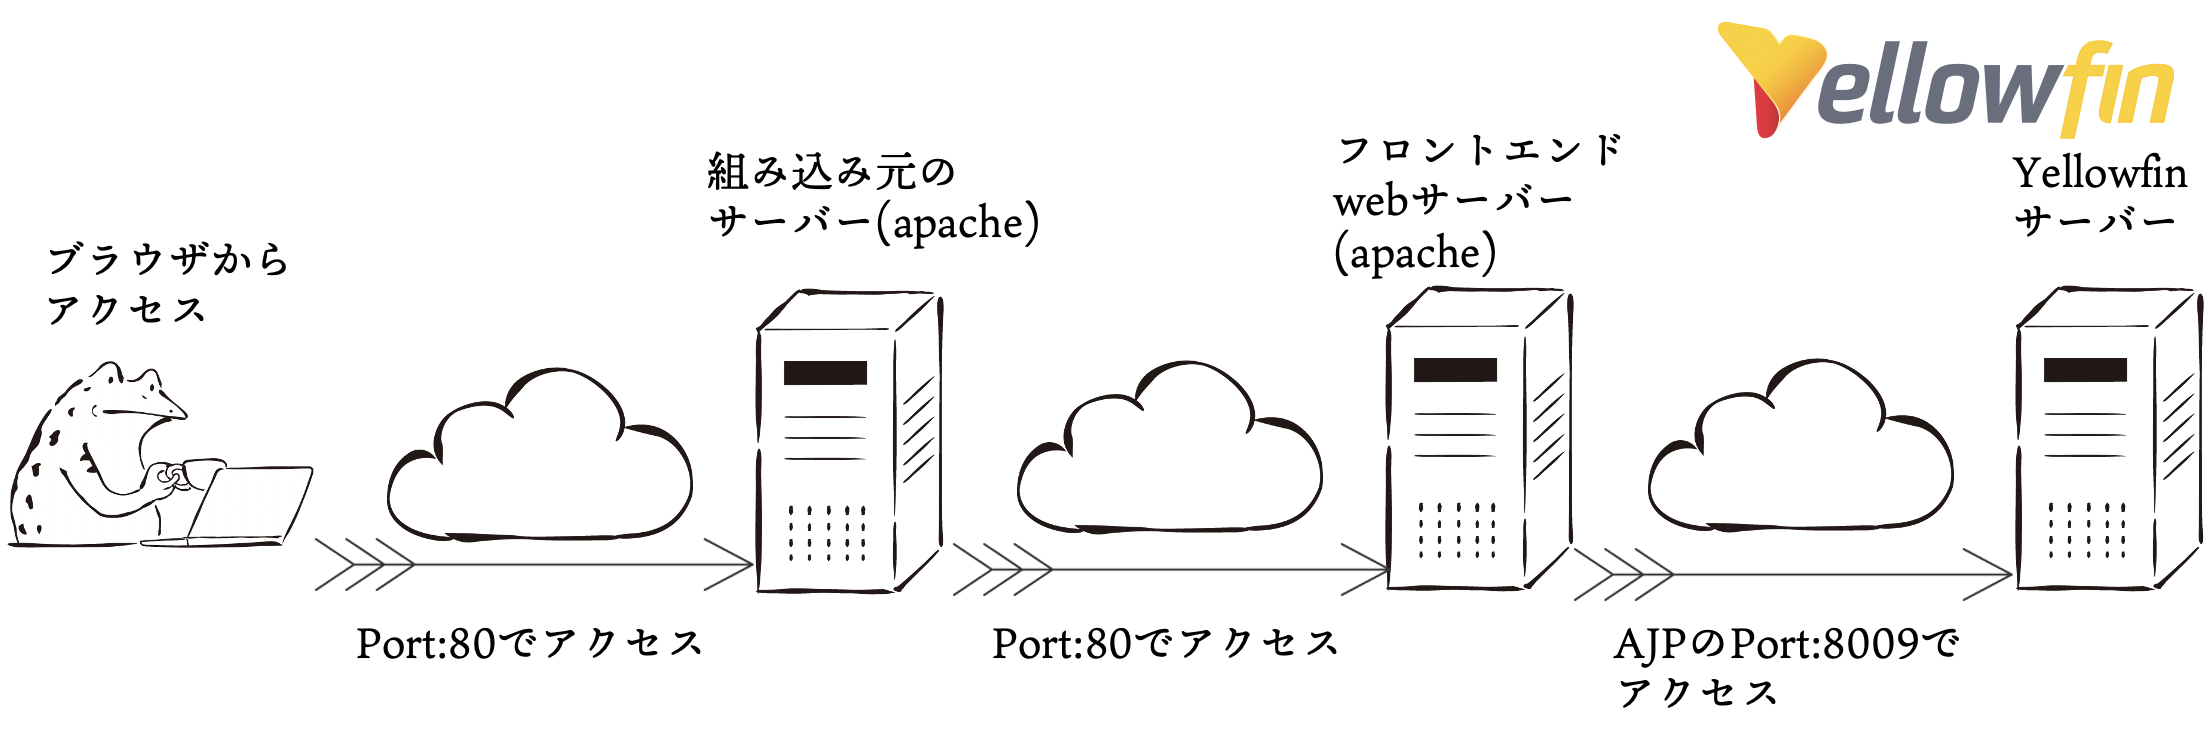
apacheのhttpd.confに以下を追加します。AJP経由のアクセスに変更する設定になります。
80番ポートで受け付けているアクセスをAJPの8009番ポートにリダイレクトする設定です。
ProxyRequests Off
ProxyPass / ajp://yellowfin.server:8009/ secret=secretPass timeout=1860
ProxyPassReverse / ajp://yellowfin.server:8009/ secret=secretPass
Yellowfinサーバーの設定
AJPからのアクセス設定(AJPでのアクセス設定用)
先程のAJP設定を受ける設定をserver.xmlに記載します。ついでにデフォルトの8080や不要なこれまでの接続設定はコメントアウトします。
    <Connector port="8009" protocol="AJP/1.3" redirectPort="8443"
               maxThreads="500" minSpareThreads="25"
               enableLookups="false" acceptCount="100"
               connectionTimeout="20000"
               URIEncoding="UTF-8"
               maxPostSize="10485760" maxParameterCount="50000"
               address="0.0.0.0"
               secretRequired="true" secret="secretPass"
    />

<!-- comment out
     <Connector port="8080" protocol="HTTP/1.1" maxHttpHeaderSize="8192"
               maxThreads="150" minSpareThreads="25"
               enableLookups="false" redirectPort="8443" acceptCount="100"
               connectionTimeout="20000" disableUploadTimeout="true"
               URIEncoding="UTF-8" compression="on" compressionMinSize="512"
               noCompressionUserAgents="gozilla, traviata"
               compressibleMimeType="text/html,application/x-javascript,text/css,application/javascript,text/javascript,text/plain,text/xml,application/json,application/vnd.ms-fontobject,application/x-font-opentype,application/x-font-truetype,application/x-font-ttf,application/xml,font/eot,font/opentype,font/otf,image/svg+xml,image/vnd.microsoft.icon,image/svg,text/comma-separated-values,application/csv,application/vnd.yellowfin.api-v1+json"
               useSendfile="false" />
-->
YellowfinサーバーのTomcat(web.xml)に以下を追加する(CORS用設定)
これがCORS対応の肝となる部分ですね。アクセス元許可の設定・プリフライトのためのOPTIONメソッドの追加・後はYellowfinのAPIに投げるためのheaderを追加します。
<filter>
  <filter-name>CorsFilter</filter-name>
  <filter-class>org.apache.catalina.filters.CorsFilter</filter-class>
  <init-param>
    <param-name>cors.allowed.origins</param-name>
    <param-value>*</param-value>
  </init-param>
  <init-param>
    <param-name>cors.allowed.methods</param-name>
    <param-value>GET,POST,OPTIONS</param-value>
  </init-param>
  <init-param>
    <param-name>cors.allowed.headers</param-name>
    <param-value>Content-Type,X-Requested-With,accept,Origin,Access-Control-Request-Method,Access-Control-Request-Headers,Authorization</param-value>
  </init-param>
</filter>
<filter-mapping>
  <filter-name>CorsFilter</filter-name>
  <url-pattern>/*</url-pattern>
</filter-mapping>
システム構成の変更(CORS用設定)
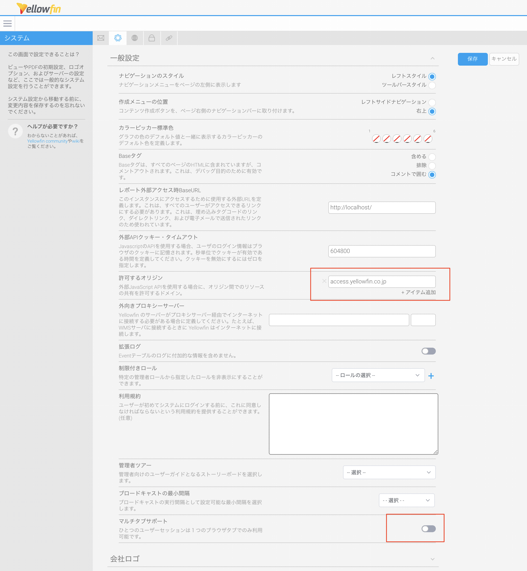
システム構成→システムタブの許可するオリジンにブラウザでアクセスするドメインを登録する。また、マルチタブサポートをOffにする。

この一連のサーバー名の設定ですが、AJPの設定も、web.xmlの設定もドメイン名ならドメイン名・IPならIPでの表記を統一しないといけないそうです。それはそうか・・・・
結果
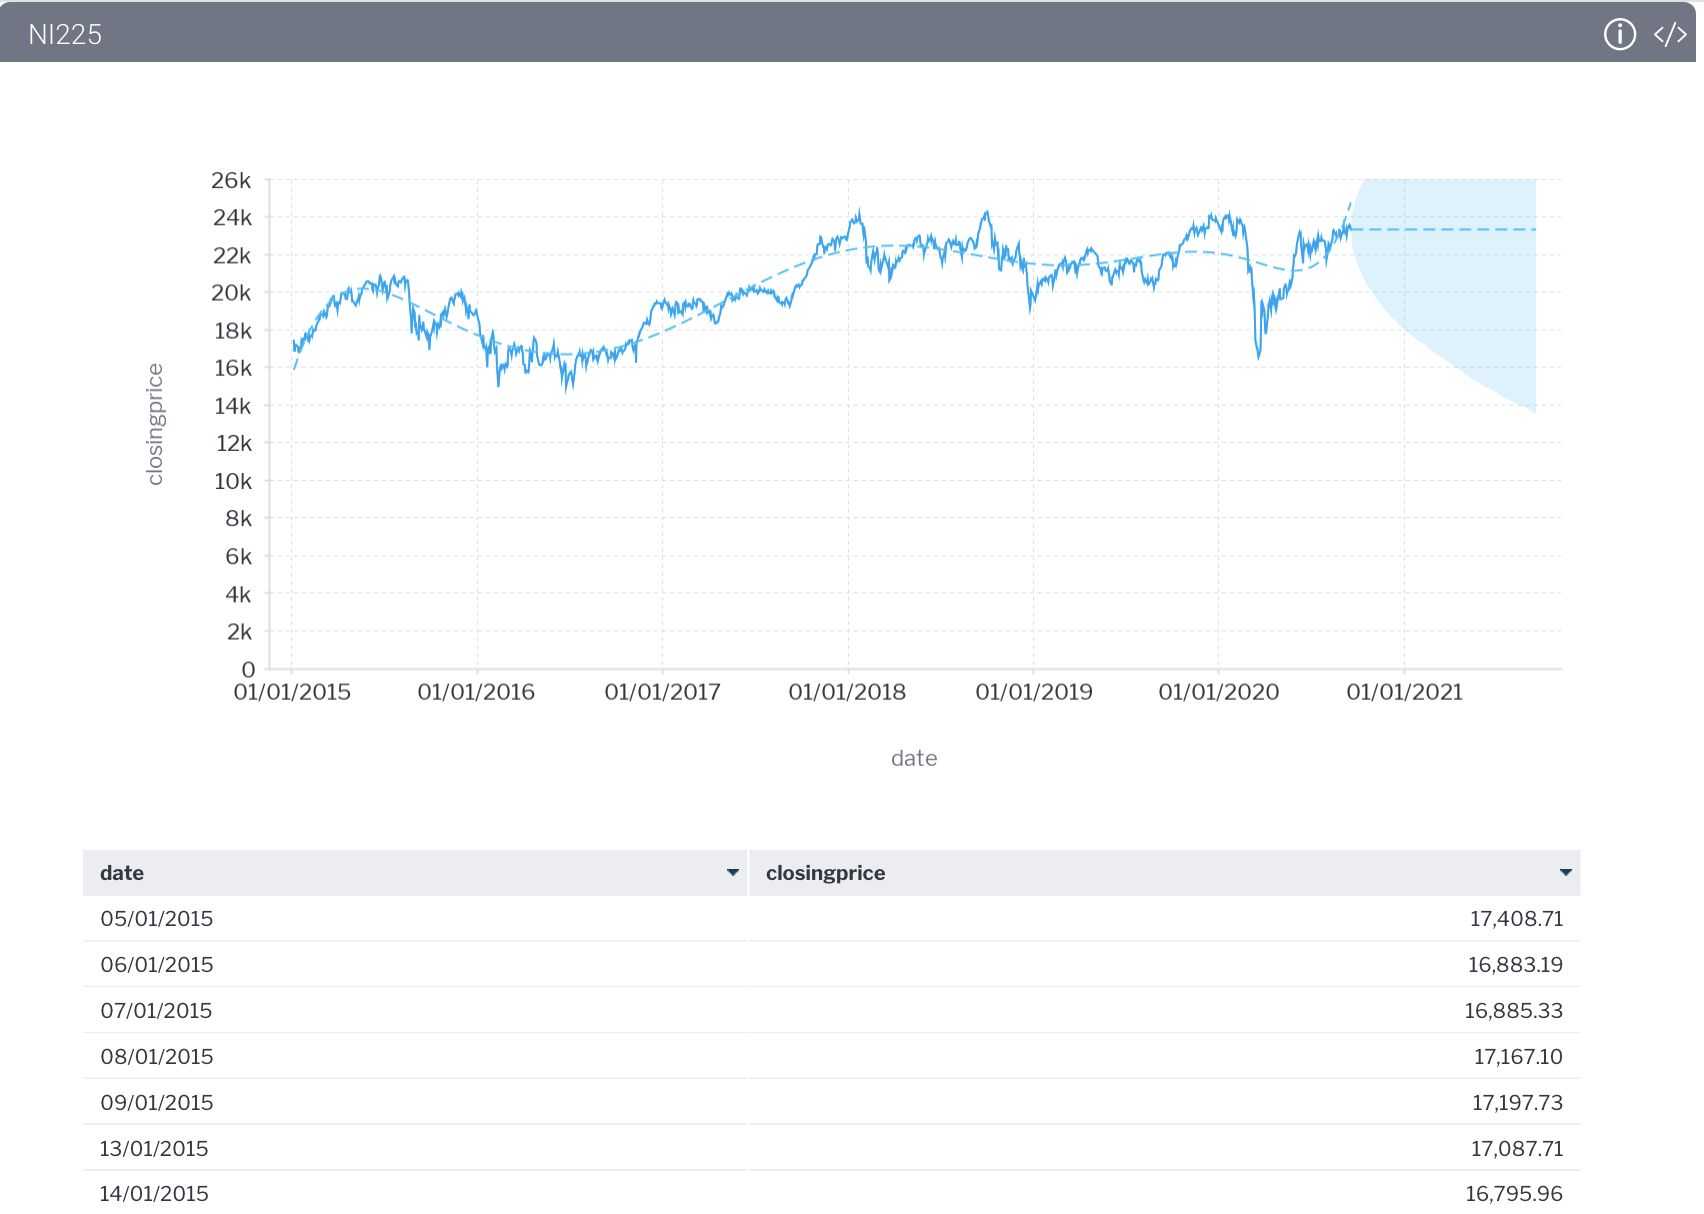
このような感じでダッシュボードの呼び出しが成功しました!これを使用すると、組み込みや外部サイトでの参照ができるようになりより利用の幅が広がりますね。
※ライセンス系統は要確認です・・

画像はダ鳥獣戯画さんからお借りしました。https://chojugiga.com/
