はじめに
Auth0 + React + SpringBoot でOIDC認証アプリを作ってみました。SPA構成でOIDC認証を実施してます。
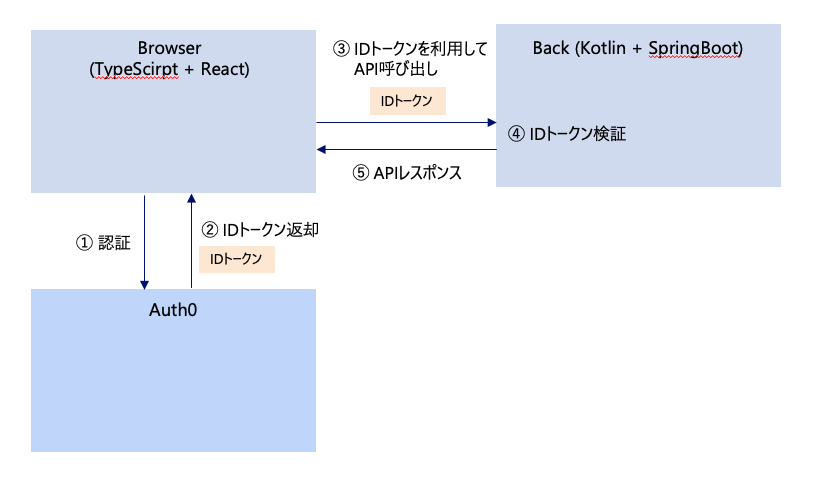
作成したアプリの処理の流れは下記です。Auth0を利用して認証をして(①)、IDトークンを取得します(②)。IDトークンを利用して、バックエンドのSpringBootのAPIと通信を行います(③)。SpringBootアプリでは、IDトークンの検証を行い(④)、レスポンスを返却します(⑤)。概要理解を目的なので、細かい正確性は無視して、大雑把に書いています。
認証とIDトークン取得(①、②の実装)
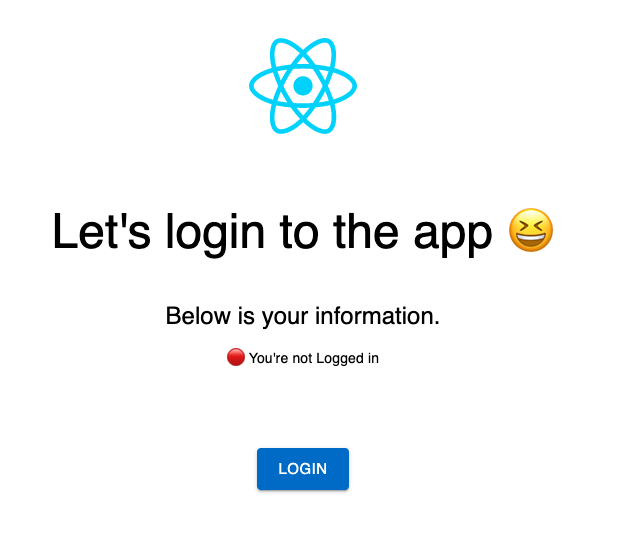
画面イメージ下記です。「LOGIN」を押下することで、Auth0に接続して、ログイン処理を行います。
ログイン処理を行うと、LocalStorageにIDトークンが保存されます。
コードは下記です。@auth0/auth0-reactを利用することで、簡単に実装できます。
import {useAuth0} from "@auth0/auth0-react";
import MenuModule from "../../misc/routes/Menu.module.css";
import reactLogo from "../../../assets/react.svg";
import {Box, Button, Typography} from "@mui/material";

function Login() {
    const {loginWithRedirect, logout, isAuthenticated, user} = useAuth0();

    return (
        <div className={MenuModule.menu}>
            <img src={reactLogo} className={MenuModule.logo} alt="logo"/>

            {isAuthenticated ? (
                <Box>
                    <Typography variant="h3" sx={{my: 5}}>
                        You're logged in 😆
                    </Typography>
                    <Typography variant="h5" sx={{mt: 5}}>
                        Below is your information.
                    </Typography>
                    <Typography variant="body2" sx={{mt: 2}}>
                        🟢 You're Logged in
                    </Typography>
                    <Typography variant="body2" sx={{mt: 1}}>
                        📛 Name: {user.name}
                    </Typography>
                    <Typography variant="body2" sx={{mt: 1}}>
                        📧 Email: {user.email}
                    </Typography>
                    <Button size={"large"} variant="contained" sx={{mx: 2, my: 10}}
                            onClick={() => logout()}>Logout</Button>

                </Box>
            ) : (
                <Box>
                    <Typography variant="h3" sx={{my: 5}}>
                        Let's login to the app 😆
                    </Typography>
                    <Typography variant="h5" sx={{mt: 5}}>
                        Below is your information.
                    </Typography>
                    <Typography variant="body2" sx={{mt: 2}}>
                        🔴 You're not Logged in
                    </Typography>
                    <Button size={"large"} variant="contained" sx={{mx: 2, my: 10}} onClick={() => loginWithRedirect()}>Login</Button>
                </Box>
            )}
        </div>
    );
}
src/main.tsxを開いて、下記のように編集しましょう。Auth0Providerの設定が肝です。
ドメインやクライアントIDは、Auth0を設定して、Reactアプリに読み込ませる必要があります。いろいろな記事で説明されているので、本記事では詳しく説明しません。ちなみに、筆者はViteを利用しています。FWにより、ファイル構成や環境変数の取得方法が異なるので注意してください。
import React from 'react'
import ReactDOM from 'react-dom/client'
import {Auth0Provider} from "@auth0/auth0-react";
import Menu from "./features/misc/routes/Menu";
import {BrowserRouter, Routes, Route, Navigate} from "react-router-dom";
import Login from "./features/login/routes/Login";

ReactDOM.createRoot(document.getElementById('root') as HTMLElement).render(
    <React.StrictMode>
        <Auth0Provider
            domain={import.meta.env.VITE_AUTH0_DOMAIN}
            clientId={import.meta.env.VITE_AUTH0_CLIENT_ID}
            cacheLocation="localstorage"
            authorizationParams={{
                redirect_uri: window.location.origin,
            }}>
            <BrowserRouter>
                <Routes>
                    <Route path={'/'} element={<Login/>}/>
                    <Route path={'/hero'} element={<Menu/>}/>
                </Routes>
            </BrowserRouter>
        </Auth0Provider>
    </React.StrictMode>,
)
バックエンドAPI呼び出し(③、⑤の実装)
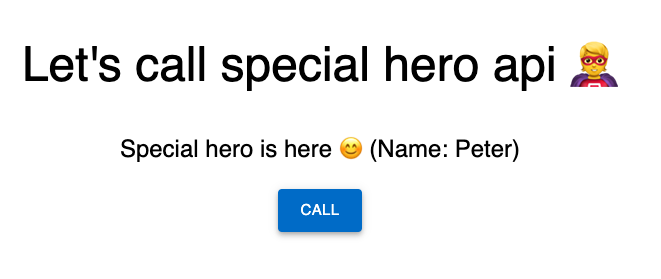
画面イメージ下記です。「CALL」を押下することで、バックエンドAPIに接続します。
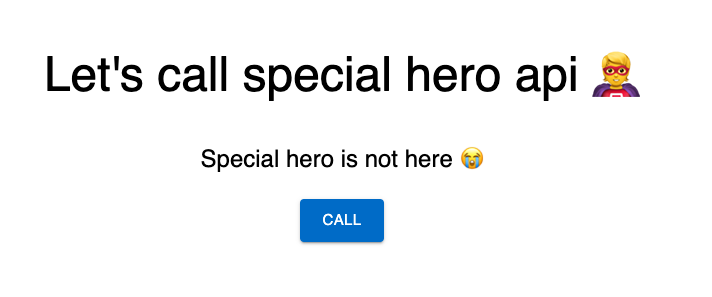
「CALL」を押下して、正常にレスポンスが返却されると画面にフィードバックされます。
コードは下記です。LocalStorageからIDトークンを引く部分が実装されています。
import reactLogo from '../../../assets/react.svg'
import MenuModule from './Menu.module.css'
import { useAuth0 } from "@auth0/auth0-react"
import {Button, Typography} from "@mui/material";
import {getHeroes} from "../../heroes/api/getHeroes";
import {getSpecialHeroes} from "../../heroes/api/getSpecialHeroes";
import {useState} from "react";
function App() {
const [spHeroName, setSpHeroName] = useState<String>('')
const requestSp = async () => {
const tokenKey = `@@auth0spajs@@::${import.meta.env.VITE_AUTH0_CLIENT_ID}::@@user@@`
const token: String = JSON.parse(localStorage.getItem(tokenKey)!!).id_token
const hero = getSpecialHeroes(token)
hero.then((res) => {
setSpHeroName(res.data.name)
})
}
return (
<div className={MenuModule.menu}>
<Typography variant="h3" sx={{ mt: 10 }}>
Let's call special hero api 🦸
</Typography>
<Typography variant="h5" sx={{ mt: 5 }}>
{spHeroName ? `Special hero is here 😊 (Name: ${spHeroName})` : "Special hero is not here 😭"}
</Typography>
<Button size={"large"} variant="contained" sx={{ mx: 2, my: 3 }} onClick={() => requestSp()}>Call</Button>
</div>
);
}
export default App;
APIコールをする部分の実装は下記です。IDトークンをAuthorizedヘッダとして格納しています。
import {Hero} from "../types/index";
import axios, {AxiosResponse} from "axios";

export const getSpecialHeroes = (token: string): Promise<AxiosResponse<Hero>> => {
    return axios.get('/api/private/hero', {
        headers: {
            Authorization: `Bearer ${token}`
        }
    });
};
バックエンドAPIでトークン検証(④の実装)
下記、バックエンドの実装です。/api/private/heroを公開する簡単なAPIです。
@RestController
class HeroController {

    @GetMapping("/api/private/hero")
    fun getSpecialHero(): Hero {
        return Hero("101", "Peter")
    }
}

data class Hero(val id: String, val name: String)
下記、build.gradleです。spring-boot-starter-security, spring-boot-starter-oauth2-resource-serverを利用しています。
plugins {
    id 'org.springframework.boot' version '2.7.0'
    id 'io.spring.dependency-management' version '1.1.0'
    id 'org.jetbrains.kotlin.jvm' version '1.8.21'
    id 'org.jetbrains.kotlin.plugin.spring' version '1.8.21'
}

// (一部省略)

dependencies {
    implementation 'org.springframework.boot:spring-boot-starter-security'
    implementation 'org.springframework.boot:spring-boot-starter-web'
    implementation 'org.springframework.boot:spring-boot-starter-oauth2-resource-server'
    implementation 'com.fasterxml.jackson.module:jackson-module-kotlin'
    implementation 'org.jetbrains.kotlin:kotlin-reflect'
    compileOnly 'org.projectlombok:lombok'
    annotationProcessor 'org.projectlombok:lombok'
    testImplementation 'org.springframework.boot:spring-boot-starter-test'
}
JWT検証の部分です。ライブラリが透過的にやってくれることも多いので少し全体が見えづらいかもですが、リクエストフィルターとしてJWT(IDトークンはJWT形式)検証を入れています。IDトークン検証は、発行者(issuer)と対象者(audience)の確認をしています。
package com.backend.auth0.sbx.config

import com.backend.auth0.sbx.security.AudienceValidator
import org.springframework.beans.factory.annotation.Value
import org.springframework.context.annotation.Bean
import org.springframework.context.annotation.Configuration
import org.springframework.security.config.annotation.web.builders.HttpSecurity
import org.springframework.security.config.annotation.web.configuration.EnableWebSecurity
import org.springframework.security.oauth2.core.DelegatingOAuth2TokenValidator
import org.springframework.security.oauth2.core.OAuth2TokenValidator
import org.springframework.security.oauth2.jwt.*
import org.springframework.security.web.SecurityFilterChain


@Configuration
@EnableWebSecurity
class WebSecurityConfig {

    @Value("\${auth0.audience}")
    val audience: String? = null

    @Value("\${auth0.issuer}")
    private val issuer: String? = null

    @Bean
    fun securityFilterChain(http: HttpSecurity): SecurityFilterChain {

        http.authorizeHttpRequests { authz ->
            authz
                .mvcMatchers("/api/public/**").permitAll()
                .anyRequest().authenticated()
                .and().cors()
                .and().oauth2ResourceServer().jwt();
        }
        return http.build()
    }

    @Bean
    fun jwtDecoder(): JwtDecoder{
        val jwtDecoder = JwtDecoders.fromOidcIssuerLocation<JwtDecoder>(issuer) as NimbusJwtDecoder

        val audienceValidator: OAuth2TokenValidator<Jwt> = AudienceValidator(audience!!)
        val withIssuer: OAuth2TokenValidator<Jwt> = JwtValidators.createDefaultWithIssuer(issuer)
        val withAudience: OAuth2TokenValidator<Jwt> = DelegatingOAuth2TokenValidator(withIssuer, audienceValidator)

        jwtDecoder.setJwtValidator(withAudience)
        return jwtDecoder
    }
}
下記、IDトークンの対象者(audience)の検証クラスです。
package com.backend.auth0.sbx.security

import org.springframework.security.oauth2.core.OAuth2Error
import org.springframework.security.oauth2.core.OAuth2TokenValidator
import org.springframework.security.oauth2.core.OAuth2TokenValidatorResult
import org.springframework.security.oauth2.jwt.Jwt


class AudienceValidator(private val audience: String): OAuth2TokenValidator<Jwt> {

    override fun validate(jwt: Jwt): OAuth2TokenValidatorResult {
        val error = OAuth2Error("invalid_token", "The required audience is missing", null)

        return if (jwt.audience.contains(audience)) {
            OAuth2TokenValidatorResult.success()
        } else OAuth2TokenValidatorResult.failure(error)
    }
}
終わりに
自身で勉強中、Auth0+SPA+バックエンドAPIでのトークン検証のパターンの記事がないな、と思って執筆しました。どなたかの助けになれば幸いです!