React+Electron+Vite
yarn create @quick-start/electron
npm の場合は、以下。
npm create @quick-start/electron
以下のことを聴かれるので、適当な回答をする。
√ Project name: ... electron-app
√ Select a framework: » react
√ Add TypeScript? ... No / [Yes]
√ Add Electron updater plugin? ... No / [Yes]
√ Enable Electron download mirror proxy? ... No / [Yes]
yarn の場合、.yarnrc.ymlがないので、追加してyarnする。
npm の場合は、そのままnpm iで良いかと。
nodeLinker: node-modules
デバッグ起動やビルドを一通り試しておくと良いでしょう。
Symbol-SDK v3
polyfill など
yarn add -D vite-plugin-node-polyfills vite-plugin-wasm
rendererのpluginsにwasm, nodePolyfillsを追加。
import { resolve } from 'path'
import { defineConfig, externalizeDepsPlugin } from 'electron-vite'
import react from '@vitejs/plugin-react'
import wasm from 'vite-plugin-wasm'
import { nodePolyfills } from 'vite-plugin-node-polyfills'

export default defineConfig({
  main: {
    plugins: [externalizeDepsPlugin()]
  },
  preload: {
    plugins: [externalizeDepsPlugin()]
  },
  renderer: {
    resolve: {
      alias: {
        '@renderer': resolve('src/renderer/src')
      }
    },
    plugins: [
      react(),
      wasm(),
      nodePolyfills({
        globals: { Buffer: true },
        include: ['buffer', 'crypto', 'stream', 'util']
      })
    ]
  }
})
Symbol-SDK
そのままでは React で動かないのでパッチを当てる。
npm の場合は、postinstall-postinstall不要です。
yarn add -D patch-package postinstall-postinstall
すでにpackage.jsonにpostinstallがあるので、先頭にpatch-package &&を追加。
"postinstall": "patch-package && electron-builder install-app-deps",
patchesディレクトリを作って、パッチファイルsymbol-sdk+3.2.2.patchを作成。
diff --git a/node_modules/symbol-sdk/src/impl/ed25519_wasm.js b/node_modules/symbol-sdk/src/impl/ed25519_wasm.js
index e0cb407..459f74e 100644
--- a/node_modules/symbol-sdk/src/impl/ed25519_wasm.js
+++ b/node_modules/symbol-sdk/src/impl/ed25519_wasm.js
@@ -3,7 +3,7 @@
 /* eslint-disable import/no-extraneous-dependencies */
 import {
 	HashMode, crypto_private_sign, crypto_private_verify, crypto_sign_keypair
-} from 'symbol-crypto-wasm-node';
+} from '../../../symbol-crypto-wasm-web/symbol_crypto_wasm.js';
 /* eslint-enable import/no-extraneous-dependencies */

 const CRYPTO_SIGN_BYTES = 64;
Symbol-SDK インストール。
yarn add symbol-sdk symbol-crypto-wasm-web
package.jsonに"type": "module"を追加。
"type": "module",
tsconfigのcompilerOptionsに"module": "ESNext", "moduleResolution": "bundler"を追加。
{
  "extends": "@electron-toolkit/tsconfig/tsconfig.node.json",
  "include": [
    "electron.vite.config.*",
    "src/main/**/*",
    "src/preload/**/*"
  ],
  "compilerOptions": {
    "module": "ESNext",
    "moduleResolution": "bundler",
    "composite": true,
    "types": [
      "electron-vite/node"
    ]
  }
}
{
  "extends": "@electron-toolkit/tsconfig/tsconfig.web.json",
  "include": [
    "src/renderer/src/env.d.ts",
    "src/renderer/src/**/*",
    "src/renderer/src/**/*.tsx",
    "src/preload/*.d.ts"
  ],
  "compilerOptions": {
    "module": "ESNext",
    "moduleResolution": "bundler",
    "composite": true,
    "jsx": "react-jsx",
    "baseUrl": ".",
    "paths": {
      "@renderer/*": [
        "src/renderer/src/*"
      ]
    }
  }
}
preloadのファイル名をindex.jsからindex.mjsに変更。
  const mainWindow = new BrowserWindow({
    width: 900,
    height: 670,
    show: false,
    autoHideMenuBar: true,
    ...(process.platform === 'linux' ? { icon } : {}),
    webPreferences: {
      preload: join(__dirname, '../preload/index.mjs'),
      sandbox: false
    }
  })
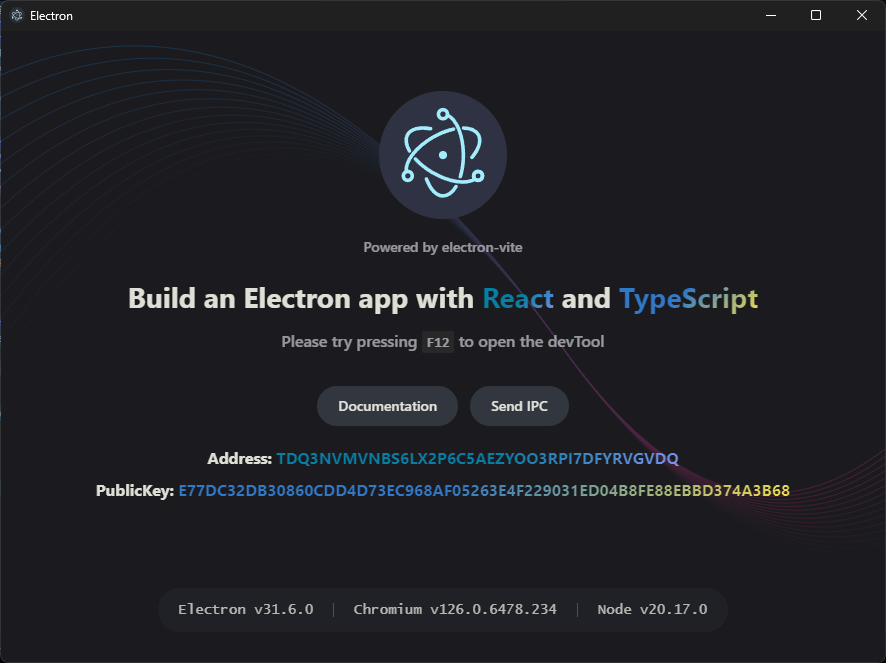
動作確認
evalを使用しているので、Content-Security-Policyのscript-srcに'unsafe-eval'を追加する。
  <meta http-equiv="Content-Security-Policy"
    content="default-src 'self'; script-src 'unsafe-eval' 'self'; style-src 'self' 'unsafe-inline'; img-src 'self' data:" />
App.tsxに Symbol-SDK を使用して、ニーモニックとアカウントを生成するコードを追記する。
import Versions from './components/Versions'
import electronLogo from './assets/electron.svg'
import { useEffect, useState } from 'react'
import { Bip32 } from 'symbol-sdk'
import { Network, SymbolAccount, SymbolFacade } from 'symbol-sdk/symbol'
function App(): JSX.Element {
const ipcHandle = (): void => window.electron.ipcRenderer.send('ping')
const [address, setAddress] = useState('')
const [publicKey, setPublicKey] = useState('')
useEffect(() => {
// ニーモニック生成
const bip32 = new Bip32()
const mnemonic = bip32.random()
// Bip32Node生成
const passwd = ''
const bip32Node = bip32.fromMnemonic(mnemonic, passwd)
// faced生成
const facade = new SymbolFacade(Network.TESTNET)
// アカウントを生成する
// Bip32Path生成
const bip32Path = facade.bip32Path(0)
// Bip32Pathから子孫Bip32Path生成
const childBip32Node = bip32Node.derivePath(bip32Path)
// 子孫Bip32Pathからキーペア生成
const keyPair = SymbolFacade.bip32NodeToKeyPair(childBip32Node)
// 公開鍵からアドレス生成
const account = new SymbolAccount(facade, keyPair)
setAddress(account.address.toString())
setPublicKey(account.publicKey.toString())
}, [])
return (
<>
<img alt="logo" className="logo" src={electronLogo} />
<div className="creator">Powered by electron-vite</div>
<div className="text">
Build an Electron app with <span className="react">React</span>
and <span className="ts">TypeScript</span>
</div>
<p className="tip">
Please try pressing <code>F12</code> to open the devTool
</p>
<div className="actions">
<div className="action">
<a href="https://electron-vite.org/" target="_blank" rel="noreferrer">
Documentation
</a>
</div>
<div className="action">
<a target="_blank" rel="noreferrer" onClick={ipcHandle}>
Send IPC
</a>
</div>
</div>
<div className="text" style={{ fontSize: 16 }}>
Address: <span className="react">{address}</span>
<br />
PublicKey: <span className="ts">{publicKey}</span>
<br />
</div>
<Versions></Versions>
</>
)
}
export default App
yarn dev
Node.js のモジュールを使用する
少し面倒だが、Electron なので Node.js のモジュールを使用できる。
child_process.execSyncを使用する例。
windowにchild_processを生やす。
import { contextBridge } from 'electron'
import { electronAPI } from '@electron-toolkit/preload'
import { execSync } from 'child_process'

// Custom APIs for renderer
const api = {}

// Use `contextBridge` APIs to expose Electron APIs to
// renderer only if context isolation is enabled, otherwise
// just add to the DOM global.
if (process.contextIsolated) {
  try {
    contextBridge.exposeInMainWorld('electron', electronAPI)
    contextBridge.exposeInMainWorld('api', api)
    contextBridge.exposeInMainWorld('child_process', { execSync: execSync })
  } catch (error) {
    console.error(error)
  }
} else {
  // @ts-ignore (define in dts)
  window.electron = electronAPI
  // @ts-ignore (define in dts)
  window.api = api
}
そのままだとタイプエラーが出るので、インターフェースを設定。
import { ElectronAPI } from '@electron-toolkit/preload'
import { execSync } from 'child_process'

declare global {
  interface Window {
    electron: ElectronAPI
    api: unknown
    child_process: {
      execSync: typeof execSync
    }
  }
}
windowから取り出して使用する。
import Versions from './components/Versions'
import electronLogo from './assets/electron.svg'
import { useEffect, useState } from 'react'
import { Bip32 } from 'symbol-sdk'
import { Network, SymbolAccount, SymbolFacade } from 'symbol-sdk/symbol'
const child_process = window.child_process
function App(): JSX.Element {
const ipcHandle = (): void => window.electron.ipcRenderer.send('ping')
const [address, setAddress] = useState('')
const [publicKey, setPublicKey] = useState('')
const [nodeVer, setNodeVer] = useState('')
useEffect(() => {
// ニーモニック生成
const bip32 = new Bip32()
const mnemonic = bip32.random()
// Bip32Node生成
const passwd = ''
const bip32Node = bip32.fromMnemonic(mnemonic, passwd)
// faced生成
const facade = new SymbolFacade(Network.TESTNET)
// アカウントを生成する
// Bip32Path生成
const bip32Path = facade.bip32Path(0)
// Bip32Pathから子孫Bip32Path生成
const childBip32Node = bip32Node.derivePath(bip32Path)
// 子孫Bip32Pathからキーペア生成
const keyPair = SymbolFacade.bip32NodeToKeyPair(childBip32Node)
// 公開鍵からアドレス生成
const account = new SymbolAccount(facade, keyPair)
setAddress(account.address.toString())
setPublicKey(account.publicKey.toString())
const nodeVerExec = child_process.execSync('node -v')
console.log(nodeVerExec)
console.log(nodeVerExec.toString())
setNodeVer(new TextDecoder().decode(nodeVerExec))
}, [])
return (
<>
<img alt="logo" className="logo" src={electronLogo} />
<div className="creator">Powered by electron-vite</div>
<div className="text">
Build an Electron app with <span className="react">React</span>
and <span className="ts">TypeScript</span>
</div>
<p className="tip">
Please try pressing <code>F12</code> to open the devTool
</p>
<div className="actions">
<div className="action">
<a href="https://electron-vite.org/" target="_blank" rel="noreferrer">
Documentation
</a>
</div>
<div className="action">
<a target="_blank" rel="noreferrer" onClick={ipcHandle}>
Send IPC
</a>
</div>
</div>
<div className="text" style={{ fontSize: 16 }}>
Address: <span className="react">{address}</span>
<br />
PublicKey: <span className="ts">{publicKey}</span>
<br />
<span className="ts">{nodeVer}</span>
</div>
<Versions></Versions>
</>
)
}
export default App