はじめに
ユーザーフォルダ作成がうまく理解できなかったので
簡単な構成のデモアプリを作成しました。
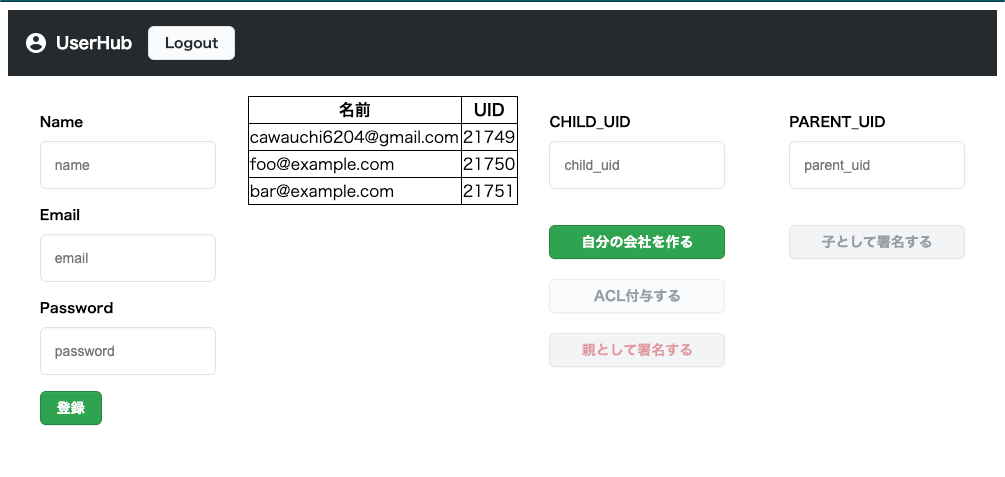
ユーザー作成グループとは
ユーザー作成グループとはユーザーが自由に作れるグループのことです。
例えば、ユーザーの下にcompany_123というグループを作って、他のユーザーをそこに所属させることができます。
ここではcompanyに所属させる人を「親」、所属させられる人を「子」として表現します。
またこのcompanyというグループに属する際に署名というものが必要になります。
この署名は親から子に送ってグループに入ってもらう事もできますし、子から親に送って入る事もできます。
では説明です。
以下は親から子に所属依頼をする流れ

1.グループの作成(親のみ)
2.エントリーを登録(親or子)
3.親の署名
4.子の署名
5.グループに子が所属される
子から親に所属依頼をする時には1が不要になり、3と4が入れ替わります。
1.グループの作成
ここではcompany_${uid}という親ユーザーのuidを使ってグループを作成します。
server/create-own-company.tsx
import * as vtecxapi from 'vtecxapi'

const uid = vtecxapi.uid()

const postData: VtecxApp.Entry[] = []

const req = {
  title: String(uid),
  link: [
    {
      ___href: `/_user/${uid}/company_${uid}`,
      ___rel: 'self'
// ___hrefに/_user/親id/会社idとしてここで会社を作成しています。
    }
  ]
}

postData.push(req)

if(postData && postData.length) {
  vtecxapi.put(postData)
} else {
  vtecxapi.sendError(400,'No Request Data')
}
上記のサービスを実行後
server/get-info.tsx
import * as vtecxapi from 'vtecxapi'

const users = vtecxapi.getFeed('/_user/21749')
でFeed情報をみると
以下のように21749というidのユーザーの下にグループが作成されているのを確認できます。
{
  "author": [
    {
      "uri": "urn:vte.cx:created:21749"
    }
  ],
  "id": "/_user/21749/company_21749,1",
  "link": [
    {
      "___href": "/_user/21749/company_21749",
      "___rel": "self"
    }
  ],
  "published": "2021-02-02T13:56:21.650+09:00",
  "title": "21749",
  "updated": "2021-02-02T13:56:21.650+09:00"
}
親はこの/_user/21749/company_21749に子を所属させます。
2.エントリーを登録
ここでは署名をする際の下準備をしていきます。
以下のファイルではurlにchildUidが指定された場合(親から子)とparentUidが指定された場合(子から親)で処理を分けています。
server/submit-entry-before-signature.tsx
import * as vtecxapi from 'vtecxapi'

const uid = vtecxapi.uid()

const childUid = vtecxapi.getQueryString('childUid')

const parentUid = vtecxapi.getQueryString('parentUid')

// * エントリーを登録
// * key:/_user/親id/group名/子id
// _userというシステムグループの中の123というidのユーザーのmygroupといいうグループの下に456というユーザーがいる。
// * alias:/_user/子id/group/group名
// _userというシステムグループの中の456というidのユーザーはmygroupというグループに所属している。

const postData: any = []

// * 親が子に参加依頼する分岐
if (childUid && childUid.length) {
  const companyCode = 'company_' + uid
  const key = `/_user/${uid}/${companyCode}/${childUid}`
  const alias = `/_user/${childUid}/group/${companyCode}`

  const req: VtecxApp.Entry = {
    link: [
      {
        ___href: key,
        ___rel: 'self'
      },
      {
        ___href: alias,
        ___rel: 'alternate'
      }
    ]
  }

  postData.push(req)
  if (postData.length && childUid) {
    vtecxapi.put(postData)
  }

// * 子がそのグループに参加申請する分岐
} else if (parentUid && parentUid.length) {
  const companyCode = 'company_' + parentUid
  const key = `/_user/${parentUid}/${companyCode}/${uid}`
  const alias = `/_user/${uid}/group/${companyCode}`

  const req: VtecxApp.Entry = {
    link: [
      {
        ___href: key,
        ___rel: 'self'
      },
      {
        ___href: alias,
        ___rel: 'alternate'
      }
    ]
  }

  postData.push(req)
  if (postData.length && parentUid) {
    vtecxapi.put(postData)
  }
} else if (childUid && childUid.length && parentUid && parentUid.length) {
  vtecxapi.sendError(400, '親と子のuidがどちらも指定されています')
} else {
  vtecxapi.sendError(400, '値が不正です')
}
親から子,子から親への署名をする際に必要な処理で、以下のaliasがとても重要な役割を果たします。
const alias = `/_user/${childUid}/group/${companyCode}`
このaliasを使って後述する署名を行います。
このaliasが親と子の間の架け橋になります。
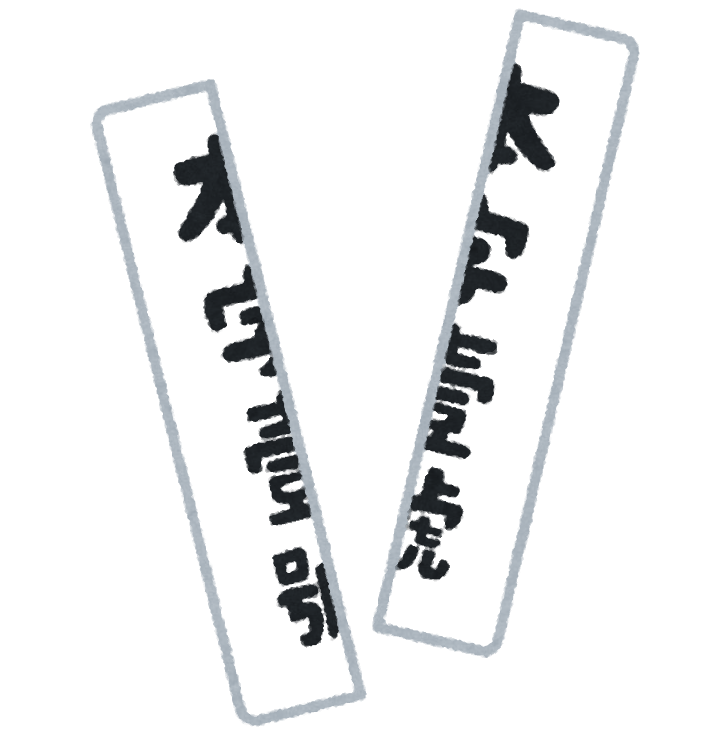
3.親の署名
まさに中学生の頃歴史の時間に習った勘合貿易のようなイメージです。
それぞれ割ったお札を持ちます。
持っている札の片割れと、相手が持っている片割れを合体させてニセモノかどうかを判別します。
親が作成したエントリー(alias)を参照して署名します。
ここでのaliasは先ほど作成した
const alias = `/_user/${childUid}/group/${companyCode}`
こちらです。
署名の方法は以下です。
PUT {key}?_signature&_revision={リビジョン(任意)}
ここでの{key}は先ほどのaliasに設定した/_user/${childUid}/group/${companyCode}になります。
 const handleSubmitSignatureByParent = async () => {
    try {
      axios.defaults.headers['X-Requested-With'] = 'XMLHttpRequest'
      await axios.get(
        '/s/submit-entry-before-signature',
        { params: { childUid: childUid } }
      )
      const getUid = await axios.get(
        '/d/?_uid'
      )
      const uid = getUid.data.feed.title
      const companyCode = 'company_' + uid
      await axios.put(`/d/_user/${uid}/${companyCode}/${childUid}?_signature&_revision=1`)
    } catch (e) {
      alert(e.message)
    }
    setChildUid('')
  }
4.子の署名
子の署名は先ほどのaliasを使います。
const handleSubmitSignatureByChild = async () => {
    const getUid = await axios.get(
      '/d/?_uid'
    )

    const uid = getUid.data.feed.title
    const companyCode = 'company_' + parentUid

    try {
      axios.defaults.headers['X-Requested-With'] = 'XMLHttpRequest'
      await axios.get(
        '/s/submit-entry-before-signature',
        { params: { parentUid: parentUid } }
      )
      axios.put(`/d/_user/${uid}/group/${companyCode}?_signature&_revision=1`)
    } catch (e) {
      alert(e.message)
    }

    setParentUid('')
  }
5.グループに子が所属される
子が署名をした段階でフレームワーク側で署名検証が行われ、成功した場合、グループに所属することができます。
server/get-info.tsx
import * as vtecxapi from 'vtecxapi'

const users = vtecxapi.getFeed('/_user/21749/company_21749')
でFeed情報をみると
{
  "author": [
    {
      "uri": "urn:vte.cx:created:21749"
    },
    {
      "uri": "urn:vte.cx:updated:21750"
    }
  ],
  "id": "/_user/21749/company_21749/21750,4",
  "link": [
    {
      "___href": "/_user/21749/company_21749/21750",
      "___rel": "self",
      "___title": "1,21749,HjXN6XbOkbKL2yunmXaGJ+x+gLjAPj4jrAl3SKToZdY="
    },
    {
      "___href": "/_user/21750/group/company_21749",
      "___rel": "alternate",
      "___title": "3,21750,UHiBErXwriNKwf6ddBhFbHqJc2TFkPDWbPBZyneMSVA="
    }
  ],
  "published": "2021-02-02T14:10:41.356+09:00",
  "updated": "2021-02-02T14:11:34.602+09:00"
},
この中のlinkを見てみると署名をする前に行った下準備がlinkとして格納されています。
___href: "/_user/21749/company_21749/21750"
___href: "/_user/21750/group/company_21749"
これで
21749というユーザーの下にあるcompany_21749という会社に21750というユーザーが所属されていることが確認できました。