概要
CERN開発の解析ライブラリROOT(C++ベース)では、データを*.rootファイルで管理・保存します。
uprootはこの*.rootファイルを高速に読み書きするpython/numpyベースのライブラリです。
リリースされて比較的日が浅いこともあり日本語のドキュメントが見当たらないですが、素粒子・原子核・宇宙実験を中心に使用されるROOTとpythonベース機械学習フレームワークをつなぐ上で非常に有用そうなので、まとめてみました。
公式ドキュメント
ROOT ホームページ

背景
作成したROOTファイルを元に機械学習を走らせたい場合、いくつかの方法が考えられます。
- ROOTマクロでcsv形式などにして読み出す
- pyROOTなどを使用して読み出す
1はcsv形式に変換するROOTマクロとcsvを読み出してnumpy arrayなどに変換するpythonコードの両方を書く必要があり、明らかに面倒です。
一方で、一見straightforwardに見える2は、Google Colabなどのクラウド環境で走らせる場合、pyROOTをしっかり導入するのはかなり大変そうです。(一応可能のようですが...リンク)
そんな中、最近リリースされたuprootは、ROOTファイルをそのまま扱えて、かつ導入コストが高くないuprootは非常に助かる存在になると思います。さらに、膨大なデータ量も高速に読み出せるという機械学習に使用する上で非常に重要な特徴をも備えています。開発チームによれば、大きなサイズのファイルに対しては本家のROOTをも上回る読み出しスピードを達成するそうです。

すでにLHC(Large Hadron Collider)実験や、XENON-nT実験といった(界隈では)メジャーな実験に多くのユーザーがいるようで、今後も継続的に開発が行われそうです。また、LHCで開発されているMLaaSにも使用されています。
インストール
pipコマンドでインストールできます。
pip install uproot
condaでもインストールすることができます。
conda config --add channels conda-forge  # if you haven't added conda-forge already
conda install uproot
C++ ROOTがインストールされていることはuprootを使用する上で必要ありません。
使い方
本稿では、最も基本的な使い道のみに絞ってご紹介します。uprootでは、ROOTオブジェクトの名前を使って読み込んだり書き込んだりします。
適当なROOTファイルを作る
適当なROOTマクロです。実行はroot -l GenRootFile.cpp.
void GenRootFile(){
   TFile* fout = new TFile("sample.root","recreate");
   TTree* tout = new TTree("tout","tout");
   Int_t    event;
   Double_t val;
   tout->Branch("event",&event,"event/I");
   tout->Branch("val"  ,&val  ,"val/D");

   TF1* fgaus = new TF1("fgaus","[0]*TMath::Gaus(x,[1],[2])",-10,10);
   fgaus->SetParameters(1,0,2);
   TH1D* hgaus = new TH1D("hgaus","hgaus",20,-10,10);
   Int_t Nevent = 100;
   for (Int_t ievent = 0; ievent < Nevent; ievent++) {
      event = ievent;
      val   = fgaus->GetRandom();

      hgaus ->Fill(val);
      tout  ->Fill();
   }

   fout ->cd();
   tout ->Write();
   hgaus->Write();
   fout ->Close();
}
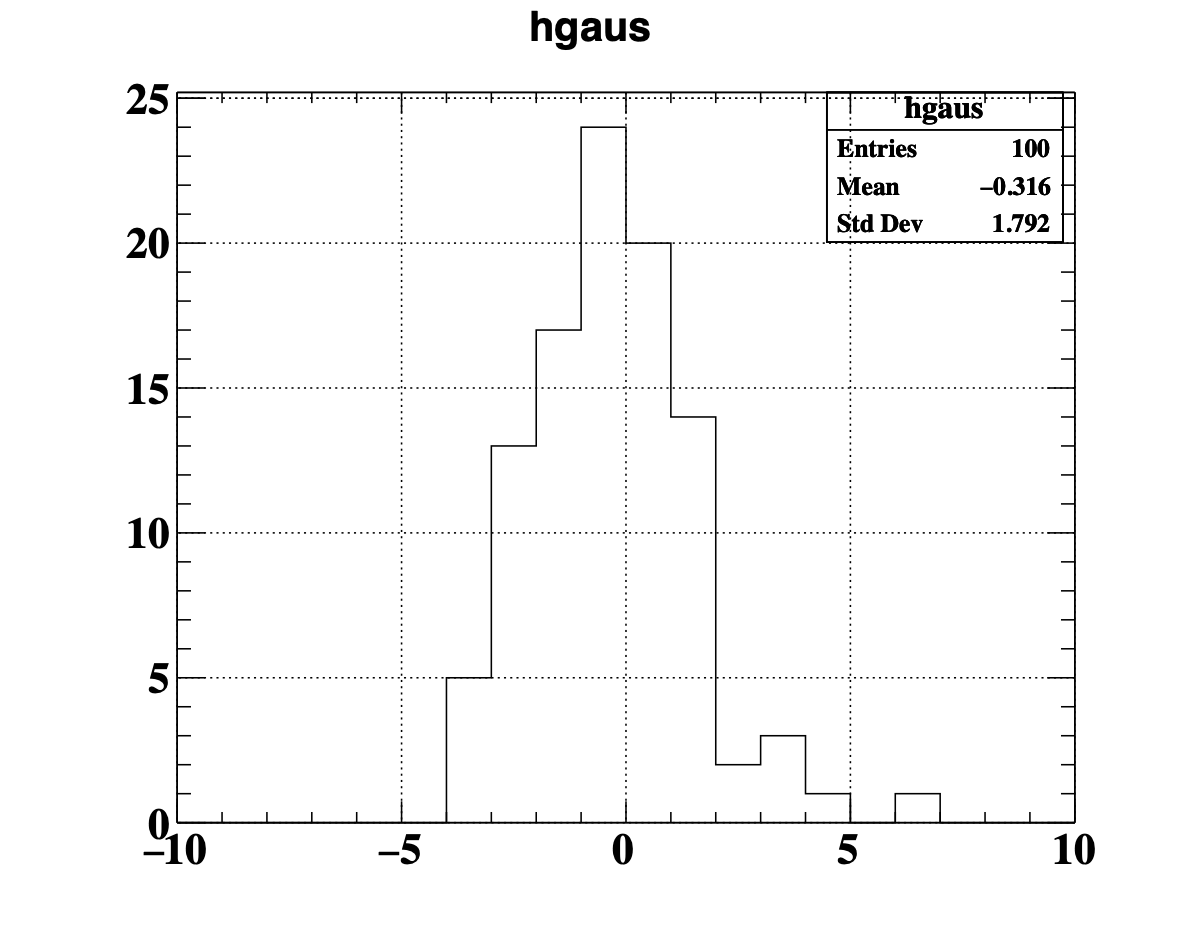
例えばこんなヒストグラムが生成されます。
rootファイルのtreeを読み込む
Treeの持っている名前(今回なら"tout")でアクセスします。
import uproot
file = uproot.open("sample.root")
tout = file["tout"] #TName
print(tout)
Treeの要素にアクセスする
TreeのBranchをnumpy arrayとして読み込むことができます。
val = tout.array("val")
Histogramを読み込む
Histogramも読み込むことができる。
hgaus = file["hgaus"] # TNameで取得
print(hgaus.edges) # ヒストグラムのx軸
print(hgaus.values)  # ヒストグラムのy軸(値)
hgaus.show()
実行結果はこんな感じ。
[-10.  -9.  -8.  -7.  -6.  -5.  -4.  -3.  -2.  -1.   0.   1.   2.   3.
   4.   5.   6.   7.   8.   9.  10.]
[ 0.  0.  0.  0.  0.  0.  5. 13. 17. 24. 20. 14.  2.  3.  1.  0.  1.  0.
  0.  0.]
               0                                                            25.2
               +---------------------------------------------------------------+
[-inf, -10) 0  |                                                               |
[-10, -9)   0  |                                                               |
[-9, -8)    0  |                                                               |
[-8, -7)    0  |                                                               |
[-7, -6)    0  |                                                               |
[-6, -5)    0  |                                                               |
[-5, -4)    0  |                                                               |
[-4, -3)    5  |************                                                   |
[-3, -2)    13 |********************************                               |
[-2, -1)    17 |******************************************                     |
[-1, 0)     24 |************************************************************   |
[0, 1)      20 |**************************************************             |
[1, 2)      14 |***********************************                            |
[2, 3)      2  |*****                                                          |
[3, 4)      3  |*******                                                        |
[4, 5)      1  |**                                                             |
[5, 6)      0  |                                                               |
[6, 7)      1  |**                                                             |
[7, 8)      0  |                                                               |
[8, 9)      0  |                                                               |
[9, 10)     0  |                                                               |
[10, inf]   0  |                                                               |
               +---------------------------------------------------------------+
書き込み
次のように、新しいROOTファイルを作成して、ヒストグラムや新しいTreeを書き込むこともできます。
import numpy as np
t = uproot.newtree({"branch1": int,
                    "branch2": np.int32,
                    "branch3": uproot.newbranch(np.float64, title="This is the title")})
with uproot.recreate("example.root") as f:
    f["hist"] = hgaus #オブジェクトの名前を適当につける
    f["t"] = t
まとめ
uprootを使えばROOTファイルをpython環境で(高速で)読み書きできることがわかりました。python系の機械学習フレームワーク(PyTorch、Tensorflowなど)で大きなファイルを食わせたい場合には特に有用そうです。

