pythonに[pyftpdlib] (https://code.google.com/p/pyftpdlib/)という便利そうなFTPサーバーライブラリがあったので使ってみました。
pyftpdlibをインストールする
[pyftpdlibのサイト] (https://code.google.com/p/pyftpdlib/)からダウンロードできるようですが・・・
pipを使うとコマンド1つでインストールできるのでおすすめ。
pip install pyftpdlib
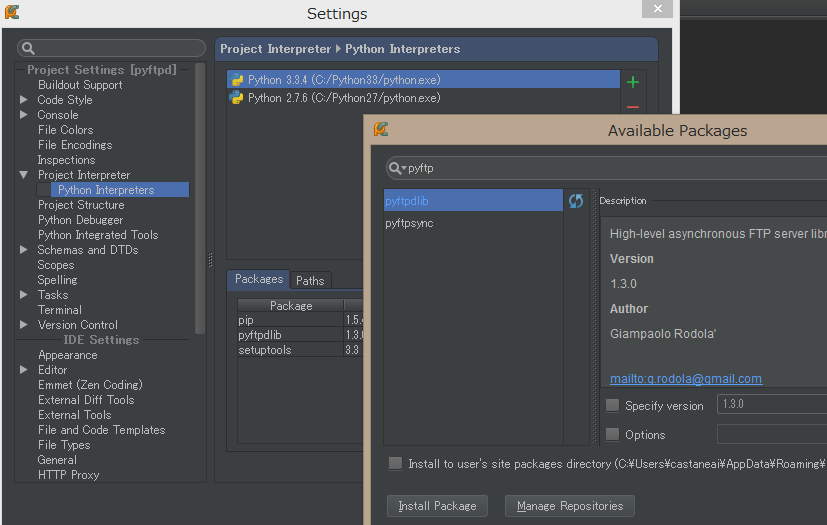
ついでに、[PyCharm] (http://www.jetbrains.com/pycharm/)を使えばGUIを使ってpipの実行ができます!(宣伝)

簡単なFTPサーバーを作る
基本は[公式サイトのクイックスタート] (https://code.google.com/p/pyftpdlib/)の通り。
自分はWindows環境でやりましたが、他のOSでもできると思います
# -*- coding: utf8 -*-
import pyftpdlib.authorizers
import pyftpdlib.handlers
import pyftpdlib.servers

# 認証ユーザーを作る
authorizer = pyftpdlib.authorizers.DummyAuthorizer()
authorizer.add_user('user', 'password', 'C:\\Users\\username\\Pictures', perm='elradfmw')

# 個々の接続を管理するハンドラーを作る
handler = pyftpdlib.handlers.FTPHandler
handler.authorizer = authorizer

# FTPサーバーを立ち上げる
server = pyftpdlib.servers.FTPServer(("127.0.0.1", 21), handler)
server.serve_forever()
この例だと、C:\Users\username\Picturesがルート・ディレクトリとなったFTPサーバーが立ち上がります。
ユーザー名:user, パスワード:password
でログインできます。
試しに、WinSCPでつないでみると、ちゃんと画像フォルダの中身が表示されました。
その他いろいろな拡張
まだ自分は見ていませんが、[公式サイトのチュートリアル] (https://code.google.com/p/pyftpdlib/wiki/Tutorial#4.0_-_Customizing_your_FTP_server)に様々な例が載っているようです。