完成品の表示ページ:
C4D
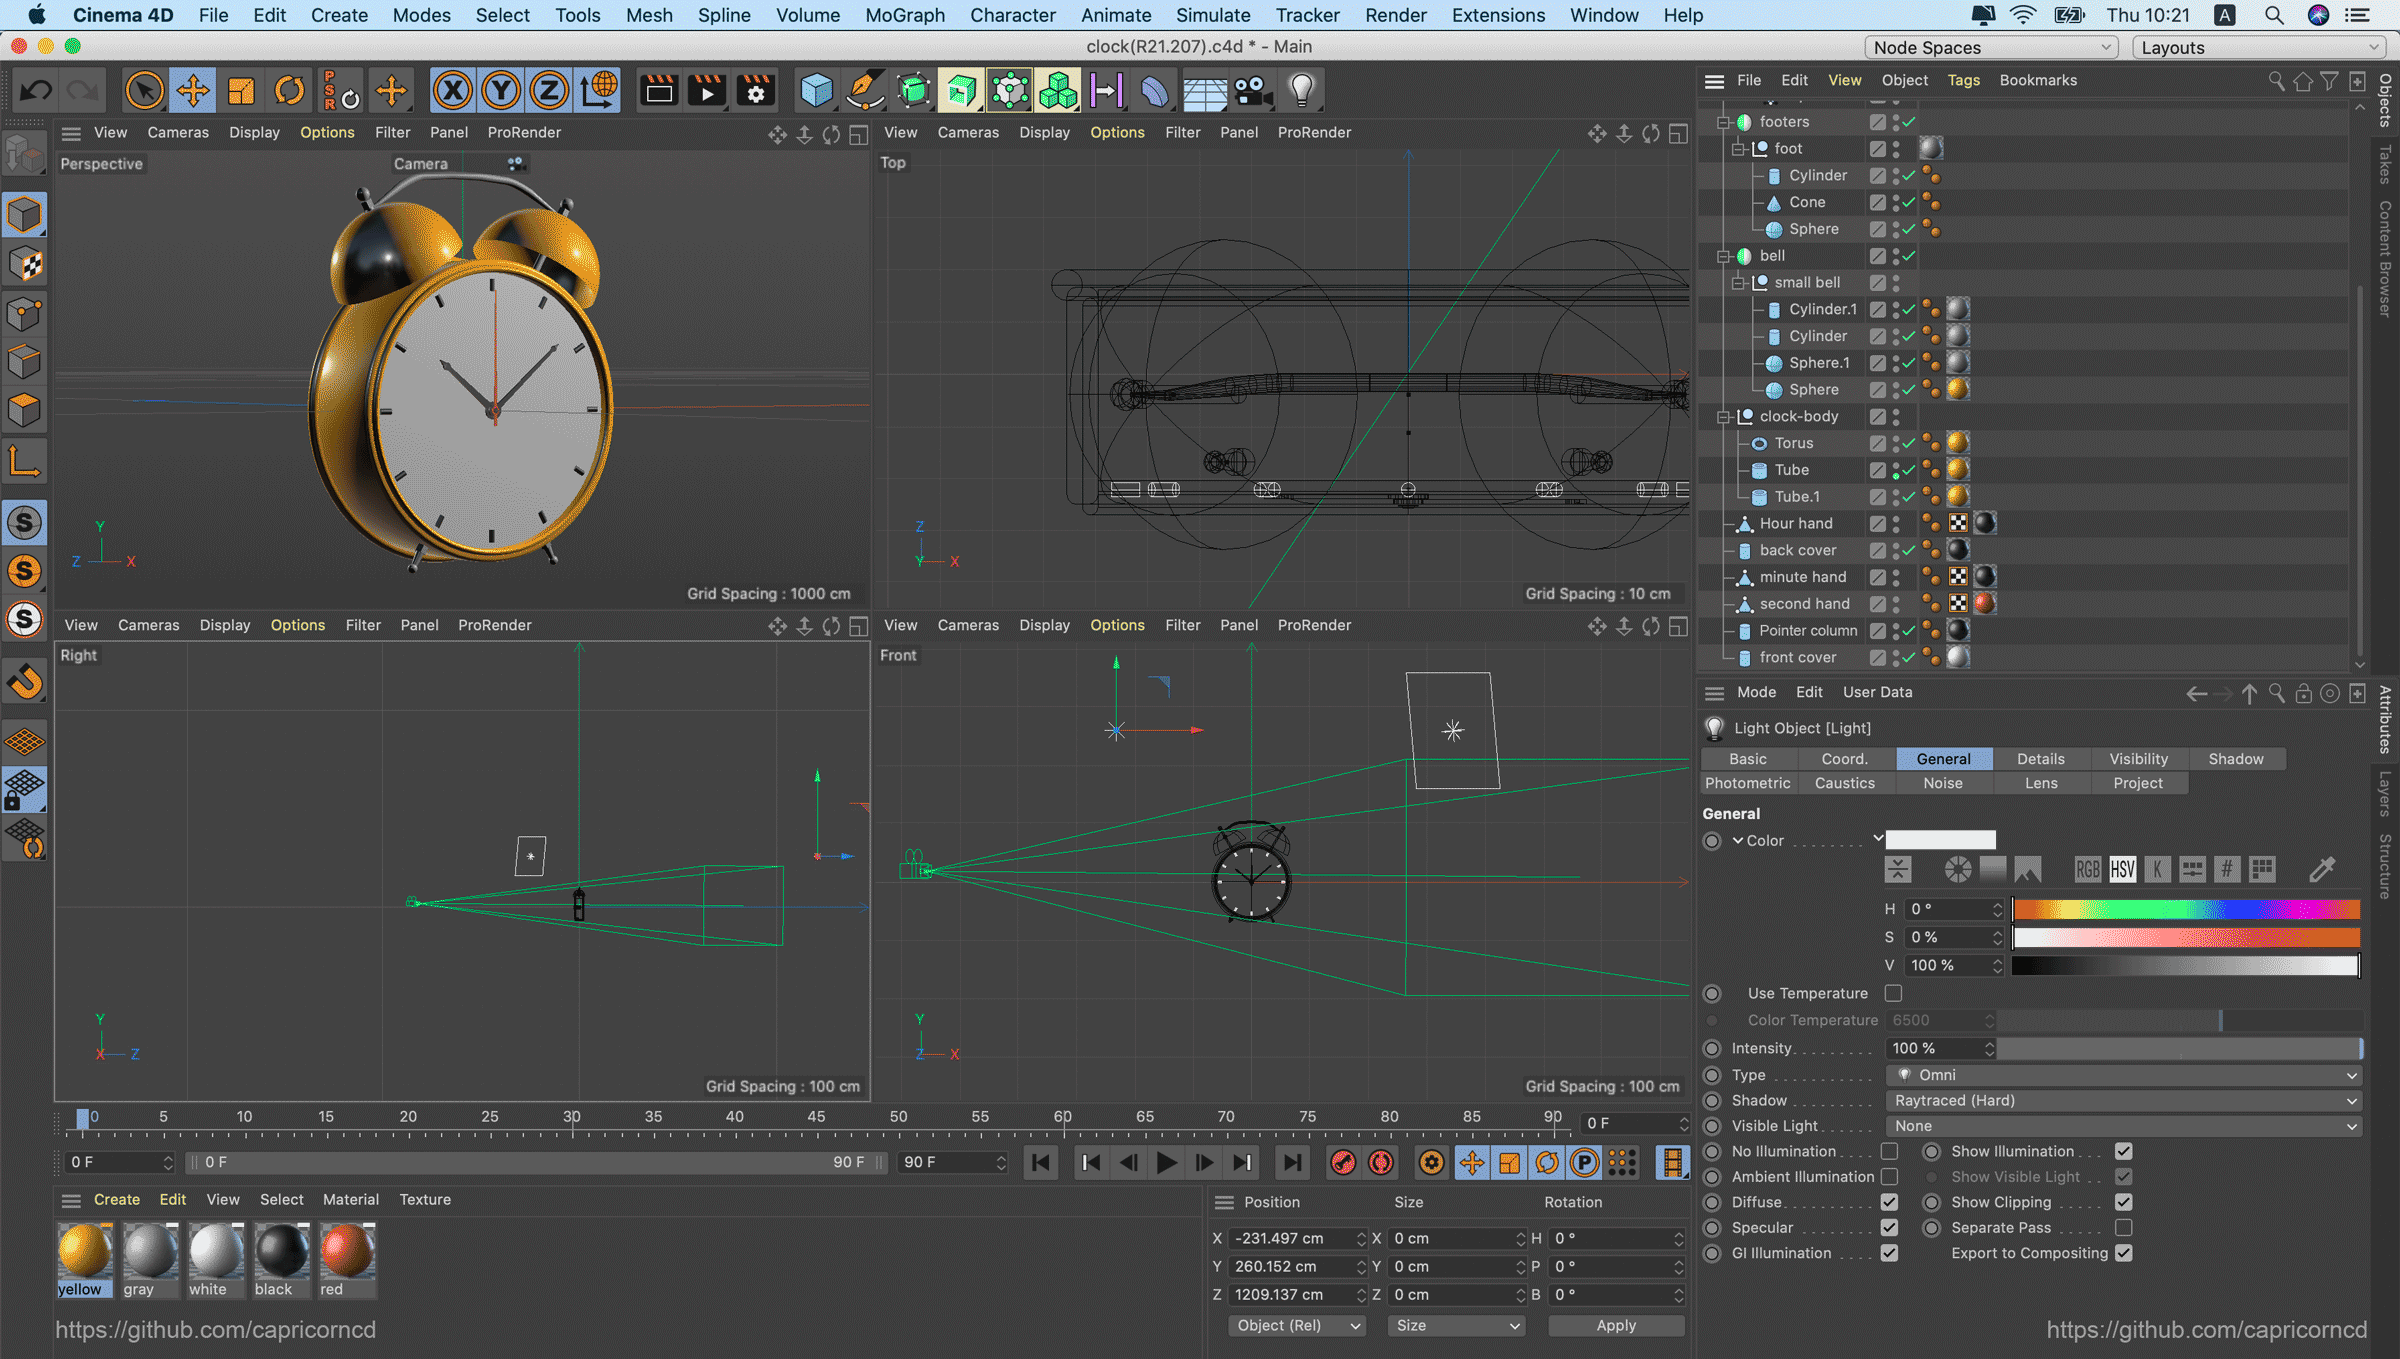
1. C4Dモデリング
C4Dを使って製品のモデルを作成する。
ご注意:
Discの使用を避けること、ブラウザで解析できないため。
各ジオメトリをマップする必要があります。グループマップは使用しないほうがいい。
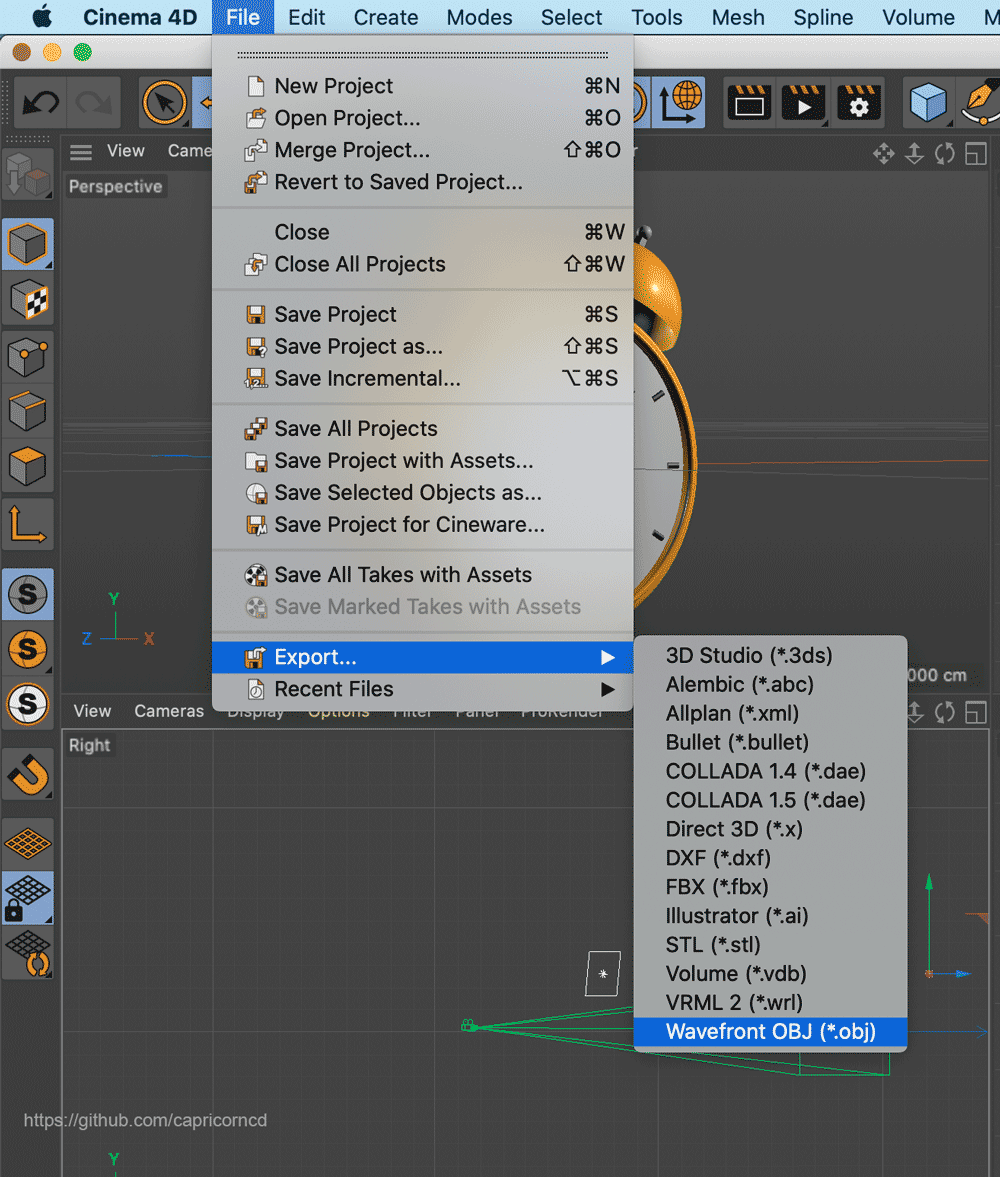
2. *.objファイルをエクスポートする
file -> Export -> Wavefront OBJ(*.obj)
ソース実装
開発環境:Node.js/Webpack4/React16/Three.js
ソース:https://github.com/capricorncd/blog/tree/master/demos/three
1. Install
# "three": "^0.120.1"
npm i -S three
# or
yarn add three
2. ソース
src/components/ClockObj/core.js
import {
  AmbientLight,
  DirectionalLight, PerspectiveCamera,
  Scene, WebGLRenderer
} from 'three'
import { OBJLoader } from 'three/examples/jsm/loaders/OBJLoader'
import { MTLLoader } from 'three/examples/jsm/loaders/MTLLoader'
import { OrbitControls } from 'three/examples/jsm/controls/OrbitControls'

let scene, renderer

/**
 * load resource
 * @returns {Promise<unknown>}
 */
 function loadResource() {
   return new Promise((resolve, reject) => {
     const objLoader = new OBJLoader()
     const mtlLoader = new MTLLoader()
     // テクスチャファイルをロードする
     mtlLoader.load('static/clock.mtl', mtl => {
       // オブジェクトをロードする前に、まずテクスチャデータを設定します
       objLoader.setMaterials(mtl)
       // オブジェクトをロードする
       objLoader.load('static/clock.obj', res => {
         resolve(res)
       }, undefined, reject)
     }, undefined, reject)
  })
}

/**
 * 初期化
 */
function _init(el, obj) {
  // コンテナサイズを取得する
  // windowの場合、window.innerWidthとwindow.innerHeightで取得する
  const width = el.offsetWidth
  const height = el.offsetHeight

  // シーンを作成する
  scene = new Scene()
  // オブジェクトをシーンに追加する
  scene.add(obj)

  // 周囲光を作成する
  const ambientLight = new AmbientLight(0x666666)
  ambientLight.position.set(100, -100, -200)
  scene.add(ambientLight)

  // 指向性ライトを作成する
  const light = new DirectionalLight(0xcccccc, 1)
  light.position.set(2000, 1000, 1000)
  scene.add(light)

  // カメラを作成する
  const camera = new PerspectiveCamera(45, width / height, 1, 80000)
  camera.position.set(-150, -50, 300)

  // レンダラーを作成する
  renderer = new WebGLRenderer({
    antialias: true
  })
  // レンダリング領域のサイズを設定する
  renderer.setSize(width, height)
  // 背景色を設定する
  renderer.setClearColor(0x000000, 1)
  el.appendChild(renderer.domElement)

  const orbitControls = new OrbitControls(camera, el)
  orbitControls.addEventListener('change', render)

  function render() {
    renderer.render(scene, camera)
  }
  render()
}

/**
 * init
 */
export function init(el) {
  loadResource().then(res => {
    _init(el, res)
  }).catch(console.error)
}

/**
 * destroy
 */
export function destroy() {
  if (!scene || !renderer) return
  scene.remove()
  renderer.dispose()
  scene = null
  renderer = null
}
src/components/ClockObj/index.jsx
import React, { useEffect, useRef } from 'react'
import { destroy, init } from './core'

function ClockObjDemo() {
  const elRef = useRef()
  useEffect(() => {
    init(elRef.current)
    return () => {
      destroy()
    }
  }, [])
  return <main className="font-size-zero" ref={elRef} />
}

export default ClockObjDemo
完成品URL