はじめに
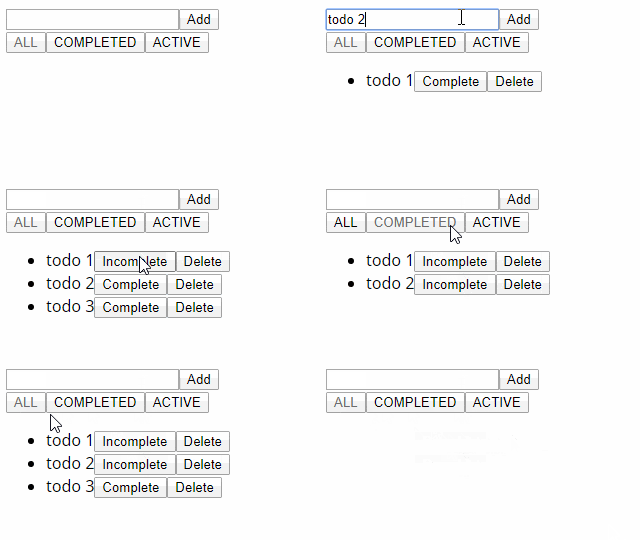
前回は、React のみでこのようななんでもない Todo アプリを作成しました

はい
なんでもないですね
今回は当初の目的である、State 管理の Redux への移行を行います
今回からいろいろと Rollup に惨敗して Webpack 使ってます
なんにも知らないくせに使うから...前回のコードに変更はないので、それだけ
なぜ Redux を使うのか?
「なぜ State 管理を分離するのか?」と言ったほうが正しいかも
今回のような、小規模も小規模なアプリではほぼ無縁な問題ですが、アプリの規模が大きくなると、以下のような様々な問題が浮き彫りとなりやがります
- State 分散されすぎ... いちいち別ファイル開くのが面倒、てかどこ? 😥
- (トップコンポーネントに State 集中しすぎることのほうが多そう
- State 管理用のコードがコンポーネント内に増えまくり... お手上げ 🙋♂️
- UI、State 処理のコードが混在して、コードが読みづらい... 🍝
- Prop のバケツリレーつらい 🥺
- etc...
しかし、Redux を使うと...?
- State は一点管理✨ どこにあるかも一目瞭然!! 😃
- State 管理のコードはコンポーネント外部に追いやり! State 管理は Redux に任せとき~~ 😘
- コンポーネントは描画に集中! 内部には UI 処理のコードだけ!! 🥰
- 必要なコンポーネントが直接 State 変更関数を受け取り!! 😍
- etc...
YEAH 😎
React 単体でもある程度マシに出来ると思いますが、そもそも React は UI 構築ライブラリであることを意識しておいたほうが良いんじゃないかなあ~と思います
(結局バケツリレーはどうにもなりませんし)
あくまで React の言う State というのは "UI(表示) に関するもの" のことであって "表示されるデータ" では無い...的な(わかって)
そこをはっきりとさせることで、開発の効率は確実に上がると考えます
(バケツリレーも無くなりますし)
コーディングの基本は分割...ってね
ディレクトリ構造
src/
 ├ components/
 │  └ app/
 ├ actions/
 ├ store/
 │  └ reducer/
 └ index.ts - エントリ
まず、Redux 用のフォルダが追加されるため、前回 src/ 直下にあった App コンポーネントフォルダを components/ に移動しています
そして、Redux 用に actions/, store/, store/reducer/ を作成します
パッケージの追加
yarn add redux react-redux
yarn add -D @types/react-redux
Store の作成
まずは Store を作らないことには React との連携もへったくれも無いので Redux 単体の機能である Store を作成します
必要な要素
Action
コンポーネントが、Store に対して「何が起きたか」を説明する
store.dispatch() を使用して Store に送信する
Action は以下のような type プロパティを持つただのオブジェクト
{
  type: "Reducer が Action の種類を識別するための文字列",
  // あとは自由
  // State 変更に必要なデータを入れておく
}
Action Creator
コンポーネントからデータを受け取り、Action を作成する
Reducer
Store に送信された Action を受け取り、State がどのように変化するかを指定する
事実上実際 State の変更を担当する大事なトコ
Store
アプリケーションに一つだけ存在し、State を保持する
- State へのアクセス手段 (
store.getState()) - State の更新手段 (
store.dispatch()) - 更新リスナの登録 (
store.subscribe())
を提供する
Action Creator
誤字とかでエラーが出るのを防ぐために Action type を別に定義しておきます
Action Creator に渡した時に string 型になるのを防ぐために as const を付けています
const ADD_TODO = "ADD_TODO" as const;
const TOGGLE_COMPLETED = "TOGGLE_COMPLETED" as const;
const DELETE_TODO = "DELETE_TODO" as const;
const SET_FILTER = "SET_FILTER" as const;
あとは必要なデータを引数に受け取り、いい感じに加工して Action を作ります
若干 JSON API 意識で、必要なデータは全て data プロパティ内に入れています
const addTodo = (text: string) => ({
  type: ADD_TODO,
  data: { id: Math.random(), text, complete: false },
});

const toggleCompleted = (id: number, isCompleted: boolean) => ({
  type: TOGGLE_COMPLETED,
  data: { id, isCompleted },
});

const deleteTodo = (id: number) => ({
  type: DELETE_TODO,
  data: id,
});
const setFilter = (filter: FilterStateType) => ({
  type: SET_FILTER,
  data: filter,
});
型定義
Reducer で型チェックするため、ReturnType を使用して、Action の型を定義します
ReturnType<typeof addTodo>
// ⇓
{
  type: "ADD_TODO";
  data: {
    id: number;
    text: string;
    complete: boolean;
  };
}
type AddTodoAction = ReturnType<typeof addTodo>;
type ToggleCompletedAction = ReturnType<typeof toggleCompleted>;
type DeleteTodoAction = ReturnType<typeof deleteTodo>;

type TodoActions =
  | AddTodoAction
  | ToggleCompletedAction
  | DeleteTodoAction;
type SetFilterAction = ReturnType<typeof setFilter>;
Reducer
引数の state, action の型定義のため、Redux.Reducer<State, Action> を使用します
初期化時には state に undefined が渡されるため、初期値を設定し
Action type で識別し、新しい State を返します
default case では引数 action を never 型に割り当てることで、絞り込みの漏れが無いようにしています
参考: TypeScript 2.0のneverでTagged union typesの絞込を漏れ無くチェックする
State の生成コードは前回と変わりないですね
const todoReducer: Redux.Reducer<TodoStateType, TodoActions> = (
  state = new Map(),
  action
) => {
  switch (action.type) {
    case ADD_TODO:
      return new Map(state.set(action.data.id, action.data));

    case TOGGLE_COMPLETED:
      const todo = state.get(action.data.id);

      if (todo) {
        return new Map(
          state.set(todo.id, { ...todo, complete: action.data.isCompleted })
        );
      }
      return state;

    case DELETE_TODO:
      state.delete(action.data);
      return new Map(state);

    default:
      const __check: never = action;
      return state;
  }
};
Filter の Action は 1種類だけなので if で
const filterReducer: Redux.Reducer<FilterStateType, SetFilterAction> = (
  state = "ALL",
  action
) => {
  if (action.type === SET_FILTER) return action.data;

  return state;
};
分割された Reducer を combineReducers を使用して1つにまとめます
combineReducers({ todoReducer, filterReducer });
Store
Reducer を createStore に渡せば Store の完成です
createStore(reducer);
型定義
前回の State 型と
Store 全体の型を定義します
type TodoType = { readonly id: number; text: string; complete: boolean };
type TodoStateType = Map<number, TodoType>;

type FilterStateType = "ALL" | "COMPLETED" | "ACTIVE";

type StoreType = {
  todo: TodoStateType;
  filter: FilterStateType;
};
React との連携
私が React 触り始めるより前の話でしたが、hooks に対応したため、面倒な stateToProps だとか dispatchToProps なんかは書かずに、呆れるほど簡単に連携可能になりました
ここが一番面倒で厄介でよくわからん意味不明な所だったのでもうこれは革命です
Redux 全然よくわからんくないです、タイトル詐欺です
(一回 connect を使って書いちゃった後に気づいたのはひみつ)
まずはトップコンポーネントを Provider でラップし、store を渡します
これで、ネストされたコンポーネントで Redux にアクセス出来るようになります
import { Provider } from "react-redux";
...
const App: React.FC = () => {
  return (
    <Provider store={store}>
      <AddTodo />
      <ToggleFilter />
      <TodoList />
    </Provider>
  );
};
そうすれば後は以下の hooks で実際に Redux にアクセスし、State の取得、Dispatch を行うだけです
useSelector()
stateToProps に当たる機能です
引数として、selector 関数を受け取り、store の値を返します
selector 関数は引数に store を受け取り、値を返す関数です
TodoList での例
import { useSelector } from "react-redux";
...
const TodoList: React.FC = () => {
  // Todo のリストを取得
  const todoList = useSelector((store: StoreType) => store.todo);
  // 現在のフィルタを取得
  const filter = useSelector((store: StoreType) => store.filter);
  ...
useDispatch()
dispatchToProps に当たる機能です
store.dispatch() を返します
Todo での例
特定の Action のみ受け付けるよう型で縛ってます
import { Dispatch } from "redux";
import { useDispatch } from "react-redux";
...
const Todo: React.FC<Props> = ({ todo }) => {
  const dispatch = useDispatch<Dispatch<ToggleCompletedAction | DeleteTodoAction>>();
  ...
まとめ
私の言う「Redux よくわからん」は十中八九 connect 周りの事だったので、hooks が使えたことで、大体 Prop で受け取っていた所を、useSelector, useDispatch に変更した感じになっちゃいました
記事書く前は使えるとか知らなかったんだもん...
それはそれとして、ディレクトリ構造とか型定義の場所とかを自分的に整理することができたので良かったです
趣旨ズレですが、Redux を使う利点もよく分かったと思います
TodoList とかが特に分かりやすい: Only React / With Redux
今回作成したコードは こちら (canoypa/react-redux-test-todo-app) にあります
Prev: とりあえず React だけで Todo
React (State) -> Redux の流れを掴むため、という名目で記事稼ぎのため一旦 React のみで Todo アプリをつくってます
参考
Redux入門【ダイジェスト版】10分で理解するReduxの基礎 、及びもと記事
Redux Docs
React Redux Docs