1.前提条件
1-1.プロジェクト作成
開発環境としては、React + Typescriptで開発していきます。
尚、執筆時のバージョンは以下のようになっています。
$ node -v
v16.17.1
実際に create-react-app でプロジェクトを作成します。
$ npx create-react-app my-project --template typescript
my-project の部分は自分の好きなプロジェクト名を設定して下さい。
上記のコマンドを確定させた後、Happy hacking! という文字が表示されれば成功です。
1-2.プロジェクト起動
上記で作成したプロジェクトのディレクトリに移動し、起動します。
$ cd {プロジェクト名}
$ yarn start
ブラウザが起動し、以下のような画面が表示されていれば成功です。
1-3.MUIのインストール
MUIと関連するモジュールをインストールします。
$ npm install @mui/material @mui/icons-material @emotion/react @emotion/styled
これでプロジェクト作成の準備は完了です。
2.画面の作成
2-1.トップ画面の作成
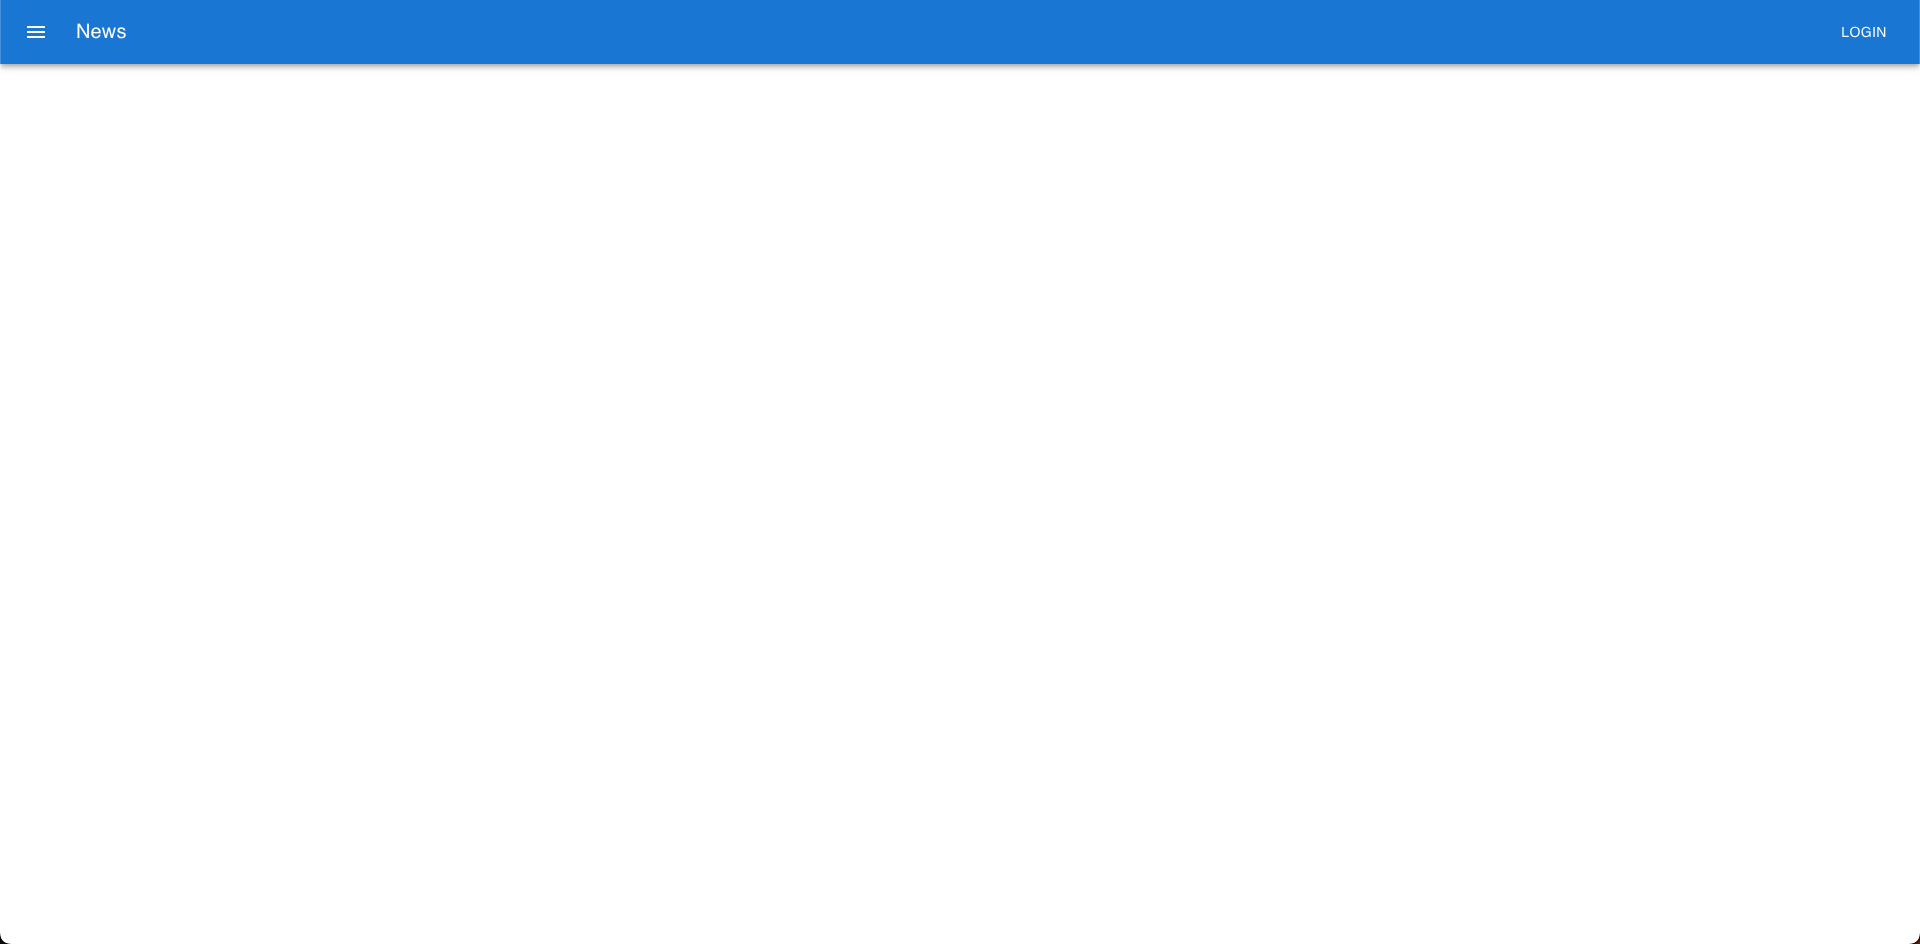
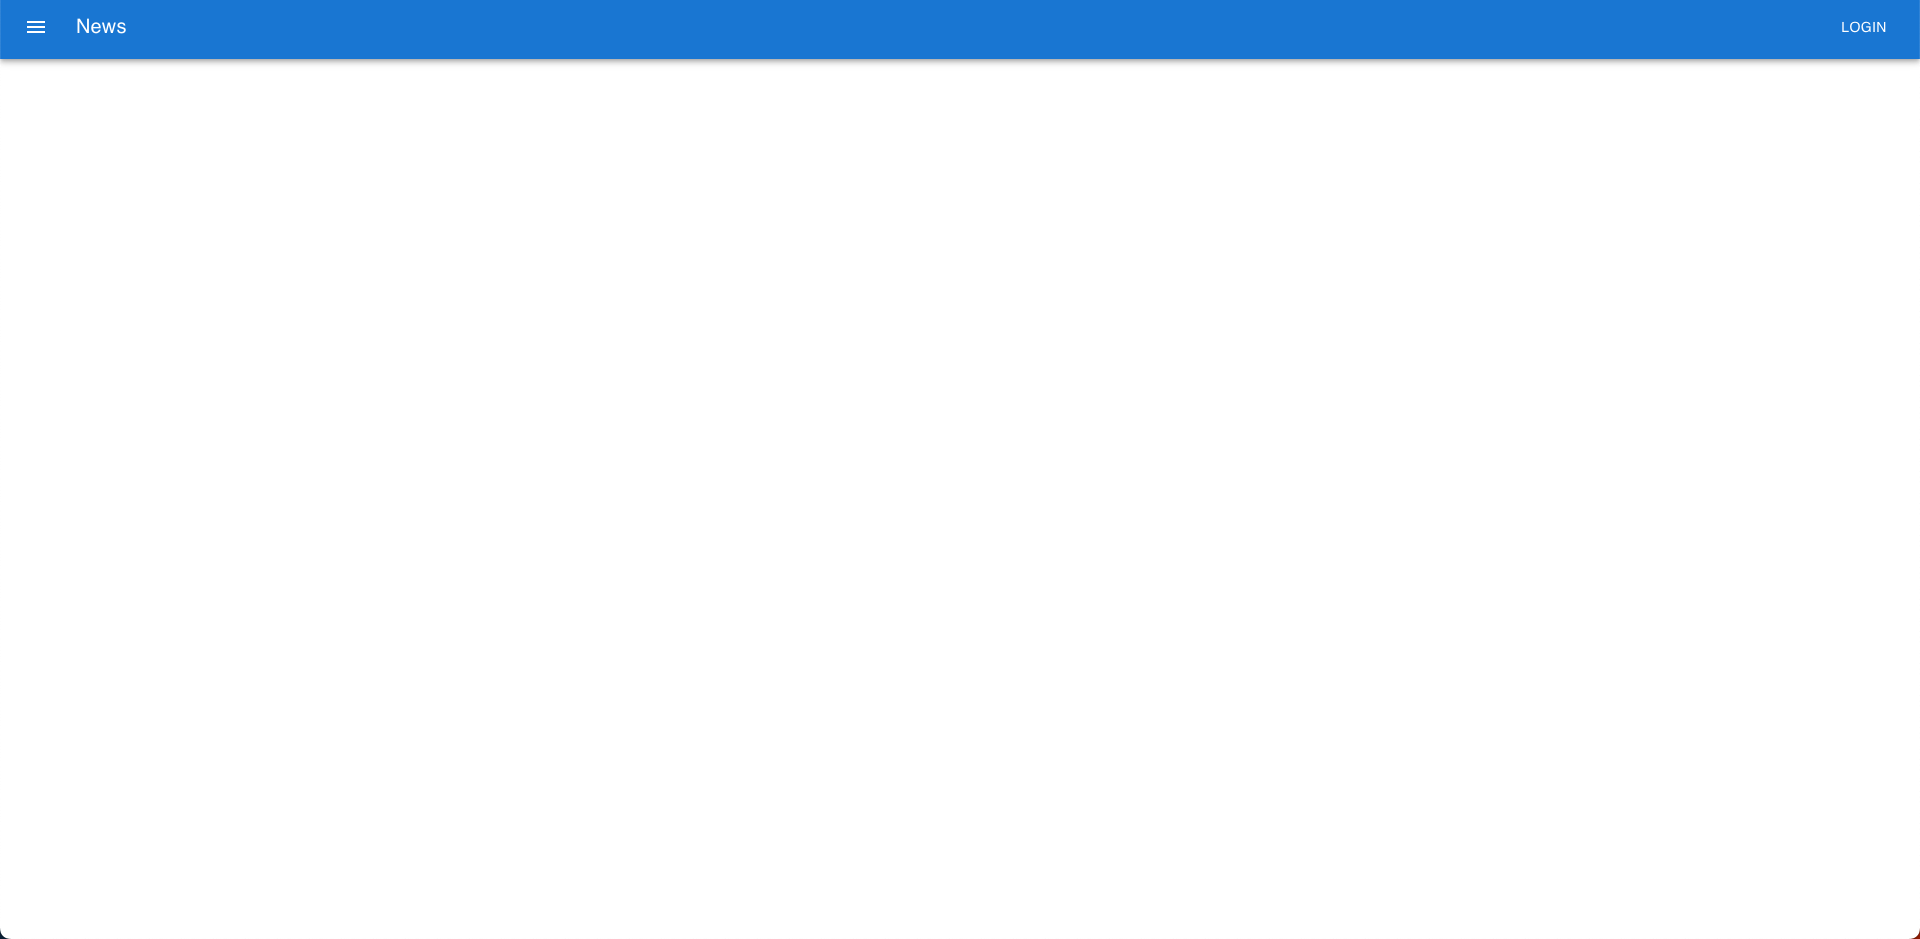
ダークモードが反映されているかを視覚的にわかりやすくするために、MUIのコンポーネントを使用したトップ画面を作成します。
MUIの Basic App bar を使用して作成します。(公式サイト)
以下がトップ画面のソースコードです。
import * as React from 'react';
import AppBar from '@mui/material/AppBar';
import Box from '@mui/material/Box';
import Toolbar from '@mui/material/Toolbar';
import Typography from '@mui/material/Typography';
import Button from '@mui/material/Button';
import IconButton from '@mui/material/IconButton';
import MenuIcon from '@mui/icons-material/Menu';

export const Top = () => {
  return (
    <Box sx={{ flexGrow: 1 }}>
      <AppBar position="static">
        <Toolbar>
          <IconButton
            size="large"
            edge="start"
            color="inherit"
            aria-label="menu"
            sx={{ mr: 2 }}
          >
            <MenuIcon />
          </IconButton>
          <Typography variant="h6" component="div" sx={{ flexGrow: 1 }}>
            News
          </Typography>
          <Button color="inherit">Login</Button>
        </Toolbar>
      </AppBar>
    </Box>
  );
}
実際のWebアプリ制作に近い環境で作成したいため、 components ディレクトリを作成しました。
そして、作成したトップ画面を表示するために App.tsx 、App.test.tsx を以下のように編集します。
import React from 'react';
import { Top } from './components/pages/top/top';

export const App = () => {
  return (
    <>
        <Top />
    </>
  );
}
import React from 'react';
import { render, screen } from '@testing-library/react';
import { App } from './App';

test('renders learn react link', () => {
  render(<App />);
  const linkElement = screen.getByText(/learn react/i);
  expect(linkElement).toBeInTheDocument();
});
上記のように編集できたら以下のような画面になります。
関数を export const 関数名 = () => にしている理由としては、import、exportで命名が統一できるからです。
そして、命名を統一することでスペルミスによるバグを未然に防ぐことができます。
また、import側で型定義ができるなど多くの利点があります。
このように、関数名を指定してexportすることを named export といいます。
3.ダークモード対応化
3-1.MUIコンポーネントを使用したダークモード対応画面の作成
今回作成するダークモード対応画面はその画面を表示しているパソコンの外観モードに対応した画面となります。
使用するMUIコンポーネントはこちらです。
上記コンポーネントを使用して、App.tsx を以下のように編集します。
import * as React from 'react';
import useMediaQuery from '@mui/material/useMediaQuery';
import { createTheme, ThemeProvider } from '@mui/material/styles';
import CssBaseline from '@mui/material/CssBaseline';
import { Top } from './components/pages/top/top'

export const App = () => {
  const prefersDarkMode = useMediaQuery('(prefers-color-scheme: dark)');

  const theme = React.useMemo(
    () =>
      createTheme({
        palette: {
          mode: prefersDarkMode ? 'dark' : 'light',
        },
      }),
    [prefersDarkMode],
  );

  return (
    <ThemeProvider theme={theme}>
      <CssBaseline />
      <Top />
    </ThemeProvider>
  );
}
useMediaQuery はMUI独自のもので、true or false の結果を返します。
3-2.結果
結果を画面で確認します。
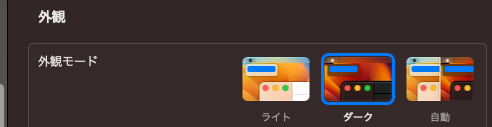
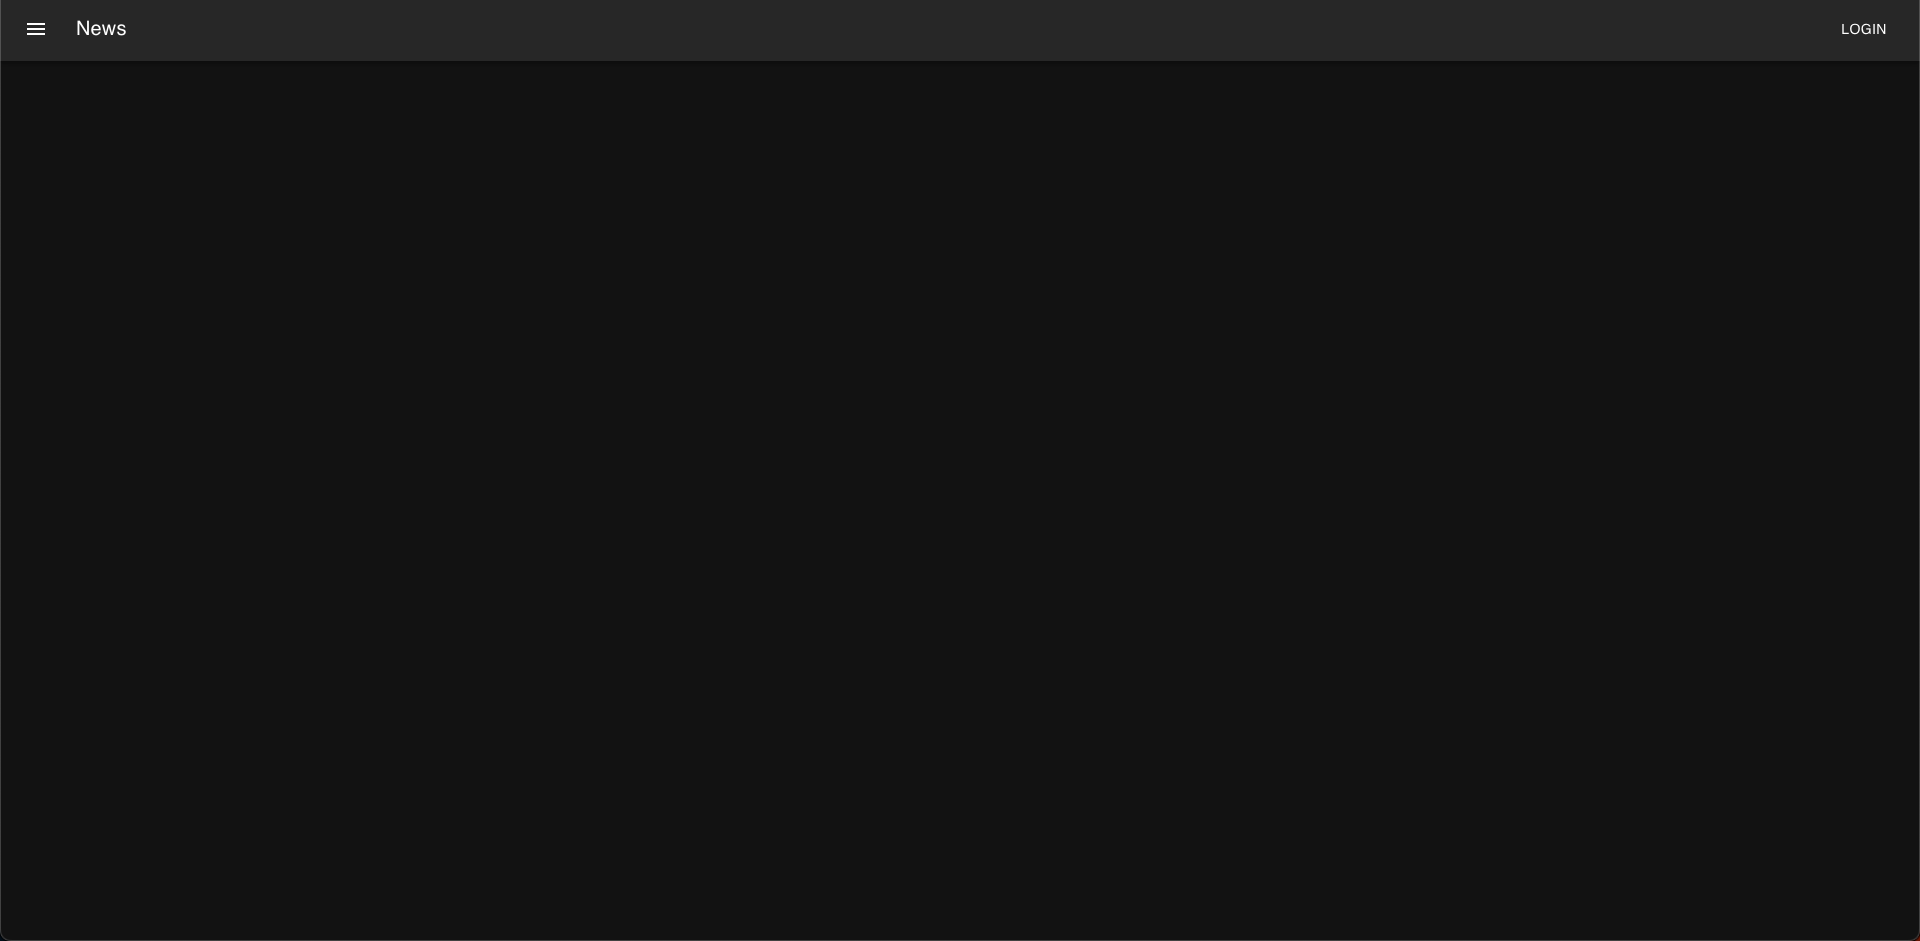
システム設定がダークモードの場合
実際の画面
システム設定がライトモードの場合
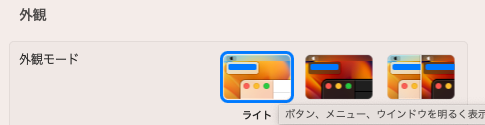
実際の画面
これでダークモード対応画面が完成しました!