Jupyter Notebookでipywidgetとjinja2を使い、Ciscoルータ(IOS)のコンフィグ生成ツールを作成します。
ipywidgetはJupyter Notebook上にテキストボックスやボタンを配置できるUIライブラリです。jinja2はpythonのテンプレートエンジンライブラリです。今回はコンフィグ作成に必要なパラメータをテキストボックスに入力し、ボタンを押すとCiscoルータのコンフィグ作成するようなツールを作ってみます。
早速ですが、Pythonコードと実行結果から確認していきます。
Pythonコード
from IPython.display import display, clear_output
from jinja2 import Template
from ipywidgets import Text, BoundedIntText, Button

global_template_txt = '''
hostname {{t_hostname}}
no ip domain-lookup
'''

recursive_template_txt = '''
int giga {{t_int_num}}
 no switchport
 ip address {{t_ip_address}} {{t_mask}}
 no shutdown
'''

global_template = Template(global_template_txt)
recursive_template = Template(recursive_template_txt)

tbox_hostname = Text (value='L3-SW1', description='hostname')
tbox_interface_num = BoundedIntText(value=0, min=0, max=5, step=1, description='Interface数:')
button = Button(description='generate config')

display(tbox_hostname)
display(tbox_interface_num)
display(button)

interface_boxes = []

def on_button_clicked(b) :
    global interface_boxes
    global_config = global_template.render(t_hostname = tbox_hostname.value)
    print(global_config)

    for i in range(tbox_interface_num.value) :
        recursive_config = recursive_template.render(t_int_num=interface_boxes[i].children[0].value,
                                                     t_ip_address=interface_boxes[i].children[1].value,
                                                     t_mask=interface_boxes[i].children[2].value)
        print(recursive_config)

def on_value_change(change) :
    global interface_boxes
    clear_output()
    display(tbox_hostname)
    display(tbox_interface_num)

    interface_boxes = []
    for i in range(change['new']) :
        interface_elements = [
            Text(value='1/0/1', description='I/F num'),
            Text(value='10.10.10.1',  description='I/F ip add'),
            Text(value='255.255.255.0',  description='I/F mask')]
        interface_boxes.append(ipywidgets.Box(children = interface_elements))
        display(interface_boxes[i])

    display(button)
    button.on_click(on_button_clicked)

tbox_interface_num.observe(on_value_change, names='value')
button.on_click(on_button_clicked)
実行結果
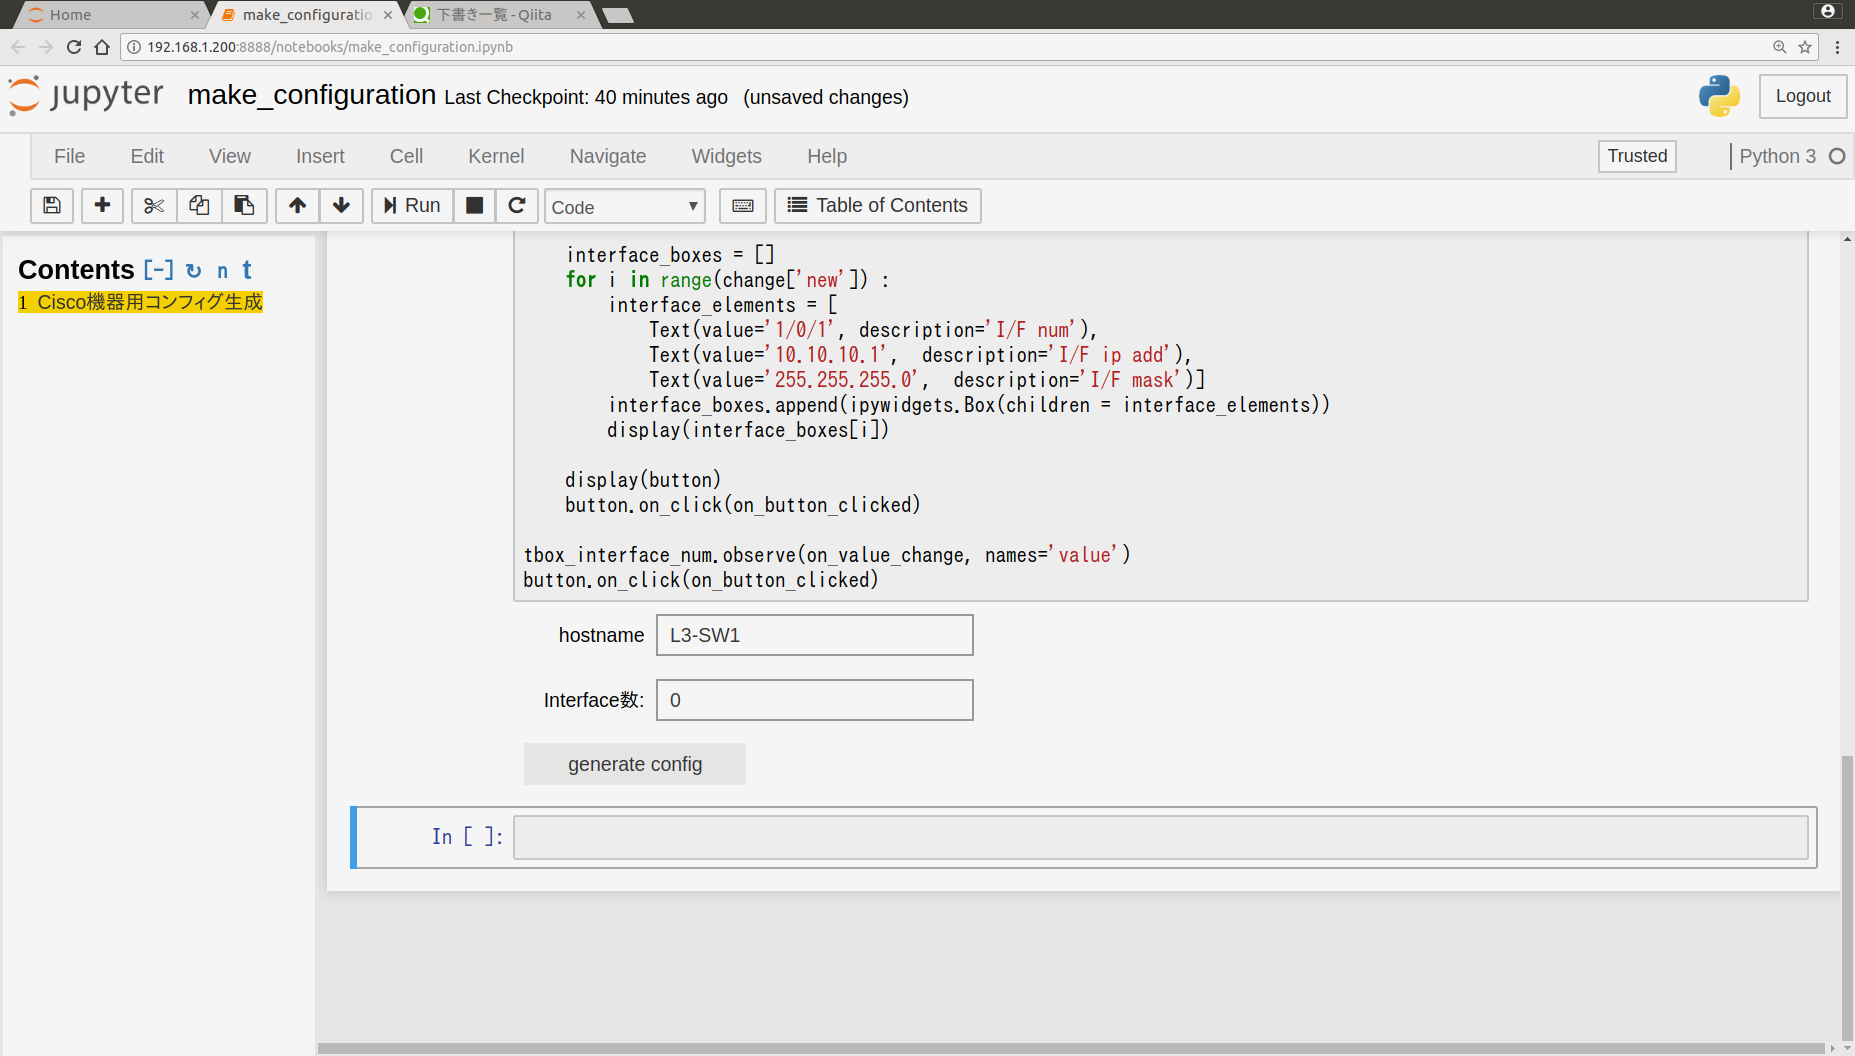
初期画面
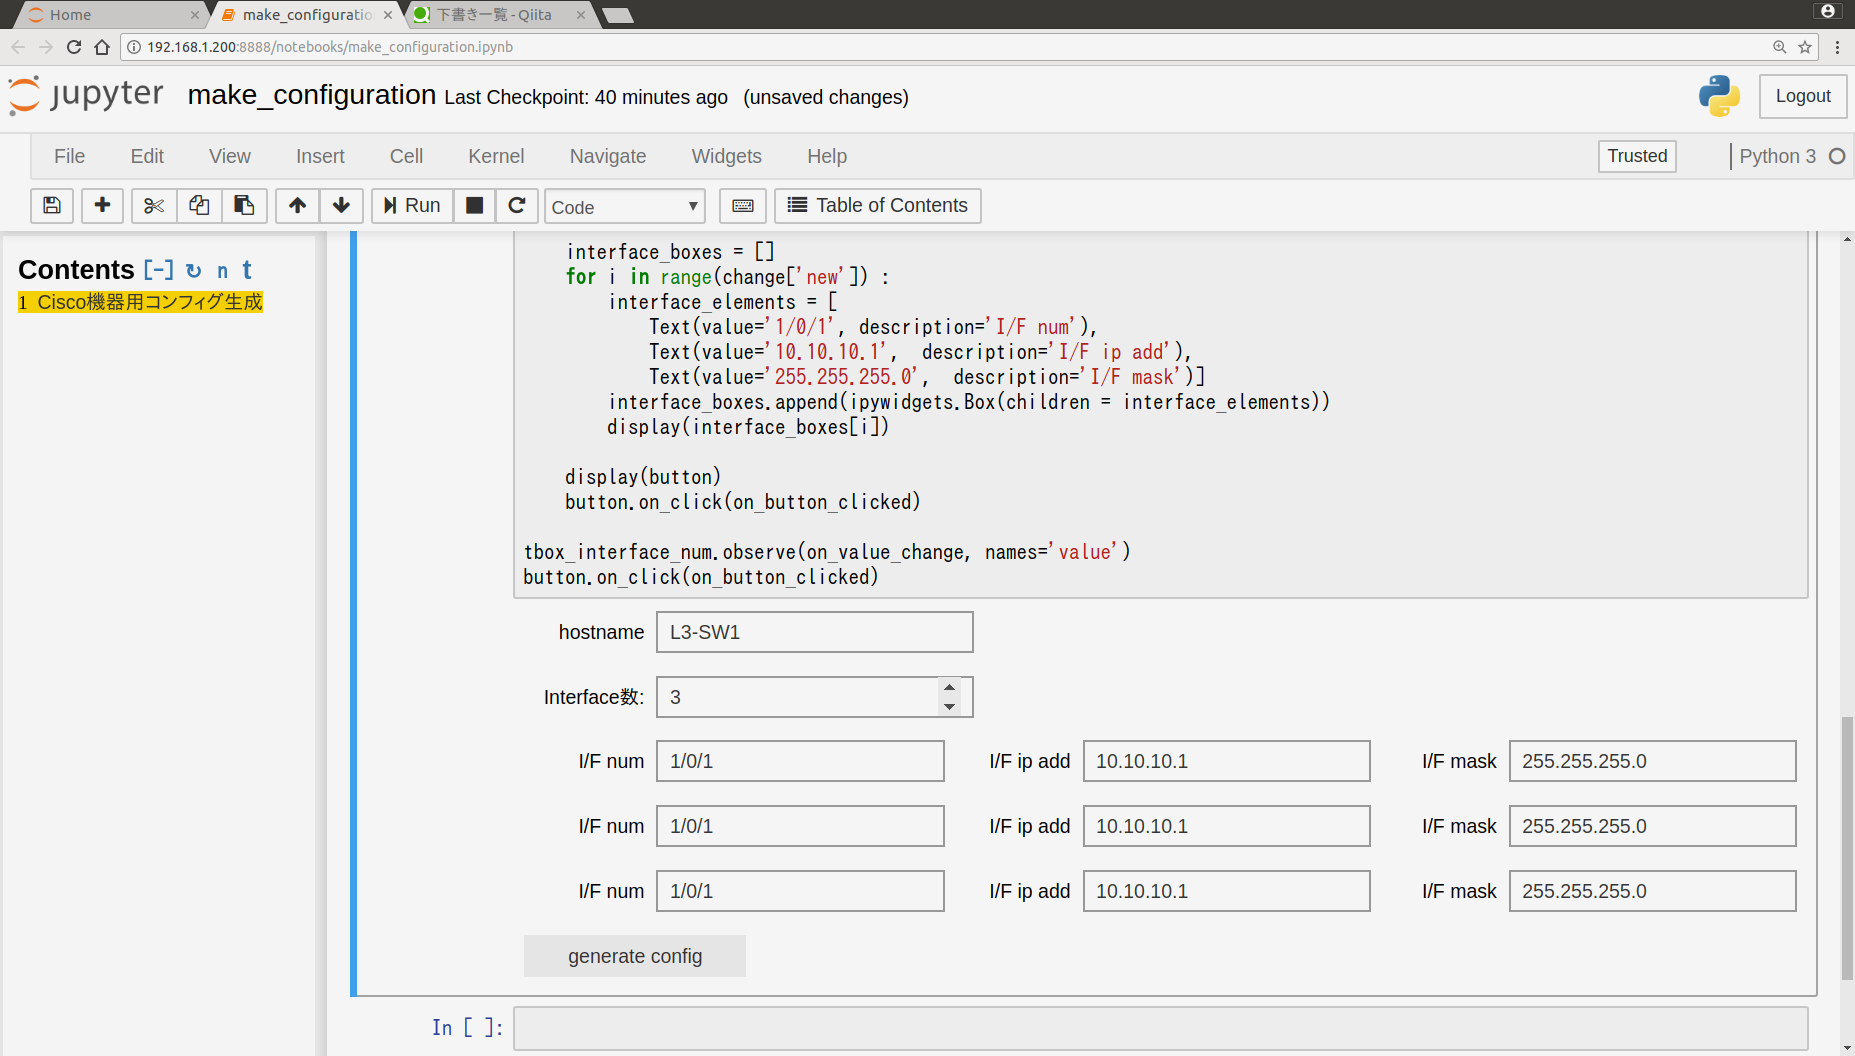
Interface数変更時
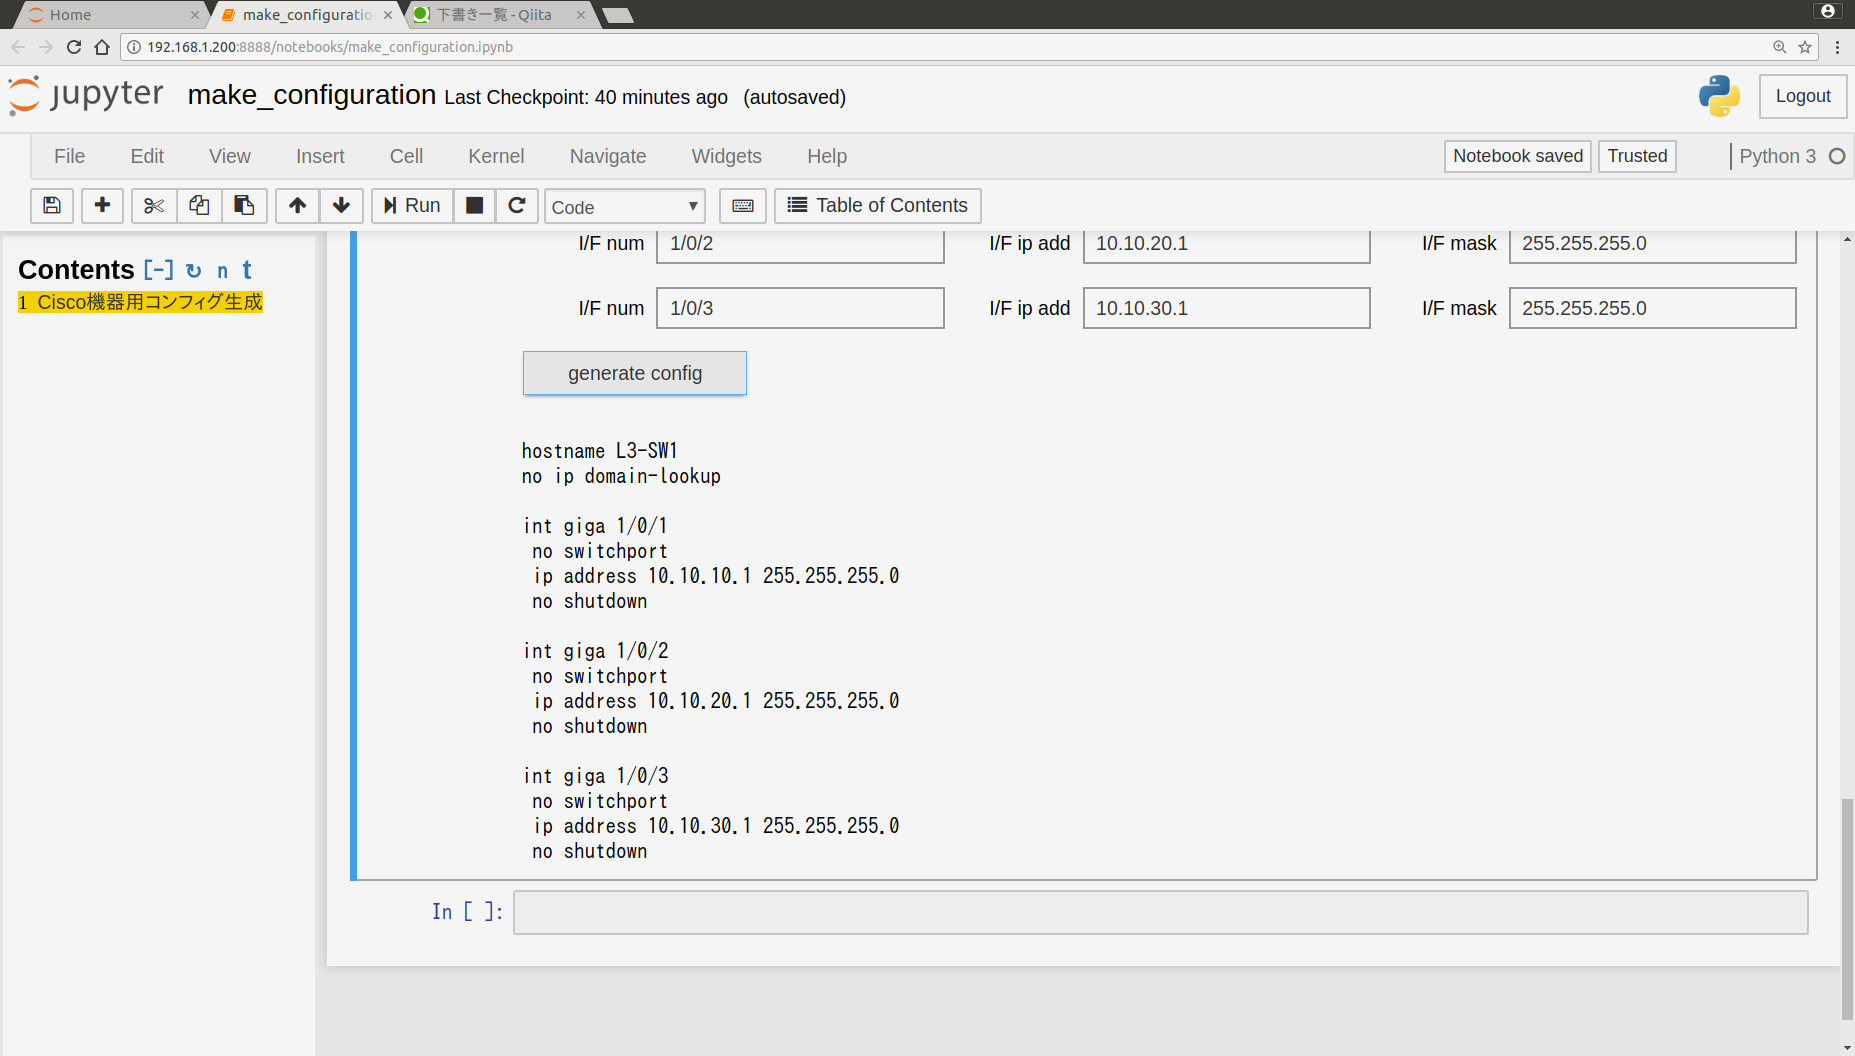
generate configボタン押下時
コンフィグの説明
実行順に見ていきます。
テンプレートの定義
global_template_txt = '''
hostname {{t_hostname}}
no ip domain-lookup
'''

recursive_template_txt = '''
int giga {{t_int_num}}
 no switchport
 ip address {{t_ip_address}} {{t_mask}}
 no shutdown
'''

global_template = Template(global_template_txt)
recursive_template = Template(recursive_template_txt)
ここでCiscoコンフィグのテンプレートを定義しています。グローバルコンフィグがglobal_templateに対応し、インターフェースコンフィグがrecursive_templateに対応しています。{{}}で囲まれた部分が変数になっており、あとから値を埋め込む箇所です。
初期画面の出力
tbox_hostname = Text (value='L3-SW1', description='hostname')
tbox_interface_num = BoundedIntText(value=0, min=0, max=5, step=1, description='Interface数:')
button = Button(description='generate config')

display(tbox_hostname)
display(tbox_interface_num)
display(button)
ここでホスト名とInterface数を入力するテキストボックス、及びコンフィグ作成ボタンを描画しています。
ipywidgetのイベント検出
tbox_interface_num.observe(on_value_change, names='value')
button.on_click(on_button_clicked)
一番最後の2行は、Interface数が変更された場合とボタンが押された場合に、それぞれon_value_change関数、on_button_clicked関数を呼び出すための記述です。
on_value_cange関数
def on_value_change(change) :
    global interface_boxes
    clear_output()
    display(tbox_hostname)
    display(tbox_interface_num)

    interface_boxes = []
    for i in range(change['new']) :
        interface_elements = [
            Text(value='1/0/1', description='I/F num'),
            Text(value='10.10.10.1',  description='I/F ip add'),
            Text(value='255.255.255.0',  description='I/F mask')]
        interface_boxes.append(ipywidgets.Box(children = interface_elements))
        display(interface_boxes[i])

    display(button)
    button.on_click(on_button_clicked)
on_value_change関数では、Interface数の変更に応じて画面に表示するインターフェースコンフィグ用のテキストボックス数を変えています。使うInterfaceが1つならテキストボックスも1行分、使うInterfaceが2つならテキストボックスも2行分出力させます。
on_button_clicked関数
def on_button_clicked(b) :
    global interface_boxes
    global_config = global_template.render(t_hostname = tbox_hostname.value)
    print(global_config)

    for i in range(tbox_interface_num.value) :
        recursive_config = recursive_template.render(t_int_num=interface_boxes[i].children[0].value,
                                                     t_ip_address=interface_boxes[i].children[1].value,
                                                     t_mask=interface_boxes[i].children[2].value)
        print(recursive_config)
on_button_clicked関数では、コンフィグ作成・出力を行っています。コンフィグ作成ボタンが押された時に、global_templateは1回だけ、recursive_templateはInterface数分だけ繰り返し処理を行い、各テキストボックスの値をテンプレートの変数部分に埋め込んだあと、作成されたコンフィグを画面出力しています。
さいごに
正直なところ、自分が使う分にはipywidgetよりもテキストベースで直接パラメータ入力したほうが効率的です。
どちらかというと、プロジェクトやチーム内で共用するなど、他人に使ってもらうことを想定しています。