0
0

Delete article

Deleted articles cannot be recovered.

Draft of this article would be also deleted.

Are you sure you want to delete this article?

More than 1 year has passed since last update.

STM32F767のArduinoでの新規Lチカコンパイル

Last updated at Posted at 2021-02-04

X何らかの方法でArduinoをインストールしておく。

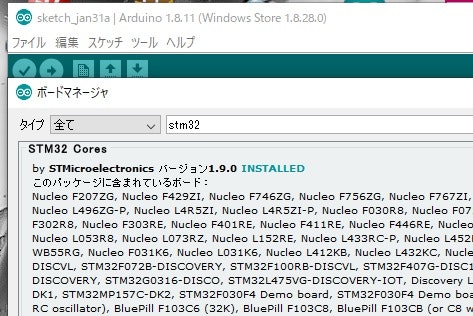
1.stm32ライブラリーのインストール
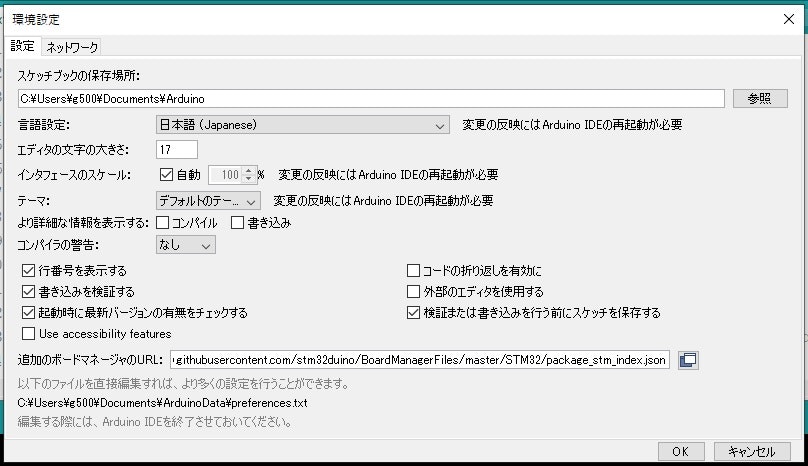
追加ボードマネージャー
[ファイル]->[環境設定]

下記を,で追加

https://raw.githubusercontent.com/stm32duino/BoardManagerFiles/master/STM32/package_stm_index.json

2.ボードの設定

3.サンプルの読み込み

4.コンパイル

5.おわり

わからない所は、STM32F303K8 Arduinoを参考にしてしらべてね!!
https://www.denshi.club/pc/nucleo/nucleoarduino1blink.html

stm32_oled_d_3.jpg

l_ax_1.jpg

l_ax_2.jpg

f767_a_1.jpg

l_ax_5.jpg

f767_a_2.jpg


PB0  LD1[Green]
PB7  LD2[Blue]
PB14 LD3[Red]
PC13 USER_Btn


0
0
0

Register as a new user and use Qiita more conveniently

  1. You get articles that match your needs
  2. You can efficiently read back useful information
  3. You can use dark theme
What you can do with signing up
0
0

Delete article

Deleted articles cannot be recovered.

Draft of this article would be also deleted.

Are you sure you want to delete this article?