x まだ試していない 確認済み 2022/3/29_8:01
目的
I2Cのテスト
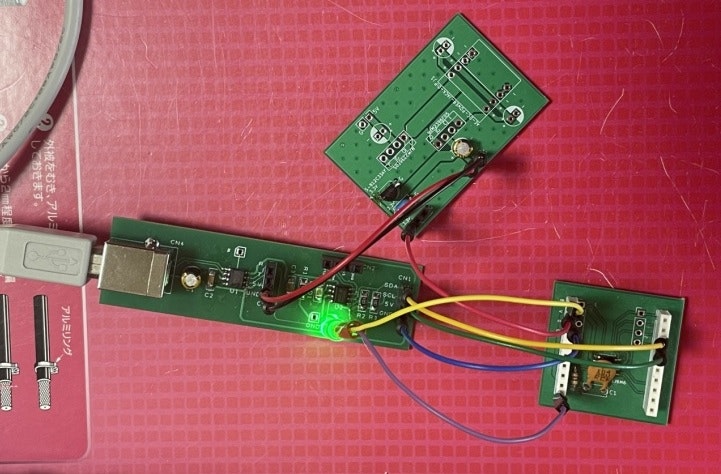
I2C_USARTコンバータのArduinoバージョン
STM32G031とVSCode+STM32CubeでI2Cスレーブの受信文字をシリアル出力(受信)(STM32-I2C-USART)(CH340N)
I2Cから送られて来たデータを受信してUSBシリアルに出力するプログラム
//I2C_SERIAL_CONVERTER_031_1

#include <Arduino.h>
#include <Wire.h>

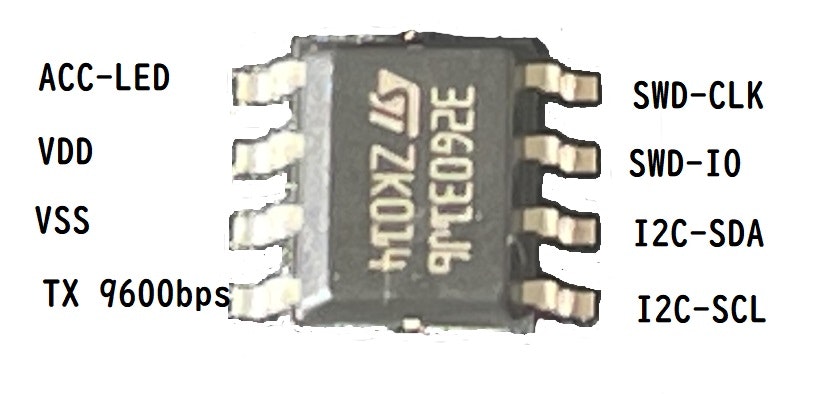
#define TX1      PA0  // 4pin
#define LED1     PB7  // 1pin

#define DW   digitalWrite


#define UART_DELAY 102   //  9600bps ok 031

//仮想シリアルへの一文字出力 9600bps
int pc_putc(char ch) {

  DW(TX1, HIGH);

  DW(TX1, LOW);//START
  delayMicroseconds(UART_DELAY); //START BIT WAIT

  for (int ii = 0; ii < 8; ii++) {
    DW(TX1, (ch >> ii) & 1  );
    delayMicroseconds(UART_DELAY); //DATA 1-8BIT WAIT
  }//for

  DW(TX1, HIGH);//Stop
  delayMicroseconds(UART_DELAY); //StOP BIT WAIT

  return (0);

}//pc_putc


//文字列の表示
int pc_printf(char *str1) {

  //文字の中身がゼロか
  while (*str1) {

    //一文字出力
    pc_putc(*str1 ++);

  } //while

  //戻り値
  return (0);

}//pc_printf


//初期化
void setup()
{

  //ポートをhiにする 初期化
  pinMode(TX1, OUTPUT);
  DW(TX1, HIGH);

  //LEDの初期化
  pinMode(LED1, OUTPUT);
  DW(LED1, HIGH); //debug
  delay(500);     //debug
  DW(LED1, LOW);

  //I2Cの初期化
  Wire.begin(PA12, PA11); //stm32g031

  Wire.begin(0x40);  //I2Cスレーブアドレスの設定
  Wire.onReceive(receiveEvent); //データが来ると呼ばれる関数

} //setup


//メインループ
void loop()
{
} //loop


//レシーブイベント
void receiveEvent(int howMany) {

  int x = Wire.read(); //I2C受信データの読み込み

  //  char c_hex[] = {
  //    '0', '1', '2', '3', '4', '5', '6', '7',
  //    '8', '9', 'A', 'B', 'C', 'D', 'E', 'F'
  //  };
  //
  //  char buf[] = { c_hex[(x >> 4) & 0x0f], c_hex[x & 0x0f]  , 0 };
  //
  //  char buf[] = { x, 0  };

  DW(LED1, HIGH);

  //I2Cスレーブの受信データの表示
  pc_putc(x);
  //pc_printf( buf ); //debug

  DW(LED1, LOW);

}//receiveEvent
細かいバグがあり制作途中
ばぐあり
//I2C_Master_ino_031_1

#include <Arduino.h>
#include <Wire.h>


#define TX1      PA0  // 4pin
#define LED1     PB7  // 1pin

#define DW   digitalWrite

#define UART_DELAY 102   //  9600bps ok 031


//仮想シリアルへの一文字出力 9600bps
int pc_putc(char ch) {

  DW(TX1, HIGH);

  DW(TX1, LOW);//START
  delayMicroseconds(UART_DELAY);

  for (int ii = 0; ii < 8; ii++) {
    DW(TX1, (ch >> ii) & 1  );
    delayMicroseconds(UART_DELAY);
  }//for

  DW(TX1, HIGH);//Stop
  delayMicroseconds(UART_DELAY);

  return (0);

}//pc_putc


//文字列の表示
int pc_printf(char *str1) {

  //文字の中身がゼロか
  while (*str1) {

    //一文字出力
    pc_putc(*str1 ++);

  } //while

  //戻り値
  return (0);

}//pc_printf


//初期化
void setup()
{

  //ポートをhiにする 初期化
  pinMode(TX1, OUTPUT);
  DW(TX1, HIGH);

  //LEDの初期化
  pinMode(LED1, OUTPUT);
  DW(LED1, HIGH);

  //I2Cの初期化
  Wire.begin(PA12, PA11); //stm32g031

  Wire.begin(0x40);  //I2Cスレーブアドレスの設定
  Wire.onReceive(receiveEvent); //データが来ると呼ばれる関数

} //setup


} //setup


//メインループ
void loop()
{
} //loop


//レシーブイベント
void receiveEvent(int howMany) {

  int x = Wire.read(); //I2C受信データの読み込み

//  char c_hex[] = {
//    '0', '1', '2', '3', '4', '5', '6', '7',
//    '8', '9', 'A', 'B', 'C', 'D', 'E', 'F'
//  };
//
//  char buf[] = { c_hex[(x >> 4) & 0x0f], c_hex[x & 0x0f]  , 0 };

  char buf[] = { x, 0  };

  //I2Cスレーブの受信データの表示
  pc_printf( buf );

}//receiveEvent
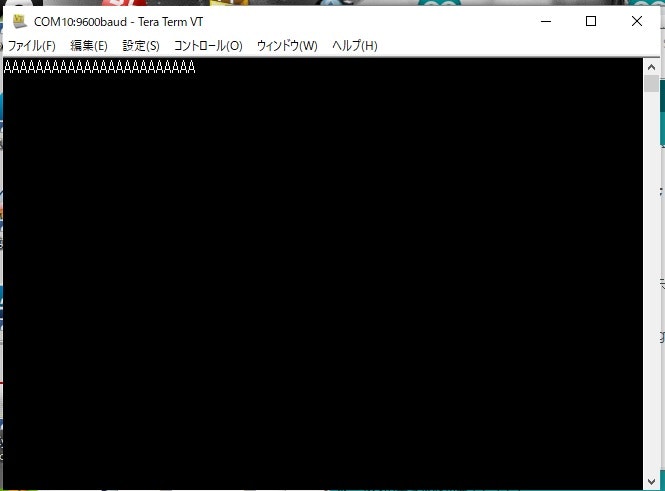
テストデータ 「A」の連続出力
//I2C_A_031_1

#include <Arduino.h>
#include <Wire.h>

//STM32G031J6M6 i2cピンの定義
#define sdaPin PA12    // ArduinoA4
#define sclPin PA11    // ArduinoA5

#define en     PB7     // 1pin

#define ADDR1  0x40

//初期化
void setup() {

  delay(3000); //not Delete

  //GPIOの初期化
  pinMode(en, OUTPUT);

  //i2cの初期化
  Wire.begin(sdaPin, sclPin); //STM32G031J6M6

}//setup

//メインループ
void loop() {

  digitalWrite(en, 1); //LED ON debug

  //I2Cに送信
  Wire.beginTransmission(ADDR1);
  Wire.write('A');
  Wire.endTransmission();

  delay(500);//0.5秒待つ


  digitalWrite(en, 0); //LED OFF debug
  delay(500);//0.5秒待つ

}//loop


