x PA0をGPIOがわかる人むけ
x PA0を470Ωでプルアップ
x アドレスは、0x40(8ビット0x80)
目的
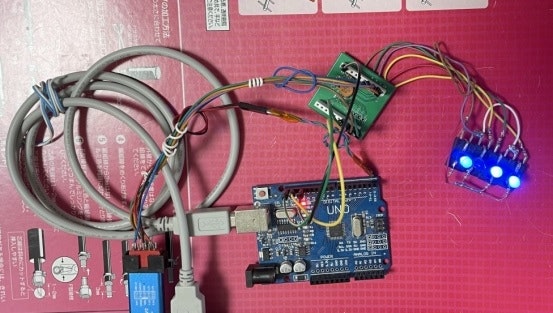
I2CでIOを拡張する。
金銭的には、ほぼ意味は、無い。
たまたまSTM32G031J6M6がある場合、買いに行く手間が省ける。
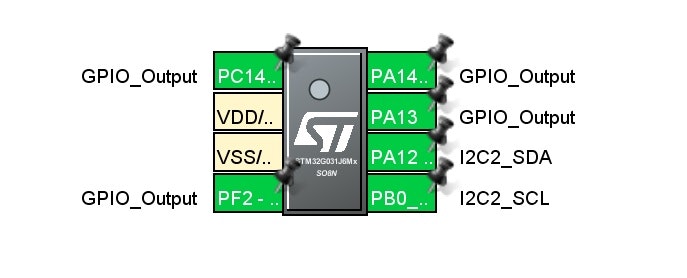
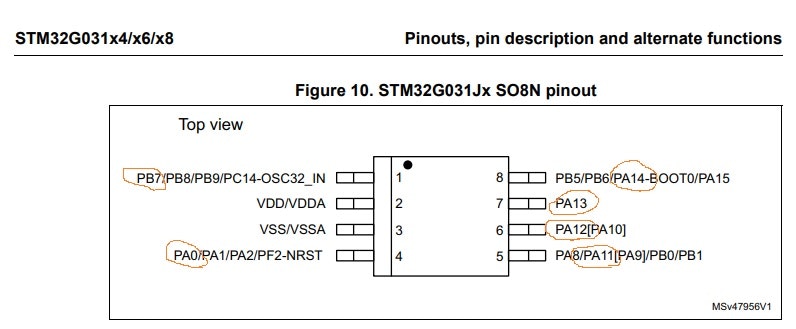
1 1ビット目
2 VDD
3 GND
4 2ビット目
8 SWD 3ビット目
7 SWD 4ビット目
6 SDA
5 SCL
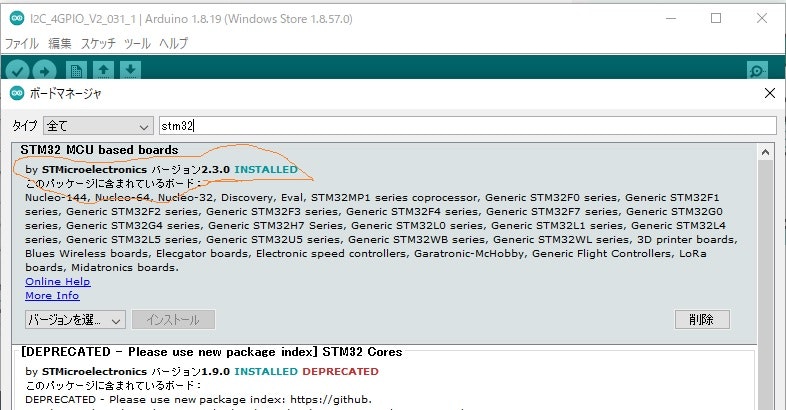
ファイル-環境設定-追加の...
https://github.com/stm32duino/BoardManagerFiles/raw/main/package_stmicroelectronics_index.json
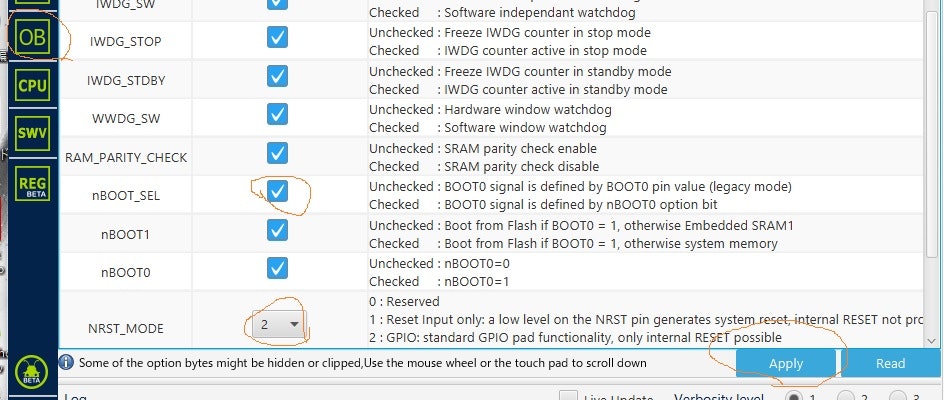
親切な人がNRSTにつてい書いてある
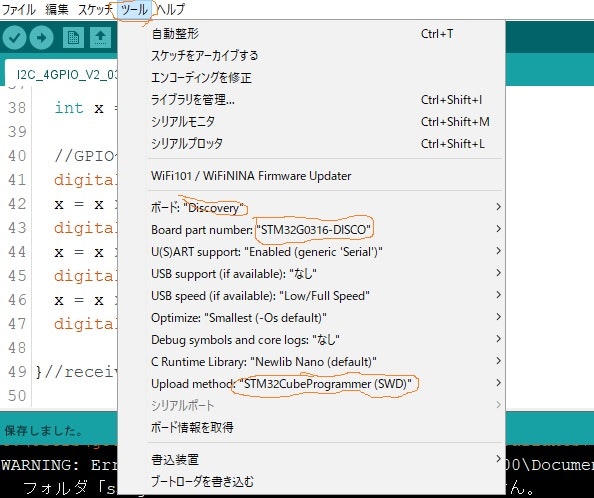
プログラム
//I2C_4GPIO_V2_031_1

#include <Arduino.h>
#include <Wire.h>


//初期化
void setup()
{

  delay(3000); //not delete

  //i2cの初期化
  Wire.setSDA(PA12);
  Wire.setSCL(PA11);
  Wire.begin(); //pa12 pa11
  Wire.begin(0x40);  //I2Cスレーブアドレスの設定
  Wire.onReceive(receiveEvent); //データが来ると呼ばれる関数

  //GPIOの初期化
  pinMode(PB7, OUTPUT);
  pinMode(PA0, OUTPUT);
  pinMode(PA14, OUTPUT);
  pinMode(PA13, OUTPUT);

} //setup


//メインループ
void loop() {
} //loop


//レシーブイベント
void receiveEvent(int howMany) {

  int x = Wire.read(); //I2C受信データの読み込み

  //GPIOへビットを設定
  digitalWrite(PA0,  x & 0x01);
  x = x >> 1;
  digitalWrite(PB7,  x & 0x01);
  x = x >> 1;
  digitalWrite(PA14, x & 0x01);
  x = x >> 1;
  digitalWrite(PA13, x & 0x01);

}//receiveEvent