x 過去ログを見よ!!
目的
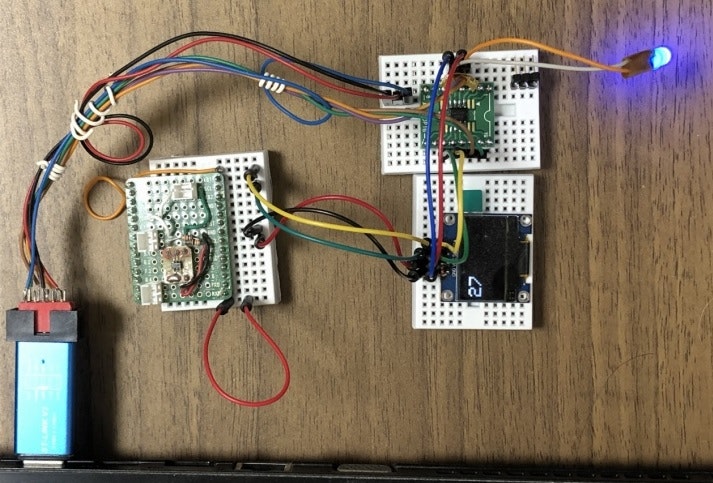
OLEDのテスト
今日は、雪なのでマイナスに対応?
STTS751は、秋月で前に売っていたやっ
いろいろ
ねむいさんも、OLED成功したみたい。
x なぜか画像が出ない場合は、2,3回、再表示するとでるかも
結果
プログラム
//I2C_SSD1306_CHAR_C011_1


//ヘッダーファイル
#include <Wire.h>
#include <Adafruit_GFX.h>
#include <Adafruit_SSD1306.h>


//定義
#define SCREEN_WIDTH 128 // OLED display width, in pixels
#define SCREEN_HEIGHT 64 // OLED display height, in pixels
#define OLED_RESET     -1 // Reset pin # (or -1 if sharing Arduino reset pin)
#define SCREEN_ADDRESS 0x3C ///< See datasheet for Address; 0x3D for 128x64, 0x3C for 128x32
Adafruit_SSD1306 display(SCREEN_WIDTH, SCREEN_HEIGHT, &Wire, OLED_RESET);

//センサーのアドレス
#define STTS751 0x39

//小数点部の定義
char t_0001[][6] =
{
".0000", //0
".0625", //1
".1250", //2
".1875", //3
".2500", //4
".3125", //5
".3750", //6
".4375", //7
".5000", //8
".5625", //9
".6250", //10
".6875", //11
".7500", //12
".8125", //13
".8750", //14
".9375" //15
};


//初期化
void setup() {

  //I2Cのポートの変更
  Wire.setSDA(19); //PA10
  Wire.setSCL(18); //PA9

  // I2Cアドレスは使用するディスプレイに合わせて変更する
  display.begin(SSD1306_SWITCHCAPVCC, SCREEN_ADDRESS);

  //I2Cの初期化
  //Wire.begin(); //OLEDでオープンされているのでいらない

}//setup


//メインループ
void loop() {

  // 画面表示をクリア
  display.clearDisplay();

  // テキストサイズを設定
  display.setTextSize(3);
  // テキスト色を設定
  display.setTextColor(WHITE);
  // テキストの開始位置を設定
  display.setCursor(0, 10);

  //温度の読み込み
  char s1[2] = {0,0}; //センサーの値
  int ii=0;

  //0番目のレジスター 温度整数部
  Wire.beginTransmission(STTS751);
  Wire.write(0);
  Wire.endTransmission();
  delay(1);
  //1
  Wire.requestFrom(STTS751, 1);
  s1[0]=99;
  while(Wire.available())  {    // 要求より短いデータが来る可能性あり
    s1[ii++] = Wire.read();       // 1バイトを受信
  }//while
  delay(1);

  // 1行目に温度を表示
  if(s1[0] >= 0 && s1[0] <= 9 ){display.print(' ');}
  if((s1[0] & 0x80) == 0){
    display.println( (int)s1[0] ); //正
  } else {
    display.println( ((int)s1[0]) - 256 ); //負
  } //end if

  // 描画バッファの内容を画面に表示
  display.display();

  delay(1000); //1秒待つ

}//loop