はじめに
以下の本を使って学習したので、その覚書です。
初学者には、とても分かりやすかったです。
学習環境としてDockerを使っていますので設定ファイルの記録として残していますが、Docker化が目的ではないので詳細な説明は割愛します。
まずは基本的な使い方
.
├── Dockerfile
├── docker-compose.yml
└── index.js
FROM node:latest
WORKDIR /project-name
version: "3"
services:
  web:
    build: .
    volumes:
      - .:/project-name
    command: node index.js
    ports:             #-p ポートフォワーディング
      - 8000:1234
    tty: true          #-t ttyを割り当てます。
    stdin_open: true   #-i STDINを開きます。
writeメソッドはhtmlコンテンツを書き出す、endはhtmlコンテンツ出力を完了するものです。
var http = require('http');      // httpサーバなどを扱う

var server = http.createServer(function(req, res) {
    res.writeHead(200, {'Content-Type': 'text/plain'});
    res.write('Hello World');
    res.end();
});
server.listen(1234);
console.log('サーバを起動しました');
ファイルが格納されているディレクトリに移動し、docker-composeを実行します。
$ docker-compose up --build -d
index.jsの数行の記述だけで、Webサーバとアプリが構築できました。
テンプレートファイルを使用する
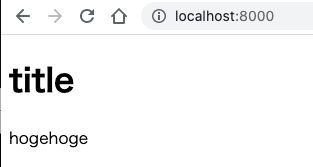
node.jsにwriteメソッドでHTMLを指定するのが現実的ではないためhtmlファイルを使います。
.
├── Dockerfile           // 変更なし
├── docker-compose.yml  // 変更なし
├── index.js
└── temp.html
<!DOCTYPE html>
<html>
<head>
	<meta charset="utf-8">
	<title>sample</title>
</head>
<body>
	<h1>title</h1>
	<p>hogehoge</p>
</body>
</html>
readFileは、第一引数から対象ファイルパス、エンコード、読み込み完了時のコールバック関数です。
var http = require('http');      // httpサーバなどを扱う
var fs = require('fs');          // ファイルを扱う

var server = http.createServer(function(req, res) {
    fs.readFile('./temp.html', 'utf-8', function(err, data) {
        res.writeHead(200, {'Content-Type': 'text/html'});
        res.write(data);
        res.end();
    });
});
server.listen(1234);
console.log('サーバを起動しました');
起動済みのコンテナを一度落としてから再度docker-composeを実行します。
$ docker-compose down
$ docker-compose up --build -d
複数のhtmlを利用する
.
├── Dockerfile           // 変更なし
├── docker-compose.yml  // 変更なし
├── index.js
├── index.html
└── next.html
<!DOCTYPE html>
<html>
<head>
	<meta charset="utf-8">
	<title>index</title>
</head>
<body>
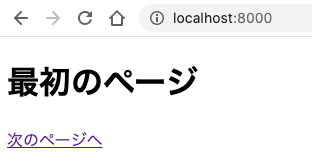
	<h1>最初のページ</h1>
	<a href="/next">次のページへ</a>
</body>
</html>
<!DOCTYPE html>
<html>
<head>
	<meta charset="utf-8">
	<title>index</title>
</head>
<body>
	<h1>最初のページ</h1>
	<a href="/next">次のページへ</a>
</body>
</html>
var http = require('http');      // httpサーバなどを扱う
var fs = require('fs');          // ファイルを扱う

var server = http.createServer(function(req, res) {
    var target = '';
    switch(req.url) {
        case '/':
        case '/index':
            target = './index.html';
            break;
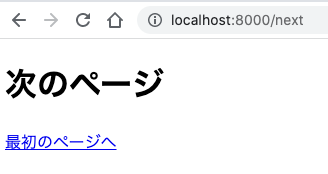
        case '/next':
            target = './next.html';
            break;
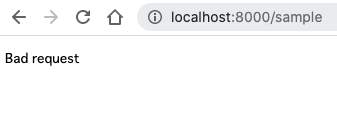
        default:
            res.writeHead(404, {'Content-Type': 'text/plain'});
            res.end('Bad request');
            return;
    }

    fs.readFile(target, 'utf-8', function(err, data) {
        res.writeHead(200, {'Content-Type': 'text/html'});
        res.write(data);
        res.end();
    });
});
server.listen(1234);
console.log('サーバを起動しました');
起動済みのコンテナを一度落としてから再度docker-composeを実行します。
$ docker-compose down
$ docker-compose up --build -d
送信データを処理する
.
├── Dockerfile           // 変更なし
├── docker-compose.yaml  // 変更なし
├── index.js
└── index.html
<!DOCTYPE html>
<html>
<head>
	<meta charset="utf-8">
	<title>index</title>
</head>
<body>
	<h1>送信データ</h1>
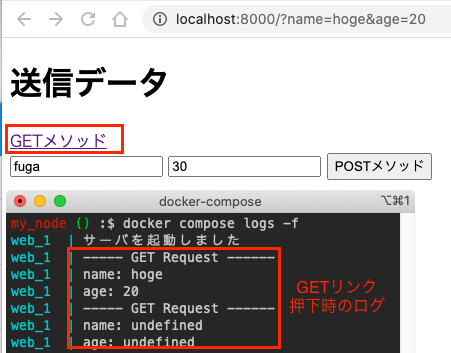
	<a href="/?name=hoge&age=20">GETメソッド</a>
    <form action="/" method="POST">
        <input type="text" name="name" value="fuga">
        <input type="text" name="age" value="30">
        <button type="submit">POSTメソッド</button>
    </form>
</body>
</html>
fs.readFileSyncは、同期的にファイルを読み込みます。これまで、リクエストがあるたびにファイル読み込みが発生していましたが、この書き方にするとサーバ起動前に1度ファイルを読み込んで、あとはそのオブジェクトを使い回すことができます。
GETメソッドは、url.parseを使い、urlのクエリ文字を取得します。第二引数をtrueにすることで?以降のクエリ文字をオブジェクトとして扱えます。falseだとname=hoge&age=20のまま保持します。
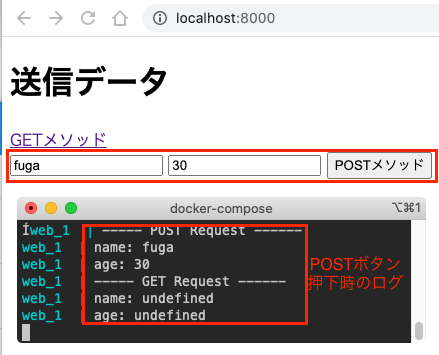
POSTメソッドの場合はhttpリクエストオブジェクト(データ受信時のdataイベントと受信完了時のendイベント)に対してハンドラを登録して扱います。
var http = require('http');      // httpサーバなどを扱う
var fs = require('fs');          // ファイルを扱う
var url = require('url');        // urlの文字列を解析
var qs = require('querystring'); // クエリ文字列を扱う

var indexPage = fs.readFileSync('./index.html', 'utf-8');

var server = http.createServer(function(req, res) {
    if(req.method == 'GET') {
        var urlParts = url.parse(req.url, true);
        console.log('----- GET Request ------');
        console.log('name: ' + urlParts.query.name);
        console.log('age: ' + urlParts.query.age);
    } else if(req.method == 'POST') {
        var body = '';
        req.on('data', function(data) {
            body += data;
        });
        req.on('end', function() {
            var params = qs.parse(body);
            console.log('----- POST Request ------');
            console.log('name: ' + params.name);
            console.log('age: ' + params.age);

        });
    }

    res.writeHead(200, {'Content-Type': 'text/html'});
    res.write(indexPage);
    res.end();
});
server.listen(1234);
console.log('サーバを起動しました');
起動済みのコンテナを一度落としてから再度docker-composeを実行します。
また、コンソール出力を確認するためログを出力させます。
$ docker-compose down
$ docker-compose up --build -d
$ docker-compose logs -f
静的ファイルの供給
.
├── Dockerfile           // 変更なし
├── docker-compose.yml  // 変更なし
├── index.js
└── animal.jpg
var http = require('http');      // httpサーバなどを扱う
var fs = require('fs');          // ファイルを扱う
var url = require('url');        // urlの文字列を解析

var server = http.createServer(function(req, res) {
    var urlParts = url.parse(req.url, true);
    var path = __dirname + '/' + urlParts.pathname;
    var stream = fs.createReadStream(path);
    stream.pipe(res);

});
server.listen(1234);
console.log('サーバを起動しました');
stream.pipeは、イベントを登録することなく、読み込んだデータを引数で指定したオブジェクトにそのまま流し込み、endも呼び出します。
起動済みのコンテナを一度落としてから再度docker-composeを実行します。
$ docker-compose down
$ docker-compose up --build -d
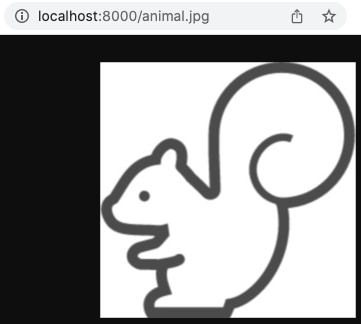
ブラウザでlocalhost:8000/animal.jpgへアクセスします。
ファンクションを使う
.
├── Dockerfile           // 変更なし
├── docker-compose.yml  // 変更なし
├── func.js
└── index.js
exportsオブジェクトでインクルード先に利用させる機能を設定します。
exports.add = function(val1, val2) {
	return val1 - val2;
}
exports.sub = function(val1, val2) {
	return val1 - val2;
}
require関数でfunc.jsをインクルードします。拡張子は不要です。
var func = require('./func');
console.log(func.add(1, 2));
console.log(func.sub(10, 3));
起動済みのコンテナを一度落としてから再度docker-composeを実行します。
また、コンソール出力を確認するためログを出力させます。
$ docker-compose down
$ docker-compose up --build -d
$ docker-compose logs -f
EJSを使う
.
├── Dockerfile           // 変更なし
├── docker-compose.yml   // 変更なし
├── package.json        // コマンドで作成
├── package-lock.json   // コマンドで作成
├── node_modules        // コマンドで作成
├── main.ejs
└── index.js
package.jsonはあらかじめ以下の内容を記載したファイルを用意しても良いです。
今回は以下のコマンドにてコンテナ内で生成しました。
$ docker-compose run --rm web npm init -y
$ docker-compose run --rm web npm install ejs
{
  "name": "project-name",
  "version": "1.0.0",
  "description": "",
  "main": "index.js",
  "scripts": {
    "test": "echo \"Error: no test specified\" && exit 1"
  },
  "keywords": [],
  "author": "",
  "license": "ISC",
  "dependencies": {
    "ejs": "^3.1.8"
  }
}
package-lock.jsonの内容は省略します。
EJSでは、.ejsファイルを作成しテンプレートとします。
<!DOCTYPE html>
<html>
<head>
	<meta charset="utf-8">
	<title><%= title %></title>
</head>
<body>
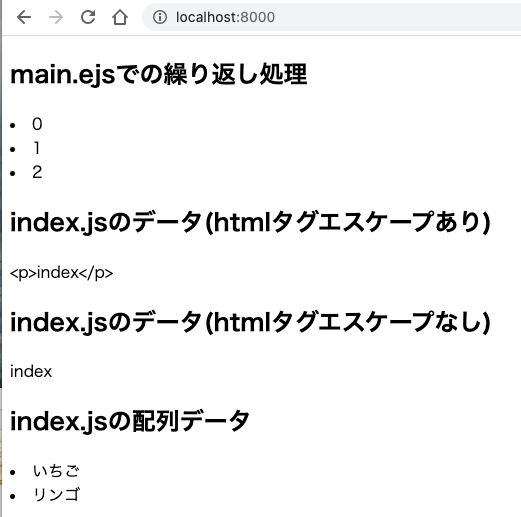
	<h2>main.ejsでの繰り返し処理</h2>
	<% for(var i=0; i<3; i++) { %>
		<li><%= i %></li>
	<% } %>

	<h2>index.jsのデータ(htmlタグエスケープあり)</h2>
	<%= contents %>

	<h2>index.jsのデータ(htmlタグエスケープなし)</h2>
	<%- contents %>

	<h2>index.jsの配列データ</h2>
	<% arr.forEach(function(val) { %>
		<li><%= val %></li>
	<% }) %>
</body>
</html>
var http = require('http');      // httpサーバなどを扱う
var fs = require('fs');          // ファイルを扱う
var ejs = require('ejs');        // ejsを扱う

var main = fs.readFileSync('./main.ejs', 'utf-8');

var server = http.createServer(function(req, res) {
    var data = ejs.render(main, {
    	title: 'EJSのテスト',
    	contents: '<p>index</p>',
    	arr: ['いちご', 'リンゴ']
    });
    res.writeHead(200, {'Content-Type': 'text/html'});
    res.write(data);
    res.end();

});
server.listen(1234);
console.log('サーバを起動しました');
起動済みのコンテナを一度落としてから再度docker-composeを実行します。
$ docker-compose down
$ docker-compose up --build -d
Expressを使う
.
├── Dockerfile           // 変更なし
├── docker-compose.yml
├── package.json        // コマンドで変更
├── package-lock.json   // コマンドで変更
├── node_modules        // コマンドで変更
├── views
|   └── temp.ejs
└── app.js
version: "3"
services:
  web:
    build: .
    volumes:
      - .:/project-name
    command: node app.js # 変更
    ports:             #-p ポートフォワーディング
      - 8000:1234
    tty: true          #-t ttyを割り当てます。
    stdin_open: true   #-i STDINを開きます。
package.jsonはあらかじめ以下の内容を記載したファイルを用意しても良いです。
今回は以下のコマンドにてコンテナ内で生成しました。
$ docker-compose run --rm web npm init -y
$ docker-compose run --rm web npm install express
{
  "name": "project-name",
  "version": "1.0.0",
  "description": "",
  "main": "index.js",
  "scripts": {
    "test": "echo \"Error: no test specified\" && exit 1"
  },
  "keywords": [],
  "author": "",
  "license": "ISC",
  "dependencies": {
    "ejs": "^3.1.8",
    "express": "^4.18.1"
  }
}
package-lock.jsonの内容は省略します。
Expressではテンプレートファイルをviewsフォルダに入れる必要があります。
<!DOCTYPE html>
<html>
<head>
	<meta charset="utf-8">
	<title>Express & EJS</title>
</head>
<body>
	<%- contents %>
</body>
</html>
Expressでは、app.jsを使うのが慣習です。
一気に記述量が減りました。expressでは、fsオブジェクトを使う必要がありません。
var express = require('express');
var ejs = require('ejs');
var app = express();

app.engine('ejs', ejs.renderFile); // テンプレートエンジンにejsを指定

app.get('/', function(req, res) {
    res.render('temp.ejs', {       // viewsフォルダから検索される
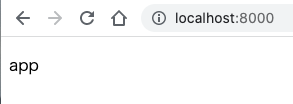
    	contents: '<p>app</p>'
    });
});

var server = app.listen(1234, function() {
    console.log('サーバを起動しました');
});
起動済みのコンテナを一度落としてから再度docker-composeを実行します。
$ docker-compose down
$ docker-compose up --build -d
おわりに
Expressは、いろいろできますがおそらくネット上に情報が多いため、ここまでにしました。
実際に使うとなったら、Expressを使うことになると思いますが、フレームワークを使うとその言語のことがよくわからないままになってしまうことが多いです。
今回学習に使った本は、フレームワークを使わない場合のNode.jsの使い方が丁寧に説明されているので、とても良かったです。


