Django アドベントカレンダー 14日目の記事です。
別の内容を考えていましたが、間に合いそうになかったので急遽内容変えました。すみません。
タイトルの通りDjangoのテンプレートタグやテンプレートフィルターに関する記事ですが、ドキュメントにも既に詳細な情報がまとまっています。
https://docs.djangoproject.com/en/2.0/howto/custom-template-tags
なのでここでは自分がよく使うテンプレートフィルターやテンプレートタグを紹介します。
Pygments でSyntax Highlight
pygmentsの使い方は大きく2つです。
- HTMLFormatterから取得したCSSクラスを読み込む
- ソースコードを
pygments.highlightで変換
1つめをテンプレートタグ、2つめをテンプレートフィルターとして実装すると次のようになります。
# <app_name>/templatetags/pygmentize.py
from django.template import Library, Node
from django.template.defaultfilters import stringfilter
from django.utils.safestring import mark_safe

from pygments import highlight
from pygments.formatters.html import HtmlFormatter
from pygments.lexers import get_lexer_by_name

register = Library()


class PygmentsCss(Node):
    def __init__(self, css_class=".highlight"):
        self.css_class = css_class

    def render(self, context):
        html_formatter = HtmlFormatter()
        styles = html_formatter.get_style_defs(self.css_class)
        return mark_safe(styles)


@register.tag
def pygments_css(parser, token):
    return PygmentsCss()


@register.filter
@stringfilter
def pygmentize(value, lexer_name):
    formatter = HtmlFormatter()
    try:
        lexer = get_lexer_by_name(lexer_name)
    except ValueError:
        lexer = get_lexer_by_name('text')
    parsed = highlight(value, lexer, formatter)
    return mark_safe(parsed)
使い方
{% extends "base.html" %}
{% load pygmentize %}

{% block extraheader %}
<style>{% pygments_css %}</style> <!-- CSS読み込み -->
{% endblock %}

{% block main %}

{% for message in messages %}
<div class="sourcecode">
    {{ snippet.code|pygmentize:"python3" }} <!-- ソースコードハイライト -->
</div>
{% endblock %}
実行結果

Markdown レンダリング
Markdown形式で入力できるようにしたいという例もけっこうあるかと思いますが、こちらも先程のpygmentsの同じようにサクッと実装できます。
# <app_name>/templatetags/markdownize.py
from django.template import Library
from django.template.defaultfilters import stringfilter
from django.utils.safestring import mark_safe
from markdown import markdown

register = Library()


@register.filter
@stringfilter
def markdownize(value):
    return mark_safe(markdown(value, safe_mode='escape'))
使い方
{% extends "base.html" %}
{% load markdownize %}

{% block main %}

<div class="markdown">
    {{ snippet.description|markdownize }}  <!-- Markdown レンダリング -->
</div>
{% endblock %}
実行結果
django-widget-tweaks のようにHTMLの属性を差し込む
例えばformをレンダリングする際に、スタイルやCSSクラスを追加したい場合、Djangoのドキュメントなどにあるのは、wigetsを定義することです。
しかし、Djangoの提供している組み込みFormやViewを使用する場合、そこのカスタマイズのためだけに継承したりするのは面倒です。
そういった時に、 django-widget-tweaks はテンプレート上でCSSの値などを差し込める便利なライブラリですが、ちょこっとやるだけなら次のような短いテンプレートフィルターで実装できたりします。
# <app_name>/templatetags/widgetpatcher.py
from django.template import Library

register = Library()


@register.filter("add_class")
def add_class(field, cls_name):
    cls_attr = field.field.widget.attrs.get("class", "") + " " + cls_name
    field.field.widget.attrs.update({"class": cls_attr})
    return field
次のように使います
{% load widgetpatcher %}

{% if form.non_field_errors %}
<div class="alert alert-danger" role="alert">
    {% for error in form.non_field_errors %}
      <p{% if forloop.last %} class="mb-0"{% endif %}>{{ error }}</p>
    {% endfor %}
  </div>
{% endif %}

{% for field in form %}
  <div class="form-group">
    {{ field.label_tag }}
    {{ field|add_class:"form-control" }}  <!-- form-control クラスを挿入 -->
    {% for error in field.errors %}
      <div class="invalid-feedback">
        {{ error }}
      </div>
    {% endfor %}
    {% if field.help_text %}
      <small class="form-text text-muted">
        {{ field.help_text|safe }}
      </small>
    {% endif %}
  </div>
{% endfor %}
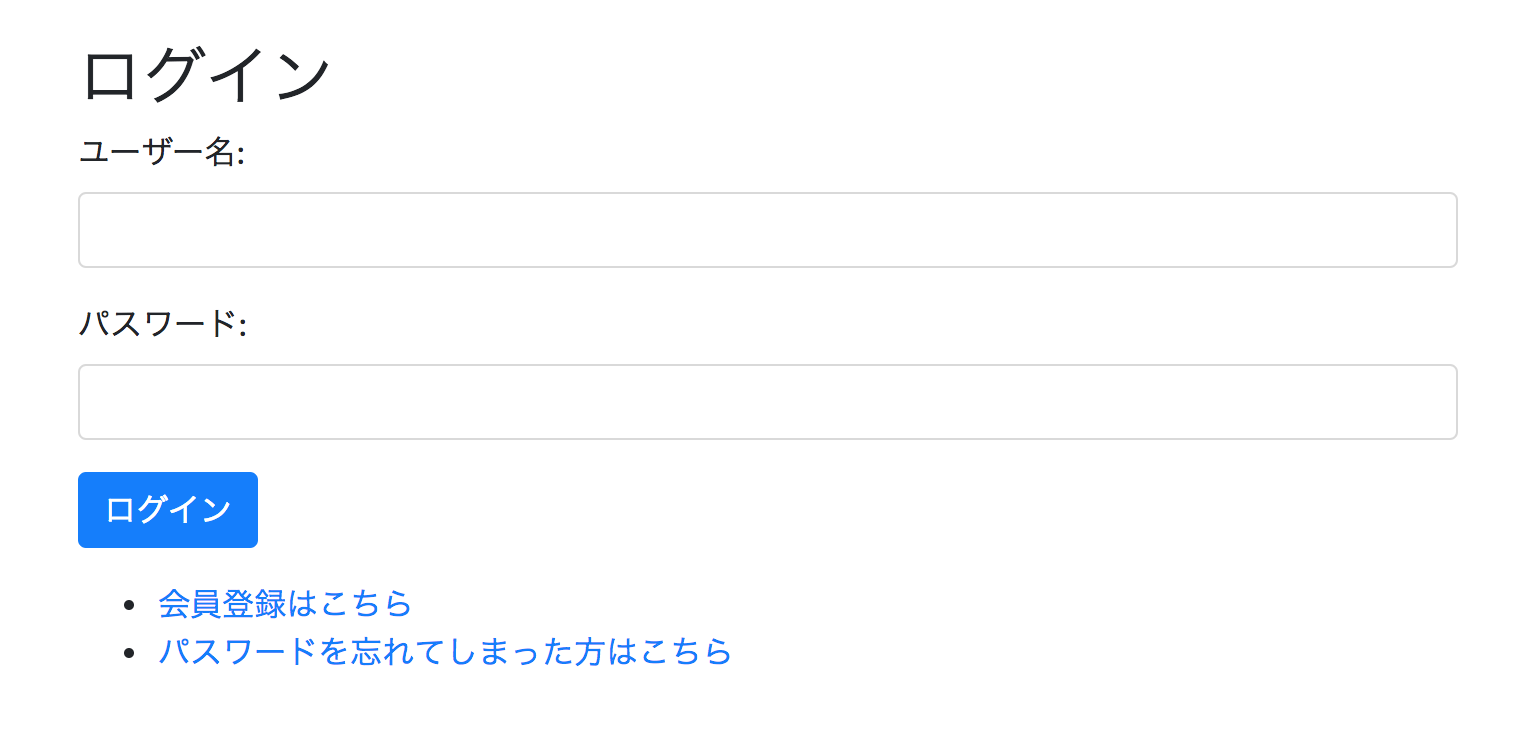
{% extends "base.html" %}
{% block title %}ログイン{% endblock %}

{% block main %}
<h2>ログイン</h2>

<form method="post">
    {% csrf_token %}
    <input type="hidden" name="next" value="{{ next }}" />
    {% include 'includes/form.html' %}
    <button type="submit" class="btn btn-primary">ログイン</button>
</form>

<ul>
    <li><a href="{% url 'signup' %}">会員登録はこちら</a></li>
    <li><a href="{% url 'password_reset' %}">パスワードを忘れてしまった方はこちら</a></li>
</ul>
{% endblock %}
実行結果
テンプレートのコンテキストをPdbデバッグする
さくっとテンプレート内の変数をデバッグしたいなと思うことがたまにあったのですが、djangosnippets.orgでたまたま見つけたスニペットが気に入っていて今でもよく使っています。
https://djangosnippets.org/snippets/1550/
このスニペットは次のように使います。
import pdb as pdb_module

from django.template import Library, Node

register = Library()


class PdbNode(Node):
    def render(self, context):
        pdb_module.set_trace()
        return ''


@register.tag
def pdb(parser, token):
    return PdbNode()
使い方
{% extends "base.html" %}
{% load debug %}

{% block main %}
<h2>デバッグ用ページ</h2>

{% pdb %}
<ul>
   {% for snippet in snippets %}
   <li>{{ snippet.title }}</li>
   {% endfor %}
</ul>

{% endblock %}
この状態で実行すると、レンダリング時にpdbが立ち上がり、 context["<field_name>"] により変数の状態を確認できます。
Starting development server at http://127.0.0.1:8000/
Quit the server with CONTROL-C.
> /Users/c-bata/PycharmProjects/djangosnippets/accounts/templatetags/debug.py(11)render()
-> return ''
(Pdb) p context["snippets"]
<QuerySet [<Snippet: <Snippet Djangoのユーザモデルをカスタマイズ>>, <Snippet: <Snippet スタイルの修正>>]>
(Pdb) p [s.id for s in context["snippets"]]
[1, 2]
(Pdb) c
[19/Nov/2017 14:12:52] "GET / HTTP/1.1" 200 1820
PyCharmのProfessional Editionとか持ってる方は、強力なテンプレートのデバッガーが使えるのでそちらを使うのがいいかもしれません。