はじめに
アプリには必須と言えるPush通知ですが、いざ実装しようとすると色々と複雑そうでよくわからない...
そんな人に向けた記事となっています。
はじめにFirebase Cloud Messaging(FCM)を利用したPush通知の実装手順を記載した後で、Push通知ASPのAppvisorを利用した手順や実際の配信の流れを説明していきます。
Push通知実装までの流れ
- ベースとなるAndroidアプリの実装
- Firebaseコンソール上でFirebaseプロジェクトを作成
- AndroidアプリでFirebaseのサービスを実装
- フォアグラウンド時の通知表示の実装
動作環境
- Android Studio Jellyfish | 2023.3.1
- Android Gradle Plugin Version 8.4.0
- Gradle Version 8.6
- Mac OS Sonoma 14.4.1
- Android 14
※Push通知の動作検証にはGoogle開発者サービスが入っている端末(エミュレータ)が必要です。
Androidアプリの作成方法
-
New Projectからプロジェクトを作成
-
「Empty Views Activity」 を選択してNextをクリック
Jetpack Composeでアプリを作る場合は「Empty Activity」を選択してください。

-
Nameを入力してFinishをクリック(ここでプロジェクトの作成が完了するまで待ってください)
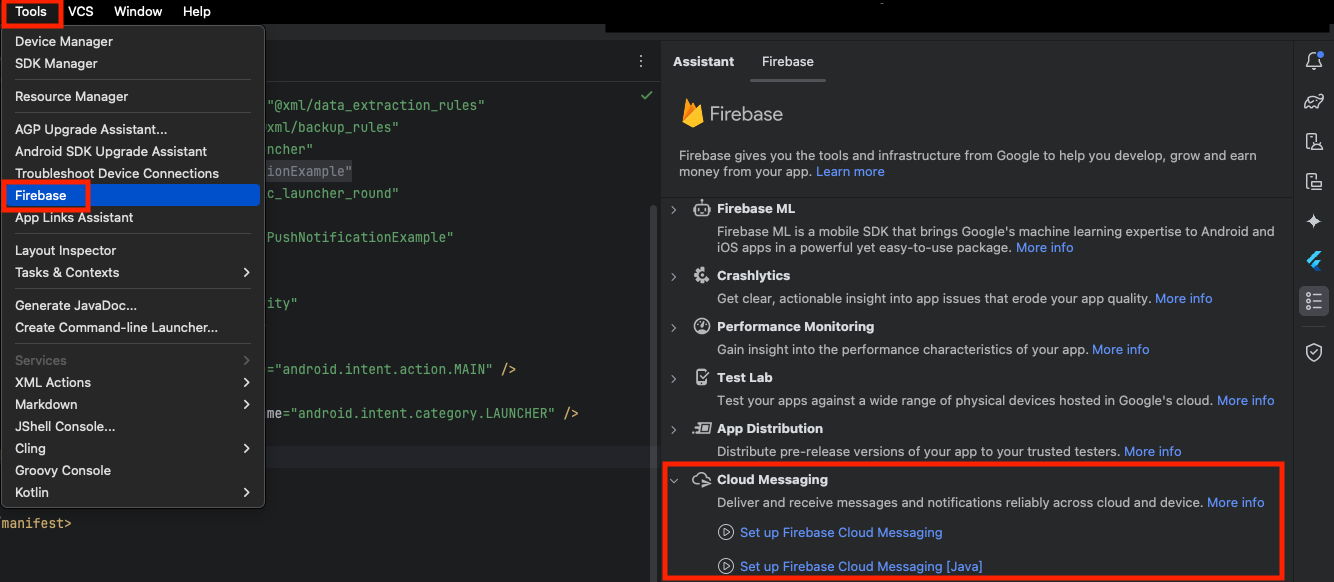
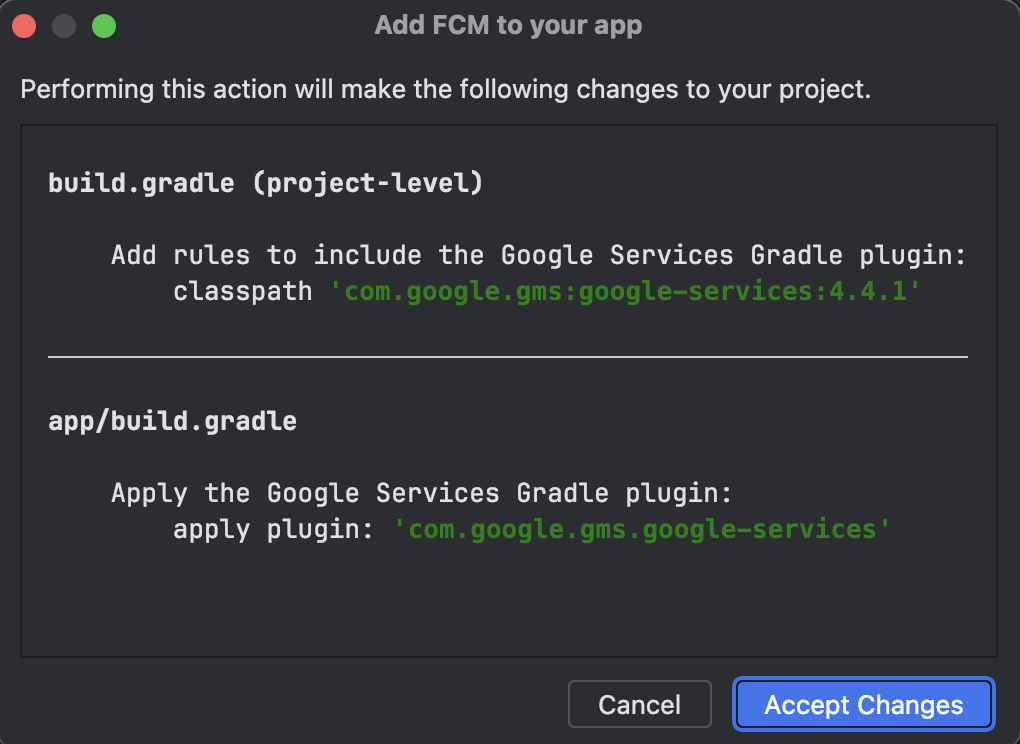
全て手動で設定していくことも可能ですが、Android StudioにはFirebaseとの連携機能が備わっているため、今回はそちらを利用していきます。 -
「Set up Firebase Cloud Messaging」をクリック
-
「Connect to Firebase」をクリック
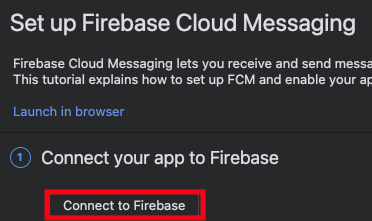
ブラウザが表示され、Googleアカウントの連携とFirebaseのプロジェクト作成手順が表示されるため作成する -
プロジェクトに名前をつける
本番のプロジェクトの場合は正式なプロジェクト名をつけておきましょう。(Firebase自体の一意なIDとなってきます)
サンプルの場合はサンプルであることがわかるような名前にしておきましょう。 -
Googleアナリティクスの設定
本番で利用する際には分析のためにも必須となるため有効としましょう。
サンプルの場合は無効で問題ありません。 -
Firebaseプロジェクトの作成中という画面が出てくるため完了を待つ
-
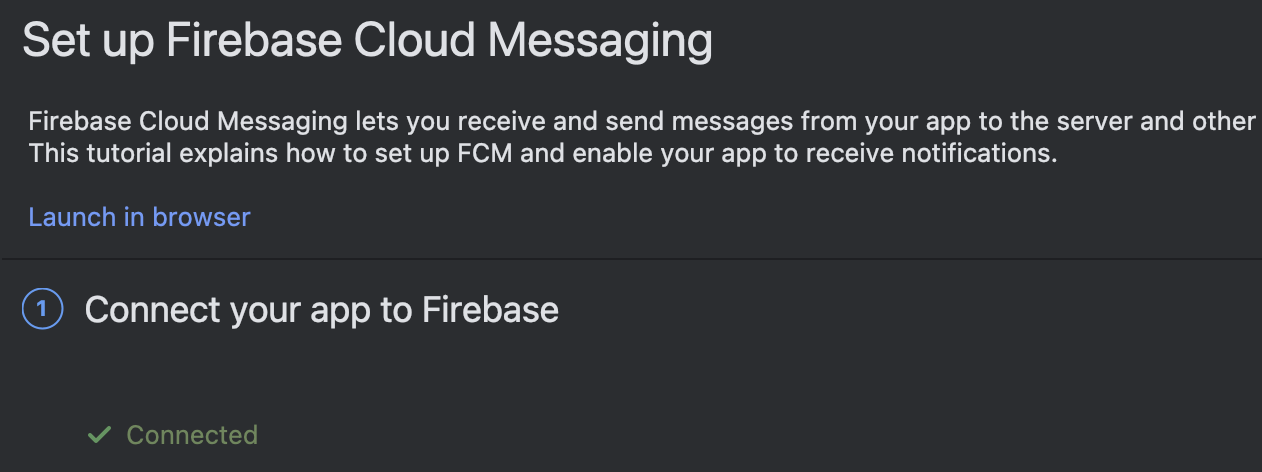
プロジェクトの作成完了と接続完了という画面が出たらAndroid Studioに戻り、「Connected」になっていることを確認する
-
表示をProjectタブに切り替えて app > src > main > java > {packagename}を右クリックし「MyFirebaseMessaging」等の任意の名前でkotlinクラスファイルを追加する

-
作成したファイルを開き以下のように書き換える(FirebaseMessagingServiceと今回必要となる「onMessageReceived」「onNewToken」の2つのメソッドを追加する
class MyFirebaseMessaging : FirebaseMessagingService() {
    override fun onMessageReceived(message: RemoteMessage) {
        super.onMessageReceived(message)
    }

    override fun onNewToken(token: String) {
        super.onNewToken(token)
    }
}
16.Projectタブに切り替えて app > src > main > AndroidManifest.xmlを開く

17.AndroidManifest.xmlに以下のserviceとmetadataを追加する
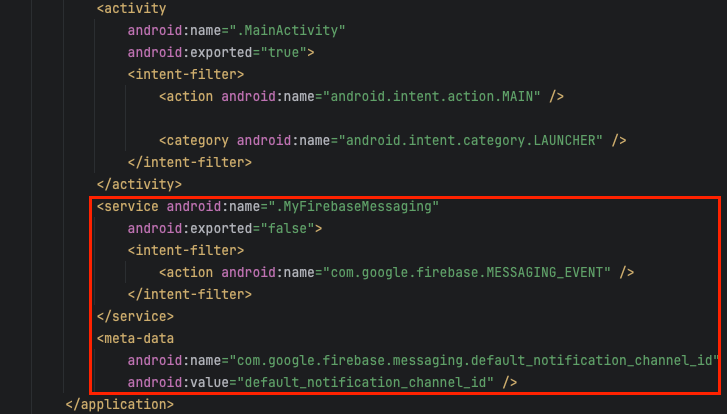
<service android:name=".MyFirebaseMessaging"
    android:exported="false">
    <intent-filter>
        <action android:name="com.google.firebase.MESSAGING_EVENT" />
    </intent-filter>
</service>
<meta-data
    android:name="com.google.firebase.messaging.default_notification_channel_id"
    android:value="default_notification_channel_id" />
18.(Android13以降)アプリ起動時に通知権限をリクエストする
MainActivity等に以下のコードを追加する
private val requestPermissionLauncher = registerForActivityResult(
    ActivityResultContracts.RequestPermission(),
) { isGranted: Boolean ->
    if (isGranted) {
        //権限が付与された
    } else {
        //権限の付与を拒否された
    }
}

private fun askNotificationPermission() {
    if (Build.VERSION.SDK_INT >= Build.VERSION_CODES.TIRAMISU) {
        if (ContextCompat.checkSelfPermission(this, Manifest.permission.POST_NOTIFICATIONS) ==
            PackageManager.PERMISSION_GRANTED
        ) {
            //権限が付与されておりすでにPush通知を受け取れる状態
        } else if (shouldShowRequestPermissionRationale(Manifest.permission.POST_NOTIFICATIONS)) {
            //一度拒否された後の許可ダイアログの再表示をしたい場合
        } else {
            //権限が付与されていないため権限をリクエストする
            requestPermissionLauncher.launch(Manifest.permission.POST_NOTIFICATIONS)
        }
    }
}
19.通知権限のリクエスト処理をonCreate等で呼び出す
override fun onCreate(savedInstanceState: Bundle?) {
    super.onCreate(savedInstanceState)
    enableEdgeToEdge()
    setContentView(R.layout.activity_main)
    ViewCompat.setOnApplyWindowInsetsListener(findViewById(R.id.main)) { v, insets ->
        val systemBars = insets.getInsets(WindowInsetsCompat.Type.systemBars())
        v.setPadding(systemBars.left, systemBars.top, systemBars.right, systemBars.bottom)
    }
    //以下の1行を追加
    askNotificationPermission()
}
ここまでで最低限のPush通知の実装は完了しており、「バックグラウンドの場合は」FirebaseのコンソールからPush通知を送ることが可能になっています。
Firebaseコンソールから一度Push通知を送って確かめてみましょう。
20.Push通知表示処理を実装してフォアグラウンドでPush通知を受け取る
class MyFirebaseMessaging : FirebaseMessagingService() {
    override fun onMessageReceived(message: RemoteMessage) {
        super.onMessageReceived(message)

        //ここから

        //Push通知タップ時に起動するActivityを指定
        val intent = Intent(this, MainActivity::class.java)
        intent.addFlags(Intent.FLAG_ACTIVITY_CLEAR_TOP)
        val pendingIntent = PendingIntent.getActivity(this, 0, intent, PendingIntent.FLAG_IMMUTABLE)
        //通知を表示するchannelIdを指定
        val channelId = "Default"
        val builder: NotificationCompat.Builder = NotificationCompat.Builder(this, channelId)
            //通知に表示されるアイコンを指定
            .setSmallIcon(R.mipmap.ic_launcher)
            //通知のタイトルを指定
            .setContentTitle(message.notification!!.title)
            //通知の本文を指定
            .setContentText(message.notification!!.body)
            //trueにしていると自動的に通知バッジを削除してくれる
            .setAutoCancel(true)
            .setContentIntent(pendingIntent)
        val manager = getSystemService(NOTIFICATION_SERVICE) as NotificationManager
        val channel = NotificationChannel(
            channelId,
            "Default channel",
            NotificationManager.IMPORTANCE_DEFAULT
        )
        //指定したIDの通知チャンネルが存在しない場合に新しく作成される
        manager.createNotificationChannel(channel)
        //指定したIDでPush通知を表示する(同じIDを利用していると上書きされて1つしか表示されない)
        manager.notify(0, builder.build())

        //ここまで追加
    }

    override fun onNewToken(token: String) {
        super.onNewToken(token)
    }
}
これで一旦のバックグラウンド/フォアグラウンドでのPush通知の表示は完了です。
最小の要件でFirebaseコンソールからただPush通知が送れれば良いという場合はここまでで完了でも良いかと思います。
ただ、実際に本番としてPush通知を運用するとなった場合は「Push通知をタップした後の処理」や「OSバージョンごとの処理分け」などまだいくつかの実装が足りていません。
また、多くの場合はアプリサーバからAPIを経由してPush通知を送ったり、アプリ側で保持している条件をもとにセグメントしてPush通知を送りたいという要件があるかと思います。
そういった場合にはアプリからサーバへ情報を連携したり、サーバ側でセグメントして送れるようにするといったような実装が必要となってきます。
そういった部分を簡略化してさまざまな機能を使いやすくしているのが【Appvisor】となります。
ここから下はAppvisorを使った実装を簡単に説明させていただきます。
Appvisorとは
アプリ開発に付随する面倒な課題を解決し、Push通知機能をはじめとしてあったら便利な周辺機能を一括導入できるASPです。
また、これまで数多くのアプリを開発してきたbravesoft株式会社が開発・運用しているサービスのため、 様々なノウハウを活かしたサポートを行うことが可能 であるといった特徴があります。
Appvisorを使った導入手順(上記の続き)
- Appvisorへ登録しアカウントを発行して、管理画面の「設定」からSDKをダウンロードしておく
- 先ほど作成したMyFirebaseMessaging.ktを削除
※FirebaseMessagingの中で記載していた処理は全てAppvisorのSDK内で実装していますので、一旦MyFirebaseMessaging.ktは削除してしまって良いです。 - app以下に「libs」というDirectoryを作成しその中に1でダウンロードしたSDKを配置する
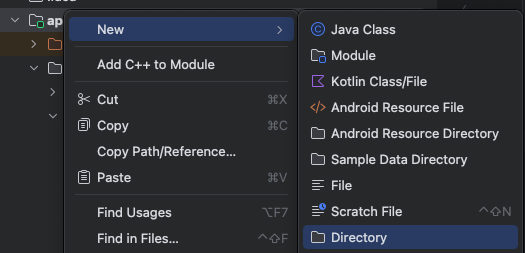

- 「File -> Project Structure... -> Dependencies ->JAR/AAR Dependency」よりSDKを導入する

- step1に「libs/appvisorPush-release.aar」というpathを入力してOKをクリックする

- app > build.gradle.ktsを確認し以下のように行が増えていることを確認する

- AndroidManifest.xmlのserviceのnameを「biz.appvisor.push.android.sdk.AppVisorPushFirebaseMessagingService」に書き換え以下のようにする
<service
    android:name="biz.appvisor.push.android.sdk.AppVisorPushFirebaseMessagingService"
    android:exported="false">
    <intent-filter>
        <action android:name="com.google.firebase.MESSAGING_EVENT" />
    </intent-filter>
</service>
<meta-data
    android:name="com.google.firebase.messaging.default_notification_channel_id"
    android:value="default_notification_channel_id" />
8.AppvisorのSDKの初期化処理を行う
import android.content.Intent
import android.os.Bundle
import androidx.activity.enableEdgeToEdge
import androidx.appcompat.app.AppCompatActivity
import androidx.core.view.ViewCompat
import androidx.core.view.WindowInsetsCompat
//以下を追加
import biz.appvisor.push.android.sdk.AppVisorPush

class MainActivity : AppCompatActivity() {
    //以下1行追加
    private val appVisorPush: AppVisorPush by lazy { AppVisorPush.init(applicationContext) }

    override fun onCreate(savedInstanceState: Bundle?) {
        super.onCreate(savedInstanceState)
        enableEdgeToEdge()
        setContentView(R.layout.activity_main)
        ViewCompat.setOnApplyWindowInsetsListener(findViewById(R.id.main)) { v, insets ->
            val systemBars = insets.getInsets(WindowInsetsCompat.Type.systemBars())
            v.setPadding(systemBars.left, systemBars.top, systemBars.right, systemBars.bottom)
            insets
        }

        //AppvisorのSDKの初期化処理ここから

        try {
            // AppVisorの管理画面で設定されているAppKeyを設定します
            val appKey = "XXXXXXX"
            this.appVisorPush.setAppInfo(appKey)
            // 通知チャネルを初期化します。
            this.appVisorPush.setNotificationChannel("default_notification_channel_id", "default notification channel")
            //通知関連の内容を設定します。(送信者ID,通知アイコン,ステータスバーアイコン,通知で起動するClass名、デフォルトの通知タイトル)
            //{Your Sender ID}に関してはFirebase > プロジェクトの設定 > Cloud Messagingの「送信者ID」に記載されている12桁ほどの数字を入力してください。
            this.appVisorPush.startPush("{Your Sender ID}", R.drawable.ic_launcher, R.drawable.ic_launcher, MainActivity::class.java, getString(R.string.app_name))
            //Push反応率チェック(必須)
            this.appVisorPush.trackPushWithActivity(this)
            // 通知権限をリクエストします。(TargetAPI33以上の場合必須)
            this.appVisorPush.requestNotificationPermission(this)
        } catch(e: IllegalArgumentException) {
            // ここにエラー発生時の処理を記述
        }

        //ここまで追加
    }

    //onNewIntentメソッドをここから
    override fun onNewIntent(intent: Intent?) {
        super.onNewIntent(intent)
        setIntent(intent)
    }
    //ここまで追加
}
ここまででAppvisorを使ってPush通知を受け取ることができるようになりました。
9.(オプション)アプリ起動時にPush通知のパラメータを受け取る
Bundleからペイロードの中身を受け取ることができるため、今回の例では受け取った値をダイアログに表示しています。
//Push通知からアプリを起動した際に通知の内容をアラートに表示する例
if (appVisorPush.checkIfStartByAppVisorPush(this)) {
    //例:Push内のメーセージ内容をAlertで表示させる。
    val bundle : Bundle? = this.appVisorPush.getBundleFromAppVisorPush(this)
    if (bundle!=null) {
        val title = bundle.getString("title")
        val message = bundle.getString("message")
        val alertDialogBuilder = AlertDialog.Builder(this)
        // アラートダイアログのタイトルを設定します
        alertDialogBuilder.setTitle(title)
        // アラートダイアログのメッセージを設定します
        alertDialogBuilder.setMessage(message)
        // アラートダイアログのボタンを設定します
        alertDialogBuilder.setPositiveButton("OK", null)
        //アラートダイアログを表示します
        alertDialogBuilder.create().show()
    }
}
これでアプリ側の設定は完了です。
Push通知を送るためにAppvisorの管理画面上の設定があるため、そちらをもう少しだけ説明させていただきます。
- 手順の7で作成したFirebaseのコンソールにログインし「プロジェクトの設定 > サービスアカウント」を開く
- 「新しい秘密鍵を生成」をクリックする

- 表示されたポップアップの「キーを生成」をクリック
そうするとjsonファイルがダウンロードされます。

- Appvisorの管理画面にログインし、「設定」を開く

- 「プロジェクトID」と書いてある場所にFirebaseコンソールの「プロジェクトの設定 > 全般 > プロジェクトID」に記載されているIDを入力する

- 「firebaseのjsonファイル」と書いてある場所に先ほどダウンロードした秘密鍵をアップロードする
- 「利用可」という表記になるため、これにて設定は完了です

- あとは実際に「通常配信」の画面からPush通知を送ってもらえればOKです
実際の画面はこのようになっており、各OSまとめて簡単にセグメントして配信をすることが可能になっています

Q&A
No1. POST_NOTIFICATIONSについて
Q1. android.permission.POST_NOTIFICATIONS の記載がないですが、必要ないですか?
A1. 今回導入している「firebaseMessaging = "24.0.0"」のライブラリバージョンではFCMのライブラリ内に記載されているため、別途の記載は不要となっています。
おわりに
ここまでご覧いただきありがとうございます。
これでPush通知を送ることができるようになったわけですが、効果的なPush通知の運用であったり、サーバからのPush通知の送付であったりと実際に半年、1年と運用を続けていくと色々と大変な部分が出てくるかと思います。
そんな時は経験豊富な担当者によるサポートが受けられるASPを活用していきましょう!
