概要
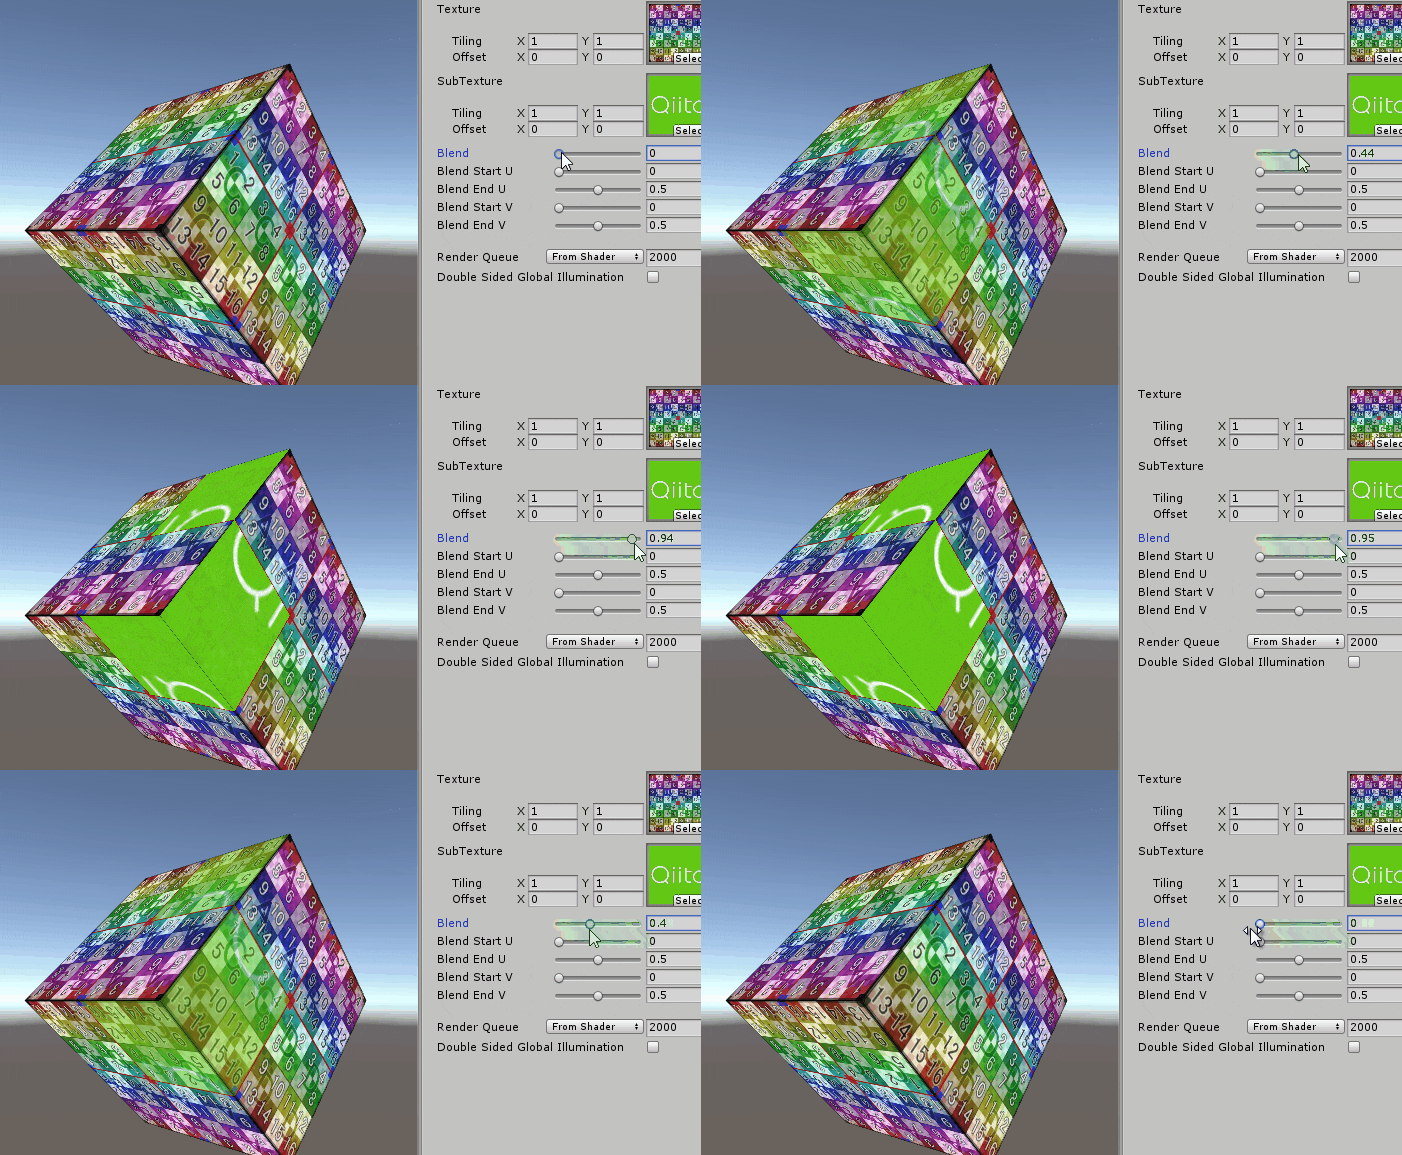
2つのテクスチャを合成して表示ができるようになるシェーダーの作り方を紹介します
今回作成したコードはこちらに置いてあります
https://github.com/tkada/UnityTextureBlendShader
全体ブレンド
今回はUnlitシェーダーをベースに作ります
いきなりソースコードです
Shader "Unlit/BlendShader"
{
    Properties
    {
        _MainTex ("Texture", 2D) = "white" {}
        _SubTex ("SubTexture", 2D) = "white" {}
        _Blend("Blend",Range (0, 1)) = 1
    }
    SubShader
    {
        Tags { "RenderType"="Opaque" }
        LOD 100

        Pass
        {
            CGPROGRAM
            #pragma vertex vert
            #pragma fragment frag
            // make fog work
            #pragma multi_compile_fog

            #include "UnityCG.cginc"

            struct appdata
            {
                float4 vertex : POSITION;
                float2 uv : TEXCOORD0;
            };

            struct v2f
            {
                float2 uv : TEXCOORD0;
                UNITY_FOG_COORDS(1)
                float4 vertex : SV_POSITION;
            };

            sampler2D _MainTex;
            sampler2D _SubTex;
            float _Blend;
            float4 _MainTex_ST;

            v2f vert (appdata v)
            {
                v2f o;
                o.vertex = UnityObjectToClipPos(v.vertex);
                o.uv = TRANSFORM_TEX(v.uv, _MainTex);
                UNITY_TRANSFER_FOG(o,o.vertex);
                return o;
            }

            fixed4 frag (v2f i) : SV_Target
            {
                // sample the texture
                fixed4 main = tex2D(_MainTex, i.uv);
                fixed4 sub = tex2D(_SubTex, i.uv);
                fixed4 col = main * (1-_Blend) + sub * _Blend;
                // apply fog
                UNITY_APPLY_FOG(i.fogCoord, col);
                return col;
            }
            ENDCG
        }
    }
}
キモとなるのはこの2行
//Sub Textureの色を取得
fixed4 sub = tex2D(_SubTex, i.uv);

//_Blendの値に応じて色をブレンドする
fixed4 col = main * (1-_Blend) + sub * _Blend;
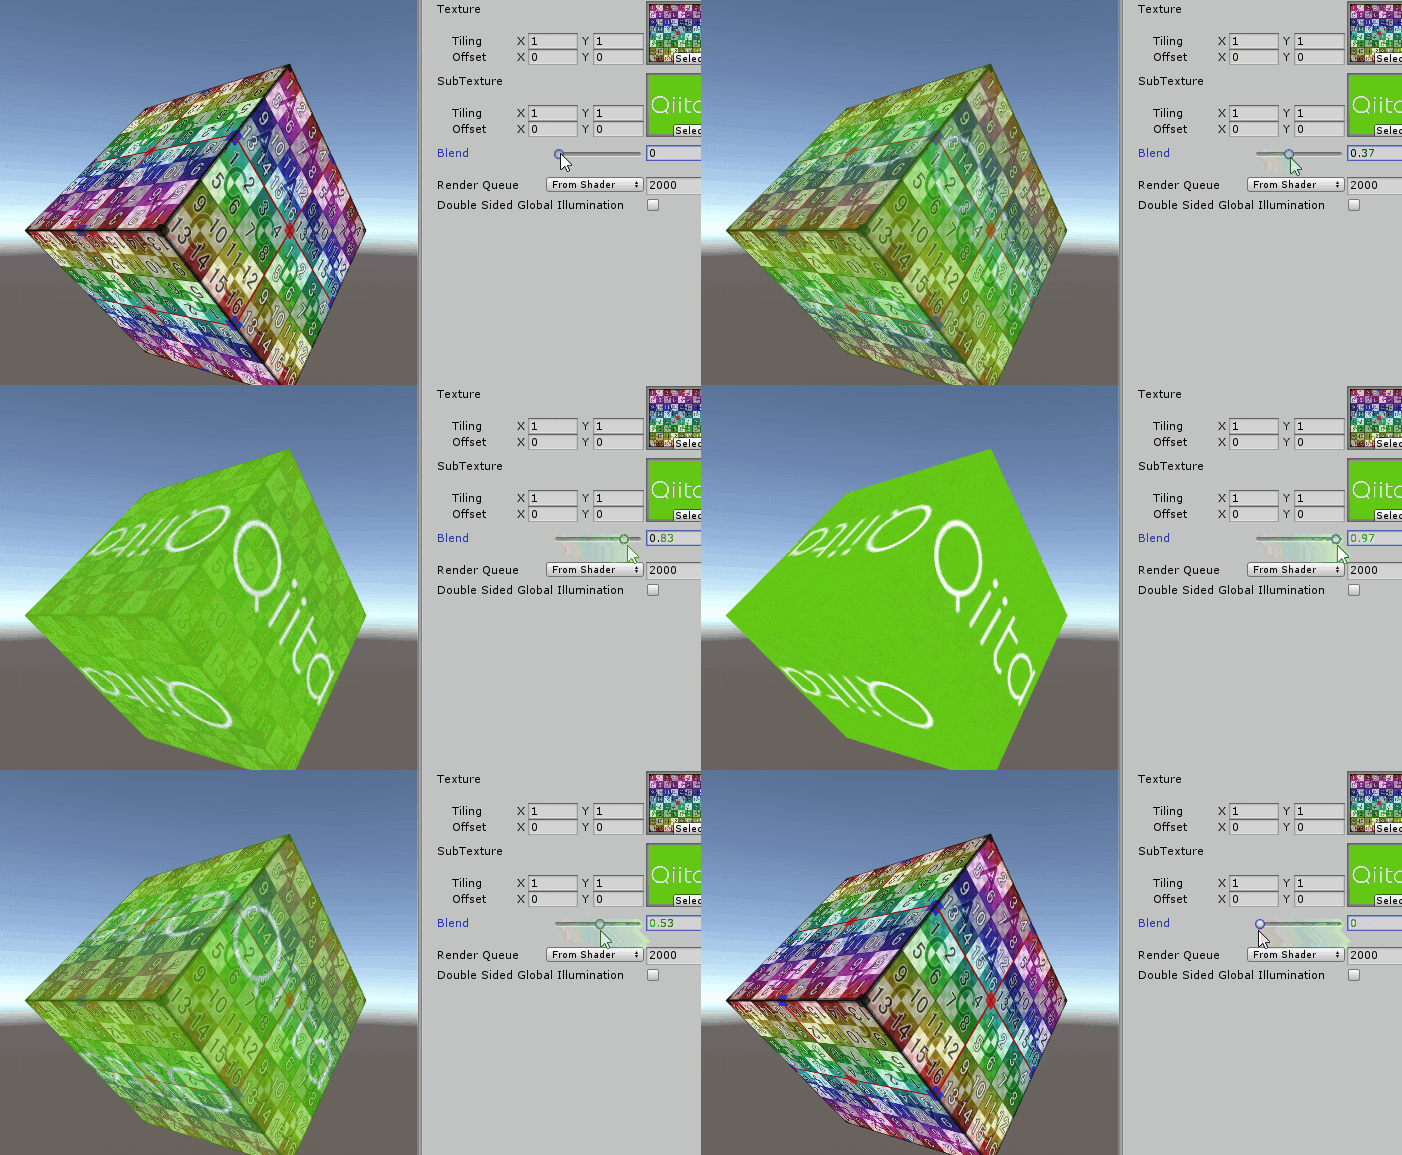
これだけで2つのテクスチャを合成することができます
UV指定ブレンド

最初の例では画像全体を合成しますが、特定の位置だけ合成したい場合もあると思います。
そのため、少しだけソースコードを変更します
Shader "Unlit/UVBlendShader"
{
    Properties
    {
        _MainTex ("Texture", 2D) = "white" {}
        _SubTex ("SubTexture", 2D) = "white" {}
        _Blend("Blend",Range (0, 1)) = 1

        //合成の始点・終点を設定
		_BlendStartU("Blend Start U",Range (0, 1)) = 0
		_BlendEndU("Blend End U",Range (0, 1)) = 1
		_BlendStartV("Blend Start V",Range (0, 1)) = 0
		_BlendEndV("Blend End V",Range (0, 1)) = 1
    }
    SubShader
    {
        Tags { "RenderType"="Opaque" }
        LOD 100

        Pass
        {
            CGPROGRAM
            #pragma vertex vert
            #pragma fragment frag
            // make fog work
            #pragma multi_compile_fog

            #include "UnityCG.cginc"

            struct appdata
            {
                float4 vertex : POSITION;
                float2 uv : TEXCOORD0;
            };

            struct v2f
            {
                float2 uv : TEXCOORD0;
                UNITY_FOG_COORDS(1)
                float4 vertex : SV_POSITION;
            };

            sampler2D _MainTex;
            sampler2D _SubTex;
            float _Blend;
            float4 _MainTex_ST;

			float _BlendStartU;
			float _BlendEndU;
			float _BlendStartV;
			float _BlendEndV;

            v2f vert (appdata v)
            {
                v2f o;
                o.vertex = UnityObjectToClipPos(v.vertex);
                o.uv = TRANSFORM_TEX(v.uv, _MainTex);
                UNITY_TRANSFER_FOG(o,o.vertex);
                return o;
            }

            fixed4 frag (v2f i) : SV_Target
            {
                // sample the texture
                fixed4 main = tex2D(_MainTex, i.uv);
                fixed4 sub = tex2D(_SubTex, i.uv);
                fixed4 col = main;

                //指定の範囲だったら合成する
				if(i.uv.x >= _BlendStartU && i.uv.y >= _BlendStartV)
				{
					if(i.uv.x <= _BlendEndU && i.uv.y <= _BlendEndV)
					{
						col = main * (1-_Blend) + sub * _Blend;
					}
				}

                // apply fog
                UNITY_APPLY_FOG(i.fogCoord, col);
                return col;
            }
            ENDCG
        }
    }
}
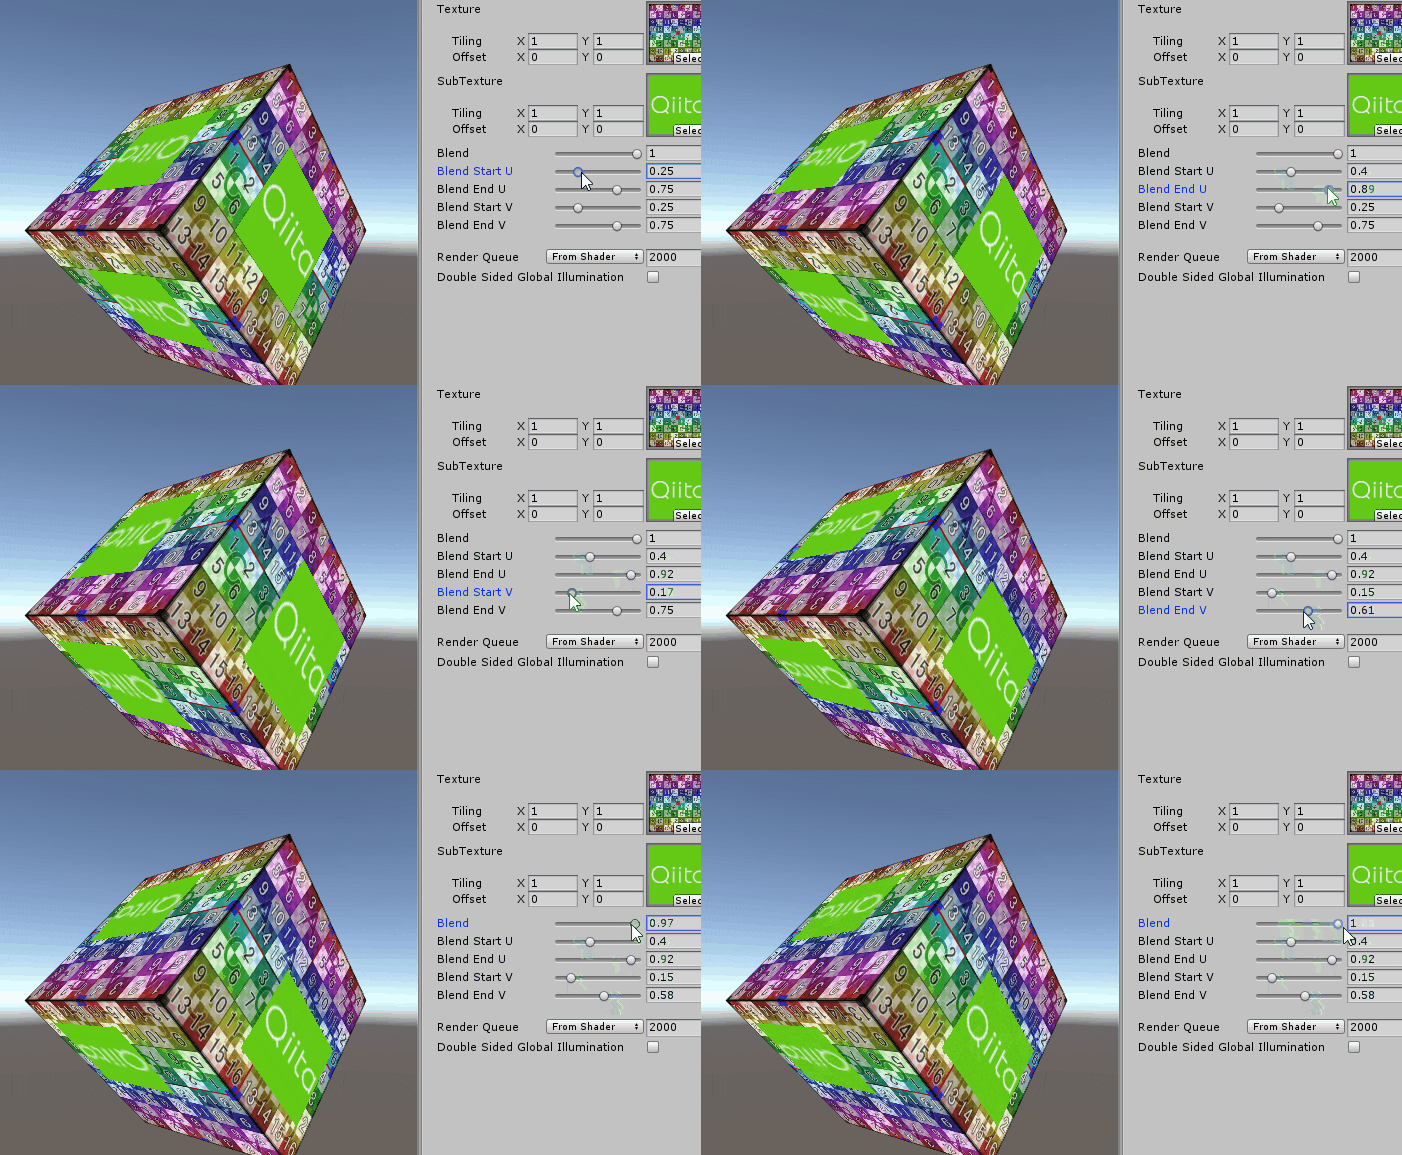
こうすることで指定したUVの部分だけ合成することができます
Sub Textureをフィットさせる
最後に合成範囲に応じてSub Textureのスケールを変更して全体が表示できるようにします
Shader "Unlit/FitUVBlendShader"
{
    Properties
    {
        _MainTex ("Texture", 2D) = "white" {}
        _SubTex ("SubTexture", 2D) = "white" {}
        _Blend("Blend",Range (0, 1)) = 1

		_BlendStartU("Blend Start U",Range (0, 1)) = 0
		_BlendEndU("Blend End U",Range (0, 1)) = 1
		_BlendStartV("Blend Start V",Range (0, 1)) = 0
		_BlendEndV("Blend End V",Range (0, 1)) = 1
    }
    SubShader
    {
        Tags { "RenderType"="Opaque" }
        LOD 100

        Pass
        {
            CGPROGRAM
            #pragma vertex vert
            #pragma fragment frag
            // make fog work
            #pragma multi_compile_fog

            #include "UnityCG.cginc"

            struct appdata
            {
                float4 vertex : POSITION;
                float2 uv : TEXCOORD0;
            };

            struct v2f
            {
                float2 uv : TEXCOORD0;
                UNITY_FOG_COORDS(1)
                float4 vertex : SV_POSITION;
            };

            sampler2D _MainTex;
            sampler2D _SubTex;
            float _Blend;
            float4 _MainTex_ST;

			float _BlendStartU;
			float _BlendEndU;
			float _BlendStartV;
			float _BlendEndV;

            v2f vert (appdata v)
            {
                v2f o;
                o.vertex = UnityObjectToClipPos(v.vertex);
                o.uv = TRANSFORM_TEX(v.uv, _MainTex);
                UNITY_TRANSFER_FOG(o,o.vertex);
                return o;
            }

            fixed4 frag (v2f i) : SV_Target
            {
                //合成範囲のスケールを算出
                float u_scale = _BlendEndU - _BlendStartU;
                float v_scale = _BlendEndV - _BlendStartV;

                //Sub TextureのUV座標を算出
                fixed2 pos = fixed2((i.uv.x - _BlendStartU) * 1/u_scale,
                                     (i.uv.y - _BlendStartV) * 1/v_scale);

                // sample the texture
                fixed4 main = tex2D(_MainTex, i.uv);
                fixed4 sub = tex2D(_SUbTex, pos);
                fixed4 col = main;

                //指定の範囲だったら合成する
				if(i.uv.x >= _BlendStartU && i.uv.y >= _BlendStartV)
				{
					if(i.uv.x <= _BlendEndU && i.uv.y <= _BlendEndV)
					{
						col = main * (1-_Blend) + sub * _Blend;
					}
				}

                // apply fog
                UNITY_APPLY_FOG(i.fogCoord, col);
                return col;
            }
            ENDCG
        }
    }
}
こうすることでgifのようにSub Textureを合成範囲に合わせてスケールすることができます
応用編 if文を使わないようにする
ここまでの例では分かりやすくするためif文を使っていました
しかしシェーダーの高速化のためif文は使わない方がいいといわれています
下記の記事を参考にif文を使わないように書き換えてみました
参考:条件分岐のためにstep関数を使う時の考え方をまとめてみた
Shader "Unlit/FitUVBlendShader"
{
    Properties
    {
        _MainTex ("Texture", 2D) = "white" {}
        _SubTex ("SubTexture", 2D) = "white" {}
        _Blend("Blend",Range (0, 1)) = 1

		_BlendStartU("Blend Start U",Range (0, 1)) = 0
		_BlendEndU("Blend End U",Range (0, 1)) = 1
		_BlendStartV("Blend Start V",Range (0, 1)) = 0
		_BlendEndV("Blend End V",Range (0, 1)) = 1
    }
    SubShader
    {
        Tags { "RenderType"="Opaque" }
        LOD 100

        Pass
        {
            CGPROGRAM
            #pragma vertex vert
            #pragma fragment frag
            // make fog work
            #pragma multi_compile_fog

            #include "UnityCG.cginc"

            struct appdata
            {
                float4 vertex : POSITION;
                float2 uv : TEXCOORD0;
            };

            struct v2f
            {
                float2 uv : TEXCOORD0;
                UNITY_FOG_COORDS(1)
                float4 vertex : SV_POSITION;
            };

            sampler2D _MainTex;
            sampler2D _SubTex;
            float _Blend;
            float4 _MainTex_ST;

			float _BlendStartU;
			float _BlendEndU;
			float _BlendStartV;
			float _BlendEndV;

            v2f vert (appdata v)
            {
                v2f o;
                o.vertex = UnityObjectToClipPos(v.vertex);
                o.uv = TRANSFORM_TEX(v.uv, _MainTex);
                UNITY_TRANSFER_FOG(o,o.vertex);
                return o;
            }

            fixed4 frag (v2f i) : SV_Target
            {
                float u_scale = _BlendEndU - _BlendStartU;
                float v_scale = _BlendEndV - _BlendStartV;

                fixed2 pos = fixed2((i.uv.x - _BlendStartU) * 1/u_scale,
                                     (i.uv.y - _BlendStartV) * 1/v_scale);

                // sample the texture
                fixed4 main = tex2D(_MainTex, i.uv);
                fixed4 sub = tex2D(_SubTex, pos);

                //if文をstep関数を使って表現.条件がそろっていればconditionに1が入る
                float condition = step(i.uv.x, _BlendEndU) *
                                    step(i.uv.y, _BlendEndV) *
                                    step(_BlendStartU, i.uv.x) *
                                    step(_BlendStartV, i.uv.y);

                //conditionが0ということは範囲外なので、_blendにかけ合わせることで合成しない範囲を表現する
                float blend = condition * _Blend;

                fixed4 col = main * (1-blend) + sub * blend;

                // apply fog
                UNITY_APPLY_FOG(i.fogCoord, col);
                return col;
            }
            ENDCG
        }
    }
}

