環境
Xcode 12.5
iOS14以上
概念
- GeometryReader
https://developer.apple.com/documentation/swiftui/geometryreader - Overlay https://developer.apple.com/documentation/swiftui/view/overlay(_:alignment:)
- RotationEffect https://developer.apple.com/documentation/swiftui/text/rotationeffect(_
 )
)
- Animation
https://developer.apple.com/documentation/swiftui/animation
画面作成
最初はボタンを作る前に中身を作る。
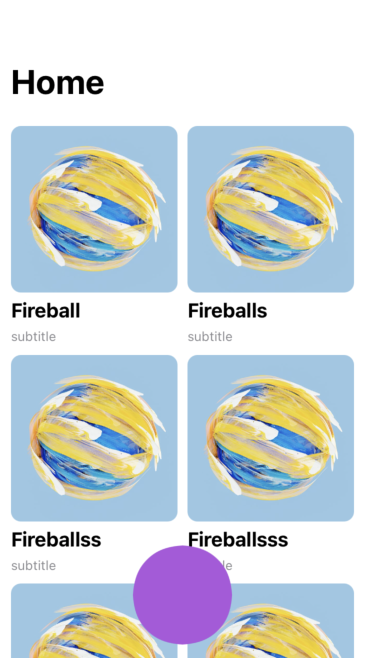
LazyVGridでUIKitのUICollectionViewように画面を作成した。
画面はこんな感じ。

GeometryReaderでoffsetの値を取る
GeometryReaderでフレームのYの座標を取ることができる。
.padding()
.navigationBarTitle("Home")
.overlay(
    GeometryReader{ proxy -> Color in
        let offset = proxy.frame(in: .global).minY
        print(offset)
        return Color.clear
    }.frame(width: 0, height: 0)
)
コンソール
570.5
556.0
545.0
519.5
532.0
520.0
(省略)
198.0
Yの座標を0からスタートしたいから少し調整した。
@State var scrollViewOffset: CGFloat = 0
@State var startOffset: CGFloat = 0

.overlay(
   GeometryReader{ proxy -> Color in
     DispatchQueue.main.async {
       if startOffset == 0 {
         self.startOffset = proxy.frame(in: .global).minY
       }
       let offset = proxy.frame(in: .global).minY
       self.scrollViewOffset = offset - startOffset
       print(self.scrollViewOffset)
    }
    return Color.clear
   }.frame(width: 0, height: 0)
)
コンソール
0.0
-17.5
-51.5
-51.5
-51.5
-51.0
-67.5
-67.5
(省略)
画面の上にボタンを配置
 })
  // ScrollView
  .overlay(
    Button(action: {

    }, label: {
     ZStack {
      RoundedRectangle(cornerRadius: 50, style: .continuous)
       .fill(Color.purple)
       .frame(width: 100, height: 100)
     }
    })
    .padding()
    ,alignment: .bottom
)
ScrollViewに重ねるボタンを生成して形を作る。
そうするとフローティングボタンようになる。
アニメーション追加していい動作で見えるようにする
上のようにできたらほぼ実装終わり。
アニメーションを追加してもっといいボタンの動作を作る
@State var scrollViewOffset: CGFloat = 0
@State var startOffset: CGFloat = 0
@State var width: CGFloat = 50
@State var changedWidth: CGFloat = 200

 })
  // ScrollView
  .overlay(
    Button(action: {

    }, label: {
     ZStack {
      RoundedRectangle(cornerRadius: 50, style: .continuous)
       .fill(Color.purple)
       .frame(width: -scrollViewOffset > 365 ? changedWidth : width, height: 50)
       .animation(.easeInOut)

      Text("メニューの一覧を見る")
       .foregroundColor(Color.white)
       .font(.system(size: 14))
       .fontWeight(.bold)
     }
     .rotationEffect(-scrollViewOffset > 365 ? .degrees(0) : .degrees(90))
    })
    .padding()
    .opacity(-scrollViewOffset > 365 ? 1 : 0)
    .animation(.linear)
    ,alignment: .bottom
)
.opacityである程度スクロール下がったらボタン出るようにする。
ボタンのフレームは条件がtrueになったらサイズを変更するようにしてテキストも表示するようにする。
最後に角度を入れて動的なボタンで見えるようにする。
完成
ホーム画面に配置されたボタンの活用
- シンプルなメニュー画面と詳しいメニュー画面がある場合、ボタン押したら画面切り替えができるようにする
- ScrollViewReaderでスクロールのトップへの移動
- お問い合せや質問コーナーなどで活用
- Twitterように活用することもできる。