概要
前回の記事でGAE第二世代/Goの構築を行ったのですが、Memcacheの代わりにRedis Cloudを使えって書かれてたので、今回はそれを使えるように構築してみます。
前回の記事(GAE第二世代+Go v1.12でechoサーバーを構築する(2019年度版))
https://qiita.com/br_branch/items/a26480a05ecb97ac20b3
今回のソースコードも以下に公開しています。
https://github.com/brbranch/GaeGo112EchoSample/tree/feature/redis
本記事のゴール
最終的に、前回使った mercari/datastore と redis を連携させます。
Redis Cloudの登録
https://redislabs.com/redis-enterprise/memcached/
こちらから「GET STARTED FREE」にて登録を行います。
メアドを登録するとActivateのメールが飛んでくるんで、それをクリックすると名前やらパスワードやらの入力が求められます。
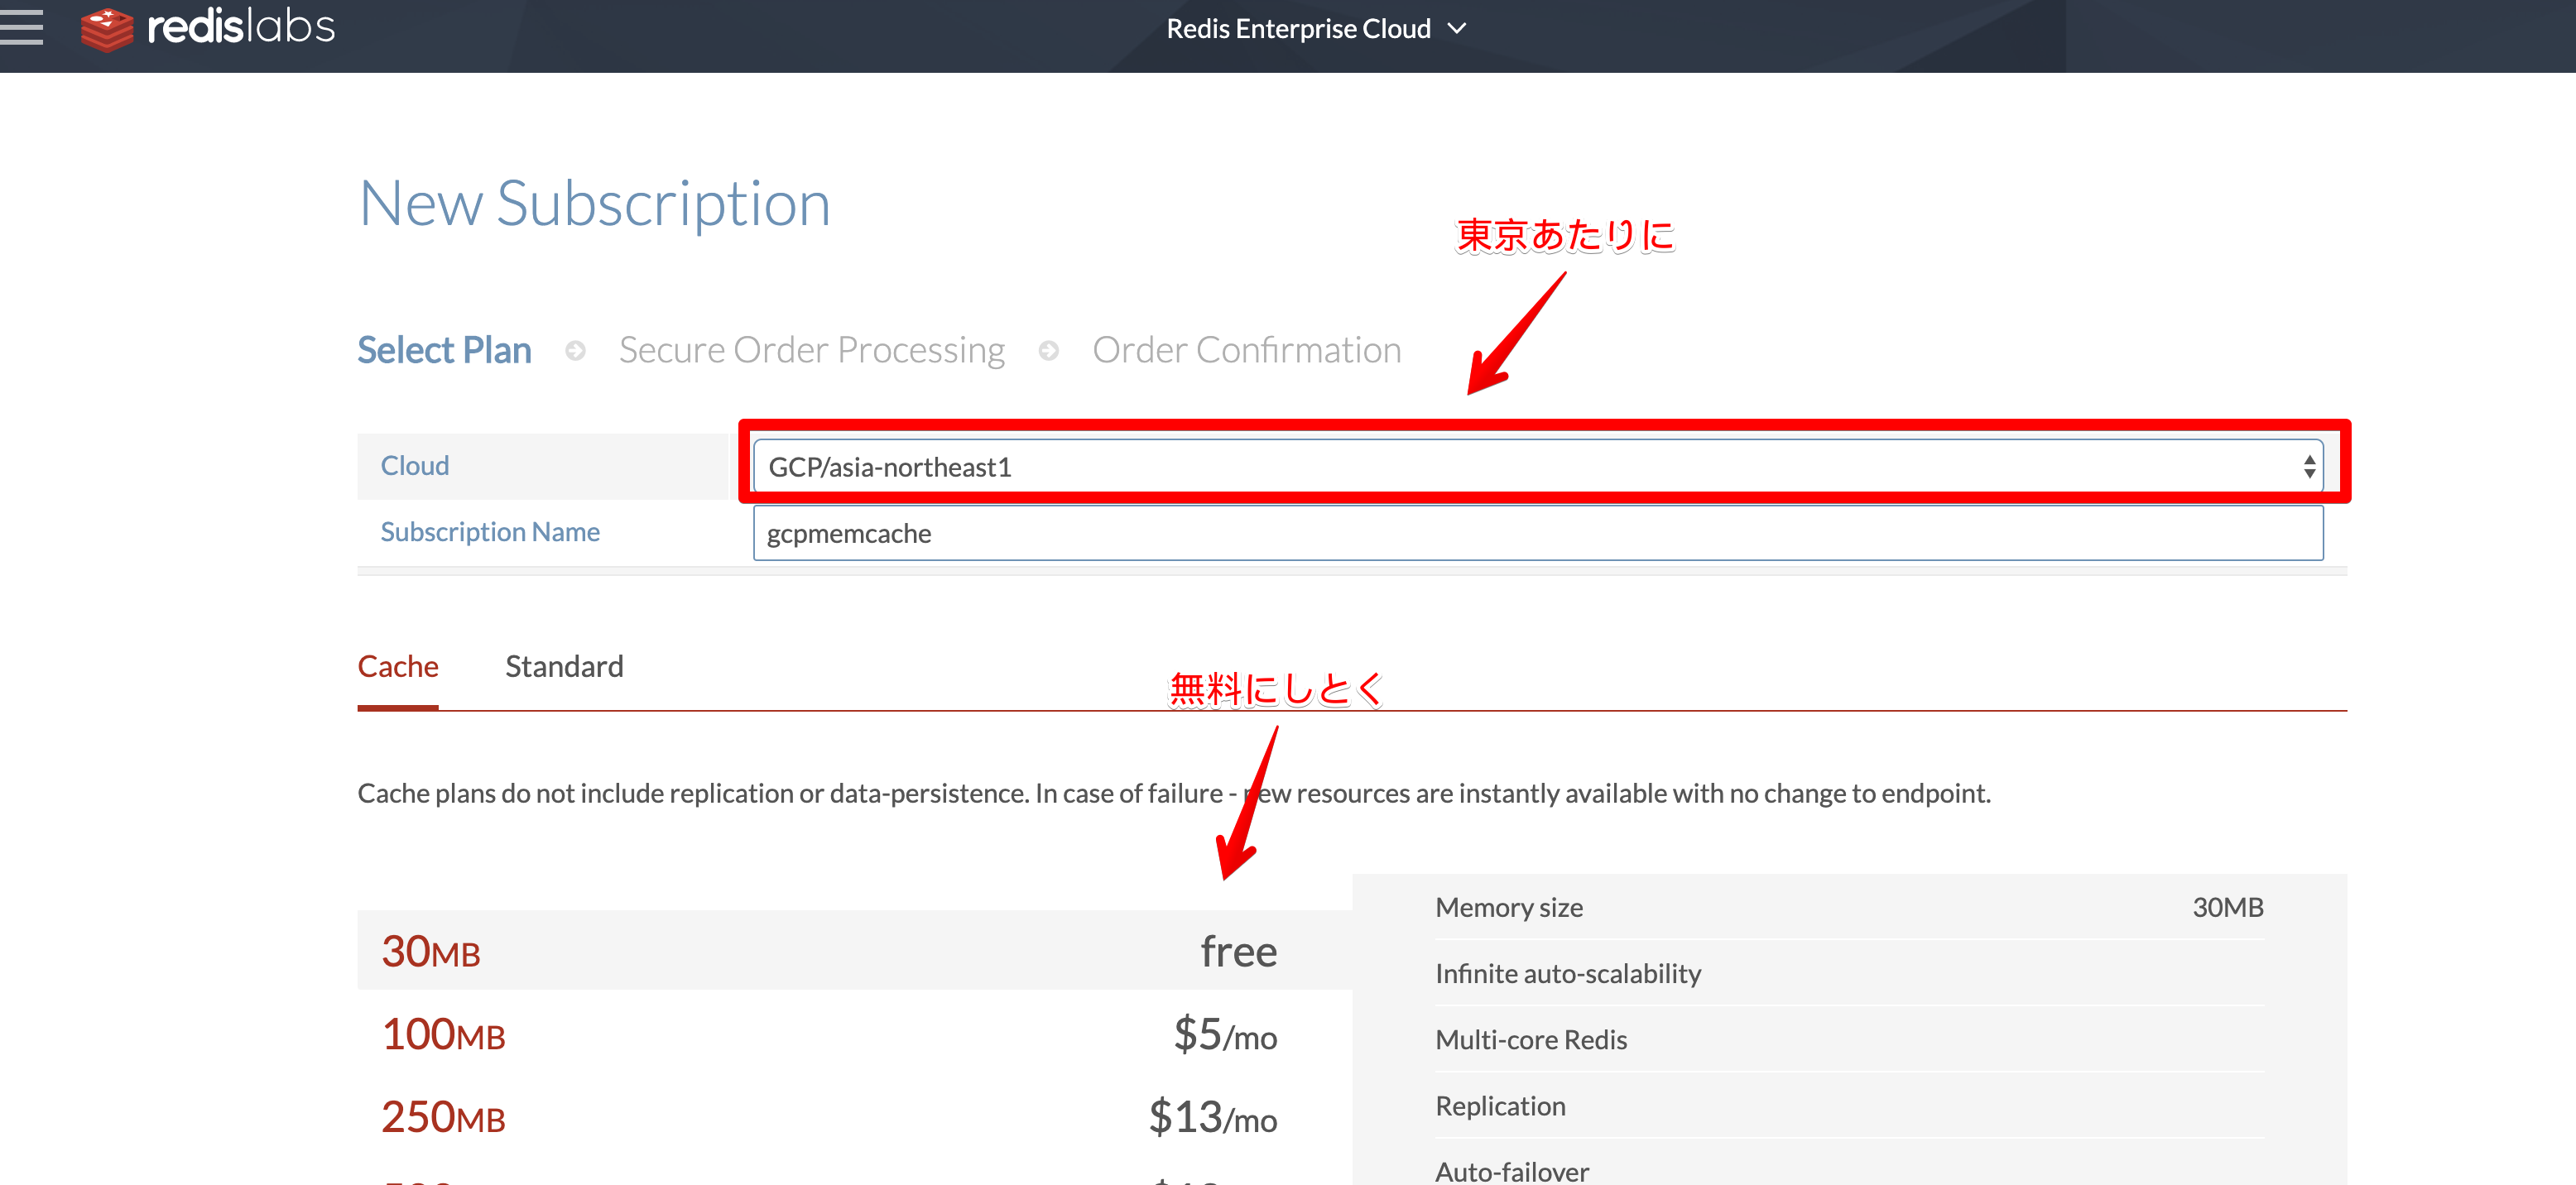
そして、それらも終わるとこんな画面へ移動します。

とりあえずはEssentialsを選択し、その後無料の30MBプランを選択します。
無料にしておくと、特にクレジットの登録とかは不要みたいです。
その先にいくと、Databaseの作成を行います。
こちらはpublicに見えるもののため、パスワードは厳重なものにしておく必要があります(とりあえずこの画面で最初から入ってるものをそのまま使うでいいんじゃないかなって思います)。
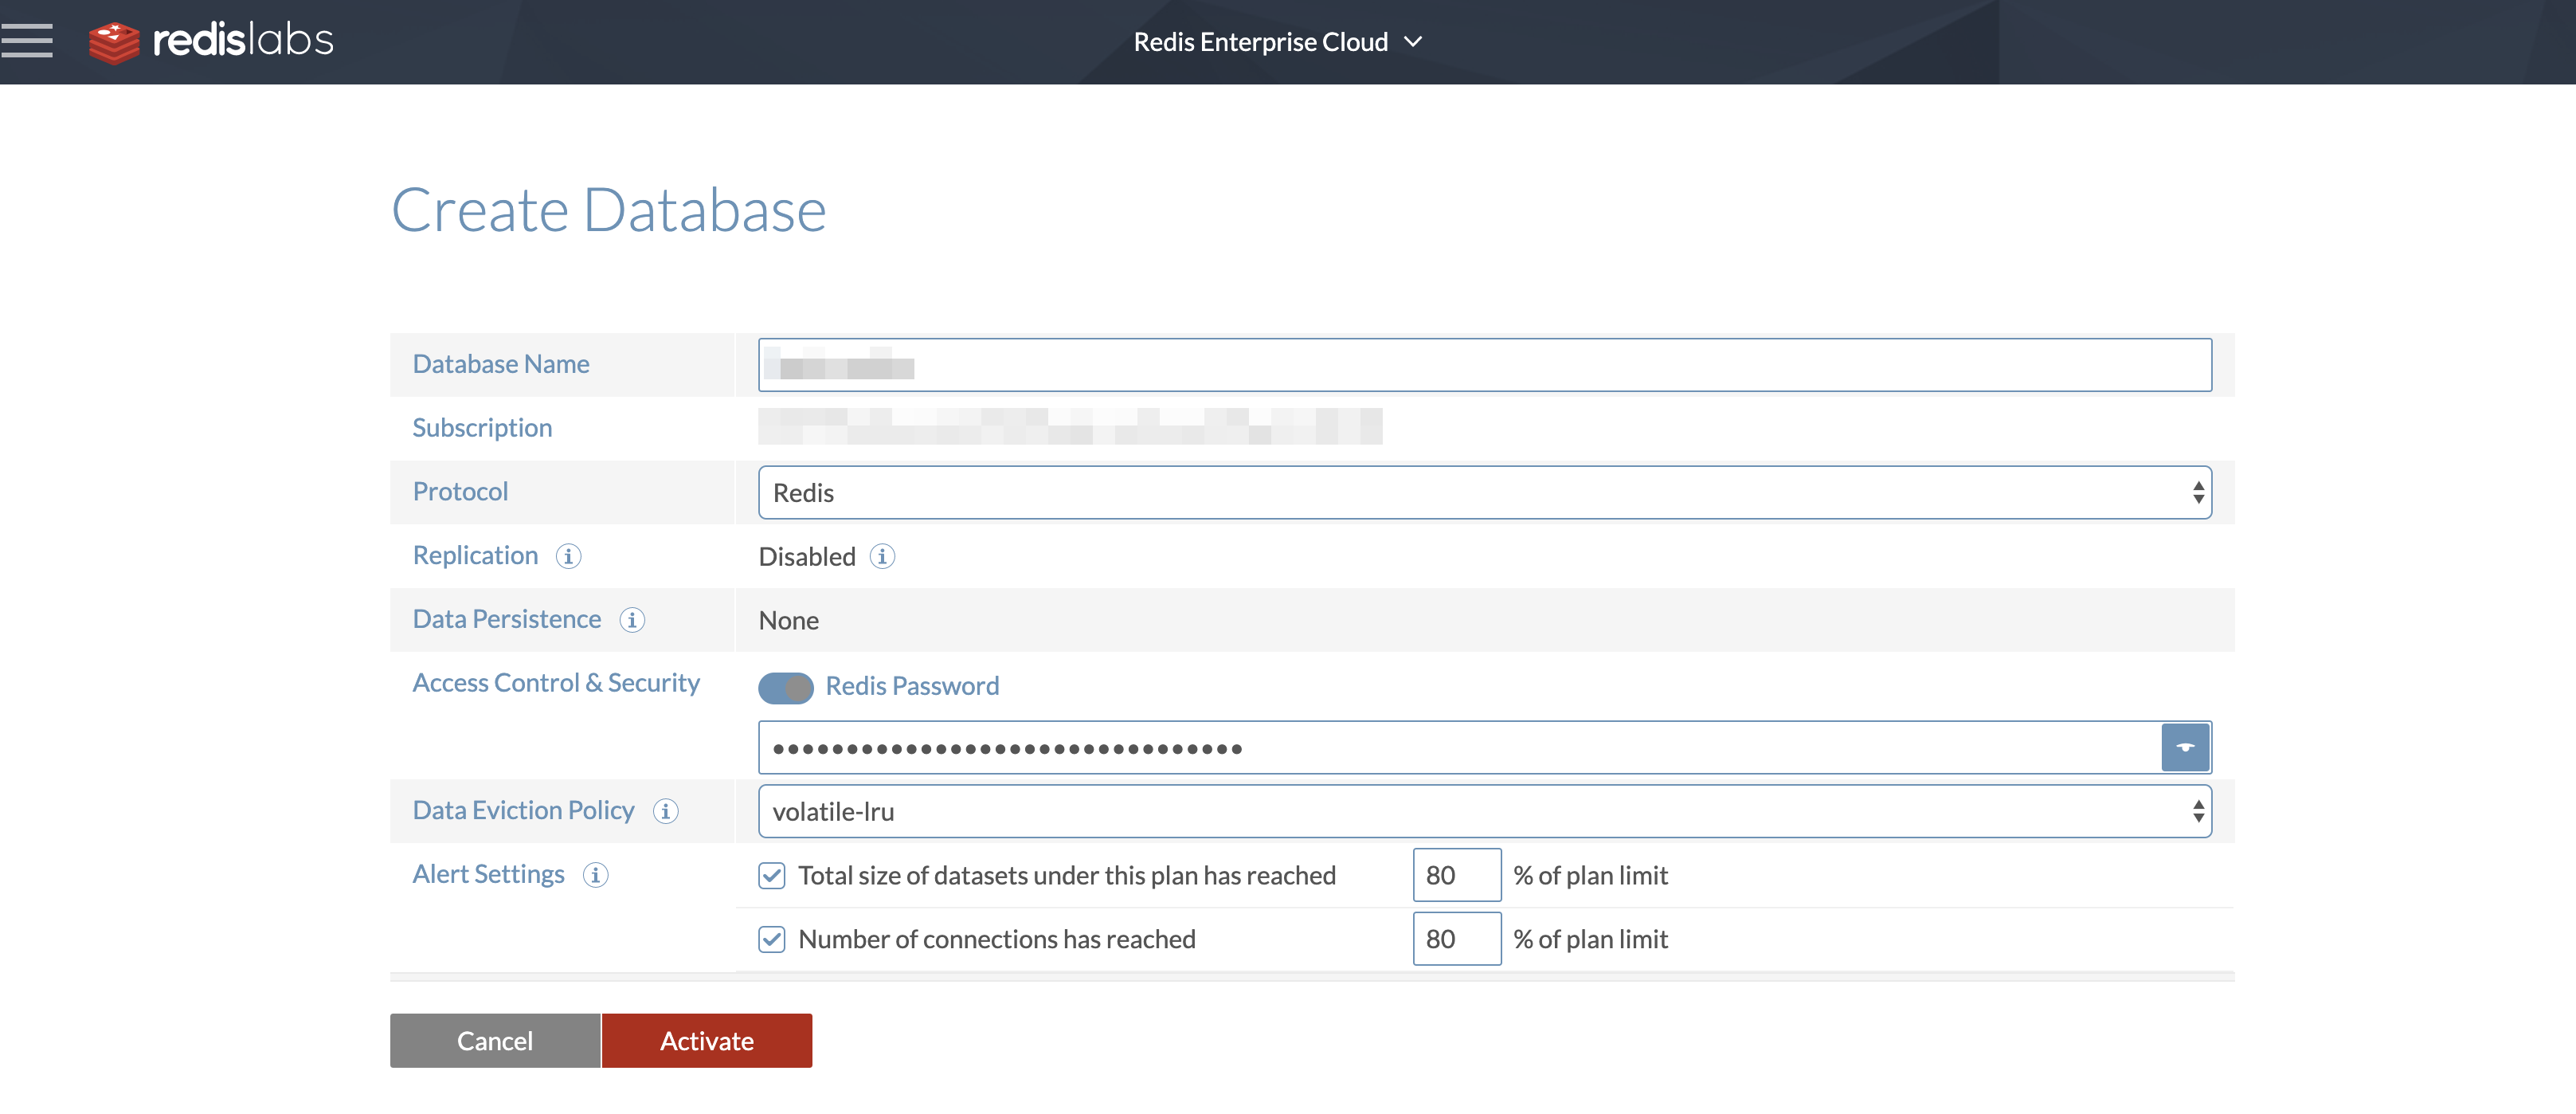
Data Eviction Policy は、メモリが最大に達した際にどう消すかというものらしいです。
詳細はこちらに記載されています。
https://redis-documentasion-japanese.readthedocs.io/ja/latest/topics/lru-cache.html#eviction-policies
以下は引用。
- noeviction : メモリ使用量が制限に達しており、クライアントが追加のメモリを要求するコマンド(DEL やいくつかの例外を除く、ほとんどの書き込みコマンド)を実行しようとした場合はエラーを返す。
- allkeys-lru : 新しいデータのためにスペースを空けるため、もっとも最近使われていない(LRU)キーから削除するよう試みる。
- volatile-lru : 新しいデータのためにスペースを空けるため、もっとも最近使われていない(LRU)キーから削除するよう試みる。ただし、 expire set が指定されたキーのみを対象とする。
- volatile-random : 新しいデータのためにスペースを空けるため、ランダムなキーを選んで削除する。ただし、 expire set が指定されたキーのみを対象とする。
とりあえずは30MBしかないんで、 allkeys-lru がいいんじゃないかなって気がします。
そこまでやると設定は完了です。
というわけで、前回 作ったレポジトリから呼び出してみます。
ちょっと遊んでみる
ということで、まずはGoogleのドキュメントを見ながらちょっと遊んでみます。
Redis Labs Redis を使用したアプリケーション データのキャッシュ保存
https://cloud.google.com/appengine/docs/flexible/go/using-redislabs-redis?hl=ja
まずは文字列の保存と取得をしてみようと思います。
package client

import "github.com/gomodule/redigo/redis"

type redisClient struct {
	pool *redis.Pool
}

var client *redisClient = nil

func GetRedisClient() *redisClient {
	if client == nil {
		panic("client is not initialized")
	}
	return client
}

func InitRedis(endpoint string, password string) {
	if client != nil {
		return
	}
	client = &redisClient{}
	client.pool = &redis.Pool{
		Dial: func() (redis.Conn, error) {
			conn, err := redis.Dial("tcp", endpoint)
			if password == "" {
				return conn, err
			}
			if err != nil {
				return nil, err
			}
			// パスワードが設定されてる場合のみ認証する(ローカルだと不要なため)
			if password != "" {
				if _, err := conn.Do("AUTH", password); err != nil {
					conn.Close()
					return nil, err
				}
			} else if (strings.HasPrefix(endpoint, "redis")) {
				// EndpointがRedusCloudなのにパスワードがないのはおかしい
				conn.Close()
				return nil, errors.New("invalid password.")
			}
			return conn, nil
		},
	}
}

func (c *redisClient) GetConnection() redis.Conn {
	return c.pool.Get()
}

func (c *redisClient) PutString(key string, value string) error {
	con := c.GetConnection()
	defer con.Close()
	_, err := con.Do("SET", key, value)
	return err
}

func (c *redisClient) GetString(key string) (string, error) {
	con := c.GetConnection()
	defer con.Close()

	return redis.String(con.Do("GET", key))
}
main.goは 前回 からの差分のみ記載します。
func main() {
	// Endpointを指定
	redisAddr := os.Getenv("REDIS_ADDR")
	// Passwordを指定
	redisPass := os.Getenv("REDIS_PASS")

	client.InitRedis(redisAddr, redisPass)

	// Redisの操作
	e.GET("/redis/put/:name", func(e echo.Context) error {
		name := e.Param("name")
		if err := client.GetRedisClient().PutString("test", name); err != nil {
			log.Fatalf("faield to get redis (reason: %v)", err)
			return e.String(http.StatusInternalServerError, "error")
		}
		return e.String(http.StatusOK, fmt.Sprintf("put redis: %s", name))
	})
	e.GET("/redis/get", func(e echo.Context) error {
		if name, err := client.GetRedisClient().GetString("test"); err != nil {
			log.Fatalf("faield to get redis (reason: %v)", err)
			return e.String(http.StatusInternalServerError, "error")
		} else {
			return e.String(http.StatusOK, fmt.Sprintf("get redis: %s", name))
		}
	})
}
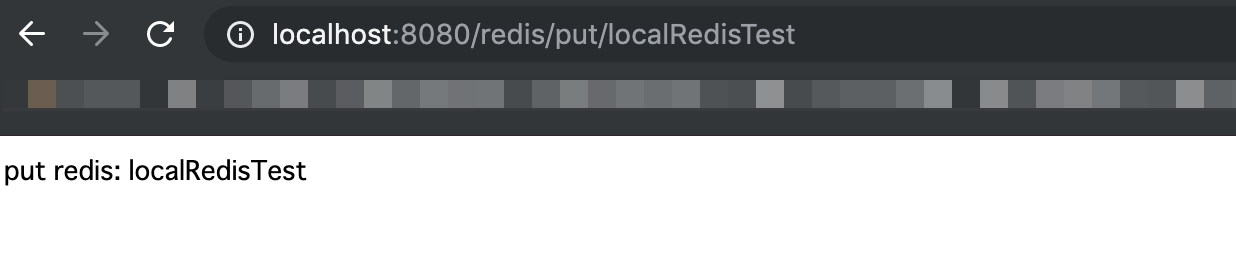
実際に http://localhost:8080/redis/put/hogehoge とやったりすることで、文字列の保存ができました。


ちなみに、Redisのサイトから中を確認することはどうもできないっぽいです。
まぁ仕方ないですね。
上記のコードの Do() で行っている第一引数は、Redisに送るコマンドだそうです。
Googleのドキュメントにあった INCR は、数値をインクリメントするというコマンドみたいですよ。
コマンドは他にもたくさん定義されています。
Redis コマンド一覧
https://symfoware.blog.fc2.com/blog-entry-521.html
ローカルでRedisを起動する
上記でも事足りるのですが、やっぱりローカル環境に構築しておきたいものですよね。
というわけで、 https://redis.io/topics/quickstart を読みながらやってみました。
追記(2019/09/11)
わざわざmakeしなくても、brewにありました。
MacにRedisをインストールする
https://qiita.com/checkpoint/items/58b9b0193c0c46400eeb
$ brew install wget # デフォルトだとMacはwget入ってないので(もう入ってたら当然不要)
$ wget http://download.redis.io/redis-stable.tar.gz
--2019-09-07 16:52:52--  http://download.redis.io/redis-stable.tar.gz
︙
2019-09-07 16:52:59 (316 KB/s) - `redis-stable.tar.gz へ保存完了 [2014657/2014657]
$ tar xvzf redis-stable.tar.gz
x redis-stable/
x redis-stable/INSTALL
x redis-stable/sentinel.conf
x redis-stable/deps/
x redis-stable/deps/update-jemalloc.sh
x redis-stable/deps/jemalloc/
︙
$ cd redis-stable
$ make
︙
# ビルドがちゃんと全部成功してるかテストする
$ make test

\o/ All tests passed without errors!

Cleanup: may take some time... OK
最後の make test は必須ではないですが、最後 \o/ All tests passed without errors! と出たら問題ないです。
作成されたものは redis-stable/src 内に入るんで、PATHを通しておきます。
実行して連携する
PATHを通したあと、以下のように実行します。
$ redis-server
65327:C 07 Sep 2019 17:03:47.270 # oO0OoO0OoO0Oo Redis is starting oO0OoO0OoO0Oo
65327:C 07 Sep 2019 17:03:47.270 # Redis version=5.0.5, bits=64, commit=00000000, modified=0, pid=65327, just started
65327:C 07 Sep 2019 17:03:47.270 # Warning: no config file specified, using the default config. In order to specify a config file use redis-server /path/to/redis.conf
65327:M 07 Sep 2019 17:03:47.272 * Increased maximum number of open files to 10032 (it was originally set to 4864).
                _._
           _.-``__ ''-._
      _.-``    `.  `_.  ''-._           Redis 5.0.5 (00000000/0) 64 bit
  .-`` .-```.  ```\/    _.,_ ''-._
 (    '      ,       .-`  | `,    )     Running in standalone mode
 |`-._`-...-` __...-.``-._|'` _.-'|     Port: 6379
 |    `-._   `._    /     _.-'    |     PID: 65327
  `-._    `-._  `-./  _.-'    _.-'
 |`-._`-._    `-.__.-'    _.-'_.-'|
 |    `-._`-._        _.-'_.-'    |           http://redis.io
  `-._    `-._`-.__.-'_.-'    _.-'
 |`-._`-._    `-.__.-'    _.-'_.-'|
 |    `-._`-._        _.-'_.-'    |
  `-._    `-._`-.__.-'_.-'    _.-'
      `-._    `-.__.-'    _.-'
          `-._        _.-'
              `-.__.-'

65327:M 07 Sep 2019 17:03:47.273 # Server initialized
65327:M 07 Sep 2019 17:03:47.273 * Ready to accept connections
というわけで、環境変数 REDIS_ADDR に localhost:6379 を渡して実行します。
その場合、パスワードは不要です。(空文字でOK)

ちゃんとローカルからとれてます。
ちなみに、さっきインストールしたツールには「redis-cli」というのも存在してて、そこでも保存した内容の取得が行なえます。
$ redis-cli
127.0.0.1:6379> get test
"localRedisTest"
ちゃんと入ってますね(`・ω・´)
mercari/datastoreとredisを連携させる
さて、ここからやっと本題です。mercari/datastoreとredisを連携させて、Entityのキャッシュをしてもらえるようにします。
import (
	client2 "gaego112echosample/client"
	"github.com/labstack/echo"
	datastore2 "go.mercari.io/datastore"
	"go.mercari.io/datastore/clouddatastore"
	"go.mercari.io/datastore/dsmiddleware/rediscache"
	// ...省略
)

func HelloWorld(e echo.Context) error {
	// ... 省略
	// Redisとの連携を行う
	redisConn := client2.GetRedisClient().GetConnection()
	defer redisConn.Close()
	mw := rediscache.New(redisConn,
		// ログが出るようにする
		rediscache.WithLogger(func(ctx context.Context, format string, args ...interface{}){
			log.Printf(format, args...)
		}),
		// Redisに登録されてるか見るためにログに出力するようにしてる
		rediscache.WithCacheKey(func(key datastore2.Key) string {
			cacheKey := fmt.Sprintf("cache:%s", key.Encode())
			log.Printf("redis cache key: %s", cacheKey)
			return cacheKey
		}),
	)
	client.AppendMiddleware(mw)
	// ... 省略
}
こんな感じで、どんどん機能をインジェクトできるんですね mericari/dtastore 。素敵。
実際に起動をしてみます。
// ターミナル1: redisサーバー
$ redis-server
// ターミナル2: datastoreエミュレーター
$ gcloud beta emulators datastore start --host-port localhost:8059 --project test-project
// ターミナル3: ローカルサーバー
$ env DATASTORE_EMULATOR_HOST=localhost:8059 DATASTORE_PROJECT_ID=test-project REDIS_ADDR=localhost:6379 go run main.go
そしてアクセスしてみると。ローカルサーバー側に以下のログが出力されます。
2019/09/07 17:40:38 Project ID:
2019/09/07 17:40:38 dsmiddleware/rediscache.SetMulti: incoming len=1
2019/09/07 17:40:38 redis cache key: cache:EgkKBHBvc3QQuWA
2019/09/07 17:40:38 dsmiddleware/rediscache.SetMulti: len=1
2019/09/07 17:40:38 dsmiddleware/rediscache.GetMulti: incoming len=1
2019/09/07 17:40:38 redis cache key: cache:EgkKBHBvc3QQuWA
2019/09/07 17:40:38 dsmiddleware/rediscache.GetMulti: hit=1 miss=0
この cache:EgkKBHBvc3QQuWA を redis-cli で取得してみると…
$ redis-cli
127.0.0.1:6379> get cache:EgkKBHBvc3QQuWA
"\x1b\xff\x83\x02\x01\x01\x0cPropertyList\x01\xff\x84\x00\x01\xff\x82\x00\x005\xff\x81\x03\x01\x01\bProperty\x01\xff\x82\x00\x01\x03\x01\x04Name\x01\x0c\x00\x01\x05Value\x01\x10\x00\x01\aNoIndex\x01\x02\x00\x00\x00\x1e\xff\x84\x00\x01\x01\acontent\x01\x06string\x0c\x06\x00\x04test\x00"
キャッシュに入ってますね。完璧!
やってみた感想
ここまで特にハマる部分もなくノリで構築することができました。
まぁきっとこうだろうみたいにわかるのはいいですね。ひとまずこれで開発していくことができそう。
参考
Redis Labs Redis を使用したアプリケーション データのキャッシュ保存
https://cloud.google.com/appengine/docs/flexible/go/using-redislabs-redis?hl=ja
mericari/datastore doc.ja
https://github.com/mercari/datastore/blob/master/doc_ja.go
Redis Quick Start
https://redis.io/topics/quickstart
Redigoを使う(1) 基本的な使い方
https://qiita.com/riverplus/items/c1df770838d3868c3a13
Redis コマンド一覧
https://symfoware.blog.fc2.com/blog-entry-521.html
GolangとRedisで遊んでみた
https://qiita.com/lightstaff/items/7428a37a24b4ad56f995