45
46

Delete article

Deleted articles cannot be recovered.

Draft of this article would be also deleted.

Are you sure you want to delete this article?

More than 5 years have passed since last update.

macからVirtualBox VMにssh接続する

Last updated at Posted at 2014-12-24

VirtualBox の環境設定を変更する

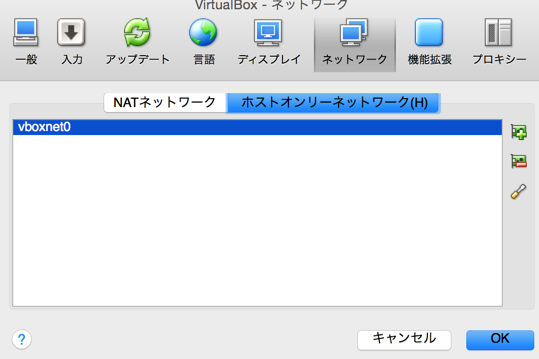
  • メニューバーから「VirtualBox」→「環境設定」→「ネットワーク」→「ホストオンリーネットワーク」を選択
  • 右のほうにある「+」を押す
  • 7340e6cdaced0112f8adcc8287e66862.png

ホストオンリーアダプターのIPアドレスを確認する

  • メニューバーから「VirtualBox」→「環境設定」→「ネットワーク」→「ホストオンリーネットワーク」を選択
  • 上の手順で作ったホストオンリーネットワークアダプターを選択
  • 右のほうにある3つのぼたんのうち、一番下のボタンを押す(オンマウスすると「ホストオンリーネットワークを編集する」って出る)
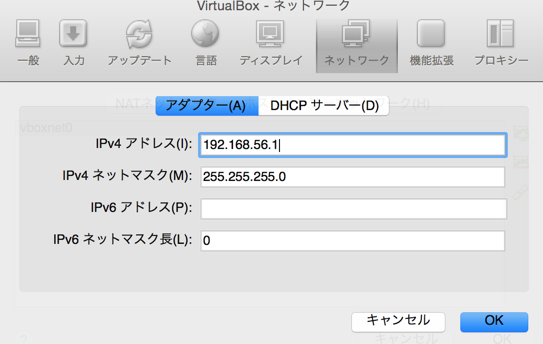
  • ed8cd174a21fb76e355ea59cd8924b7d.png
  • IPv4アドレスを控えておく

VMのネットワーク設定を変更する

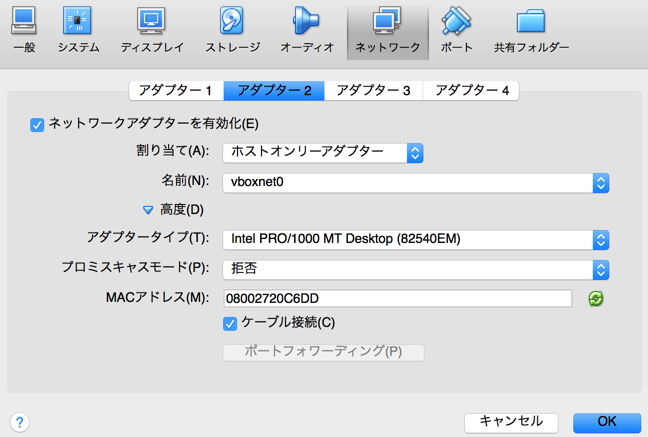
  • 「ネットワーク」→「アダプター2(有効化されてないアダプターならどれでも可)」を選択
  • 「ネットワークアダプターを有効化」にチェックを入れる
  • 「割り当て」のプルダウンを「ホストオンリーアダプター」にする
  • 8d0e143516d95002e8b4fb4993428311.png
  • MACアドレスはあとで使うので控えておく
  • ここまで出来たらVMを起動する

ifconfig を確認する

  • VirtualBoxマネージャーによる設定後にVMを起動したら、ifconfigでネットワークアダプターが追加されてた。
  • この状態でmacからsshできるのであれば以下は省略してよい。

ifcfg-eth1 を作成する

  • root 権限で以下のファイルを作成する
    • /etc/sysconfig/network-scripts/ifcfg-eth1
DEVICE=eth1
TYPE=Ethernet
ONBOOT=yes
BOOTPROTO=static
HWADDR=08:00:27:20:C6:DD
NAME="eth1"
IPADDR=192.168.56.101
NETMASK=255.255.255.0
NETWORK=192.168.56.1

ネットワークアダプターを起動する

ifup eth1

sshできるか確認する

ssh (ログインするユーザ名)@192.168.56.101
45
46
0

Register as a new user and use Qiita more conveniently

  1. You get articles that match your needs
  2. You can efficiently read back useful information
  3. You can use dark theme
What you can do with signing up
45
46

Delete article

Deleted articles cannot be recovered.

Draft of this article would be also deleted.

Are you sure you want to delete this article?