Following this guide https://kubernetes.io/docs/getting-started-guides/kops/, set up Kubernetes cluster on AWS using kops.
1. Install kops
According to the guide, kops is:
kops helps you create, destroy, upgrade and maintain production-grade, highly available, Kubernetes clusters from the command line. AWS (Amazon Web Services) is currently officially supported, with GCE and VMware vSphere in alpha and other platforms planned.
Before installing kops, you need to install kubectl https://kubernetes.io/docs/tasks/tools/install-kubectl/.
Just execute the following commands on your workstation. (In this test, I launched an ubuntu EC2 instance on AWS to use as a workstation.)
# Download the latest
curl -LO https://storage.googleapis.com/kubernetes-release/release/$(curl -s https://storage.googleapis.com/kubernetes-release/release/stable.txt)/bin/linux/amd64/kubectl

# Set kubectl executable
chmod +x ./kubectl

# Move the binary to your path
sudo mv ./kubectl /usr/local/bin/kubectl
Then, you can confirm kubectl is installed in your workstation correctly.
ubuntu@:~$ kubectl cluster-info
Kubernetes master is running at http://localhost:8080
After that, execute the following command and install kops to your workstation.
wget https://github.com/kubernetes/kops/releases/download/1.6.1/kops-linux-amd64
chmod +x kops-linux-amd64
sudo mv kops-linux-amd64 /usr/local/bin/kops
2. Configure AWS CLI
In the later part of this procedure, you need to run AWS CLI commands. So, AWS CLI should be installed in your workstation as well. Follow this guide to install AWS CLI: http://docs.aws.amazon.com/cli/latest/userguide/installing.html
Confirm the installation completed successfully.
ubuntu@:~$ aws --version
aws-cli/1.11.133 Python/2.7.12 Linux/4.4.0-1022-aws botocore/1.6.0
Next, you need to configure AWS credential. Run aws configure command and set your credential. You can get credential information at your AWS management console. Please refer this document: http://docs.aws.amazon.com/cli/latest/userguide/cli-chap-getting-started.html
$ aws configure
AWS Access Key ID [None]: ********
AWS Secret Access Key [None]: ********
Default region name [None]: ap-northeast-1
Default output format [None]: json
3. Create a Route53 Domain for Your Cluster
First of all, as I didn't have any registered domain, I needed to register a new domain. (Yes, I paid 12 dollars to register ".com" domain only for this test. I hope there will be another opportunity to use it someday.)
Registering a new domain on AWS is easy. Go to your Route 53 management console https://console.aws.amazon.com/route53/, type your new domain name and click check. Following instructions, your new domain will be registered in a few minutes.
After your new domain is registered, you can create a new subdomain with the following aws command.
Here, let's say I registered a new "test.com" root domain earlier and create a new subdomain "dev.test.com".
aws route53 create-hosted-zone --name dev.test.com --caller-reference 1
If the command works properly, you will get the result like below.
{
    "HostedZone": {
        "ResourceRecordSetCount": 2,
        "CallerReference": "1",
        "Config": {
            "PrivateZone": false
        },
        "Id": "/hostedzone/********",
        "Name": "dev.test.com."
    },
    "DelegationSet": {
        "NameServers": [
            "ns-****.awsdns-53.org",
            "ns-****.awsdns-25.com",
            "ns-****.awsdns-10.net",
            "ns-****.awsdns-15.co.uk"
        ]
    },
    "Location": "https://route53.amazonaws.com/2013-04-01/hostedzone/****",
    "ChangeInfo": {
        "Status": "PENDING",
        "SubmittedAt": "2017-08-14T12:51:14.520Z",
        "Id": "/change/****"
    }
}
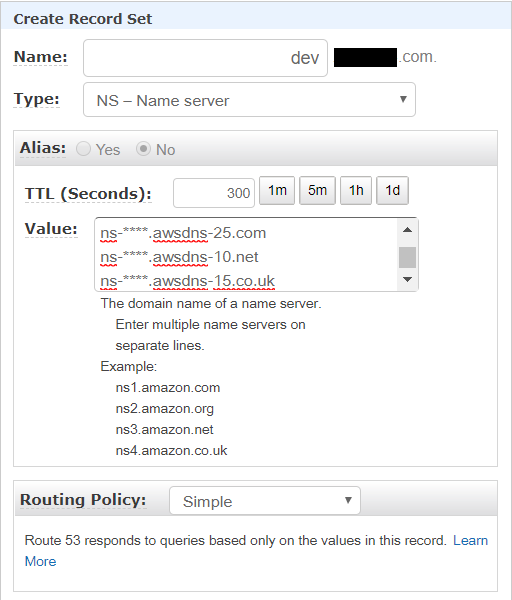
After a new subdomain is created successfully, you need to set up your NS records in the parent domain.
Go to your Route 53 management console https://console.aws.amazon.com/route53/, and select the parent domain (in my case, it is "test.com"). Click "Create Record Set", then you can add NS records like below.
To confirm NS records are properly added to your domain, use dig NS command. You should see 4 NS records that Route53 assigned your hosted zone.
ubuntu@:~$ dig NS   dev.test.com

; <<>> DiG 9.10.3-P4-Ubuntu <<>> NS dev.test.com
*** omitted ***
;; QUESTION SECTION:
;dev.test.com.               IN      NS

;; ANSWER SECTION:
dev.test.com.        60      IN      NS      ns-****.awsdns-53.org.
dev.test.com.        60      IN      NS      ns-****.awsdns-15.co.uk.
dev.test.com.        60      IN      NS      ns-****.awsdns-25.com.
dev.test.com.        60      IN      NS      ns-****.awsdns-10.net.
4. Create an S3 Bucket to Store Your Clusters State
kops uses an S3 bucket to store cluster information such as configuration. So you need to create a new S3 bucket.
Create an S3 bucket "clusters.dev.test.com".
ubuntu@:~$ aws s3 mb s3://clusters.dev.test.com
make_bucket: clusters.dev.test.com
Export KOPS_STATE_STORE to allow kops to use the bucket.
export KOPS_STATE_STORE=s3://clusters.dev.test.com
5. Build Your Cluster Configuration
Now, you will build a new cluster configuration.
ubuntu@:~$ kops create cluster --zones=ap-northeast-1a kubernetes.dev.test.com
***omitted***
Cluster configuration has been created.

Suggestions:
 * list clusters with: kops get cluster
 * edit this cluster with: kops edit cluster kubernetes.dev.test.com
 * edit your node instance group: kops edit ig --name=kubernetes.dev.test.com nodes
 * edit your master instance group: kops edit ig --name=kubernetes.dev.test.com master-ap-northeast-1a

Finally configure your cluster with: kops update cluster kubernetes.dev.test.com --yes
You can confirm the build successfully completed.
ubuntu@:~$ kops get cluster
NAME                            CLOUD   ZONES
kubernetes.dev.test.com      aws     ap-northeast-1a
Troubleshooting Memo
In case kops create cluster fails because of error reading SSH key file, you need to create ssh keys by ssh-keygen command.
ubuntu@:~$ ssh-keygen -t rsa
ubuntu@:~$ ls ./.ssh/
authorized_keys  id_rsa  id_rsa.pub
6. Create the Cluster in AWS
After the all preparations above, it is time to create your kubenetes cluster on AWS. All you need to do is running kops update cluster command with --yes flag.
ubuntu@:~$ kops update cluster kubernetes.dev.test.com --yes
***omitted***

Cluster is starting.  It should be ready in a few minutes.

Suggestions:
 * validate cluster: kops validate cluster
 * list nodes: kubectl get nodes --show-labels
 * ssh to the master: ssh -i ~/.ssh/id_rsa admin@api.kubernetes.dev.test.com
The admin user is specific to Debian. If not using Debian please use the appropriate user based on your OS.
Now you can see new instances are running in your AWS EC2 instance management console.
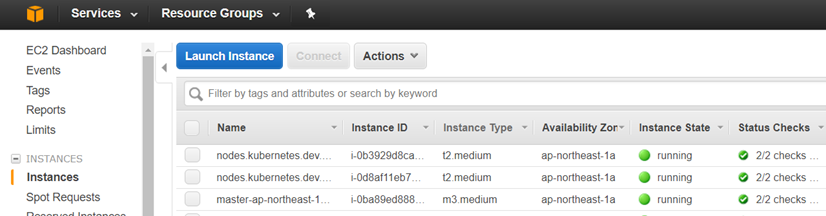
Also you can validate kubernetes cluster is running with kops validate cluster command.
ubuntu@:~$ kops validate cluster
Using cluster from kubectl context: kubernetes.dev.test.com

Validating cluster kubernetes.dev.test.com

INSTANCE GROUPS
NAME                    ROLE    MACHINETYPE     MIN     MAX     SUBNETS
master-ap-northeast-1a  Master  m3.medium       1       1       ap-northeast-1a
nodes                   Node    t2.medium       2       2       ap-northeast-1a

NODE STATUS
NAME                                            ROLE    READY
ip-****.ap-northeast-1.compute.internal master  True
ip-****.ap-northeast-1.compute.internal node    True
ip-****.ap-northeast-1.compute.internal node    True

Your cluster kubernetes.dev.test.com is ready
7. Delete the Cluster in AWS
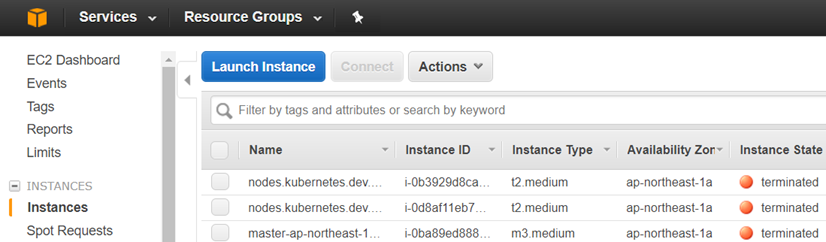
As you can see, kops created new instances for kubernetes cluster using t2.medium and m3.medium. It means, it costs you additional money to keep kubernetes cluster running. As I don't want to spend my money too much, it is time to clean up all what I have done in the last few hours. Simply, just run the following command.
kops delete cluster kubernetes.dev.test.com --yes
Then, you can see the newly created instances are terminated. Those instances will be removed in a few minutes.