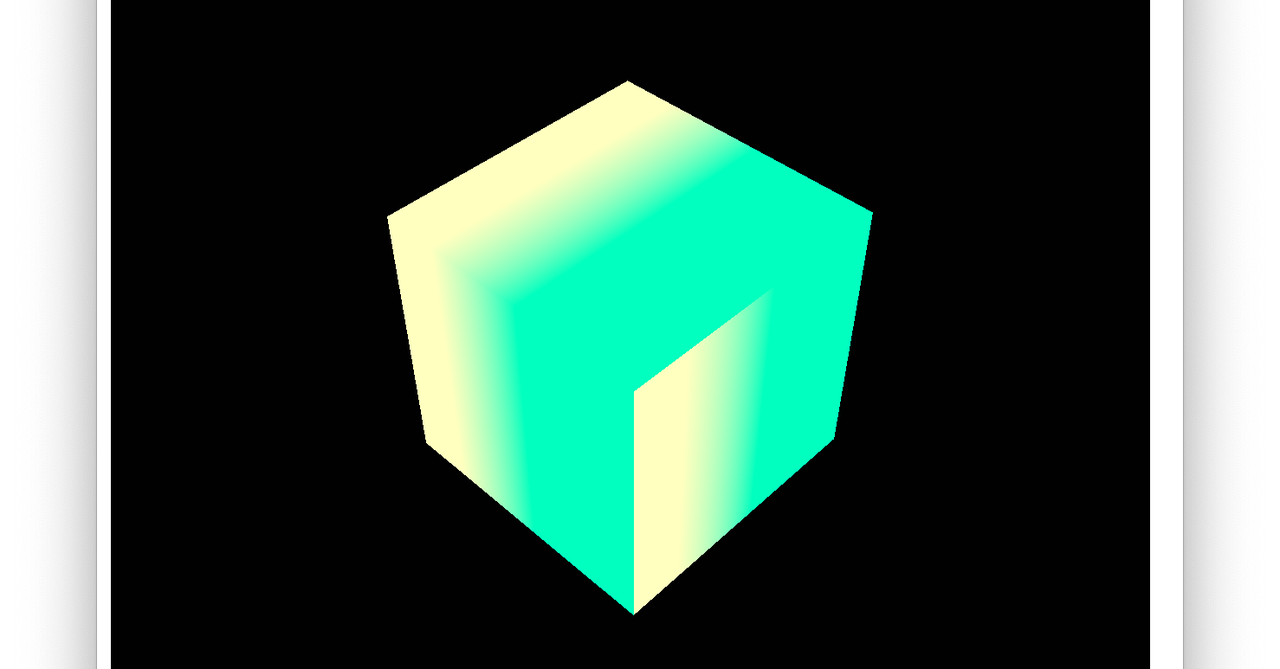
※この記事は2020年10月29日に公開したnoteの記事を移動させたページです。(一部修正・加筆を行なっています。2020/12/8)
kokeglという活動を始めました。毎日苔のCG表現を試していくサイトです。
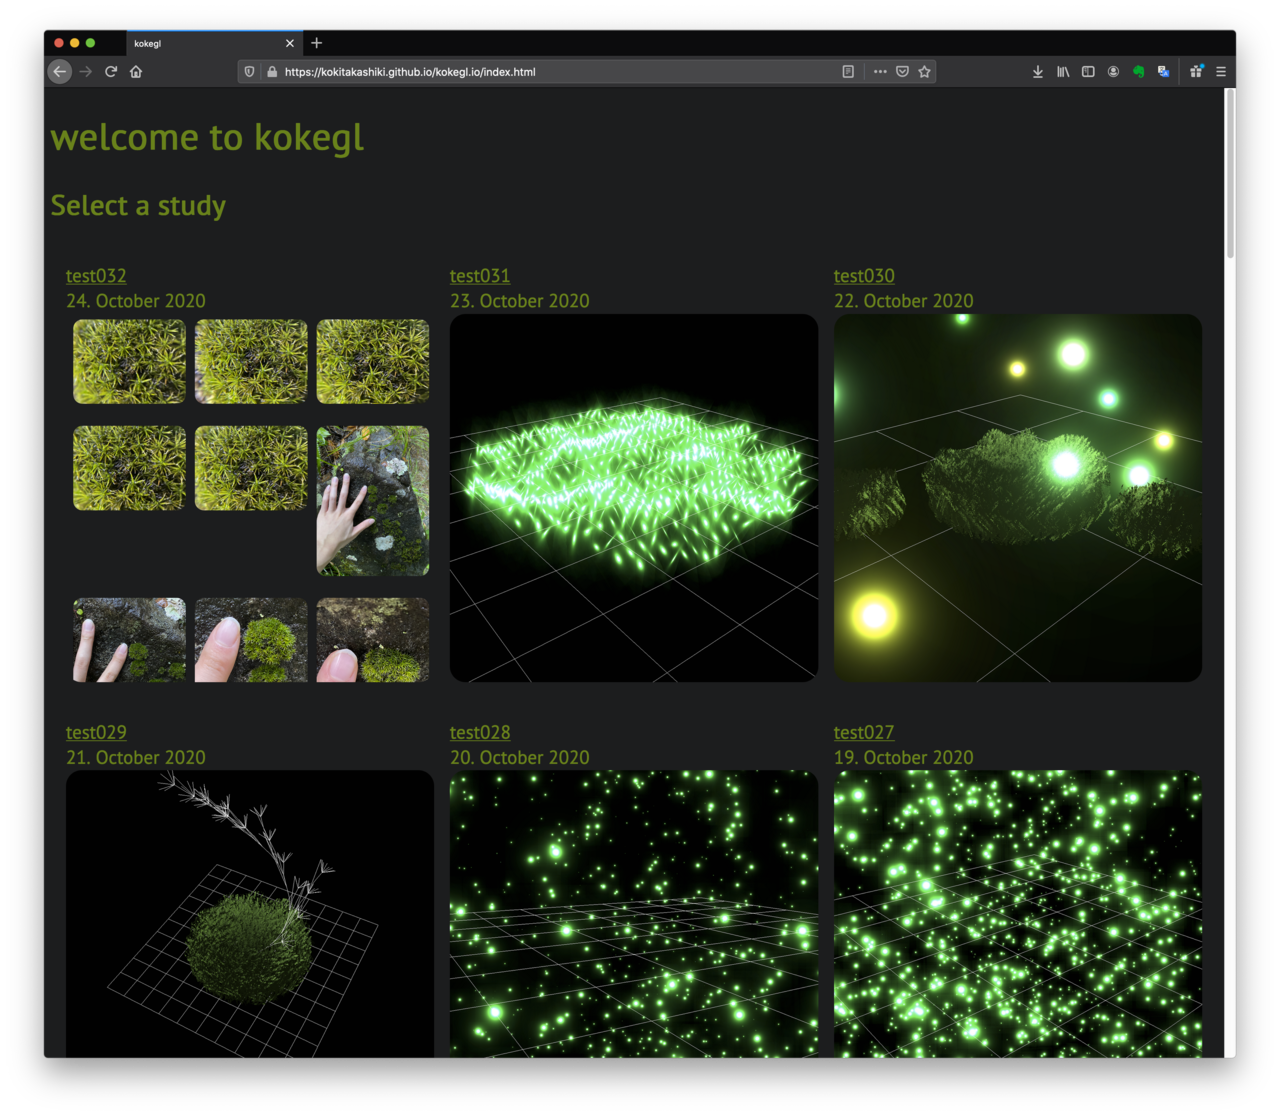
https://kokitakashiki.github.io/kokegl.io/
kokeglで使っているツール・機能・言語
・visual studio codeとLive Server
・github io
・html, css, javascript(threejs), webGL
シンプルでmacOS・windows10の両方で同じようにコードを書くことができます。そしてgithubにアップロードするだけで簡単にサイトを更新できるので小一時間で色々試せてよいです。
なので今回はvisual studio codeとLive Serverで
threejsを使ってwebGLを書いてみます。
(アップロードに関しては「github io」で検索お願いします。)
(スクリーンショットはmacですがwindowsでも動作確認済みですので、もしうまく動作しないなどありましたらコメント欄もしくはTwitterのアカウントにご連絡ください。)
準備
必要なもの
・PC(windows10 or macOS)
(スペックはvisual studio codeとchrome or firefoxが動けばokです。)
(linuxでもできるかもしれませんが自己責任でお願いします。)
インストールが必要なソフトウェア
・visual studio code
・chrome or firefox
(その他ブラウザでも大丈夫だとは思いますがjavascriptやwebGLに非対応だとコードが動作しないので自分の記事のコードを試せない可能性があります。)
インストールが必要なvisual studio codeの拡張機能
・Live Server
(これの機能がないと試せないのでインストールお願いします。)
インストールしておくと便利な拡張機能
・Japanese Language Pack for Visual Studio Code
具体的な準備に関してはそれぞれのインストールに関してわかりやすい記事がたくさんありますので、そちらを検索お願いします。
threejsを使ってwebGLを書いてみます。
html
threejsを使ってwebGLを書くにあたって必要なのはwebpageです。そのwebpageはhtmlによって記述し作成します。
プロジェクトを保存するためのフォルダを作成します。
(例ではthreejs_projという名前でフォルダを作成しています。)
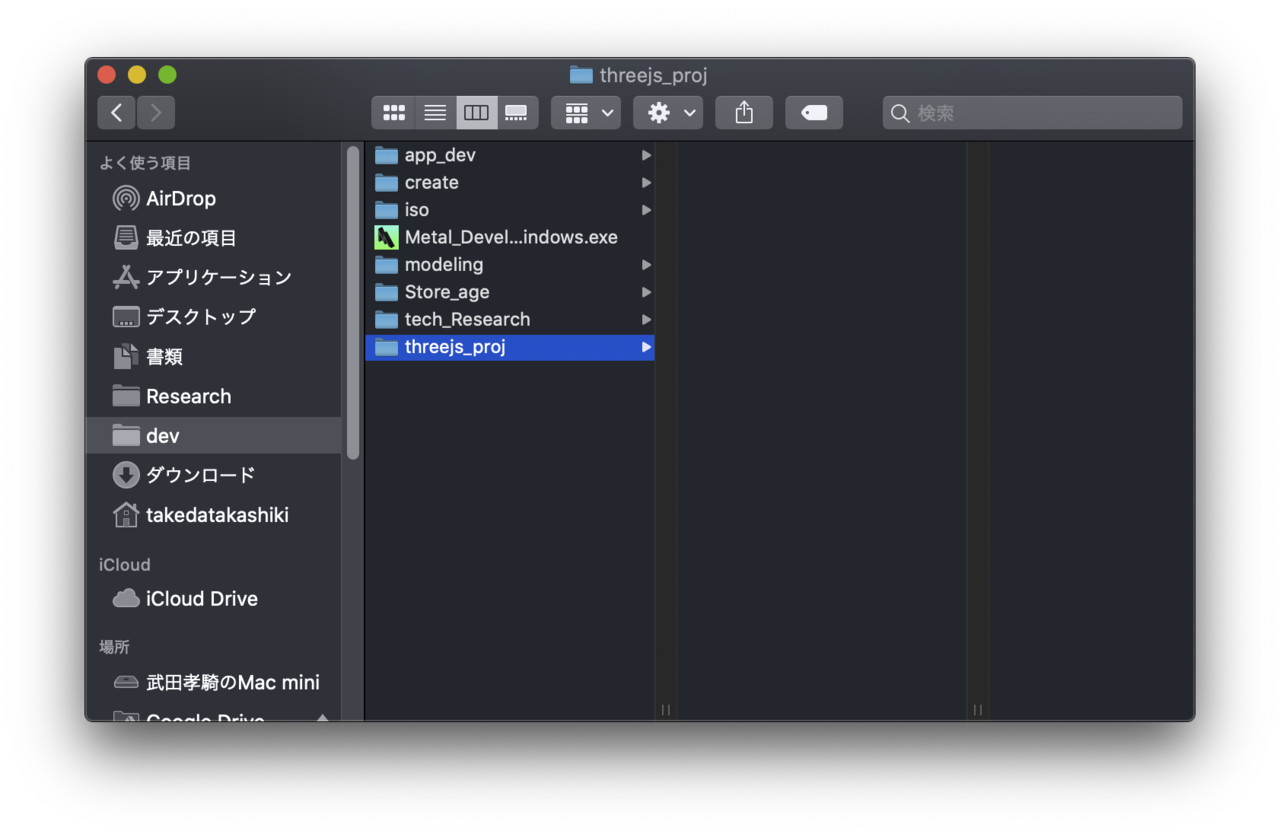
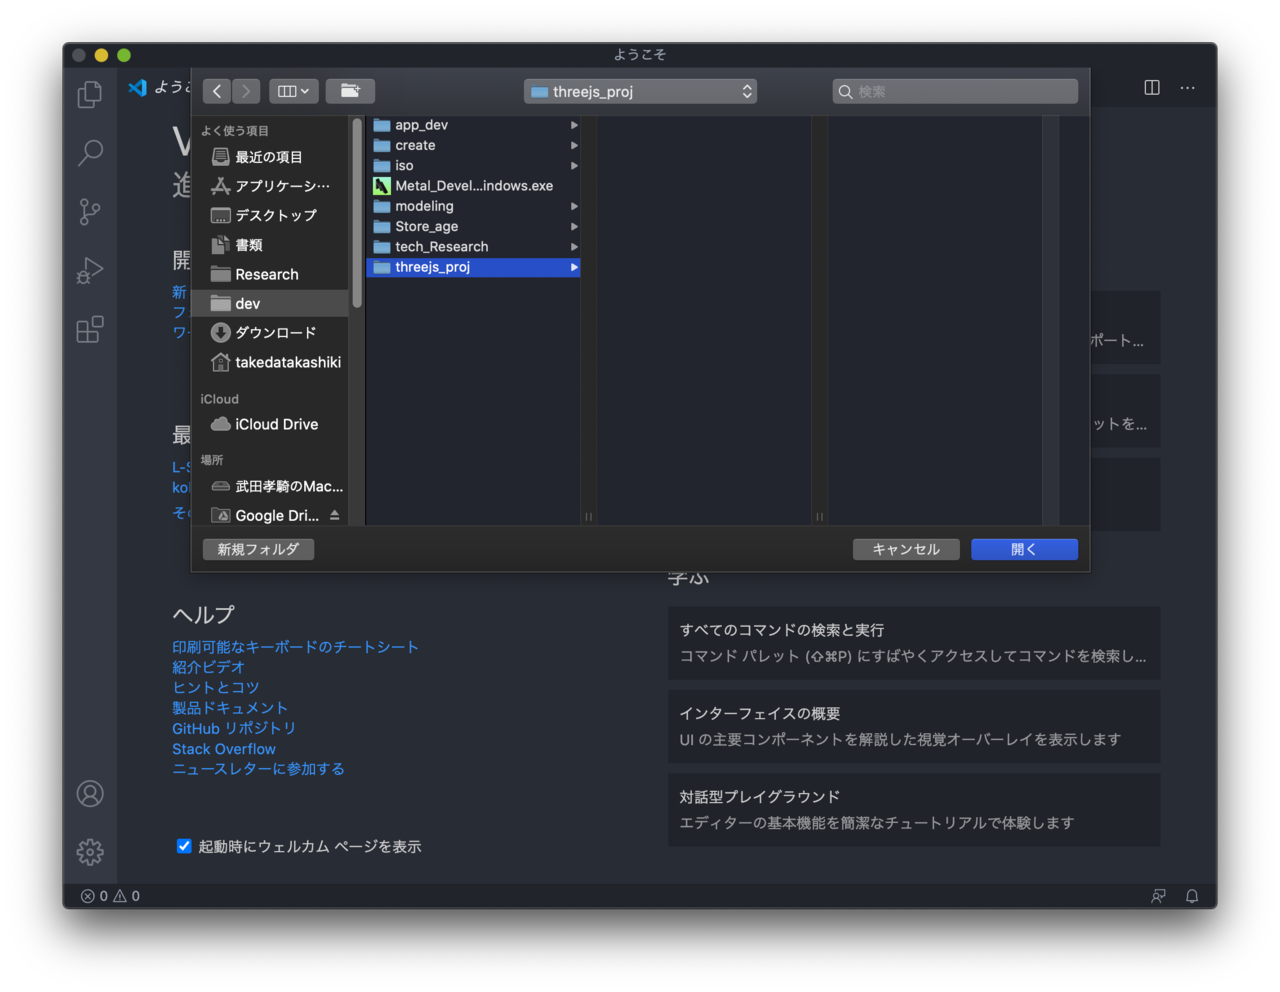
visual studio codeを開きます。フォルダを開くをクリックします。
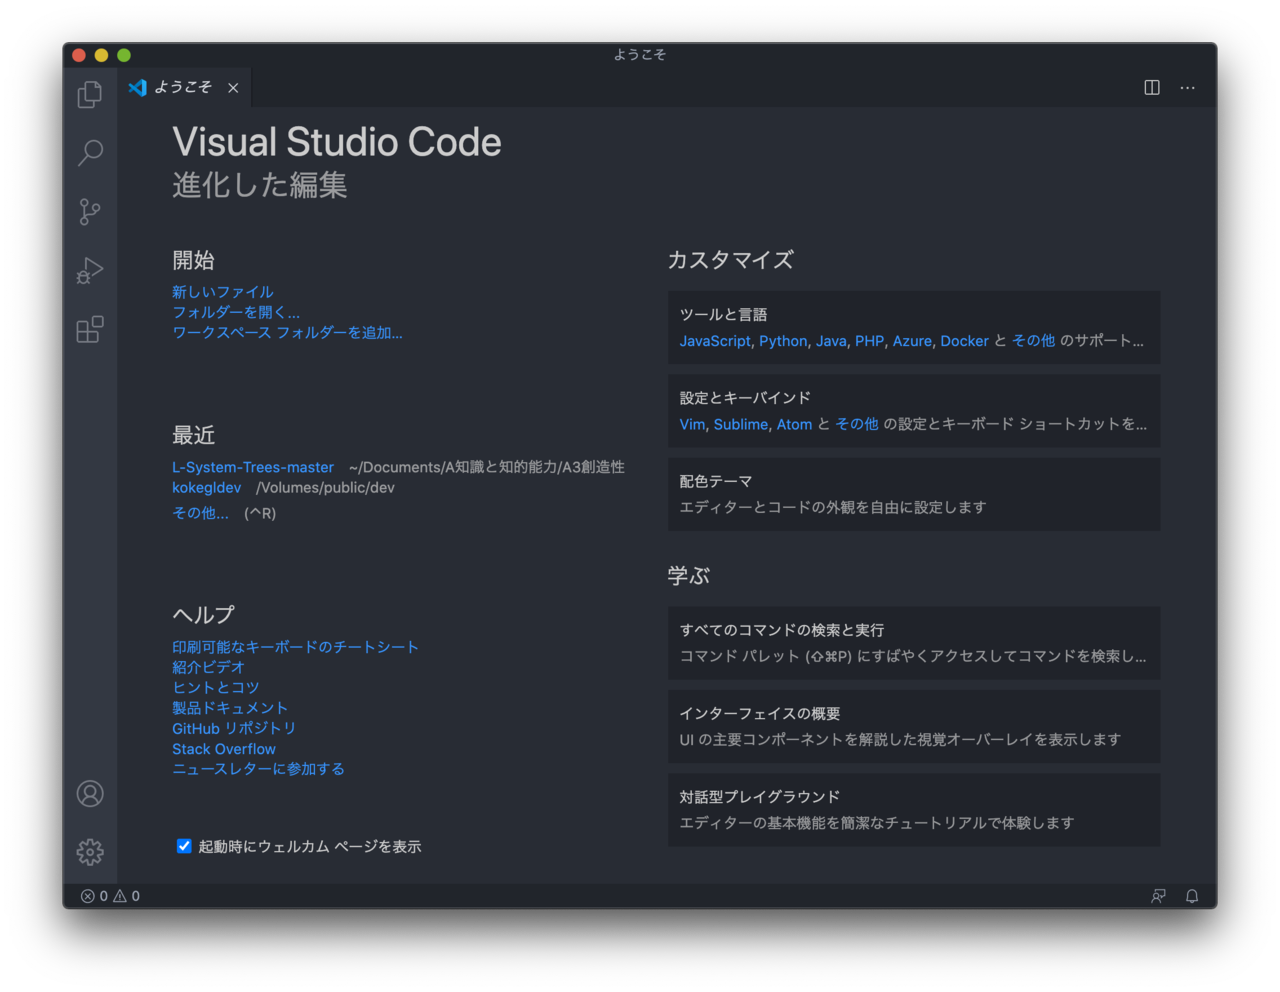
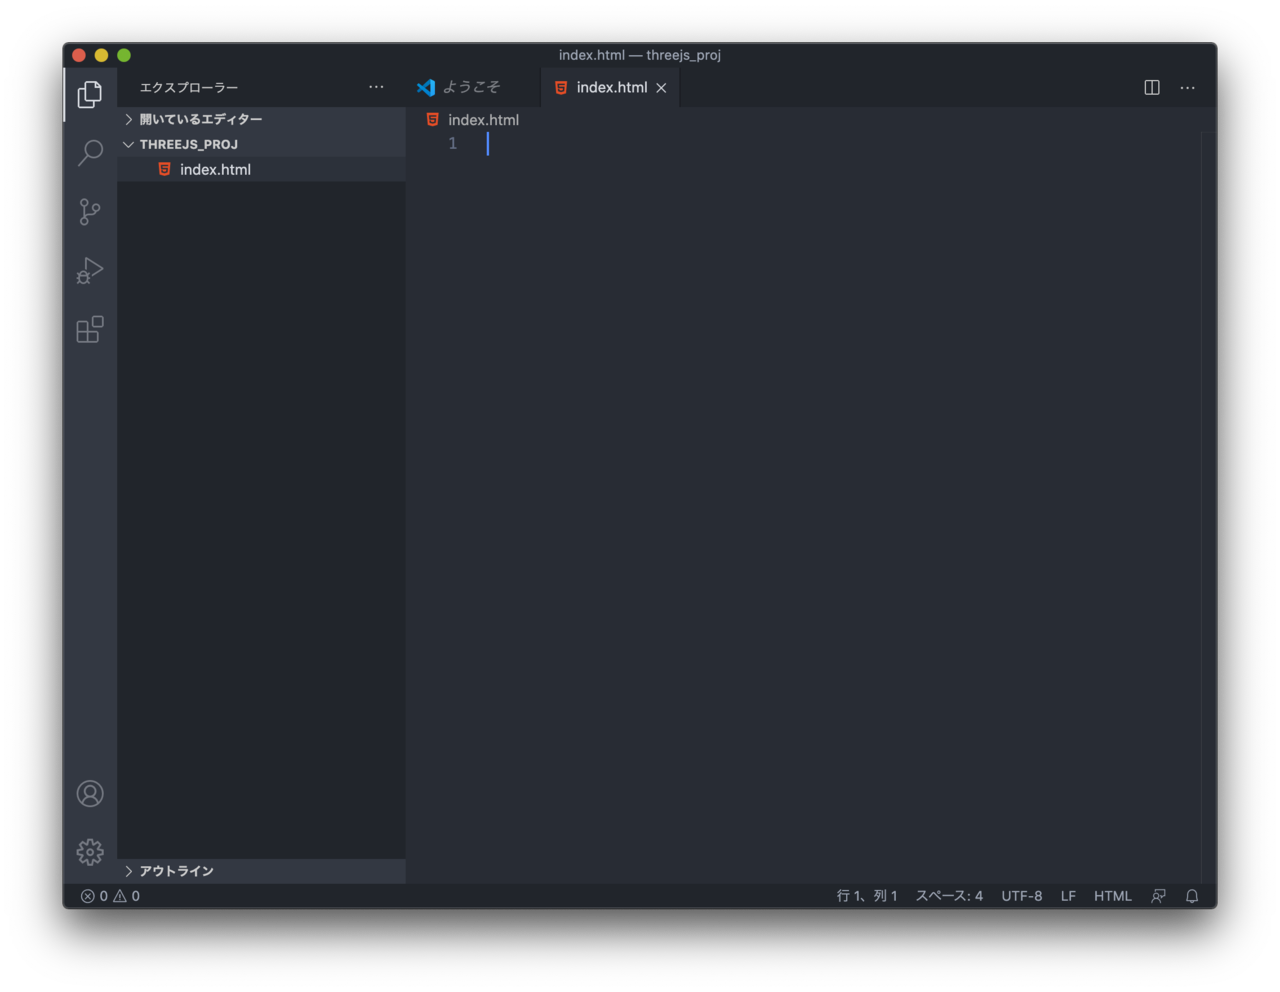
自分がつけたフォルダのタイトルが左ペインに上部に表示されています。
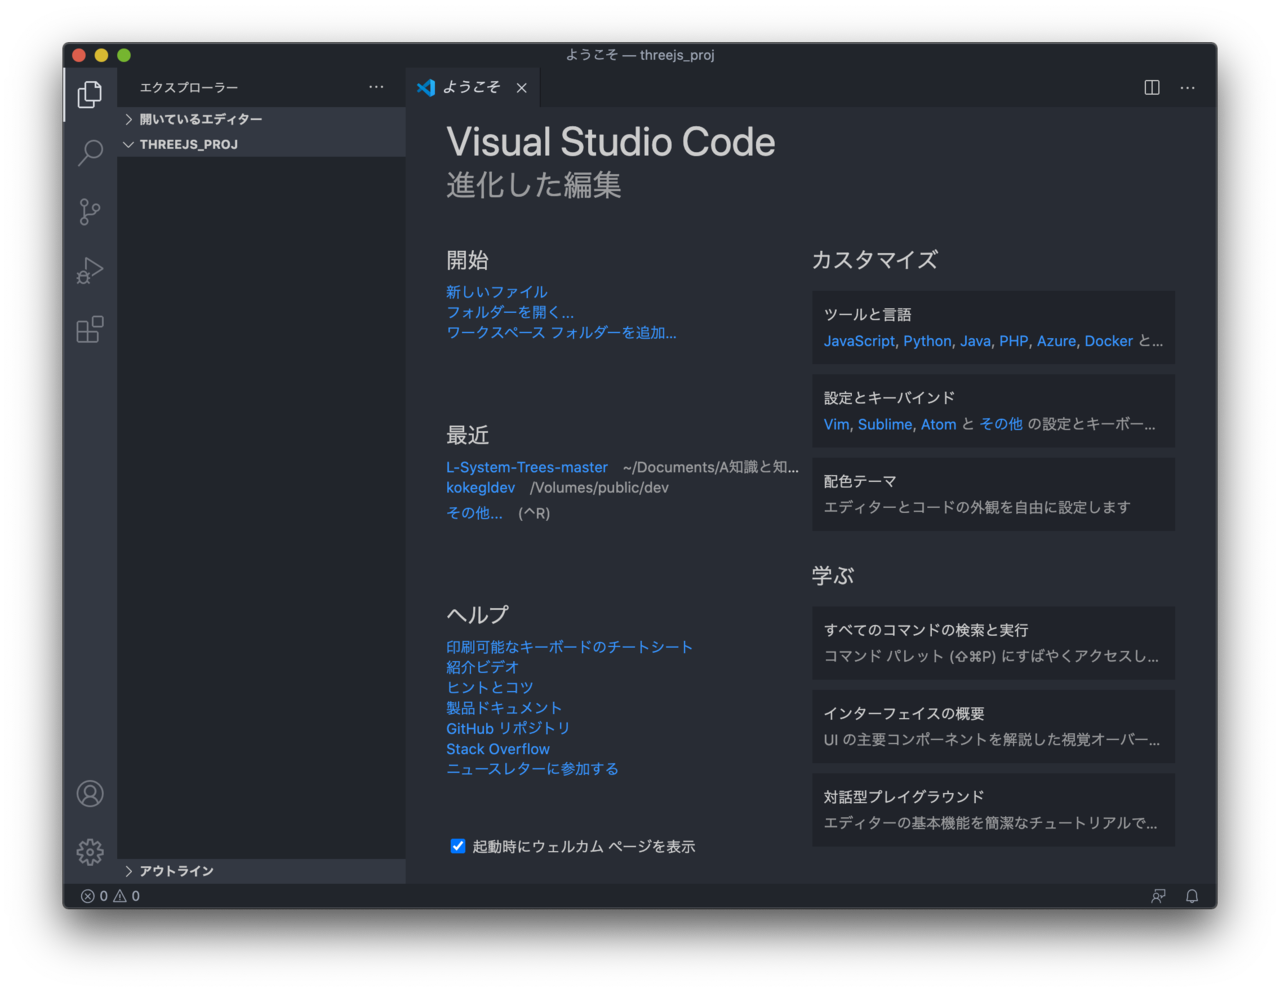
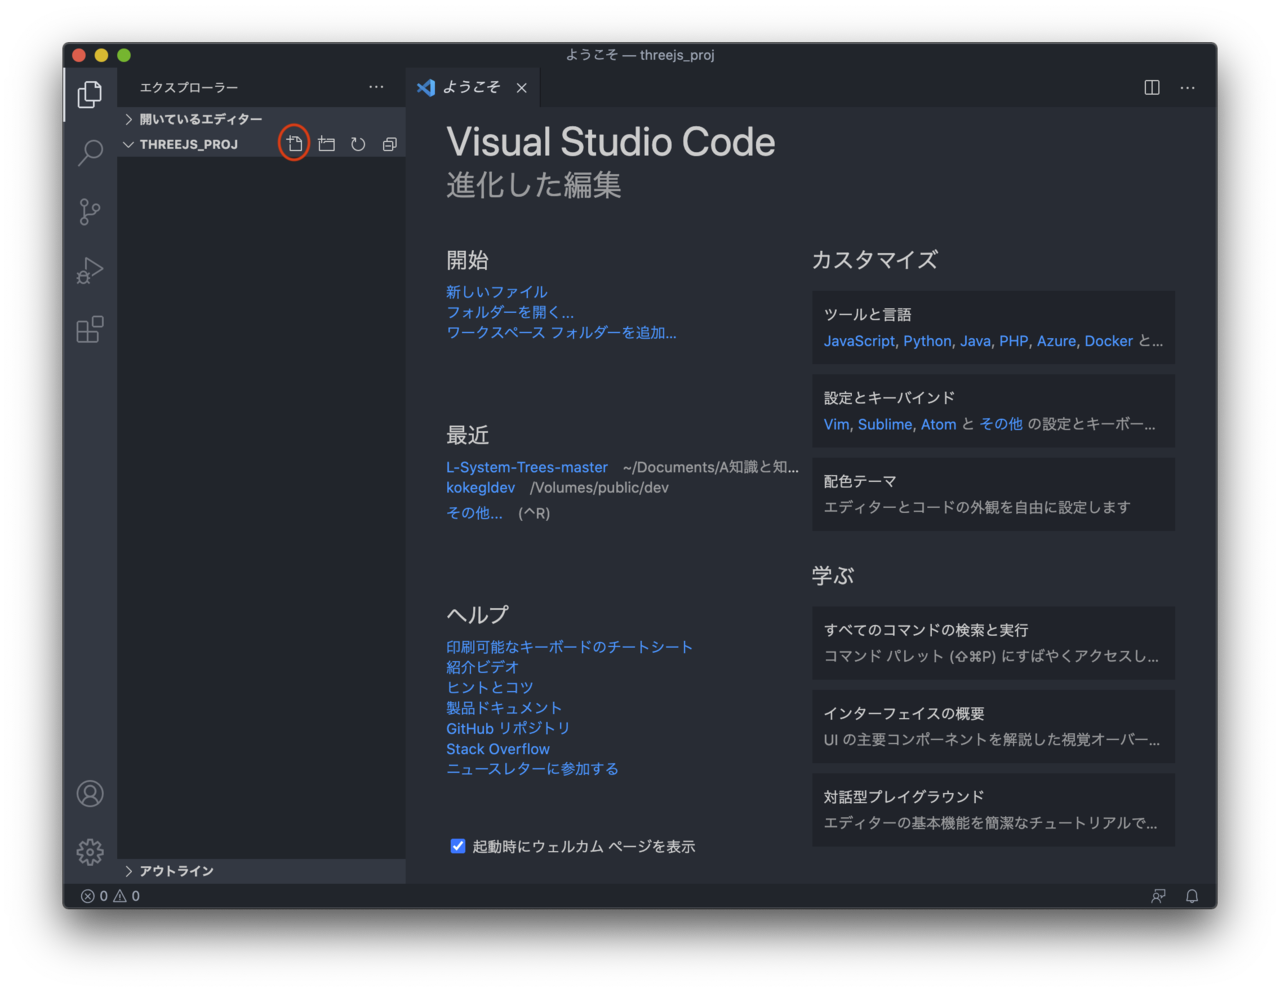
この左ペインのエリアにマウスカーソルをおきます。するとアイコンが4つ出てきます。一番左のアイコンをクリックして新しいファイルを作成します。名前は「index.html」にします。
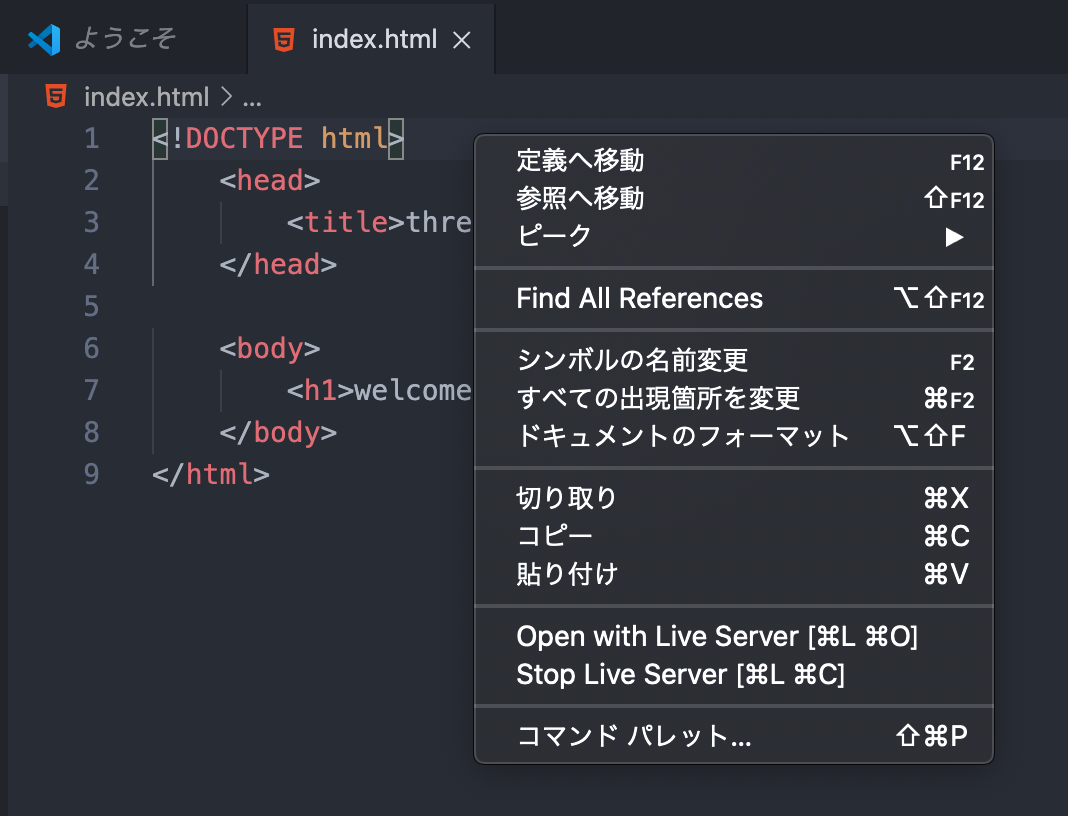
下記のコードを書き加えてwebpageを作ってみます。
<!DOCTYPE html>
   <head>
       <title>threejs test</title>
   </head>

   <body>
       <h1>welcome!!</h1>
   </body>
</html>
Go Liveのボタンがない時は右クリックをしてOpen with Live Serverをクリックします。
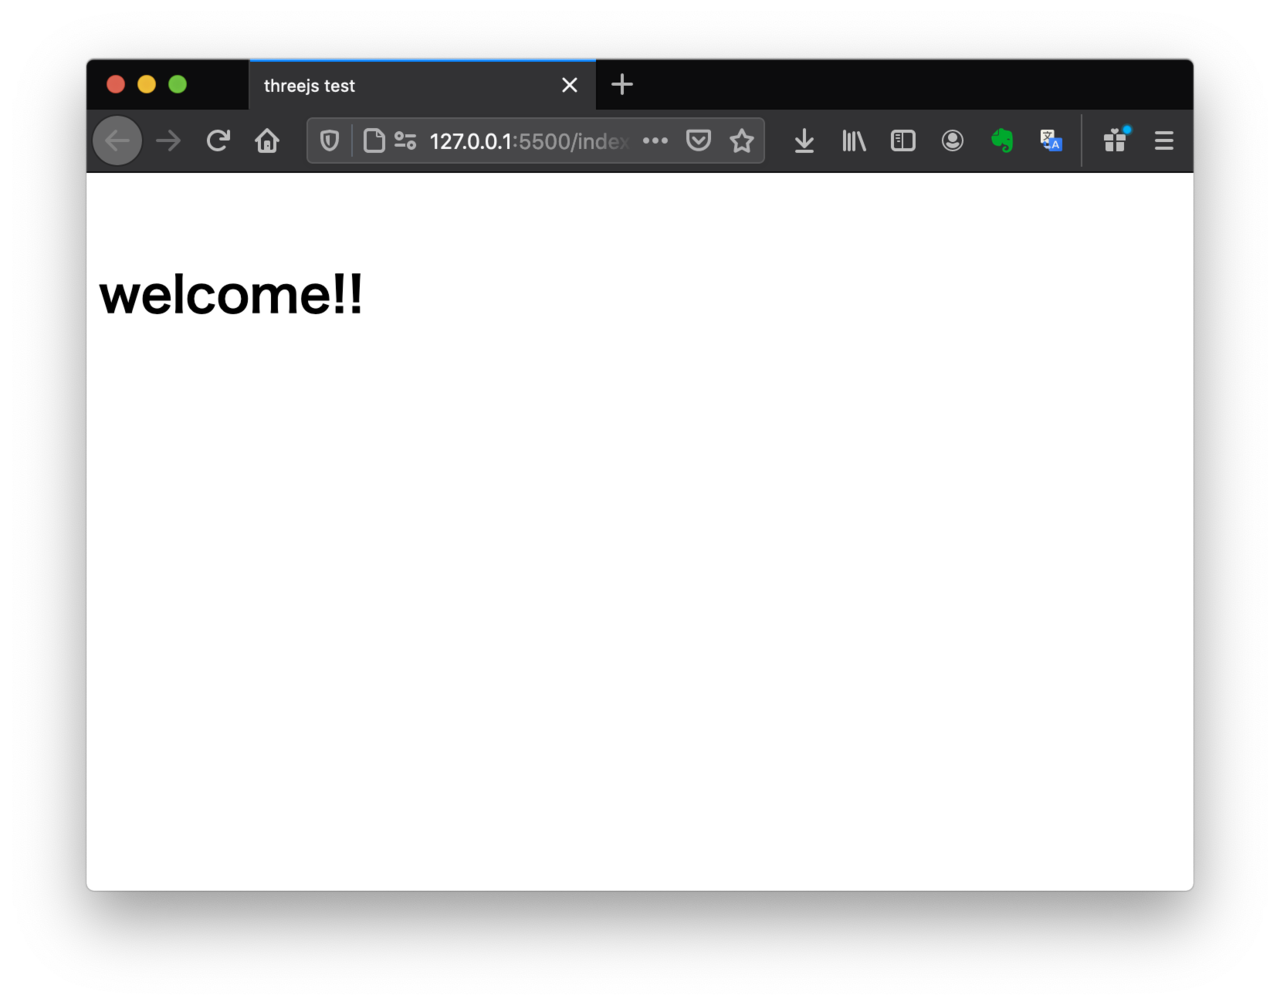
ブラウザが自動で開き「welcome!!」と表示されらwebpageは完成です。
threejs
webpageができました。ここにthreejsでCGの表現を加えます。
その前にthreejsの説明がまだでした。
three.jsは、ウェブブラウザ上でリアルタイムレンダリングによる3次元コンピュータグラフィックスを描画する、クロスブラウザ対応の軽量なJavaScriptライブラリ及びアプリケーションプログラミングインタフェースである。
引用先URL : https://ja.wikipedia.org/wiki/Three.js
3DCG表現をwebpageに反映するためのAPIで javascriptによって記述できるのがThreejsです。
どのような表現できるのか、イメージをつかみたい方は下記のサイトを参考にしてみてください。
https://threejs.org/
簡単でしたがthreejsの説明は以上です。
ここからはthreejsを使って四角い箱を表示してみます。
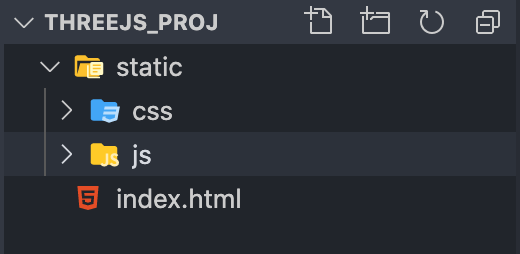
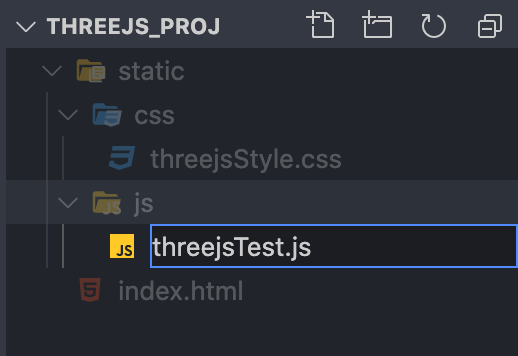
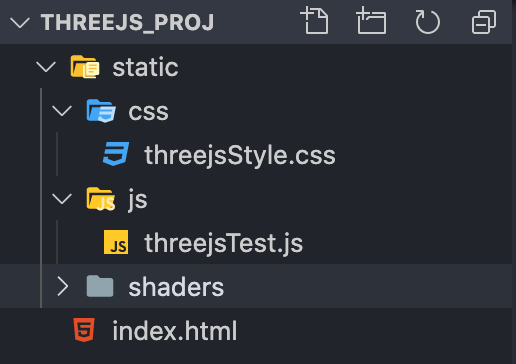
visual studio codeでcssとjavascriptを格納するフォルダを作成します。
新しいファイルを作成したときに押したアイコンの隣に新しいフォルダを作成できるアイコンがあるので、まずstaticというフォルダを作成し、その中にcssとjsという名前のフォルダを作成します。
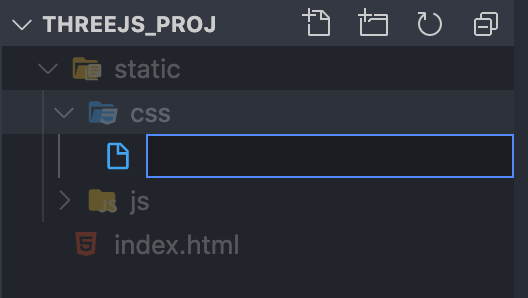
次に空のファイルを2つ作成します。
一つ目はthreejsの表示領域であるcanvasのサイズを指定するためのcssファイルです。
cssフォルダをクリックします。新しいファイルを作成します。名前は「threejsStyle.css」とします。
二つ目はthreejsを実際に書いていくjavascriptファイルです。
jsフォルダをクリックします。新しいファイルを作成します。名前は「threejsTest.js」とします。
二つのファイルを作成できました。
index.html, threejsStyle.css, threejsTest.jsの3つのファイルにコードを記述し、canvasを作成します。
<!DOCTYPE html>
   <head>
       <title>threejs test</title>
       <link type="text/css" rel="stylesheet" href="/static/css/threejsStyle.css"/>
       <script src="https://cdnjs.cloudflare.com/ajax/libs/jquery/3.3.1/jquery.min.js"></script>
       <script src="https://cdnjs.cloudflare.com/ajax/libs/three.js/110/three.min.js"></script>
   </head>

   <body>
       <h1>welcome!!</h1>
       <canvas class="mycanvas" id="testCanvas"></canvas>
       <script type="text/javascript" src="/static/js/threejsTest.js"></script>
   </body>
</html>
.mycanvas{
   width: 600px;
   height: 600px;
}
//画面サイズ
var canvasWidth  = 600;
var canvasHeight = 600;

//3Dの設定用value
var renderer, scene, camera, light;

scene = new THREE.Scene();

// パースペクティブなカメラの設定
// new THREE.PerspectiveCamera(画角, アスペクト比, 描画開始距離, 描画終了距離)
camera = new THREE.PerspectiveCamera(
	45,
	canvasWidth / canvasHeight,
	1,
	10000
 );
 camera.position.set(0, 0, +1000);

//レンダリングの設定
renderer = new THREE.WebGLRenderer({canvas: document.querySelector("#testCanvas")});
renderer.setPixelRatio(window.devicePixelRatio);

//3Dモデル用value
var geometry, material, box, time;

//一回だけ呼んで初期化するよー
init();
//毎回呼んでアニメーションするよー
animate();

//初期化用仕掛けちゃん(ファンクションとかメソッドとか)
function init(){

	/* ここに色々書いていくよ!! */

}

//アニメーション用仕掛けちゃん
function animate(){
	window.requestAnimationFrame(animate);
	render();
}

//綺麗な豆腐に変えてくれる魔法の呪文笑(レンダリング画質の調整)
function resizeRendererToDisplaySize(renderer) {
   const canvas = renderer.domElement;
   const width = canvas.clientWidth;
   const height = canvas.clientHeight;
   const needResize = canvas.width !== width || canvas.height !== height;
   if (needResize) {
     renderer.setSize(width, height, false);
   }
   return needResize;
 }

//レンダリング用仕掛けちゃん
function render(){

	if (resizeRendererToDisplaySize(renderer)) {
		const canvas = renderer.domElement;
		camera.aspect = canvas.clientWidth / canvas.clientHeight;
		camera.updateProjectionMatrix();
	  }

    //カメラとシーンをレンダリング
	renderer.render(scene, camera);
}
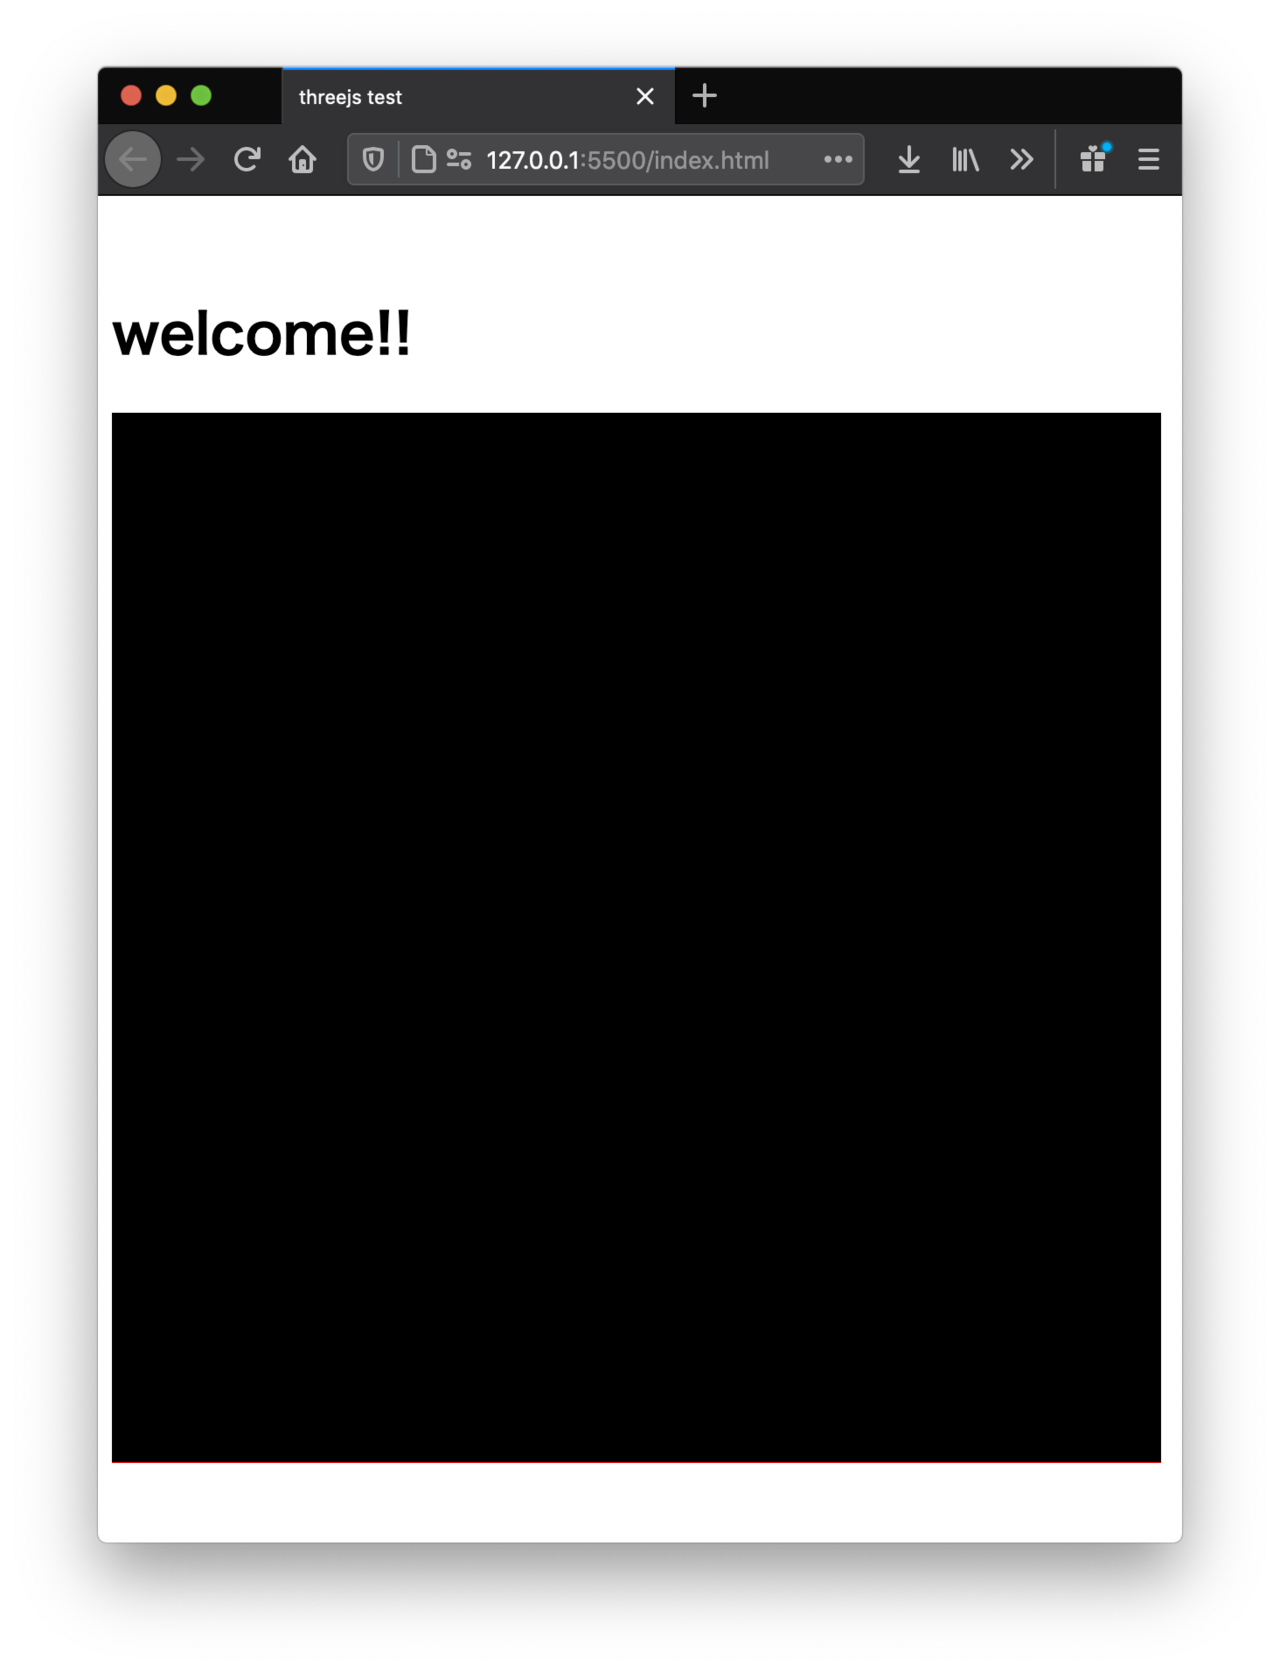
この記述を加えるとcanvasができます。ブラウザでは黒く表示されます。
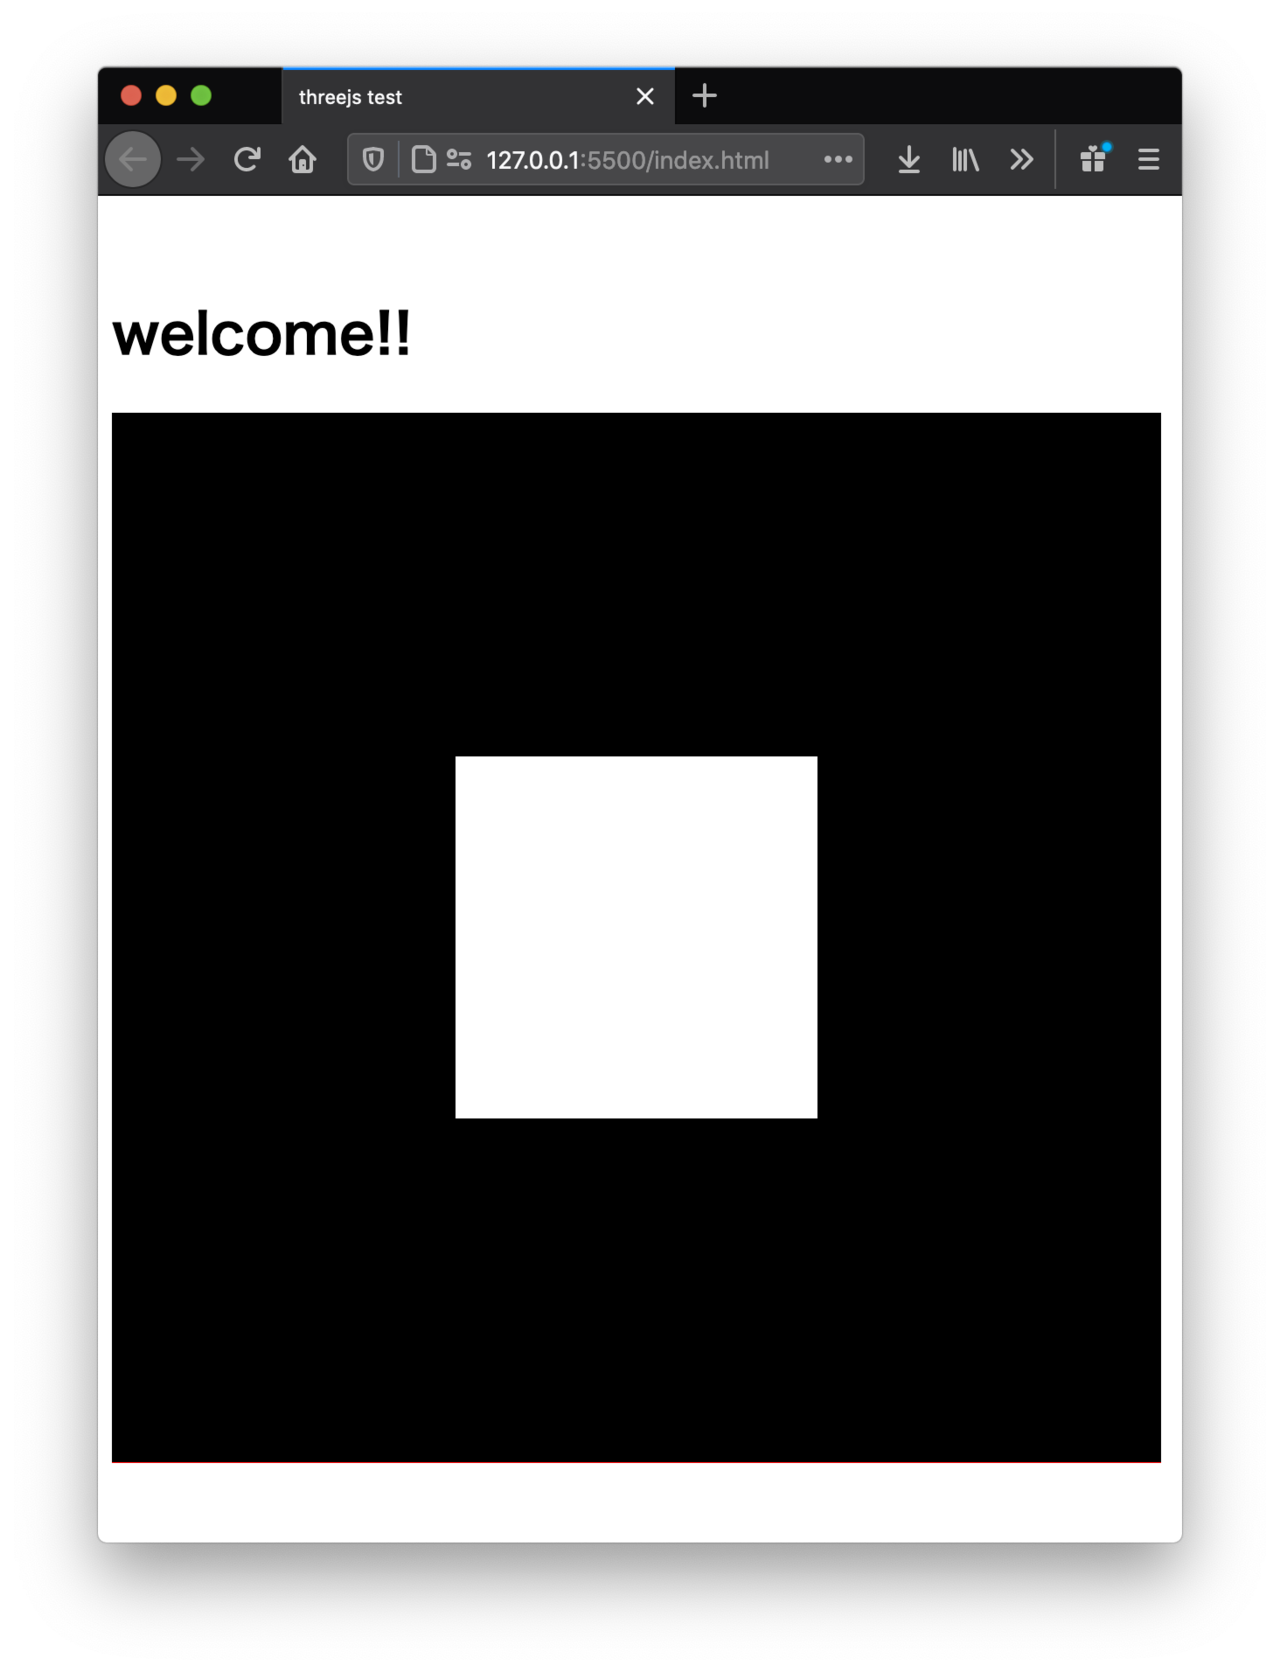
canvasができたので白い立方体を表示させてみます。
threejsTest.jsのinitという名前のfanction通称「初期化用仕掛けちゃん」に下記を書き入れます。
...

//初期化用仕掛けちゃん(ファンクションとかメソッドとか)
function init(){

	/* ここに色々書いていくよ!! */

	// box の作成
    geometry = new THREE.BoxGeometry(250, 250, 250);

    material = new THREE.MeshBasicMaterial({
       color       : 0xffffff
	});

	box = new THREE.Mesh(geometry, material);
	scene.add(box);

	// new THREE.DirectionalLight(色)
	light = new THREE.DirectionalLight(0xffffff);
	light.intensity = 2; // 光の強さを倍に
	// ライトの位置を変更
	light.position.set(1, 1, 1);
	// シーンに追加
	scene.add(light);

}

...
白い四角が表示されました。通称「豆腐」です。とても鋭い角ばった豆腐です。角にかぶりつくと口や舌を切ります。そのくらい鋭利です。
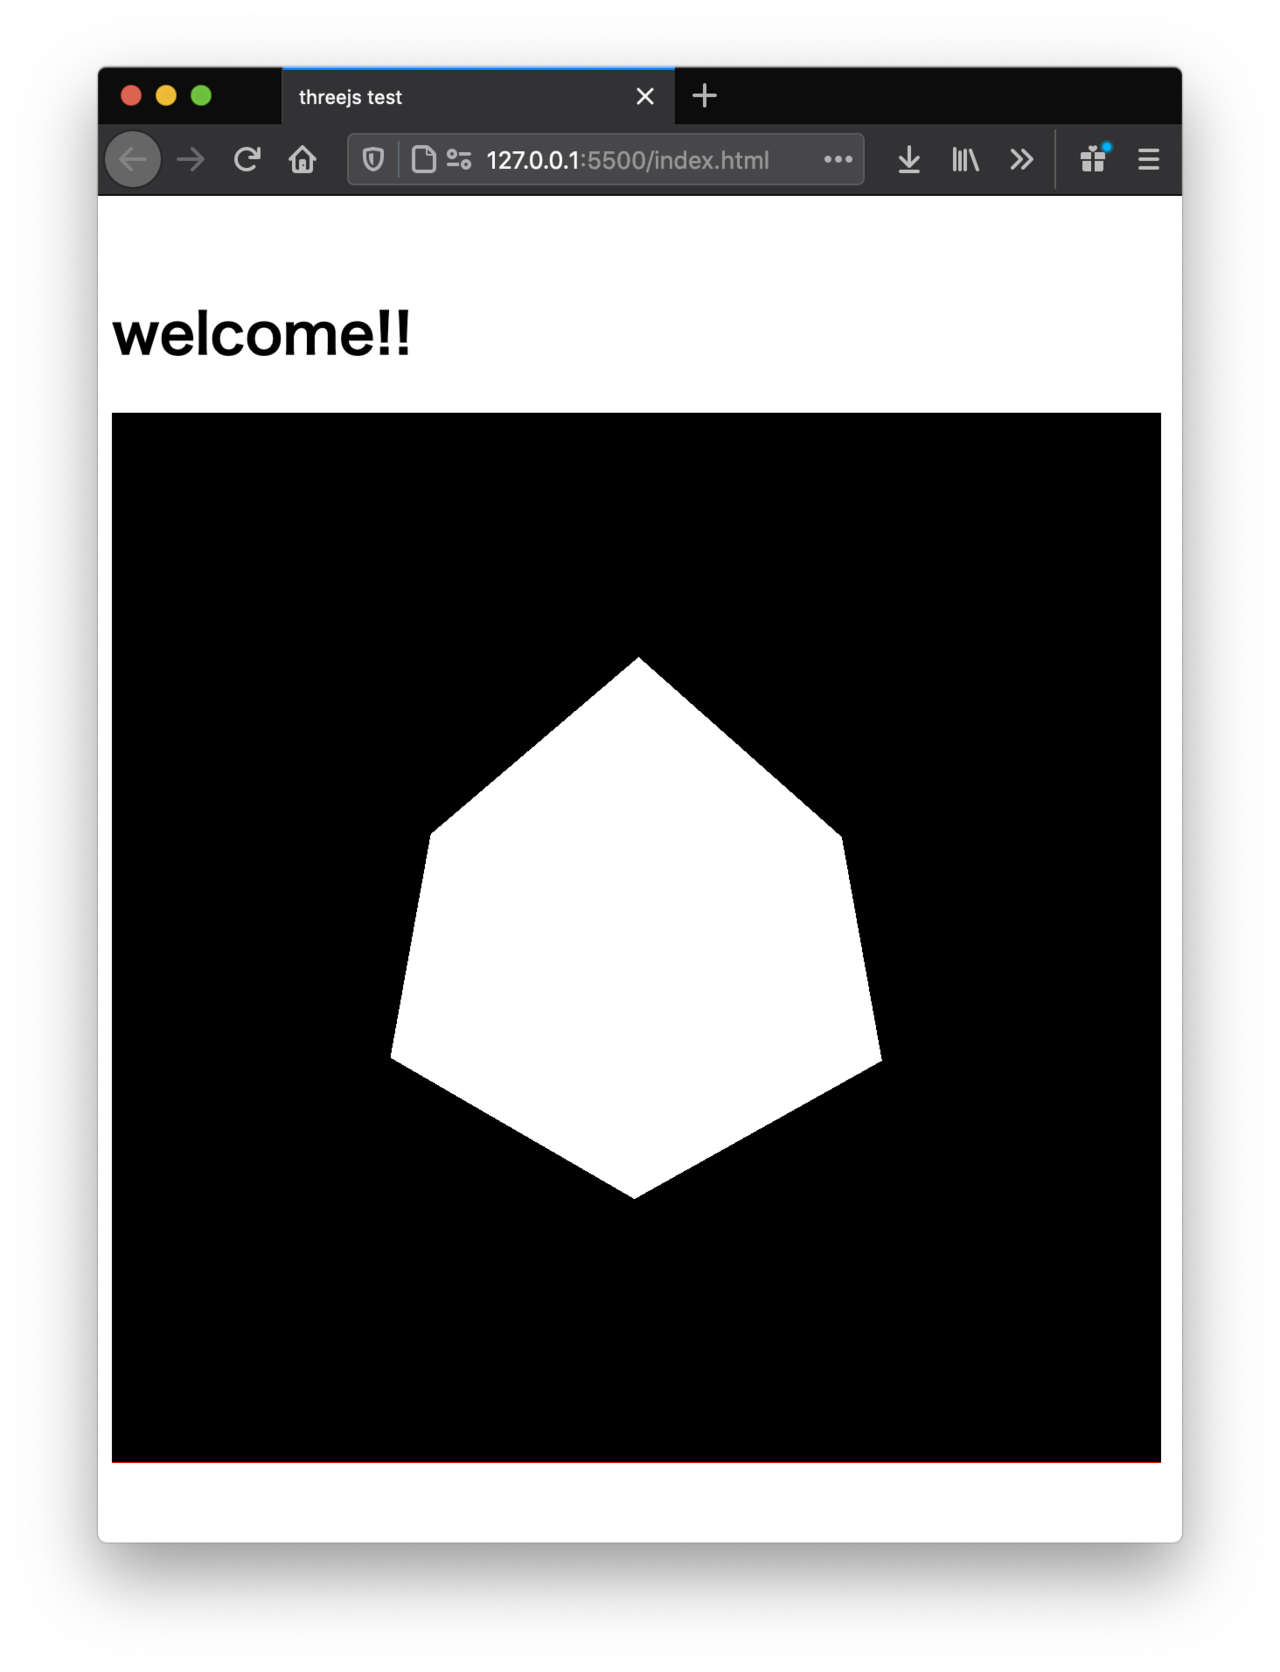
冗談はさておき、本当に立方体なのか確認します。
threejsTest.jsのrenderという名前のfanction通称「レンダリング用仕掛けちゃん」に下記を書き入れます。
...

//レンダリング用仕掛けちゃん
function render(){

	if (resizeRendererToDisplaySize(renderer)) {
		const canvas = renderer.domElement;
		camera.aspect = canvas.clientWidth / canvas.clientHeight;
		camera.updateProjectionMatrix();
	  }

    //boxを回転させるよ
	box.rotation.x += 0.01;
	box.rotation.y += 0.01;

	renderer.render(scene, camera);
}

...
クルクルと豆腐が回転しています。柔らかさはなさそうです。杏仁豆腐の方が近いかもしれません。
webGL
「threejsを使って四角い箱を表示」ができました。今度はこれに色を塗っていきます。ここからが本番です。
webGLを使ってこの白い豆腐に模様を塗りましょう。
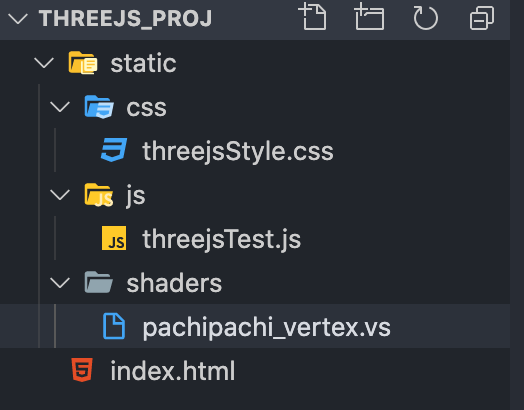
visual studio codeでwebGLのコードを格納するフォルダを作成します。
staticというフォルダの中にshadersという名前のフォルダを作成します。
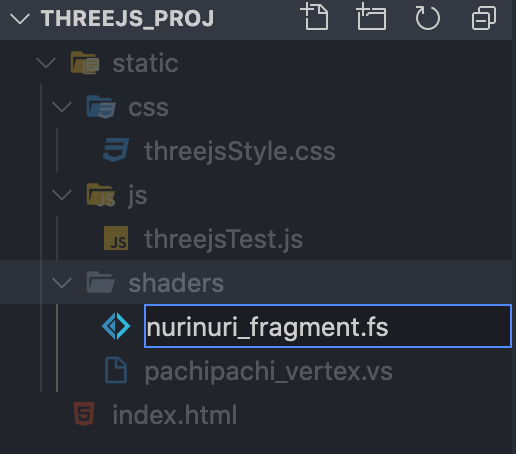
次に空のファイルを2つ作成します。
一つ目は四角の6面にパチパチと色をはめ込むpachipachi_vertex.vsです。
vertexの正体は謎です(というのは冗談ですが詳しくは検索お願いします)。
二つ目は色を操るnurinuri_fragment.fsです。nurinuri_fragment.fsここで記述した模様が6面に張り付けられます(pachipachi_vertex.vsによって)。
fragmentの正体は謎です(というのは冗談ですが詳しくは検索お願いします)。
pachipachi_vertex.vs, nurinuri_fragment.fs, threejsTest.jsこの3つのファイルにコードを記述し豆腐を塗ります。
//精度の指定
precision mediump float;

//modelViewMatrixの宣言
uniform mat4 modelViewMatrix;

//projectionMatrixの宣言
uniform mat4 projectionMatrix;

//positionの宣言
attribute vec3 position;

//uvの宣言
attribute vec2 uv;

varying vec2 vUv;

void main(){
   gl_Position = projectionMatrix * modelViewMatrix * vec4(position,1.0);

   //フラグメントシェーダにuvを転送
   vUv = uv;
}
precision mediump float;
uniform float time;
varying vec2 vUv;
void main(void) {
   //uv座標系で、オブジェクトの中心に原点を設定
   vec2 uv = -1.0 + 2.0 * vUv;
	float t = time * 0.001 * 0.1;
	float s = abs(sin(t));
   gl_FragColor = vec4(uv.x / vUv.x + s, 1.0 + s, 1.0 - s, 1.);
}
threejsTest.jsのinitという名前のfanction通称「初期化用仕掛けちゃん」に下記を書き入れます。
//初期化用仕掛けちゃん(ファンクションとかメソッドとか)
function init(){
	// box の作成
    geometry = new THREE.BoxGeometry(250, 250, 250);

    // threejsからfragmentShaderに値を送信
    uniforms = {
   	  "time": {type: "f",value: 1.0}
    }

    //外部からシェーダを読み込む
	var threeVertexShaderText = null, fragmentShaderText = null;

	$.ajax({
	    async: false,
	    url: '/static/shaders/pachipachi_vertex.vs',
	    async: false,
	    cache: false,
	    error: function(jqxhr, status, exception) {
	      console.debug('jqxhr', jqxhr);
	      console.debug('status', status);
	      console.debug('exception', exception);
	    }
	})
	.done(function(response) {
	    threeVertexShaderText = response;
	    //console.log(threeVertexShaderText)
	})
	.fail(function () {
	    console.log('error');
	});

	$.ajax({
	    async: false,
	    url: '/static/shaders/nurinuri_fragment.fs',
	    dataType: 'html',
	    async: false,
	    cache: false,
	    error: function(jqxhr, status, exception) {
	      console.debug('jqxhr', jqxhr);
	      console.debug('status', status);
	      console.debug('exception', exception);
	    }
	})
	.done(function(response) {
	    fragmentShaderText = response;
	    //console.log(fragmentShaderText)
	})
	.fail(function () {
	    console.log('error');
	});

	console.log("vert " + threeVertexShaderText);
	console.log("frag " + fragmentShaderText);

    //マテリアルを作成(これがboxの色になります。)
    material = new THREE.RawShaderMaterial({
       uniforms       : uniforms,
       vertexShader   : threeVertexShaderText,
       fragmentShader : fragmentShaderText
	});

    // boxを作成
	box = new THREE.Mesh(geometry, material);
    // シーンに追加
	scene.add(box);

	// new THREE.DirectionalLight(色)
	light = new THREE.DirectionalLight(0xffffff);
	light.intensity = 2; // 光の強さを倍に
	// ライトの位置を変更
	light.position.set(1, 1, 1);
	// シーンに追加
	scene.add(light);

}
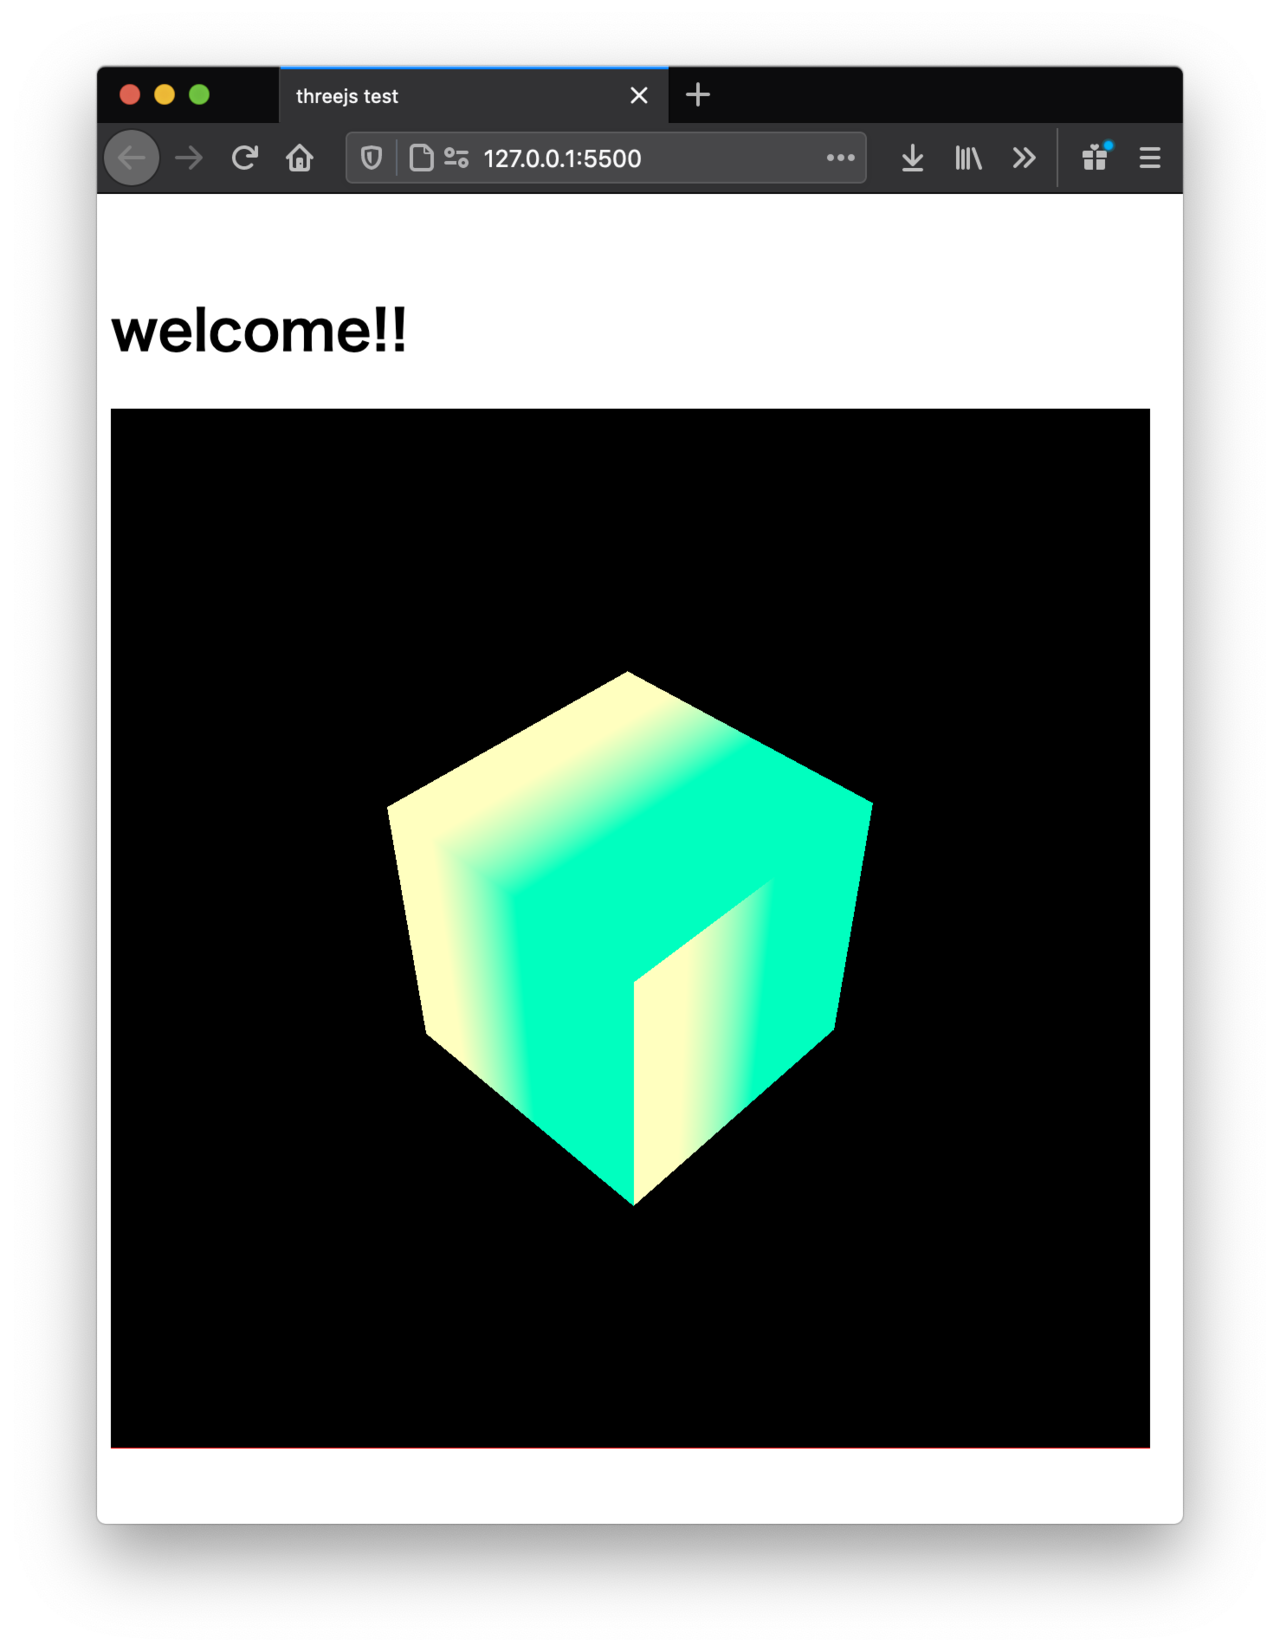
飴になりました。しかも時間によって味(色)が変化する飴です。とても鋭利なので口に入れた瞬間血だらけになります。
冗談はさておき、threejsを使ってwebGLを書くことができました!。きれいに塗れました♪。
threejsに興味を持っていただいた方は是非公式サイトのexampleを試してみてください。
https://threejs.org/examples/#webgl_animation_cloth
webGLを使ってかいたフラグメントシェーダー(模様のコード)に興味を持った方は3Dよりかは2Dで まずは書いてみることを強くお勧めします。今回の飴ちゃんは2Dの模様を6面に張り付けています。なので素直に2Dの方が数式のイメージなどがつきやすいと自分は思います。
フラグメントシェーダー(模様のコード)に興味を持った方は下記のサイトがおすすめです。
|
The Book of Shaders This is a gentle step-by-step guide through the abstract and complex un... |
 |
|---|
threejsを使ってwebGLを書いてみました。
今回は3DCGに挑戦しました。細かい技術的なことはさておいて、白い豆腐をぬりたぐりました。技術的なことも大切ですが何事も楽しい方がいいと思います。なので楽しく塗り塗りしてみました笑。🧑🎨
ここまで読んでくださりありがとう御座います。自身のスキルや知識はまだ始まったばかりの初心者ですが楽しく色々なものが作れたらと思います。♪
