CSSフィルタサンプル作成(2)
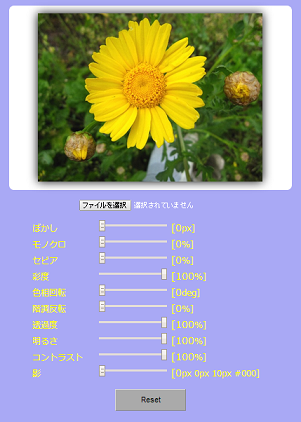
前回は、エフェクト関数毎にエフェクトをかけるようなサンプルを作成しましたが、今回は、複数のエフェクト関数を同時にエフェクトがかけられるようなサンプルを作成してみました。
このサンプルであれば、単一でエフェクトをかけた場合と、複数でエフェクトをかけた場合でのエフェクト効果が検証できるのではないかと思います。
複数エフェクトをかける場合のコードイメージは、下記のようになります。
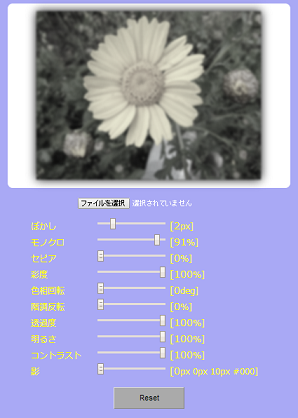
例えば、ぼかしを入れたモノクロ画像にしたい場合。
img {
  filter:blur(2px) grayscale(91px);
}
上記のエフェクトイメージは下記のようになります。
エフェクト画像の保存
ここまで出来てしまうと、スマホなどで撮った写真をfilterプロパティを利用して編集して、その画像を保存するようなアプリを開発できるんじゃないかと思っていろいろ調べましたが、どうも、canvasやjQueryプラグインのvintage.jsなどを使った方が楽に実装できるみたいです。今度、時間がある時にもでチャレンジしたいと思います。
サンプルコード
最後に、今回作成したサンプルのソースを開示しますので、興味ある方がいましたら、実際に動かして試してみて下さい。因みに、画像ファイルを選択できるようにしましたので、みなさんのお好きな画像を使って多重エフェクトの効果を実感してもらえればと思います。
また、使っていてエフェクトの初期設定が分からなくなったよ~という人のために、リセットボタンを付けておきました。
<!DOCTYPE html>
<html>
<head>
<meta charset="UTF-8" />

<style type="text/css">body {
    margin: 0;
    padding: 0;
    font-family: "メイリオ",meiryo;
}
# sample {
    padding: 16px;
    background-color: #A9A9F5;
}
img {
    vertical-align: middle;
}
.sample-img {
    text-align: center;
    margin: 0 auto 16px;
    background-color: #FFFFFF;
    width: 40%;
    padding: 15px;
    border-radius: 10px;
}
# filter {
    width: 450px;
    margin: 0 auto 10px;
    list-style-type: none;
    padding: 0;
}
# filter li {
    color: #FFFF00;
}
# filter input[type = "range"] {
    cursor: pointer;
}
.filter-type {
    display: inline-block;
    width: 120px;
}
.filter-value {
    font-size: 18px !important;
}
# file {
    color: #fff;
    cursor: pointer;
}
# reset {
    cursor: pointer;
    background-color: #aaa;
    width: 8%;
    font-size: 14px;
    padding: 10px 0;
    margin: 0 auto 8px;
    border-radius: 2px;
}
# reset:hover {
	background:#F4FA58;
}
figure {
    margin: 0;
    padding: 0;
}
.code {
    line-height: 1.4;
    padding: 8px;
    display: block;
    background-color: #fdfdfd;
    border: 4px solid #ccc;
    font-size: 14px !important;
    text-align: left;
    border-radius: 2px;
}
</style></head>

<body>
<div id="sample">

<figure class="sample-img"><img src="sunflower.jpg" id="effected-image" max-width="80%" height="270px"></figure>

<p style="text-align:center;"><input type="file" id="file" ></p>

<ul id="filter">
    <li><span class="filter-type">ぼかし</span>
        <input type="range" id="blur" value="" min="0" max="10"> <span class="filter-value">0</span>px]</li>

    <li><span class="filter-type">モノクロ</span>
        <input type="range" id="grayscale" value="" min="0" max="100"> <span class="filter-value">0</span>%]</li>

    <li><span class="filter-type">セピア</span>
        <input type="range" id="sepia" value="" min="0" max="100"> <span class="filter-value">0</span>%]</li>

    <li><span class="filter-type">彩度</span>
        <input type="range" id="saturate" value="" min="0" max="100"> <span class="filter-value">100</span>%]</li>

    <li><span class="filter-type">色相回転</span>
        <input type="range" id="hue-rotate" value="" min="0" max="360"> <span class="filter-value">0</span>deg]</li>

    <li><span class="filter-type">階調反転</span>
        <input type="range" id="invert" value="" min="0" max="100"> <span class="filter-value">0</span>%]</li>

    <li><span class="filter-type">透過度</span>
        <input type="range" id="opacity" value="" min="0" max="100"> <span class="filter-value">100</span>%]</li>

    <li><span class="filter-type">明るさ</span>
        <input type="range" id="brightness" value="" min="0" max="100"> <span class="filter-value">100</span>%]</li>

    <li><span class="filter-type">コントラスト</span>
        <input type="range" id="contrast" value="" min="0" max="100"> <span class="filter-value">100</span>%]</li>

    <li><span class="filter-type">影</span>
        <input type="range" id="drop-shadow" value="" min="0" max="10"> <span class="filter-value">0</span>px 0px 10px #000]</li>
</ul>

<p style="text-align:center;" class="bottom_0"><input type="button" value="Reset" id="reset"></p>


</div>

<script type="text/javascript" src="http://code.jquery.com/jquery.min.js"></script>

<script type="text/javascript">
var Filter = function () {};

Filter.prototype = {

    blur: 0,
    grayscale: 0,
    sepia: 0,
    saturate: 100,
    huerotate: 0,
    invert: 0,
    opacity: 100,
    brightness: 100,
    contrast: 100,
    dropshadow: 0

};

Filter.prototype.init = function () {

   this.init_value = [

        this.blur,
        this.grayscale,
        this.sepia,
        this.saturate,
        this.huerotate,
        this.invert,
        this.opacity,
        this.brightness,
        this.contrast,
        this.dropshadow

    ];

    this.setFilterValue(this.init_value);
    this.setStyle(this.init_value);

};

Filter.prototype.getFilterValue = function () {

    var that = this;
    var filterRange = $("#filter").find("li").find("input");

    filterRange.each(function (i) {

        $(this).on("change", function () {

            var change_value = that.init_value;
            var $this = $(this);

            change_value[i] = $this.val();
            that.setFilterValue(change_value);
            that.setStyle(change_value);

        });

    });

};

Filter.prototype.setFilterValue = function (value) {

    var filterRange = $("#filter").find("li").find("input");

    filterRange.each(function (i) {

        var $this = $(this);

        $this.val(value[i]);
        $this.parent().find(".filter-value").text('[' + value[i]);

    });

};

Filter.prototype.setStyle = function (value) {

    var image = $("#effected-image");
    var style = "blur(" + value[0] + "px) grayscale(" + value[1] + "%) sepia(" + value[2] + "%) saturate(" + value[3] + "%) hue-rotate(" + value[4] + "deg) invert(" + value[5] + "%) opacity(" + value[6] + "%) brightness(" + value[7] + "%) contrast(" + value[8]+ "%) drop-shadow(" + value[9] + "px 0px 10px #000)";
    var css_code = $("#css-code");
    image.css({"-webkit-filter": style, "-moz-filter": style, "filter": style});
    css_code.html(style);

};

Filter.prototype.reset = function () {

    var that = this;
    var reset = $("#reset");

    reset.on("click", function () {

        that.init();

    });

};

Filter.prototype.uploadFile = function () {

    if (window.File && window.FileReader) {

        var file = $("#file");
        var image = $("#effected-image");
	    var reader = new FileReader();

        file.on("change", function (e) {

            var f = e.target.files;

            for (var i = 0, l = f.length; i < l; i++) {

                reader.readAsDataURL(f[i]);

            }

        });

        try {

            reader.addEventListener("load", function () {

                image.attr("src", reader.result).css({"max-width": "auto", "height": "270px"});

            }, false);

        } catch (e) {

            reader.attachEvent("load", function () {

                image.attr("src", reader.result).css({"max-width": "auto", "height": "270px"});

            });

        }

    }

};

Filter.prototype.start = function () {

    this.init();
    this.reset();
    this.getFilterValue();
    this.uploadFile();

};

var filter = new Filter();
filter.start();
</script>
</body>
</html>

